22
www.digiop.com
SECTION 3: CONFIGURE THE DIGIOP® 3D CAMERA
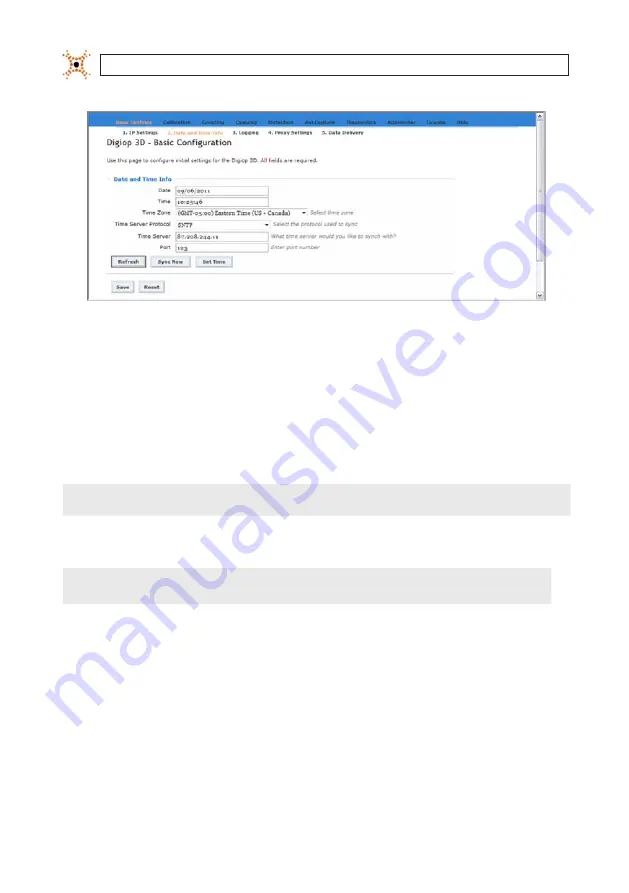
Date and Time Info tab
4.
Click the
Time Zone
drop-down box and select the appropriate time zone from the list. Set the time zone to the time zone
at the installation site.
5.
Click the
Time Server Protocol
drop-down box and select the appropriate protocol. Enter the preferred time server
protocol for your site. Consult with your network administrator for more information.
6.
Enter the IP address of a time server in the Time Server field.
NOTE
The time server service will set the camera time to UTC time, therefore the time server can be running in any time zone.
7.
Enter the Port number from which the DIGIOP® 3D camera should attempt to get a time synchronization.
NOTE
The time synchronization port and data delivery port can be sent to the same IP Address and port if necessary. The default
port number is 2000.
8.
Click
Save
.
3.3.1 Testing Time Sync configuration
After you save the configuration settings for the time sync, click
Sync No
w to test the connection to the time sync server. When
you click
Sync Now
, a time sync request is sent to the IP address and port specified on the
Date and Time Info
page. A success or
failure message is displayed at the top of the page depending on the synchronization outcome.
Содержание D3D-2500
Страница 8: ...viii www digiop com...
Страница 116: ...108 www digiop com SECTION 11 USING THE DIGIOP 3D CAMERA WITH DIGIOP ELEMENTS...
Страница 124: ...116 www digiop com...