If you installed an add-in network adapter and want to disable the integrated network adapter:
1.
Enter system setup (see
Entering System Setup
), select
Integrated NIC Controller,
and then change the setting to
Off
.
2.
Connect the network cable to the add-in network adapter connectors. Do not connect the network cable to the integrated connector on the back panel.
If you removed an add-in network connector:
1.
Enter system setup (see
Entering System Setup
), select
Integrated NIC Controller
, and then change the setting to
On
.
2.
Connect the network cable to the integrated connector on the back panel of the computer.
Drives
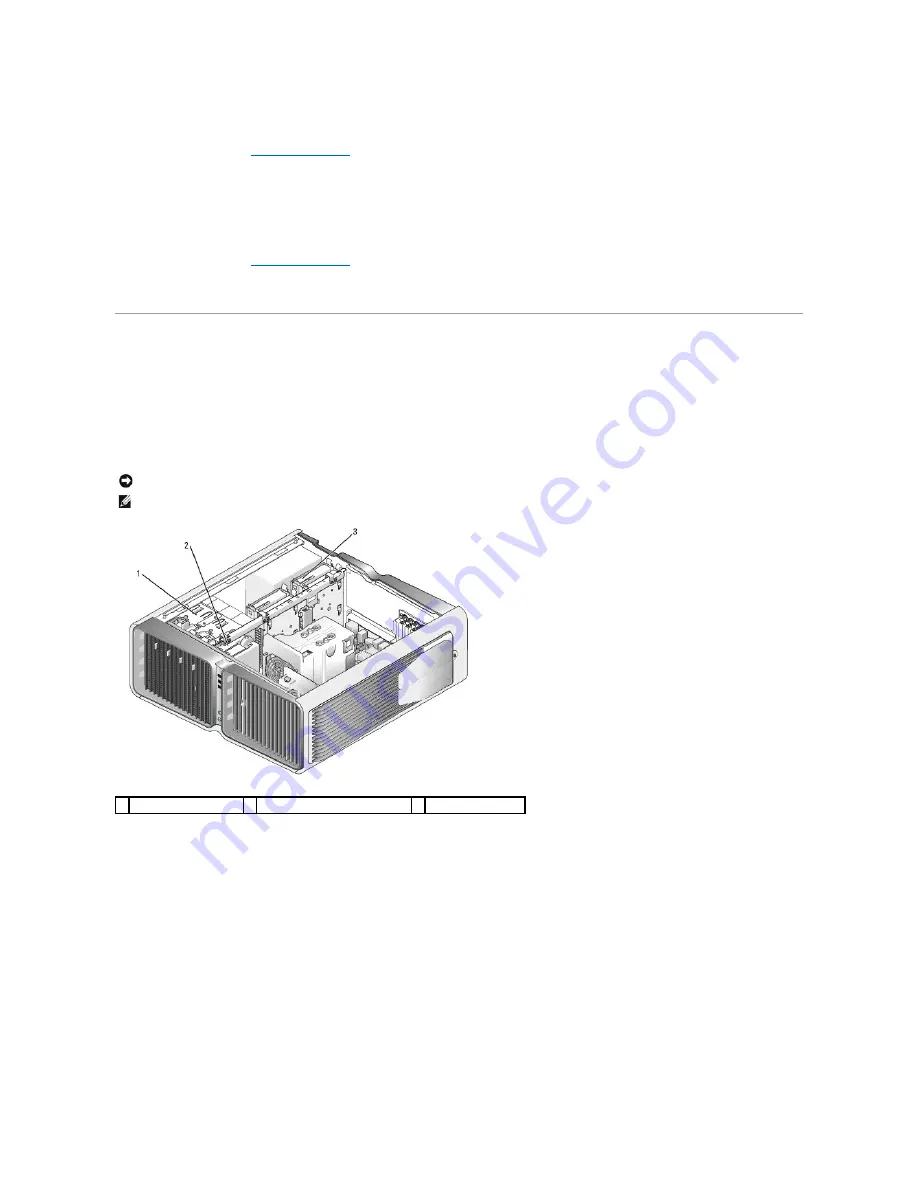
Your computer supports:
l
Six SATA devices (hard drives or optical drives)
l
Two IDE devices (two hard drives or two optical drives)
l
One floppy drive
l
One Media Card Reader
About Serial ATA (SATA) Drives
Your computer supports up to four serial ATA hard drives and two serial ATA optical drives. SATA drives provide the following benefits by transferring data
using serial technology and flexible cables that are thinner and longer than IDE cables:
l
Improved cable routing facilitates more efficient airflow inside the chassis.
l
Compact cable connectors save space on the system board and on the hard drive, allowing for more efficient utilization of space inside the chassis.
General Drive Installation Guidelines
SATA drives should be connected to connectors labeled "SATA" on the system board. IDE drives should be connected to the connectors labeled "IDE."
When connecting a SATA cable, hold the cable by the connector at each end and press firmly into the connector. When disconnecting a SATA cable, hold the
cable by the connector at each end and pull until the connector detaches.
NOTICE:
When removing and replacing drives, be sure to leave the drive data and power cables connected to the system board.
NOTE:
The 5.25-inch Media Card Reader/floppy drive carrier is not interchangeable with the hard drive carrier.
1 CD/DVD drive bays (4)
2 floppy drive/media card reader
3 hard-drive bays (4)
Содержание XPS M2010
Страница 20: ...Back to Contents Page ...
Страница 25: ...Back to Contents Page ...
Страница 39: ......
Страница 47: ...2 Tighten the captive screw Back to Contents Page ...
Страница 57: ......


