Back to Contents Page
Diskette, Tape, and CD-
ROM Drives: Dell™ OptiPlex™ GX100 System User's Guide
Installing a CD-ROM Drive in a Small-Form-Factor Chassis
To install a CD-ROM drive in the 5.25-inch drive bay in the small-form-factor chassis, perform the following steps.
1. Unpack the drive and prepare it for installation.
NOTICE: To avoid possibly damaging the drive by electromagnetic static (EMS), ground yourself by touching an unpainted
metal surface on the back of the computer.
Check the documentation that accompanied the drive to verify that the drive is configured for your computer system. Change any settings
necessary for your configuration.
2. Remove the computer cover as instructed in "
Removing and Replacing the Computer Cover
."
3. If a drive is already installed in the drive bay, remove it.
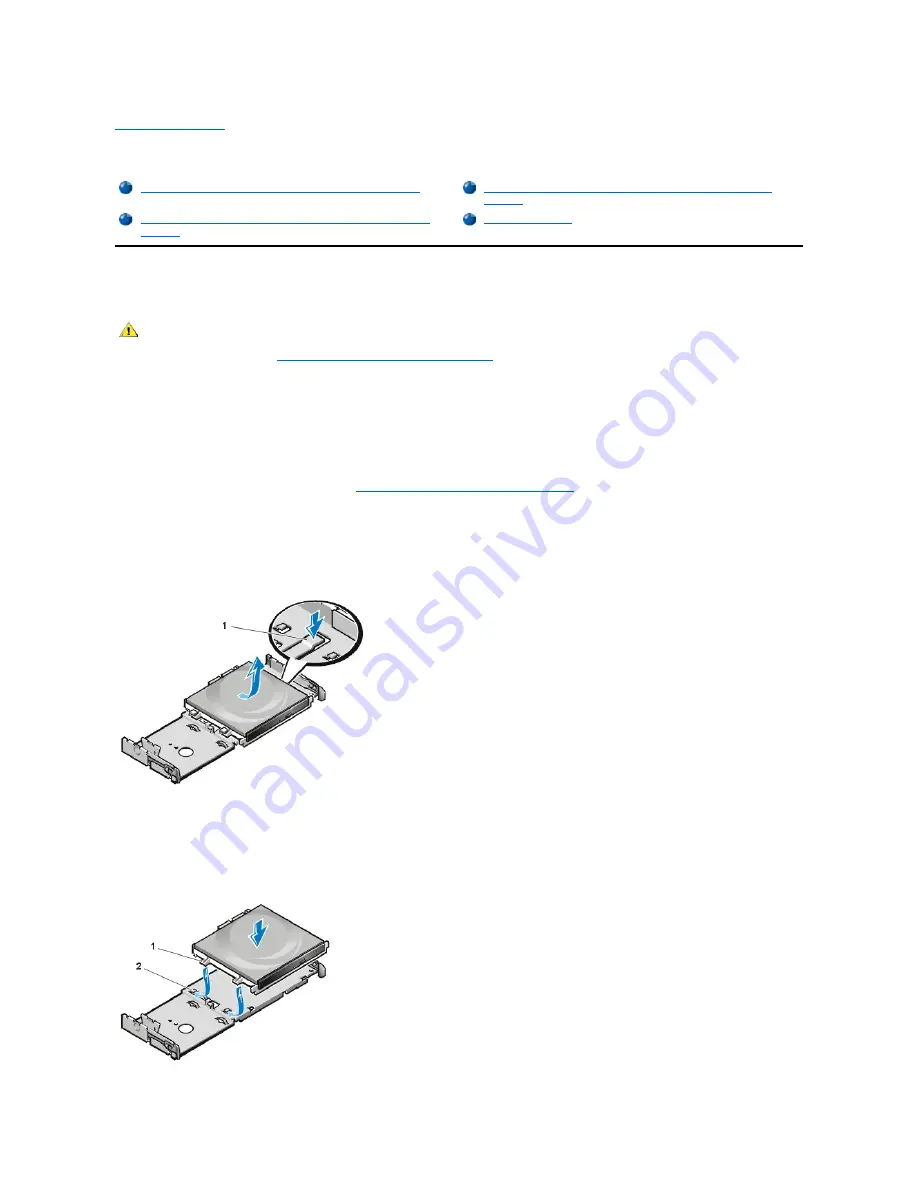
Disconnect the power cable and interface cable from the back of the drive. Push down on the drive release tab on the right side of the
drive (see Figure 1), and slide the drive forward out of the chassis.
Figure 1. Removing a CD-ROM Drive From the Small-Form-Factor Chassis
4. Install the new drive in the chassis.
Align the tabs along the bottom of the drive with the notches on the chassis, and slide the drive toward the back of the chassis until it
snaps into place (see Figure 2).
Figure 2. Inserting a CD-ROM Drive in the Small-Form-Factor Chassis
Installing a CD-ROM Drive in a Small-Form-Factor Chassis
Installing a Diskette, Tape, or CD-ROM Drive in a Mini Tower
Chassis
Installing a Diskette, Tape, or CD-ROM Drive in a Low-Profile
Chassis
Connecting Drives
CAUTION: To avoid the possibility of electric shock, turn off the computer and any peripherals, disconnect them from their
electrical outlets, and then wait at least 5 seconds before you remove the computer cover. Also, before you install a drive, see
the other precautions in "
Safety First
—
For You and Your Computer
."
1
Drive release tab
1
Tabs (2)
2
Notches (2)
Содержание OptiPlex GX100
Страница 64: ...Back to Contents Page ...


