13
Read First
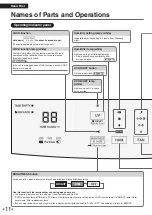
WARNING
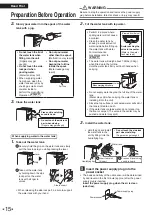
Be sure to stop the operation and remove the power supply
plug before installation. (Electric shock or injury may result)
Preparation Before Operation
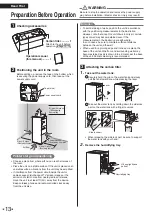
1
Checking accessories
Carbon filter
........... 1
Attach to the unit before
operation.
►
Page 13, 14
Operation manual
(this manual)
.......... 1
2
Positioning the unit in the room
Before setting up, remove the tape on the bottom which
is securing the power supply cord, then take out the
power supply cord.
Tape (blue)
Power supply cord
At least 40 inches
(100cm) away
from ceiling
At least 12 inches
(30cm) away from wall
Air flow
At least 12 inches
(30cm) away from wall
At least 4 inches
(10cm) away from wall
Pointers for good positioning
•
Choose a place from where airflow can reach all areas of
the room.
• Place the unit on a stable surface. If the unit is placed on an
unstable surface, vibrations from the unit may be amplified.
• If interference from the power circuit inside the unit or
cables causes disturbance of TV screen images or the
emission of static noise from nearby radios or stereos,
move the unit to at least 7ft (2m) away from the device.
Keep cordless phones and radio-controlled clocks away
from the unit also.
Attention
• To avoid staining of walls, position the unit in accordance
with the positioning measurements in the illustration.
However, note that since this unit draws in dirty air, certain
types of wall may become stained even if the
measurements in the illustration are adhered to.
In such cases, be sure to maintain sufficient distance
between the unit and the wall.
• When used for a prolonged period in the same place, the
base of the unit and the floor and surrounding walls may
become stained as air is drawn into air inlets near the base
of the unit. Periodic cleaning is recommended.
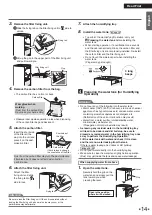
3
Attaching the carbon filter
1.
Take out the water tank.
1 Securely hold the grip on the water tank and slowly
pull the tank toward you while pressing the lever.
Lever
Grip
2 Take out the water tank by holding down the side lock
part on the water tank with a finger to unlock.
Side lock part
• When releasing the side lock part, be sure to support
the water tank with your hand.
2.
Remove the humidifying tray.
Lift up slightly and
pull out
Humidifying tray
01_EN_3P672685-2A.indd 13
2021/12/13 13:55:55
Содержание MCKB70YSAU
Страница 2: ...1...

