


Devices
Wired zones
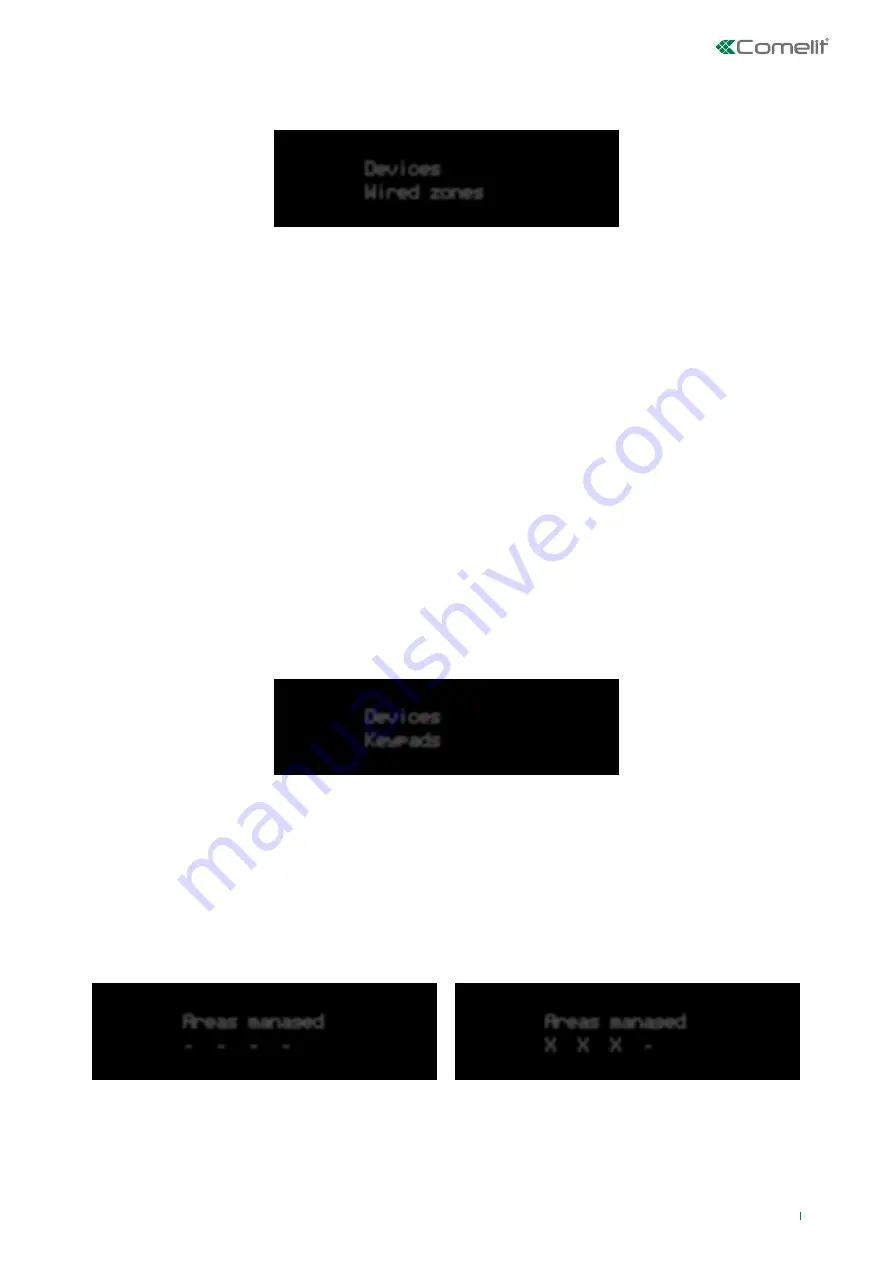
Devices
Keypads
Areas managed
- - - -
Areas managed
X X X -
33
Wired zones
The two wired zones available on the control panel are configured using this menu.
Select zone:
this menu entry is used to select the zone to be edited.
• Description:
this menu is used to edit the description of the zone. For detailed information regarding the descriptions of the
zones, please refer to Programming for individual RF zones.
• Zone type:
this menu is used to edit the zone type. For detailed information regarding the zone types, please refer to
Programming for individual RF zones.
• Zone attributes:
this menu is used to edit the zone attributes.
• Zone camera:
this menu entry is used to assign one or more cameras to the zone for video alarm verification.
• Zone balancing:
this menu option is used to select the type of balancing the zone will use for its reaction. The options are:
Normally open, Normally closed, Single, Double.
• Pulse:
this menu option is used to set the reaction time parameters for the zone.
◊ Detection type: "Standard" or "Rapid" can be selected.
◊ Acquisition time: used to set the time interval within which the alarm pulses will be taken into account. Configuration
includes a setting for the Units (seconds or minutes) and a unit multiplier.
◊ Alarm pulse time: used to set the minimum duration of the valid alarm pulses. Configuration includes a setting for the
Units (100 milliseconds or minutes) and a unit multiplier.
◊ No. of pulses: used to set the number of pulses within the acquisition time period which generates an alarm.
Keypads
This menu is used to edit the configuration of the built-in keypad.
Edit keypads
◊ Keypad description
◊ Assign areas to the keypad: this menu entry is used to assign areas to which the keypad should be connected in terms of
display or management.
- Areas managed: this menu is used to assign the areas which should be managed by the keypad.
The same selection method can be used to assign all areas. A row with underlined characters (_) represents existing
areas. The area can be selected by using the L/R keys to move between characters. When an area is selected using
enter, the underlined character will change to an “X” to indicate “Area enabled”. The following is an example of managed
areas:
The above images show that areas 1, 2 and 3 are enabled for management via the keypad.


