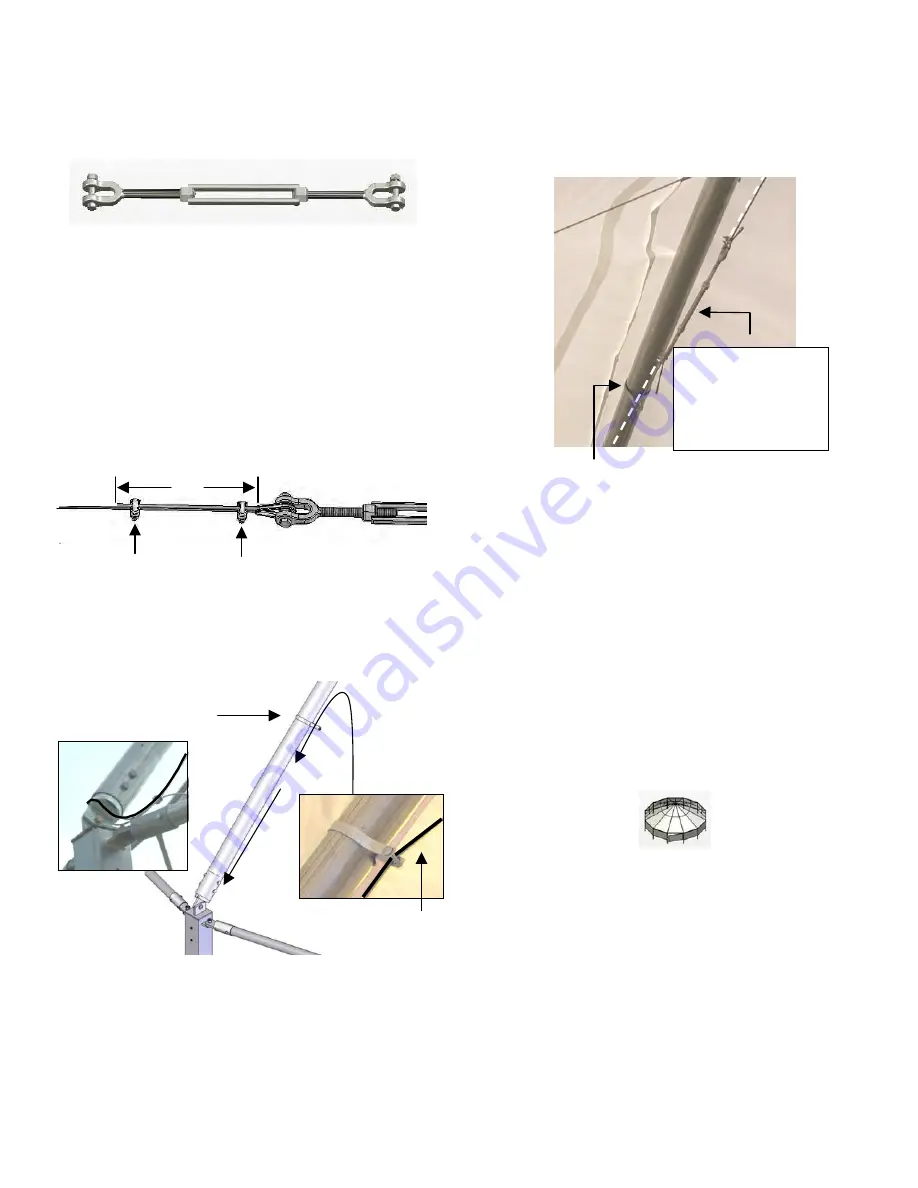
4. Select a turnbuckle and open it to its extended
position.
5. Remove the bolt from each turnbuckle eye, insert a
cable thimble, and reinstall the bolt to secure the
thimble in the eye.
6. Insert one end of one 8' cable section through one
end of the turnbuckle and around the thimble. Use
approximately 12" of cable to clamp to the
turnbuckle.
7. Install two cable clamps to secure the cable to the
turnbuckle. Consult the turnbuckle diagram below for
additional information if needed.
8. Thread the free end of the 8' cable and turnbuckle
assembly through the band clamp and down to the
ground post where the rafter is attached.
9. Using two (2) additional cable clamps, secure the
cable around the end pipe connector as you did at
the crown. See Step 3 if needed.
10. Repeat the steps to attach the free end of the upper
30' cable,
which is attached to the same rafter
, to the
remaining end of the turnbuckle.
Cable is threaded through the band clamp.
NOTE:
Pull the slack from the upper cable when
attaching it to the turnbuckle and verify that the
turnbuckle is in its open or extended position.
11. Repeat the steps to assemble and attach the
remaining long cables for the rafters.
12. After all long cables for each rafter are in place,
slightly tighten each turnbuckle until snug.
13. Continue with the installation of the cross cabling for
the main frame.
ATTENTION:
Do not tighten the long rafter cable
assemblies at this time.
12"
Cable Clamps
Band Clamp
Lower cable is
installed through
the band clamp
with the turnbuckle
attached above.
Cable
Visit www.ClearSpan.com for additional products and customer assistance.
14 of 36


