17-15
Cisco ASA Series Firewall CLI Configuration Guide
Chapter 17 ASA CX Module
Configure the ASA CX Module
Step 2
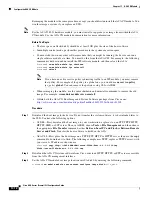
Log in with the username
admin
and the password
Admin123
. You will change the password as part of
this procedure.
Step 3
Enter the following
command:
asacx>
setup
Example:
asacx>
setup
Welcome to Cisco Prime Security Manager Setup
[hit Ctrl-C to abort]
Default values are inside [ ]
You are prompted through the setup wizard. The following example shows a typical path through the
wizard; if you enter
Y
instead of
N
at a prompt, you will be able to configure some additional settings.
This example shows how to configure both IPv4 and IPv6 static addresses. You can configure IPv6
stateless auto configuration by answering
N
when asked if you want to configure a static IPv6 address.
Enter a hostname [asacx]:
asa-cx-host
Do you want to configure IPv4 address on management interface?(y/n) [Y]:
Y
Do you want to enable DHCP for IPv4 address assignment on management interface?(y/n)[N]:
N
Enter an IPv4 address [192.168.8.8]:
10.89.31.65
Enter the netmask [255.255.255.0]:
255.255.255.0
Enter the gateway [192.168.8.1]:
10.89.31.1
Do you want to configure static IPv6 address on management interface?(y/n) [N]:
Y
Enter an IPv6 address:
2001:DB8:0:CD30::1234/64
Enter the gateway:
2001:DB8:0:CD30::1
Enter the primary DNS server IP address [ ]:
10.89.47.11
Do you want to configure Secondary DNS Server? (y/n) [N]:
N
Do you want to configure Local Domain Name? (y/n) [N]
Y
Enter the local domain name:
example.com
Do you want to configure Search domains? (y/n) [N]
Y
Enter the comma separated list for search domains:
example.com
Do you want to enable the NTP service?(y/n) [N]:
Y
Enter the NTP servers separated by commas:
1.ntp.example.com, 2.ntp.example.com
Step 4
After you complete the final prompt, you are presented with a summary of the settings. Look over the
summary to verify that the values are correct, and enter
Y
to apply your changed configuration. Enter
N
to cancel your changes.
Example:
Apply the changes?(y,n) [Y]:
Y
Configuration saved successfully!
Applying...
Done.
Generating self-signed certificate, the web server will be restarted after that
...
Done.
Press ENTER to continue...
asacx>
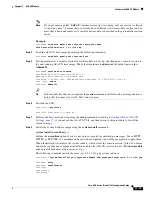
Note
If you change the host name, the prompt does not show the new name until you log out and log
back in.
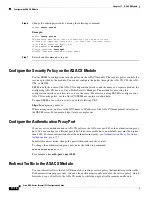
Step 5
If you do not use NTP, configure the time settings. The default time zone is the UTC time zone. Use the
show time
command to see the current settings. You can use the following commands to change time
settings:
asacx>
config timezone
asacx>
config time
Содержание ASA 5512-X
Страница 5: ...P A R T 1 Service Policies and Access Control ...
Страница 6: ......
Страница 50: ...3 14 Cisco ASA Series Firewall CLI Configuration Guide Chapter 3 Access Rules History for Access Rules ...
Страница 51: ...P A R T 2 Network Address Translation ...
Страница 52: ......
Страница 126: ...5 28 Cisco ASA Series Firewall CLI Configuration Guide Chapter 5 NAT Examples and Reference DNS and NAT ...
Страница 127: ...P A R T 3 Application Inspection ...
Страница 128: ......
Страница 255: ...P A R T 4 Connection Settings and Quality of Service ...
Страница 256: ......
Страница 288: ...12 14 Cisco ASA Series Firewall CLI Configuration Guide Chapter 12 Quality of Service History for QoS ...
Страница 303: ...P A R T 5 Advanced Network Protection ...
Страница 304: ......
Страница 339: ...P A R T 6 ASA Modules ...
Страница 340: ......
Страница 398: ...17 28 Cisco ASA Series Firewall CLI Configuration Guide Chapter 17 ASA CX Module History for the ASA CX Module ...

