16-14
Cisco ASA Series Firewall CLI Configuration Guide
Chapter 16 ASA FirePOWER (SFR) Module
Configure the ASA FirePOWER Module
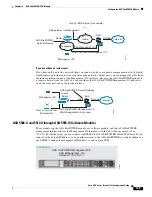
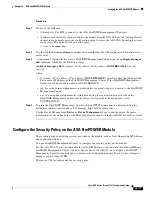
to a Defense Center, you must provide the hostname or the IP address along
with the registration key.
'configure manager add [hostname | ip address ] [registration key ]'
However, if the sensor and the Defense Center are separated by a NAT device,
you must enter a unique NAT ID, along with the unique registration key.
'configure manager add DONTRESOLVE [registration key ] [ NAT ID ]'
Later, using the web interface on the Defense Center, you must use the same
registration key and, if necessary, the same NAT ID when you add this
sensor to the Defense Center.
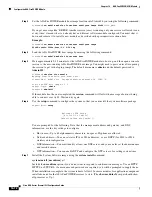
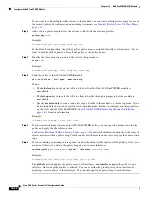
Step 11
(Optional for 5506-X.)
Identify the FireSIGHT Management Center appliance that will manage this
device using the
configure manager add
command.
You come up with a registration key, which you will then use in FireSIGHT Management Center when
you add the device to its inventory. The following example shows the simple case. When there is a NAT
boundary, the command is different; see
Add ASA FirePOWER to the FireSIGHT Management Center,
.
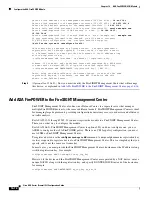
>
configure manager add 10.89.133.202 123456
Manager successfully configured.
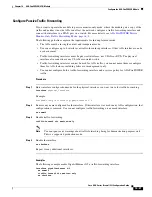
For the 5506-X, you can instead use ASDM to configure the policy on the ASA FirePOWER module.
When using ASDM, you can configure one module at a time, which is a good solution when you have a
single device or very few devices. If you have a large number of devices, FireSIGHT Management Center
is a better solution.
Step 12
(Skip for 5506-X when using ASDM.)
Log into the FireSIGHT Management Center using an HTTPS
connection in a browser, using the hostname or address entered above. For example,
https://DC.example.com.
Use the Device Management (
Devices > Device Management
) page to add the device. For more
information, see the online help or the Managing Devices chapter in the
FireSIGHT System User Guide
.
Tip
You also configure NTP and time settings through FireSIGHT Management Center. Use the
Time Synchronization settings when editing the local policy from the
System > Local > System
Policy
page.
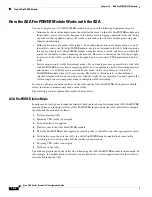
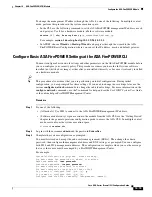
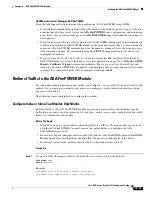
Change the ASA FirePOWER Management IP Address
If you cannot use the default management IP address, then you can set the management IP address from
the ASA. After you set the management IP address, you can access the ASA FirePOWER module using
SSH to perform additional setup.
If you already configured the management address during initial system setup through the ASA
FirePOWER CLI, as described in
Configure Basic ASA FirePOWER Settings at the ASA FirePOWER
, then it is not necessary to configure it through the ASA CLI or ASDM.
Note
For a software module, you can access the ASA FirePOWER CLI to perform setup by sessioning from
the ASA CLI; you can then set the ASA FirePOWER management IP address as part of setup. For a
hardware module, you can complete the initial setup through the Console port.
Содержание ASA 5512-X
Страница 5: ...P A R T 1 Service Policies and Access Control ...
Страница 6: ......
Страница 50: ...3 14 Cisco ASA Series Firewall CLI Configuration Guide Chapter 3 Access Rules History for Access Rules ...
Страница 51: ...P A R T 2 Network Address Translation ...
Страница 52: ......
Страница 126: ...5 28 Cisco ASA Series Firewall CLI Configuration Guide Chapter 5 NAT Examples and Reference DNS and NAT ...
Страница 127: ...P A R T 3 Application Inspection ...
Страница 128: ......
Страница 255: ...P A R T 4 Connection Settings and Quality of Service ...
Страница 256: ......
Страница 288: ...12 14 Cisco ASA Series Firewall CLI Configuration Guide Chapter 12 Quality of Service History for QoS ...
Страница 303: ...P A R T 5 Advanced Network Protection ...
Страница 304: ......
Страница 339: ...P A R T 6 ASA Modules ...
Страница 340: ......
Страница 398: ...17 28 Cisco ASA Series Firewall CLI Configuration Guide Chapter 17 ASA CX Module History for the ASA CX Module ...


