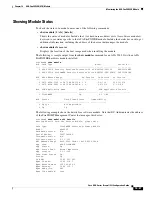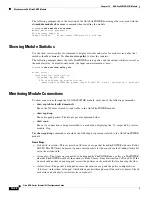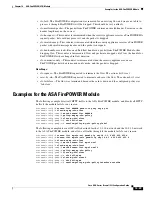
16-25
Cisco ASA Series Firewall CLI Configuration Guide
Chapter 16 ASA FirePOWER (SFR) Module
Managing the ASA FirePOWER Module
Procedure
Step 1
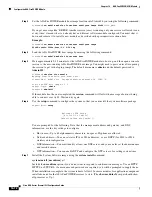
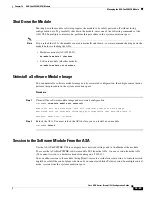
Connect to the Console port. Use the console cable included with the ASA product to connect your PC
to the console using a terminal emulator set for 9600 baud, 8 data bits, no parity, 1 stop bit, no flow
control. See the hardware guide for your ASA for more information about the console cable.
Step 2
Enter the
system reboot
command to reload the system.
Step 3
When prompted, break out of the boot by pressing Esc. If you see grub start to boot the system, you have
waited too long.
This will place you at the rommon prompt.
Step 4
At the rommon prompt, enter
set
and configure the following parameters:
•
ADDRESS—The management IP address of the module.
•
SERVER—The IP address of the TFTP server.
•
GATEWAY—The gateway address to the TFTP server. If the TFTP server is directly attached to
Management1/0, use the IP address of the TFTP server. If the TFTP server and management address
are on the same subnet, do not configure the gateway or TFTP boot will fail.
•
IMAGE—The Boot Image path and image name on the TFTP server. For example, if you place the
file on the TFTP server in /tftpboot/images/filename.img, the IMAGE value is images/filename.img.
For example:
ADDRESS=10.5.190.199
SERVER=10.5.11.170
GATEWAY=10.5.1.1
IMAGE=asasfr-boot-5.3.1-26-54.img
Step 5
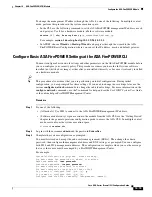
Enter
sync
to save the settings.
Step 6
Enter
tftp
to initiate the download and boot process.
You will see ! marks to indicate progress. When the boot completes after several minutes, you will see
a login prompt.
Step 7
Log in as
admin
, with the password
Admin123
.
Step 8
Use the
setup
command to configure the system so that you can install the system software package.
You are prompted for the following. Note that the management address and gateway, and DNS
information, are the key settings to configure.
•
Host name—Up to 65 alphanumeric characters, no spaces. Hyphens are allowed.
•
Network address—You can set static IPv4 or IPv6 addresses, or use DHCP (for IPv4) or IPv6
stateless autoconfiguration.
•
DNS information—You must identify at least one DNS server, and you can also set the domain name
and search domain.
•
NTP information—You can enable NTP and configure the NTP servers, for setting system time.
Step 9
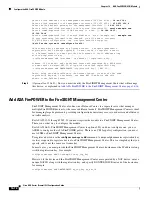
Install the System Software image using the
system install
command:
system install
[
noconfirm
]
url
Include the
noconfirm
option if you do not want to respond to confirmation messages.
When installation is complete, the system reboots. Allow 10 or more minutes for application component
installation and for the ASA FirePOWER services to start.
Содержание ASA 5512-X
Страница 5: ...P A R T 1 Service Policies and Access Control ...
Страница 6: ......
Страница 50: ...3 14 Cisco ASA Series Firewall CLI Configuration Guide Chapter 3 Access Rules History for Access Rules ...
Страница 51: ...P A R T 2 Network Address Translation ...
Страница 52: ......
Страница 126: ...5 28 Cisco ASA Series Firewall CLI Configuration Guide Chapter 5 NAT Examples and Reference DNS and NAT ...
Страница 127: ...P A R T 3 Application Inspection ...
Страница 128: ......
Страница 255: ...P A R T 4 Connection Settings and Quality of Service ...
Страница 256: ......
Страница 288: ...12 14 Cisco ASA Series Firewall CLI Configuration Guide Chapter 12 Quality of Service History for QoS ...
Страница 303: ...P A R T 5 Advanced Network Protection ...
Страница 304: ......
Страница 339: ...P A R T 6 ASA Modules ...
Страница 340: ......
Страница 398: ...17 28 Cisco ASA Series Firewall CLI Configuration Guide Chapter 17 ASA CX Module History for the ASA CX Module ...


