15-6
Cisco ASA Series Firewall CLI Configuration Guide
Chapter 15 Threat Detection
Configure Threat Detection
Procedure
Step 1
(Optional) Enable
all
statistics.
threat-detection statistics
Example:
hostname(config)# threat-detection statistics
To enable only certain statistics, enter this command for each statistic type (shown in this table), and do
not also enter the command without any options. You can enter
threat-detection statistics
(without any
options) and then customize certain statistics by entering the command with statistics-specific options
(for example,
threat-detection statistics host number-of-rate 2
). If you enter
threat-detection
statistics
(without any options) and then enter a command for specific statistics, but without any
statistic-specific options, then that command has no effect because it is already enabled.
If you enter the
no
form of this command, it removes all
threat-detection statistics
commands,
including the
threat-detection statistics access-list
command, which is enabled by default.
Step 2
(Optional) Enable statistics for ACLs (if they were disabled previously).
threat-detection statistics access-list
Example:
hostname(config)# threat-detection statistics access-list
Statistics for ACLs are enabled by default. ACL statistics are only displayed using the
show
threat-detection top access-list
command. This command is enabled by default.
Step 3
(Optional) Configure statistics for hosts (
host
keyword), TCP and UDP ports (
port
keyword), or
non-TCP/UDP IP protocols (
protocol
keyword).
threat-detection statistics
{
host
|
port
|
protocol
}
[
number-of-rate
{
1
|
2
|
3
}]
Example:
hostname(config)# threat-detection statistics host number-of-rate 2
hostname(config)# threat-detection statistics port number-of-rate 2
hostname(config)# threat-detection statistics protocol number-of-rate 3
The
number-of-rate
keyword sets the number of rate intervals maintained for statistics. The default
number of rate intervals is
1
, which keeps the memory usage low. To view more rate intervals, set the
value to
2
or
3
. For example, if you set the value to
3
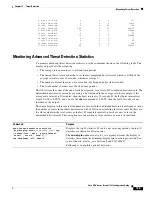
, then you view data for the last 1 hour, 8 hours, and
24 hours. If you set this keyword to
1
(the default), then only the shortest rate interval statistics are
maintained. If you set the value to
2
, then the two shortest intervals are maintained.
The host statistics accumulate for as long as the host is active and in the scanning threat host database.
The host is deleted from the database (and the statistics cleared) after 10 minutes of inactivity.
Step 4
(Optional) Configure statistics for attacks intercepted by TCP Intercept (to enable TCP Intercept, see
Protect Servers from a SYN Flood DoS Attack (TCP Intercept), page 11-4
threat-detection statistics tcp-intercept
[
rate-interval
minutes
]
[
burst-rate
attacks_per_sec
] [
average-rate
attacks_per_sec
]
Example:
hostname(config)# threat-detection statistics tcp-intercept rate-interval 60 burst-rate
800 average-rate 600
Содержание ASA 5512-X
Страница 5: ...P A R T 1 Service Policies and Access Control ...
Страница 6: ......
Страница 50: ...3 14 Cisco ASA Series Firewall CLI Configuration Guide Chapter 3 Access Rules History for Access Rules ...
Страница 51: ...P A R T 2 Network Address Translation ...
Страница 52: ......
Страница 126: ...5 28 Cisco ASA Series Firewall CLI Configuration Guide Chapter 5 NAT Examples and Reference DNS and NAT ...
Страница 127: ...P A R T 3 Application Inspection ...
Страница 128: ......
Страница 255: ...P A R T 4 Connection Settings and Quality of Service ...
Страница 256: ......
Страница 288: ...12 14 Cisco ASA Series Firewall CLI Configuration Guide Chapter 12 Quality of Service History for QoS ...
Страница 303: ...P A R T 5 Advanced Network Protection ...
Страница 304: ......
Страница 339: ...P A R T 6 ASA Modules ...
Страница 340: ......
Страница 398: ...17 28 Cisco ASA Series Firewall CLI Configuration Guide Chapter 17 ASA CX Module History for the ASA CX Module ...

