


ASUS P9X79 WS
2-23
2.2.9
Internal connectors
1.
Intel
®
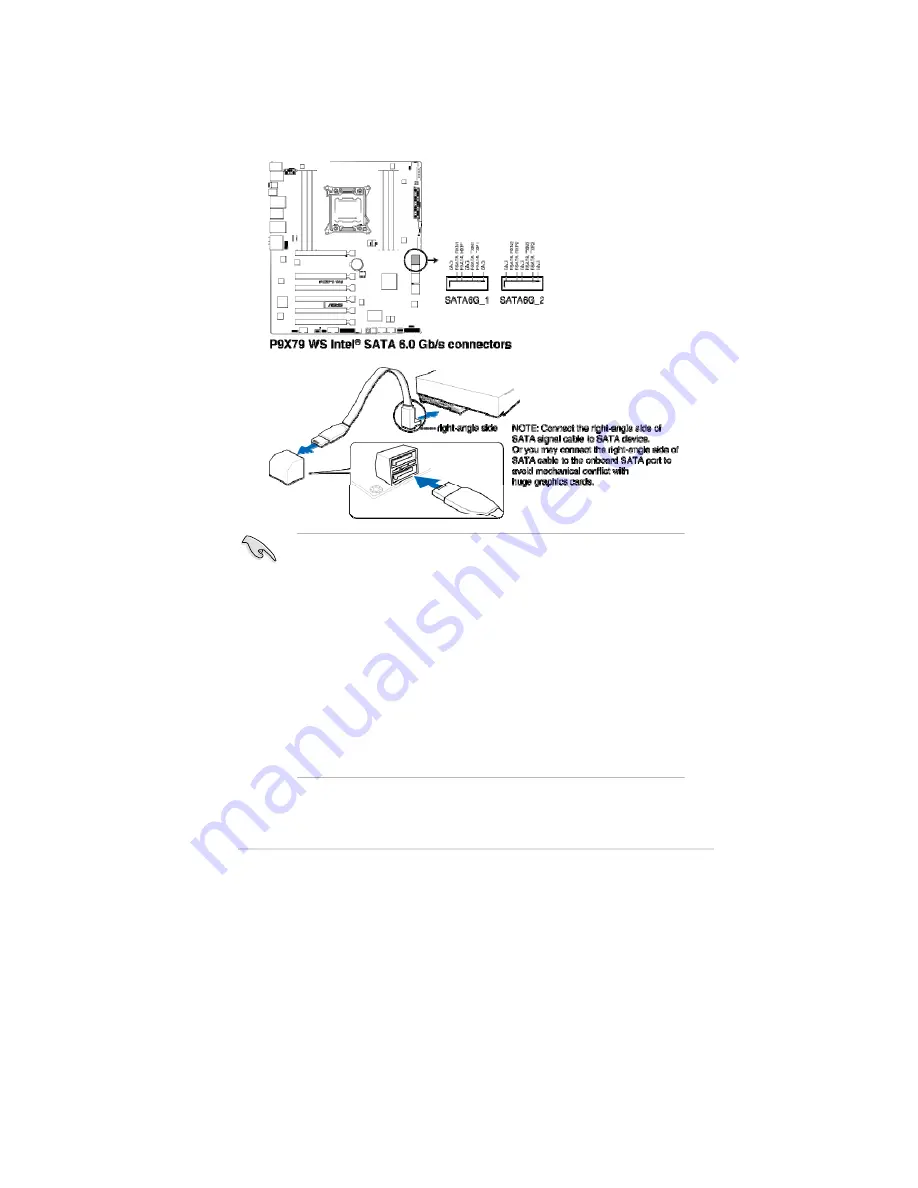
X79 Serial ATA 6.0 Gb/s connectors (7-pin SATA6G_1/2 [gray])
These connectors connect to Serial ATA 6.0 Gb/s hard disk drives via Serial
ATA 6.0 Gb/s signal cables.
®
•
These connectors are set to [IDE Mode] by default. If you intend to create
a Serial ATA RAID set using these connectors, set the SATA Mode item in
the BIOS to [RAID Mode]. Refer to section
3.5.4 SATA Configuration
for
details.
•
Before creating a RAID set, refer to section 4.4 RAID configurations or the
manual bundled in the motherboard support DVD.
•
When using hot-plug and NCQ, set the SATA Mode in the BIOS to [AHCI
Mode]. Refer to section
3.5.4 SATA Configuration
for details.
•
You must install Windows
®
XP Service Pack 3 or later versions before using
Serial ATA hard disk drives. The Serial ATA RAID feature is available only if
you are using Windows
®
XP SP3 or later versions.
•
You must load
IRST Driver
during OS installation for the system to detect
the Optical Disk Drive (the ODD should be connected to the SATA_3G
port), or else the ODD will not run.
Содержание Kronos 600 X79-KA SERIES
Страница 1: ...User Guide Kronos 600 Workstation X79 KA XXXXX XX XXX...
Страница 8: ...CIARA Kronos 600 workstation X79 KA XXXXX XX XXX 8...
Страница 36: ...CIARA Kronos 600 workstation X79 KA XXXXX XX XXX 36 NOTES...
Страница 43: ...P9X79 WS Motherboard...
Страница 58: ...16...
Страница 59: ...This chapter describes the motherboard features and the new technologies it supports Pro 1 duct introduction...
Страница 60: ...ASUS P9X79 WS Chapter summary 1 1 1 Welcome 1 1 1 2 Package contents 1 1 1 3 Special features 1 2...
Страница 107: ...ASUS P9X79 WS 2 37 5 6 Triangle mark 7 8 B A 9 B A...
Страница 109: ...ASUS P9X79 WS 2 39 2 3 4 DIMM installation 1 2 3 To remove aDIMM B A...
Страница 111: ...ASUS P9X79 WS 2 41 3 DO NOT overtighten the screws Doing so can damage the motherboard...
Страница 112: ...2 42 Chapter 2 Hardware information 2 3 6 ATX Power connection 1 2 OR...
Страница 113: ...ASUS P9X79 WS 2 43 2 3 7 SATAdevice connection 1 OR 2...
Страница 117: ...ASUS P9X79 WS 2 47 Connect toStereoSpeakers Connect to2 1 channelSpeakers Connect to4 1 channelSpeakers...
Страница 118: ...2 48 Chapter 2 Hardware information Connect to5 1 channelSpeakers Connect to7 1 channelSpeakers...
Страница 122: ...2 52 Chapter 2 Hardwareinformation...
Страница 133: ...ASUS P9X79 WS 3 11 Chapter 3 Scroll down to display the following items Scroll down to display the following items...
Страница 226: ...5 14 Chapter 5 rv JltipleGPUtechnology support...


