


4-24
Chapter 4: Software support
Chapter
4
Deleting a RAID set
Take caution when deleting a RAID set. You will lose all data on the hard disk drives when
you delete a RAID set.
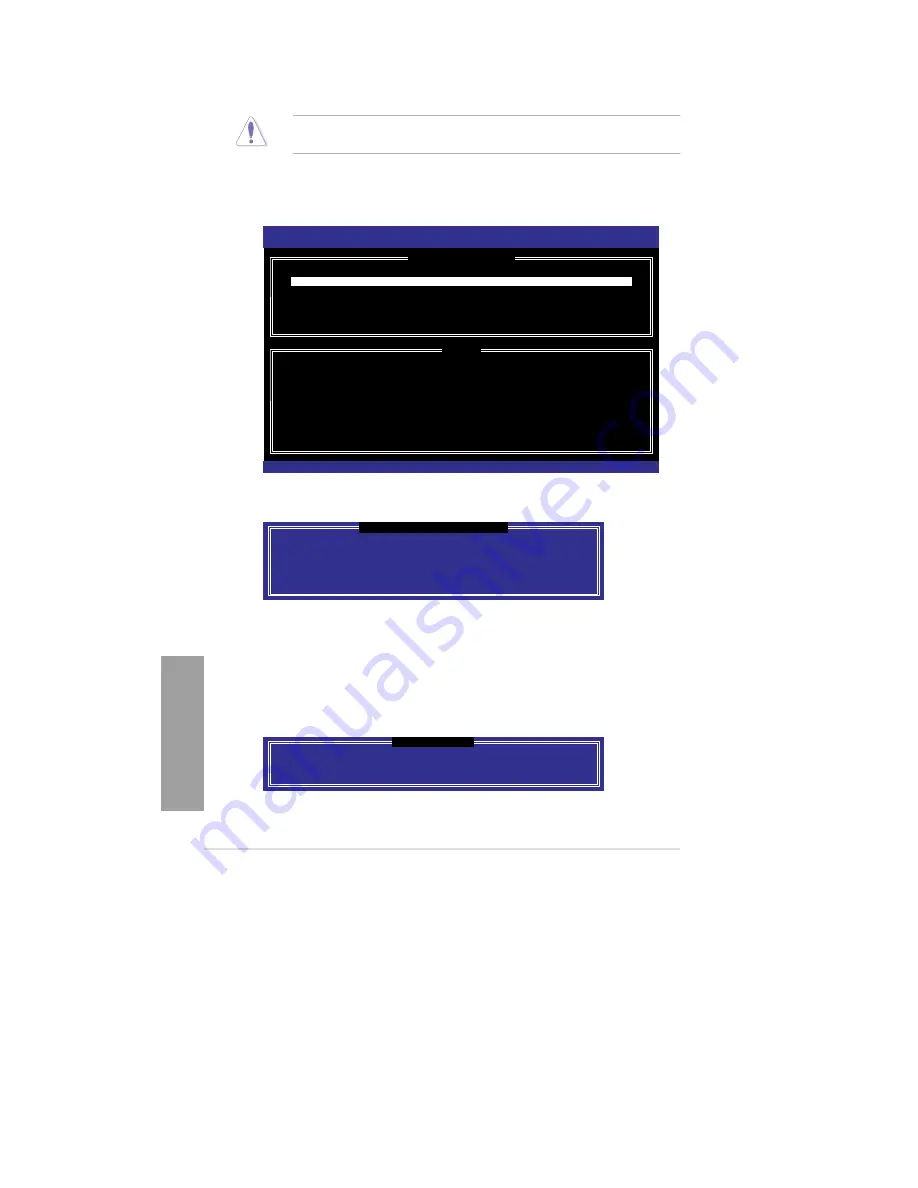
To delete a RAID set:
1.
From the utility main menu, select
2. Delete RAID Volume
and press <Enter>. The
following screen appears:
Intel(R) Rapid Storage Technology - Option ROM - v10.0.0.1032
Copyright(C) 2003-10 Intel Corporation. All Rights Reserved.
[
DELETE VOLUME MENU
]
Name Level
Drives
Capacity
Status
Bootable
Volume0 RAID0(Stripe)
2
298.0GB Normal
Yes
[
HELP
]
Deleting a volume will reset the disks to non-RAID.
WARNING:
ALL DISK DATA WILL BE DELETED.
(This does not apply to Recovery volumes)
[
↑↓
]-Select
[ESC]-Previous Menu
[DEL]-Delete Volume
2.
Use the up/down arrow key to select the RAID set you want to delete, and then press
<Del>. The following warning message appears:
[
DELETE VOLUME VERIFICATION
]
ALL DATA IN THE VOLUME WILL BE LOST!
(This does not apply to Recovery volumes)
Are you sure you want to delete volume “Volume0”? (Y/N):
3.
Press <Y> to delete the RAID set and return to the utility main menu, or press <N> to
return to the
DELETE VOLUME
menu.
Exiting the Intel
®
Rapid Storage Technology Option ROM utility
To exit the utility:
1.
From the utility main menu, select
5. Exit
, and then press <Enter>. The following
warning message appears:
[
CONFIRM EXIT
]
Are you sure you want to exit? (Y/N):
2.
Press <Y> to exit or press <N> to return to the utility main menu.
Содержание Kronos 600 X79-KA SERIES
Страница 1: ...User Guide Kronos 600 Workstation X79 KA XXXXX XX XXX...
Страница 8: ...CIARA Kronos 600 workstation X79 KA XXXXX XX XXX 8...
Страница 36: ...CIARA Kronos 600 workstation X79 KA XXXXX XX XXX 36 NOTES...
Страница 43: ...P9X79 WS Motherboard...
Страница 58: ...16...
Страница 59: ...This chapter describes the motherboard features and the new technologies it supports Pro 1 duct introduction...
Страница 60: ...ASUS P9X79 WS Chapter summary 1 1 1 Welcome 1 1 1 2 Package contents 1 1 1 3 Special features 1 2...
Страница 107: ...ASUS P9X79 WS 2 37 5 6 Triangle mark 7 8 B A 9 B A...
Страница 109: ...ASUS P9X79 WS 2 39 2 3 4 DIMM installation 1 2 3 To remove aDIMM B A...
Страница 111: ...ASUS P9X79 WS 2 41 3 DO NOT overtighten the screws Doing so can damage the motherboard...
Страница 112: ...2 42 Chapter 2 Hardware information 2 3 6 ATX Power connection 1 2 OR...
Страница 113: ...ASUS P9X79 WS 2 43 2 3 7 SATAdevice connection 1 OR 2...
Страница 117: ...ASUS P9X79 WS 2 47 Connect toStereoSpeakers Connect to2 1 channelSpeakers Connect to4 1 channelSpeakers...
Страница 118: ...2 48 Chapter 2 Hardware information Connect to5 1 channelSpeakers Connect to7 1 channelSpeakers...
Страница 122: ...2 52 Chapter 2 Hardwareinformation...
Страница 133: ...ASUS P9X79 WS 3 11 Chapter 3 Scroll down to display the following items Scroll down to display the following items...
Страница 226: ...5 14 Chapter 5 rv JltipleGPUtechnology support...


