


ASUS P9X79 WS
3-43
Chapter
3
3.7
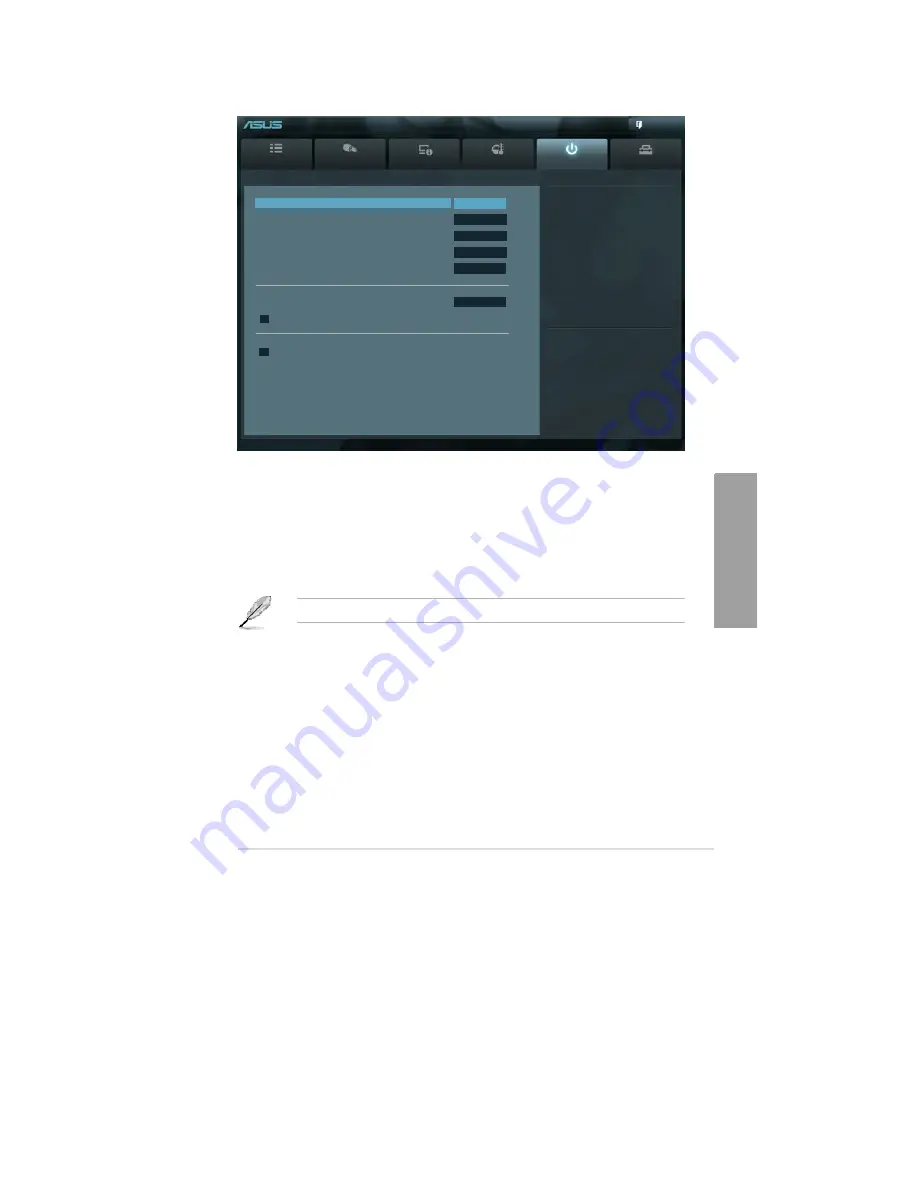
Boot menu
The Boot menu items allow you to change the system boot options.
UEFI BIOS Utility - Advanced Mode
Exit
Main
Ai Tweaker
Advanced
Monitor
Boot
Tool
Bootup NumLock State
On
Full Screen Logo
Disabled
Wait For ‘F1’ If Error
Enabled
Option ROM Messages
Force BIOS
Setup Mode
EZ Mode
Boot Option Priorities
Boot Option #1
IBA GE Slo...
> Network Device BBS Priorities
Boot Override
> IBA GE Slot 00CB V1372
Select the keyboard NumLock state
→←
: Select Screen
↑↓
: Select Item
Enter: Select
+/-: Change Opt.
F1: General Help
F2: Previous Values
F3: Shortcut
F5: Optimized Defaults
F6: ASUS Ratio Boost
F10: Save ESC: Exit
F12: Print Screen
Version 2.10.1208. Copyright (C) 2011 American Megatrends, Inc.
Bootup NumLock State [On]
[On]
Sets the power-on state of the NumLock to [On].
[Off]
Sets the power-on state of the NumLock to [Off].
Full Screen Logo [Enabled]
[Enabled]
Enables the full screen logo display feature.
[Disabled]
Disables the full screen logo display feature.
Set this item to [Enabled] to use the ASUS MyLogo 2™ feature.
Wait For ‘F1’ If Error [Enabled]
[Disabled]
Disables this function.
[Enabled]
The system waits for the <F1> key to be pressed when error occurs.
Post Report [5 sec]
This item appears only when you set the
Full Screen Logo
item to [Disabled]. This item
allows you to select the desired Post Report waiting time from 1-10 sec.
Configuration options: [1 sec] [2 sec] [3 sec] [4 sec] [5 sec] [6 sec] [7 sec] [8 sec] [9 sec] [10
sec] [Until Press ESC].
Содержание Kronos 600 X79-KA SERIES
Страница 1: ...User Guide Kronos 600 Workstation X79 KA XXXXX XX XXX...
Страница 8: ...CIARA Kronos 600 workstation X79 KA XXXXX XX XXX 8...
Страница 36: ...CIARA Kronos 600 workstation X79 KA XXXXX XX XXX 36 NOTES...
Страница 43: ...P9X79 WS Motherboard...
Страница 58: ...16...
Страница 59: ...This chapter describes the motherboard features and the new technologies it supports Pro 1 duct introduction...
Страница 60: ...ASUS P9X79 WS Chapter summary 1 1 1 Welcome 1 1 1 2 Package contents 1 1 1 3 Special features 1 2...
Страница 107: ...ASUS P9X79 WS 2 37 5 6 Triangle mark 7 8 B A 9 B A...
Страница 109: ...ASUS P9X79 WS 2 39 2 3 4 DIMM installation 1 2 3 To remove aDIMM B A...
Страница 111: ...ASUS P9X79 WS 2 41 3 DO NOT overtighten the screws Doing so can damage the motherboard...
Страница 112: ...2 42 Chapter 2 Hardware information 2 3 6 ATX Power connection 1 2 OR...
Страница 113: ...ASUS P9X79 WS 2 43 2 3 7 SATAdevice connection 1 OR 2...
Страница 117: ...ASUS P9X79 WS 2 47 Connect toStereoSpeakers Connect to2 1 channelSpeakers Connect to4 1 channelSpeakers...
Страница 118: ...2 48 Chapter 2 Hardware information Connect to5 1 channelSpeakers Connect to7 1 channelSpeakers...
Страница 122: ...2 52 Chapter 2 Hardwareinformation...
Страница 133: ...ASUS P9X79 WS 3 11 Chapter 3 Scroll down to display the following items Scroll down to display the following items...
Страница 226: ...5 14 Chapter 5 rv JltipleGPUtechnology support...


