


4-10
Chapter 4: Software support
Chapter
4
4.3.4
EPU
EPU is an energy-efficient tool that satisfies different computing needs. This utility provides
several modes that you can select to save system power. Selecting Auto mode will have the
system shift modes automatically according to current system status. You can also customize
each mode by configuring settings like CPU frequency, GPU frequency, vCore Voltage, and
Fan Control.
Launching EPU
After installing AI Suite II from the motherboard support DVD, launch EPU by clicking
Tool > EPU
on the AI Suite II main menu bar.
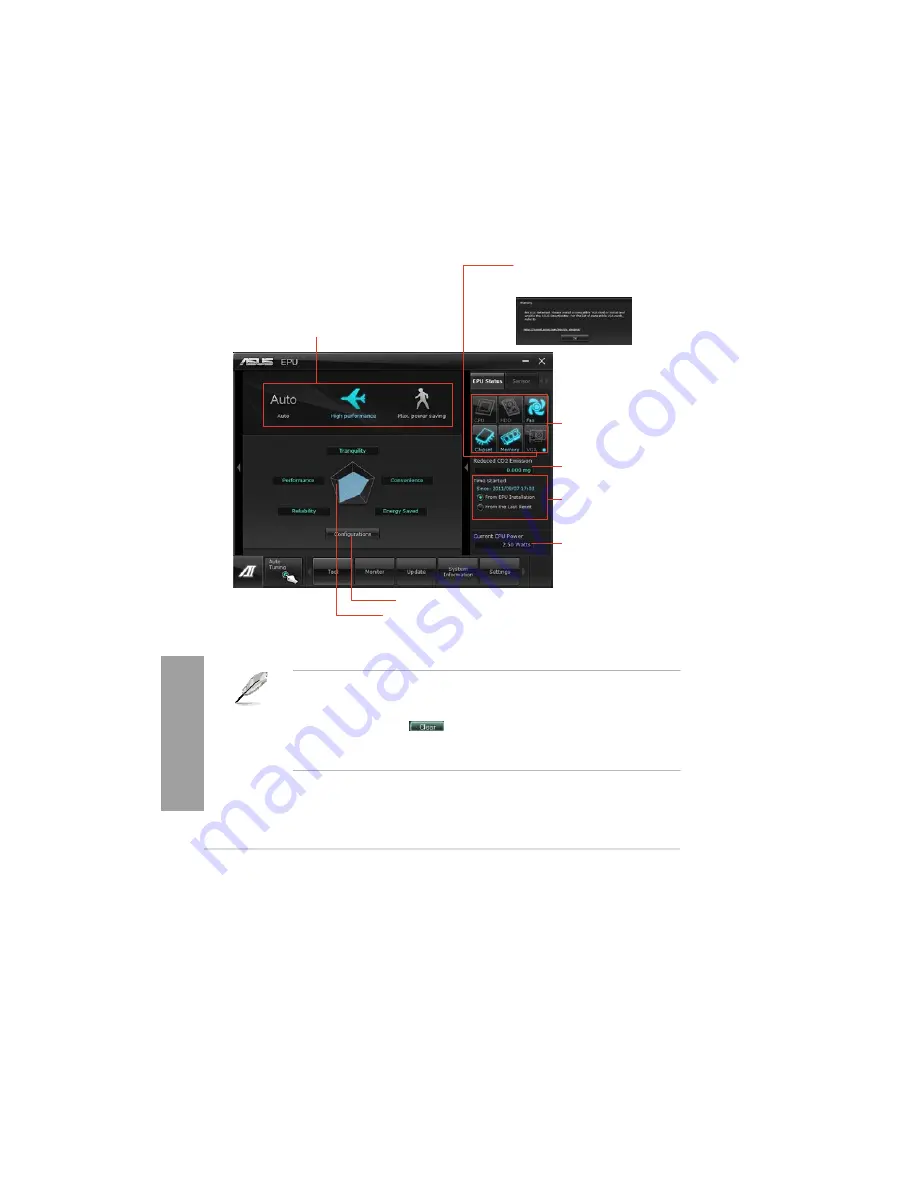
Displays the following message
if no VGA power saving engine is
detected.
Multiple system
operating modes
The items lighting up
means power saving
engine is activated
Displays the amount
of CO2 reduced
*Shifts between the
display of Total and
Current CO2 reduced
Displays the current
CPU power
Advanced settings for each mode
Displays the system
properties of each mode
*• Select
From EPU Installation
to show the CO2 that has been reduced since you
installed EPU.
*• Select
From the Last Reset
to show the total CO2 that has been reduced since you
click the Clear button
.
•
Refer to the software manual in the support DVD or visit the ASUS website at
www.asus.com for detailed software configuration.
Содержание Kronos 600 X79-KA SERIES
Страница 1: ...User Guide Kronos 600 Workstation X79 KA XXXXX XX XXX...
Страница 8: ...CIARA Kronos 600 workstation X79 KA XXXXX XX XXX 8...
Страница 36: ...CIARA Kronos 600 workstation X79 KA XXXXX XX XXX 36 NOTES...
Страница 43: ...P9X79 WS Motherboard...
Страница 58: ...16...
Страница 59: ...This chapter describes the motherboard features and the new technologies it supports Pro 1 duct introduction...
Страница 60: ...ASUS P9X79 WS Chapter summary 1 1 1 Welcome 1 1 1 2 Package contents 1 1 1 3 Special features 1 2...
Страница 107: ...ASUS P9X79 WS 2 37 5 6 Triangle mark 7 8 B A 9 B A...
Страница 109: ...ASUS P9X79 WS 2 39 2 3 4 DIMM installation 1 2 3 To remove aDIMM B A...
Страница 111: ...ASUS P9X79 WS 2 41 3 DO NOT overtighten the screws Doing so can damage the motherboard...
Страница 112: ...2 42 Chapter 2 Hardware information 2 3 6 ATX Power connection 1 2 OR...
Страница 113: ...ASUS P9X79 WS 2 43 2 3 7 SATAdevice connection 1 OR 2...
Страница 117: ...ASUS P9X79 WS 2 47 Connect toStereoSpeakers Connect to2 1 channelSpeakers Connect to4 1 channelSpeakers...
Страница 118: ...2 48 Chapter 2 Hardware information Connect to5 1 channelSpeakers Connect to7 1 channelSpeakers...
Страница 122: ...2 52 Chapter 2 Hardwareinformation...
Страница 133: ...ASUS P9X79 WS 3 11 Chapter 3 Scroll down to display the following items Scroll down to display the following items...
Страница 226: ...5 14 Chapter 5 rv JltipleGPUtechnology support...


