ASUS P9X79 WS
4-19
Chapter
4
4.3.12 Audio
configurations
The Realtek
®
audio CODEC provides 8-channel audio capability to deliver the ultimate audio
experience on your computer. The software provides Jack-Sensing function, S/PDIF Out
support, and interrupt capability. The CODEC also includes the Realtek
®
proprietary UAJ
®
(Universal Audio Jack) technology for all audio ports, eliminating cable connection errors and
giving users plug and play convenience.
Follow the installation wizard to install the Realtek
®
Audio Driver from the support DVD that
came with the motherboard package.
If the Realtek audio software is correctly installed, you will find the
Realtek HD Audio
Manager
icon on the taskbar. Double-click on the icon to display the Realtek HD Audio
Manager.
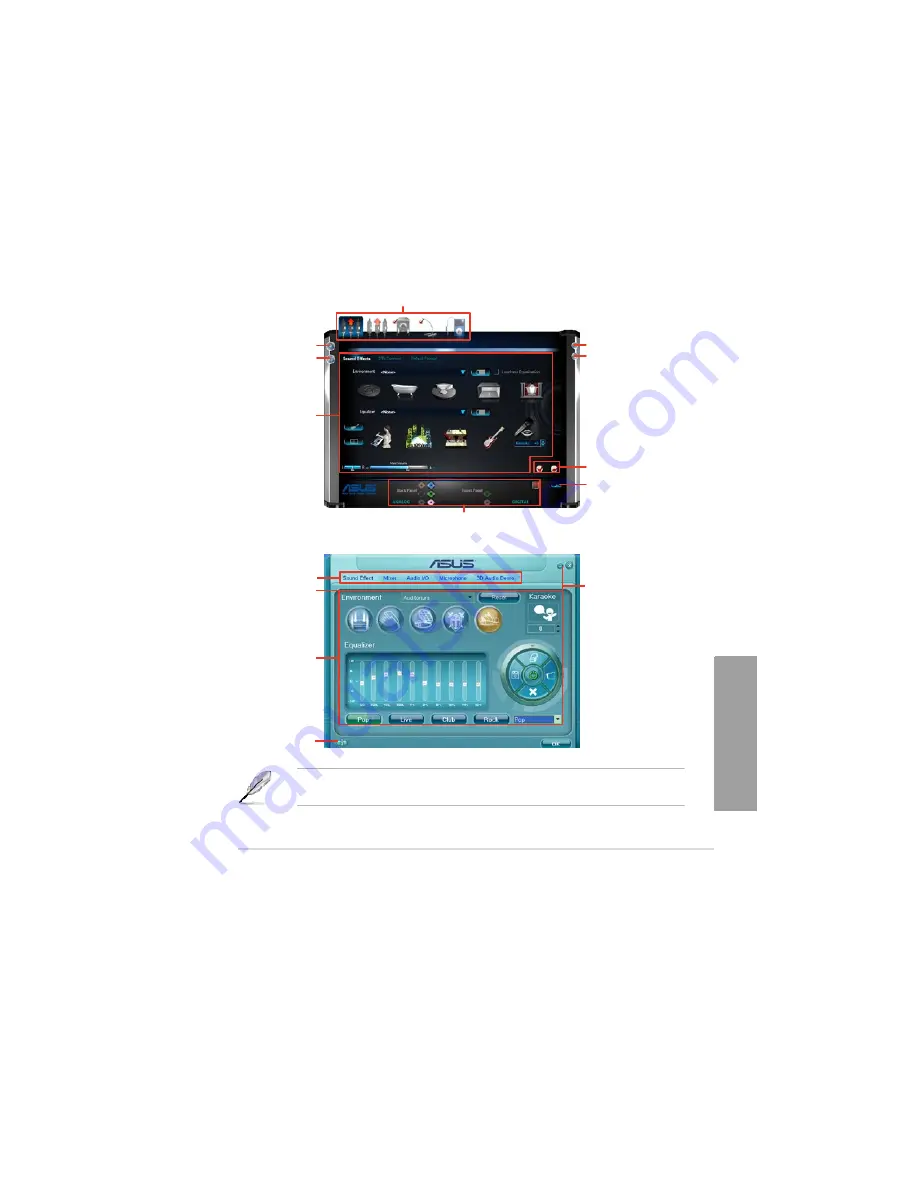
A.
Realtek HD Audio Manager with DTS UltraPC II for Windows
®
7™ / Vista™
Configuration option tabs (vary with the audio devices connected)
Device advanced
settings
Information button
Exit button
Minimize button
Control settings
Set default device buttons
Connector settings
Analog and digital connector status
B.
Realtek HD Audio Manager for Windows XP
Configuration
options
Exit button
Minimize button
Control settings
window
Information
button
Refer to the software manual in the support DVD or visit the ASUS website at
www.asus.com for detailed software configuration.
Содержание Kronos 600 X79-KA SERIES
Страница 1: ...User Guide Kronos 600 Workstation X79 KA XXXXX XX XXX...
Страница 8: ...CIARA Kronos 600 workstation X79 KA XXXXX XX XXX 8...
Страница 36: ...CIARA Kronos 600 workstation X79 KA XXXXX XX XXX 36 NOTES...
Страница 43: ...P9X79 WS Motherboard...
Страница 58: ...16...
Страница 59: ...This chapter describes the motherboard features and the new technologies it supports Pro 1 duct introduction...
Страница 60: ...ASUS P9X79 WS Chapter summary 1 1 1 Welcome 1 1 1 2 Package contents 1 1 1 3 Special features 1 2...
Страница 107: ...ASUS P9X79 WS 2 37 5 6 Triangle mark 7 8 B A 9 B A...
Страница 109: ...ASUS P9X79 WS 2 39 2 3 4 DIMM installation 1 2 3 To remove aDIMM B A...
Страница 111: ...ASUS P9X79 WS 2 41 3 DO NOT overtighten the screws Doing so can damage the motherboard...
Страница 112: ...2 42 Chapter 2 Hardware information 2 3 6 ATX Power connection 1 2 OR...
Страница 113: ...ASUS P9X79 WS 2 43 2 3 7 SATAdevice connection 1 OR 2...
Страница 117: ...ASUS P9X79 WS 2 47 Connect toStereoSpeakers Connect to2 1 channelSpeakers Connect to4 1 channelSpeakers...
Страница 118: ...2 48 Chapter 2 Hardware information Connect to5 1 channelSpeakers Connect to7 1 channelSpeakers...
Страница 122: ...2 52 Chapter 2 Hardwareinformation...
Страница 133: ...ASUS P9X79 WS 3 11 Chapter 3 Scroll down to display the following items Scroll down to display the following items...
Страница 226: ...5 14 Chapter 5 rv JltipleGPUtechnology support...


