


CIARA
Kronos 600 workstation X79-KA-XXXXX-XX-XXX
- 10 -
1.3.2 Windows 8 Recovery from Startup Settings
With the Windows Startup Settings screen (formerly advanced boot options) you can start Windows in different advanced
troubleshooting modes so you can find and fix problems on your WORK STATION. In previous versions of Windows, you could get to
this screen by pressing F8 before Windows started up. Windows 8 WORK STATIONs start up quickly so there's not enough time to
press F8.
There are two ways to get to the Windows Startup Settings screen in Windows 8 :
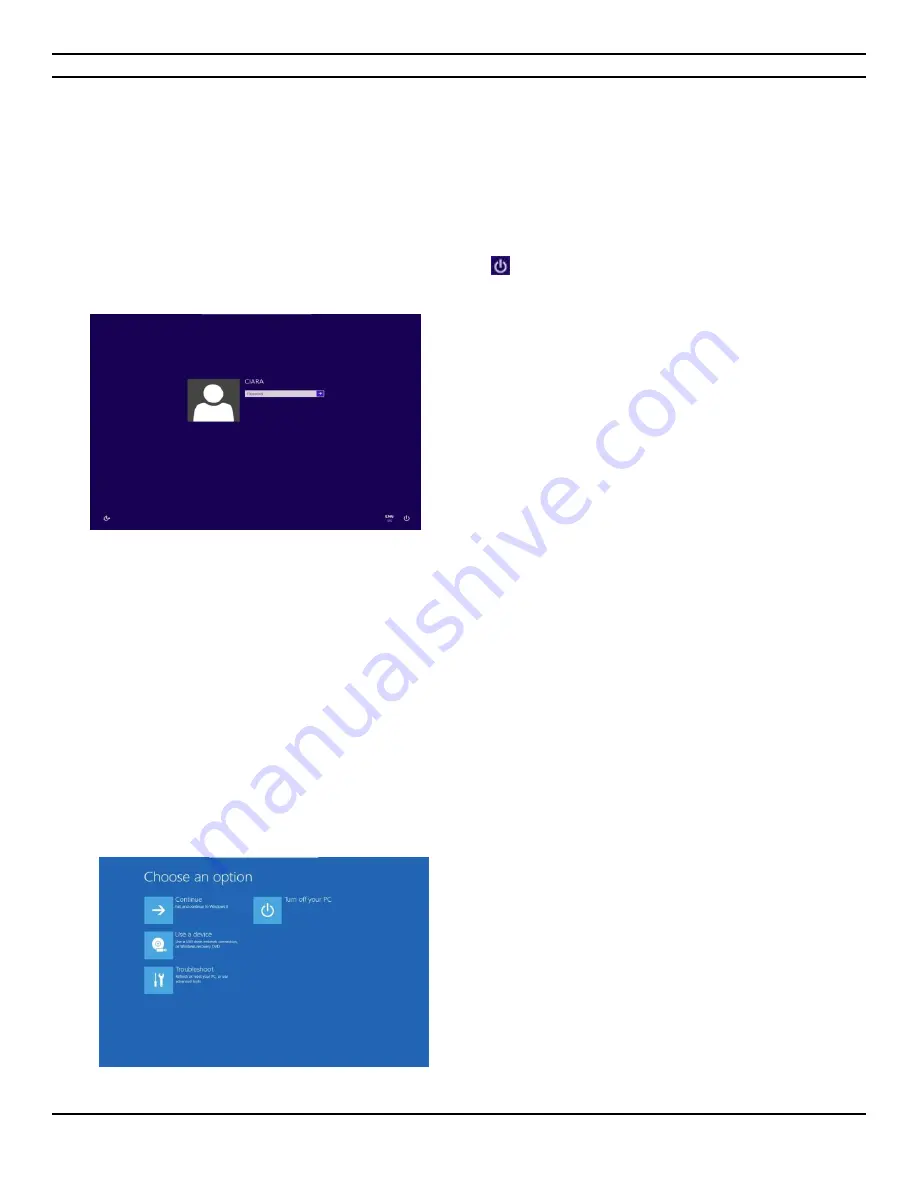
If you're not signed in to Windows, tap or click the power icon
from the sign-in screen, hold
Shift
, and then tap or click
Restart.
Or, if you're already signed in:
1.
Swipe in from the right edge of the screen, tap
Settings
, and then tap
Change WORK STATION settings
.
(If you're using a mouse, point to the upper-right corner of the screen, move the mouse pointer down, click
Settings
,
and then click
Change WORK STATION settings
.)
2.
Under
WORK STATION settings
, tap or click
General
.
3.
Under
Advanced startup
, tap or click
Restart now
.
4.
On the
Choose an option
screen, tap or click
Troubleshoot
.
5.
Tap or click
Startup Settings
.
6.
Tap or click
Restart
.
7.
On the
Startup Settings
screen, choose the startup setting you want.
8.
Sign in to your WORK STATION with a user account that has administrator rights.
Choose
Troubleshoot
Содержание Kronos 600 X79-KA SERIES
Страница 1: ...User Guide Kronos 600 Workstation X79 KA XXXXX XX XXX...
Страница 8: ...CIARA Kronos 600 workstation X79 KA XXXXX XX XXX 8...
Страница 36: ...CIARA Kronos 600 workstation X79 KA XXXXX XX XXX 36 NOTES...
Страница 43: ...P9X79 WS Motherboard...
Страница 58: ...16...
Страница 59: ...This chapter describes the motherboard features and the new technologies it supports Pro 1 duct introduction...
Страница 60: ...ASUS P9X79 WS Chapter summary 1 1 1 Welcome 1 1 1 2 Package contents 1 1 1 3 Special features 1 2...
Страница 107: ...ASUS P9X79 WS 2 37 5 6 Triangle mark 7 8 B A 9 B A...
Страница 109: ...ASUS P9X79 WS 2 39 2 3 4 DIMM installation 1 2 3 To remove aDIMM B A...
Страница 111: ...ASUS P9X79 WS 2 41 3 DO NOT overtighten the screws Doing so can damage the motherboard...
Страница 112: ...2 42 Chapter 2 Hardware information 2 3 6 ATX Power connection 1 2 OR...
Страница 113: ...ASUS P9X79 WS 2 43 2 3 7 SATAdevice connection 1 OR 2...
Страница 117: ...ASUS P9X79 WS 2 47 Connect toStereoSpeakers Connect to2 1 channelSpeakers Connect to4 1 channelSpeakers...
Страница 118: ...2 48 Chapter 2 Hardware information Connect to5 1 channelSpeakers Connect to7 1 channelSpeakers...
Страница 122: ...2 52 Chapter 2 Hardwareinformation...
Страница 133: ...ASUS P9X79 WS 3 11 Chapter 3 Scroll down to display the following items Scroll down to display the following items...
Страница 226: ...5 14 Chapter 5 rv JltipleGPUtechnology support...


