6.0 Operation
20
6.0 Operation
IMPORTANT: DO NOT ATTEMPT TO OPERATE THE CUTTER UNTIL YOU HAVE THOROUGHLY
READ AND UNDERSTAND ALL OF THE FOLLOWING INSTRUCTIONS. CALL YOUR
AUTHORIZED CHALLENGE DEALER IF YOU STILL HAVE ANY QUESTIONS.
6.1 Power – Main Switch
Power is brought to the machine when the main power switch is turned to the “ON” position (Figure
14). The display and line lights are turned on at this time.
Figure 14
The display and line lights will shut off after 5 minutes without any activity. This shut-off time can be
changed in the Parameters screen of the Maintenance Mode section on page 26. To restore power
to the display and line lights, press any button on the keyboard, or press any cut button, or lift up the
front guard (if equipped).
6.2 Start Up
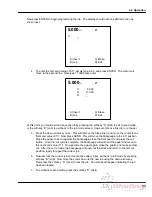
Once power has been turned on, the Titan 265 will show the following display:
When the CLEAR key is pressed the clamp and knife will move up if they are not already in the up
position (provided the front guard is closed, if equipped). Then the backgauge will move to
coordinate the true position into the computer. When finished, the machine will be in “Send Mode”
and the display will appear similar to the display shown on page 21.
OFF
ON
55.000
in
Backgauge must move to be
preset. Please clear the table and
close guard.
Warning! Clamp and Knife may
move.
Revision x.x
Press clear to start
A) Maint
B) Job
Содержание Titan 265
Страница 60: ...9 0 Parts List Sequence of Operations 59 9 2 Main Assembly Side View 44000 Sht 2 Rev J...
Страница 61: ...9 0 Parts List Sequence of Operations 60 9 3 Main Assembly Rear View 44000 Sht 3 Rev E...
Страница 62: ...9 0 Parts List Sequence of Operations 61 9 4 Main Assembly Table View 44000 Sht 4 Rev E...
Страница 63: ...9 0 Parts List Sequence of Operations 62 9 5 Main Assembly Parts List 44000 Sht 5 Rev S...
Страница 64: ...9 0 Parts List Sequence of Operations 63 Main Assembly Parts List continued 44000 Sht 6 Rev N...
Страница 65: ...9 0 Parts List Sequence of Operations 64 9 6 Main Assembly Cut Buttons 44000 Sht 7 Rev H...
Страница 66: ...9 0 Parts List Sequence of Operations 65 9 7 Main Assembly Front Shield 44000 Sht 7 Rev H...
Страница 67: ...9 0 Parts List Sequence of Operations 66 9 8 Electrical Panel Assembly EE 2879 Rev H...
Страница 68: ...9 0 Parts List Sequence of Operations 67 Electrical Panel Assembly continued EE 2879 Rev H...
Страница 69: ...9 0 Parts List Sequence of Operations 68 Electrical Panel Assembly continued EE 2879 Rev H...
Страница 71: ...9 0 Parts List Sequence of Operations 70 9 10 Hydraulic Power Unit Assembly H 507 Rev E...
Страница 72: ...9 0 Parts List Sequence of Operations 71 Hydraulic Power Unit Assembly continued H 507 Rev E...
Страница 73: ...9 0 Parts List Sequence of Operations 72 9 11 Manifold Assembly H 516 Sheet 1 Rev C...
Страница 74: ...9 0 Parts List Sequence of Operations 73 9 12 Hydraulic Schematic H 516 Sheet 2 Rev B...
Страница 75: ...9 0 Parts List Sequence of Operations 74 9 13 Manifold Sub Plate Assembly H 517...
Страница 76: ...9 0 Parts List Sequence of Operations 75 9 14 Sequence Check Valve Assembly H 551 Rev A...
Страница 77: ...9 0 Parts List Sequence of Operations 76 9 15 Basic Machine Schematic E 2853 Rev C...
Страница 78: ...9 0 Parts List Sequence of Operations 77 Basic Machine Schematic continued E 2853 Rev C...
Страница 80: ...9 0 Parts List Sequence of Operations 79 9 17 Cut Button Assembly EE 2851 1...
Страница 81: ...9 0 Parts List Sequence of Operations 80 9 18 Control Console Assembly EE 2773 1 Rev C...
Страница 82: ...9 0 Parts List Sequence of Operations 81 9 19 Control P C Assembly EE 2807 1...
Страница 83: ...9 0 Parts List Sequence of Operations 82 9 20 Power Panel Label S 1781 54 Rev C...
Страница 85: ...9 0 Parts List Sequence of Operations 84 9 22 Knife Latch Assembly 47568 Rev C...
Страница 86: ...9 0 Parts List Sequence of Operations 85 9 23 Line Light Assembly EE 2779 Rev B...
Страница 88: ...10 0 Safety Systems Test 87 NOTES...


