9-28
Installing the Optional Accessor
ies
9
Network Board
1
Turn the printer OFF.
2
If a USB cable is connected, turn the computer off, and then
disconnect the USB cable from the printer.
3
Disconnect the power plug from the AC power outlet.
4
Remove the power cord from the printer.
5
Disconnect the LAN cable from the network board.
6
Remove the two screws and remove the network board.
IMPORTANT
•
Do not touch the network board parts, printed circuits, or connectors with your
hands.
•
Do not drop screws, paper clips, staples, or other metal objects inside the printer. If
any of these objects should drop inside the printer, do not plug the power plug into
the AC power outlet and contact your local authorized Canon dealer.
7
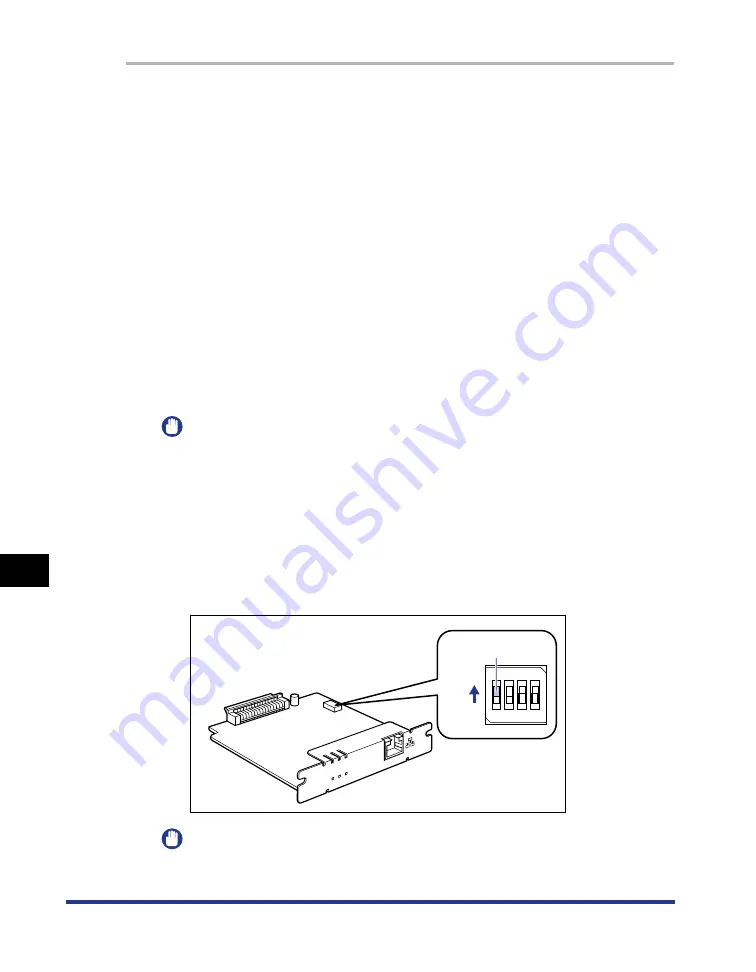
Switch the DIP switch 1 to ON.
Set the DIP switches with a small tool such as the tip of a ball-point pen.
IMPORTANT
When setting the DIP switches, be careful not to damage the main board with a
small tool such as the tip of a ball-point pen. Do not use a sharp object such as a
mechanical pencil.
ERR
LNK
100
ON
OFF
1
2
3
4
DIP switch 1
Содержание LBP3310
Страница 2: ...LBP3310 Laser Printer User s Guide ...
Страница 41: ...1 14 Before You Start 1 Optional Accessories ...
Страница 77: ...Turning the Printer ON OFF 2 36 Installing the Printer 2 ...
Страница 225: ...5 28 Basic Usage of the Printer 5 How to Use Help 3 Double click the title of the desired topic in the displayed list ...
Страница 237: ...5 40 Basic Usage of the Printer 5 Printer Status Window ...
Страница 299: ...6 62 Using the Various Printing Functions 6 Editing Jobs with PageComposer ...
Страница 331: ...7 32 Routine Maintenance 7 Handling the Printer ...
Страница 389: ...8 58 Troubleshooting 8 Confirming the Printer Features ...
Страница 427: ...10 6 Dimensions of Each Part 10 Appendix Paper Feeder Unit PF 35P 117 4 116 6 399 7 421 1 mm Front Surface ...
Страница 437: ...10 16 Location of the Serial Number 10 Appendix ...


