45
Using DaVinci Resolve
Sometimes your selection can spill into areas of the shot you don’t want to affect. You can easily mask
out the unwanted areas using a power window. Simply create a new window and shape it to select
only the area of color you want. If your selected color moves in the shot, you can use the tracking
feature to track your power window.
Adding a Power Window
Power windows are an extremely effective secondary color correction tool that can be used to isolate
specific regions of your clips. These regions don’t have to be static, but can be tracked to move with
a camera pan, tilt or rotation, plus the movement of the region itself. For example, you can track a
window on a person in order to make color and contrast changes just to that person without affecting
his/her surroundings. By making corrections like this you can influence the audience’s attention on
areas you want them to look at.
To add a power window to your clip:
Step 1.
Add a new serial node.
Step 2.
Open the ‘window’ palette and select a window shape by clicking on the icon next to the
shape. Your selected window shape will appear on the node.
Step 3.
Resize the shape by clicking and dragging the blue points around the shape. The pink
points adjust the edge softness. You can position the shape by clicking the center point
and moving it to the area you want to isolate. Rotate the window using the point connected
to the center.
Now you can make color corrections to your image in just the area you want.
Tracking a Window
The camera, object or area in your shot may be moving, so to make sure your window stays on your
selected object or area, you’ll need to use DaVinci Resolve’s powerful tracking feature. The tracker
analyzes the pan, tilt, zoom and rotation of the camera or object in your clip so you can match your
windows to that movement. If this isn’t done, your correction can move off the selected target and
call attention to itself, which you probably don’t want.
To track a window to a moving object:
Step 1.
Create a new serial node and add a power window.
Step 2.
Go to the start of your clip and position and size the window to highlight just the object
or area you want.
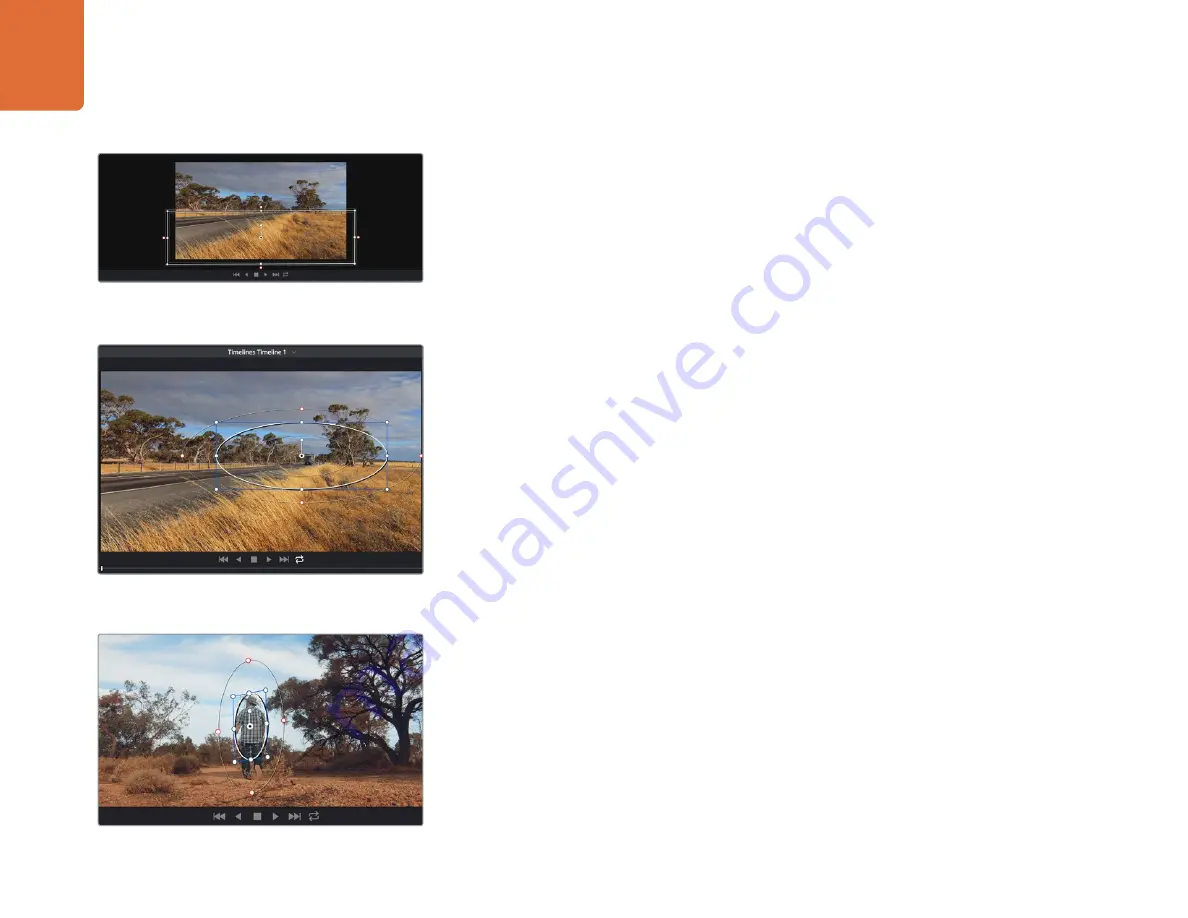
You can track objects or areas in your clip using the tracker
feature so power windows can follow the action.
Power windows let you make secondary corrections to specific
parts of your image.
Use power windows to mask out areas you don't want to be
affected by the HSL qualifier secondary adjustments.


