


Page 170
724-746-5500 | blackbox.com
Chapter 4: Configuration
5. Save your settings by pressing the “Okay” button.
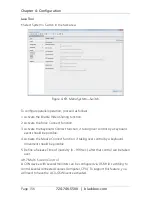
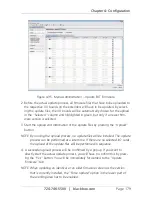
6. If you have created a Master/Slave CON Unit, select “Configuration > CON
Devices” in the main menu of the master matrix and press the “New R”
button.
A switchable CON Device will be created.
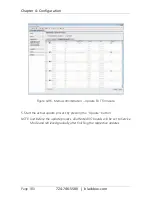
7. If you have created a Master/Slave CPU Unit, select Configuration > CPU
Devices in the main menu of the master matrix and press the New R button.
A switchable CPU Device will be created.
8. Enter an appropriate Device name into the Name field.
9. Assign the previously configured Extender Unit to the newly-created device by
moving the Extender Unit from the Ext available field into the Ext assigned field
and save your settings.
10. Repeat steps 1 to 9 for the Sub Matrix.
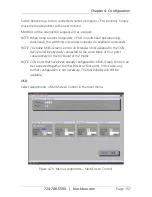
11. Select Configuration > System in the main menu of the Sub Matrix and set the
Sub Matrix option to Y.
The OSD of the Sub Matrix will immediately freeze and will be only accessible
by using the keyboard command <hotkey>, <s>, <o>.
12. Restart all I/O boards on which any Master/Slave CON or CPU Units have been
configured or alternatively restart the matrix.
13. Connect the Tie Lines to the matrices. Ensure that each Master/Slave CON on
one matrix is connected to Master/Slave CPU on the other matrix to switch
between two matrices.
The Matrix Casacading is now configured and can be used. Additional Tie Lines
are configured accordingly.
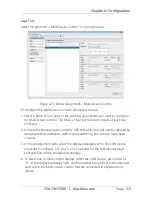
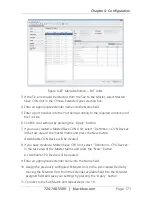
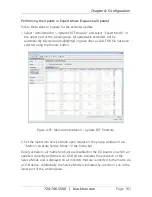
Java Tool
1. Connect to the Master Matrix and activate the Online Configuration Mode.
2. Select the menu Definition > EXT Units in the task area and press the New
button.
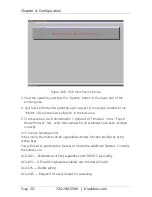
A popup window opens.