background image

Menus and Basic Procedures

118814-D Rev. 00

1-9

The Nautica Wizard Toolbar

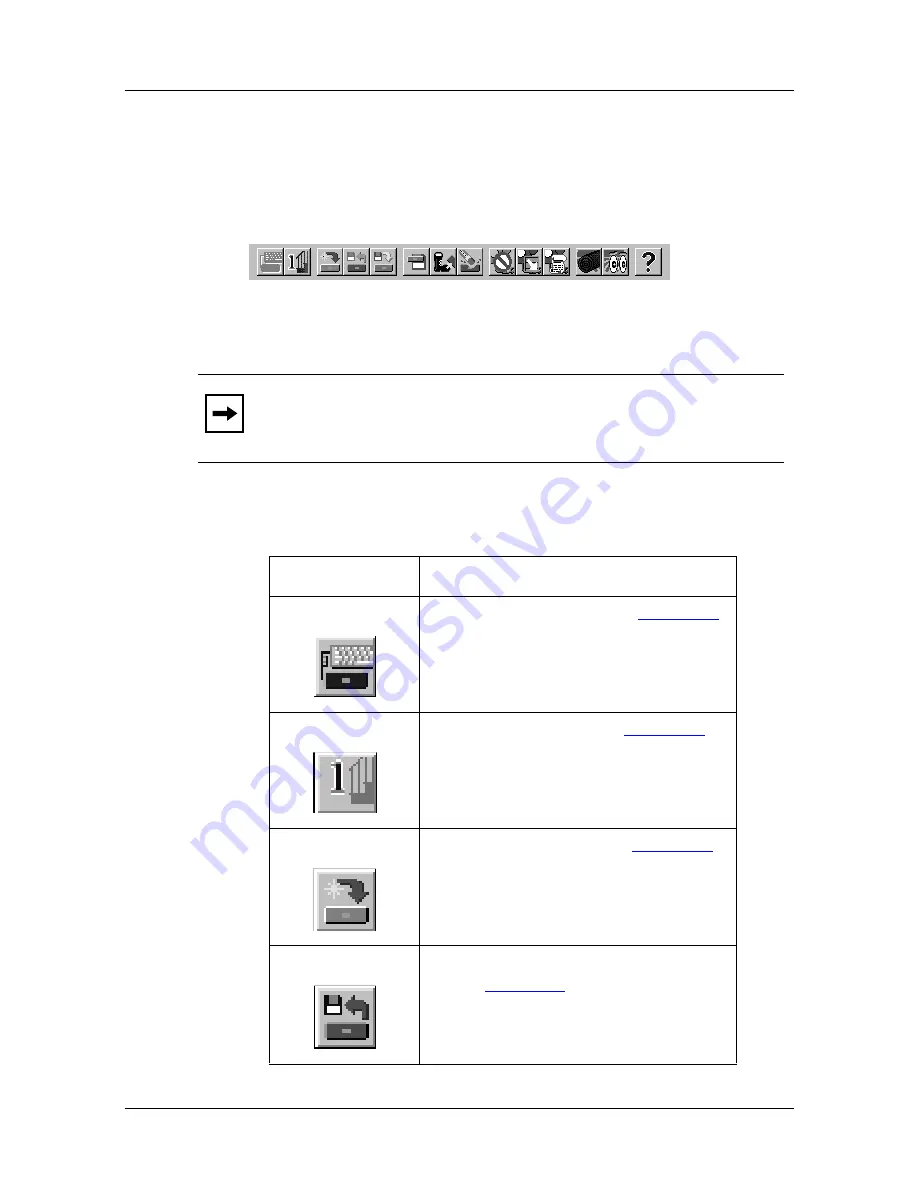
Below the menu bar is the toolbar. The toolbar is a row of icons 
that allows you to perform some menu commands rather than 
choosing the command itself from the relevant menu.

Figure 1-4.

Nautica Wizard Tool bar

The buttons are as follows:

Note: 

Most of the buttons in the toolbar only become available 

if a router is selected in the main Nautica Wizard window.

Button

Description

Run Installation Assistant (

page 1-29

)

One Step Configuration (

page 1-30

)

Download New Software (

page 1-16

)

Save Router Configuration to a File 
(*.ncf) (

page 1-20

)

Содержание 4000

Страница 1: ...Part No 118814 D Rev 00 April 1998 Nautica Configuration Wizard 5 Reference Guide ...

Страница 2: ... at DFARS 252 227 7013 Notwithstanding any other license agreement that may pertain to or accompany the delivery of this computer software the rights of the United States Government regarding its use reproduction and disclosure are as set forth in the Commercial Computer Software Restricted Rights clause at FAR 52 227 19 Statement of Conditions In the interest of improving internal design operatio...

Страница 3: ...IMITATION THE IMPLIED WARRANTIES OF MERCHANTABILITY AND FITNESS FOR A PARTICULAR PURPOSE In addition the program and information contained herein are licensed only pursuant to a license agreement that contains restrictions on use and disclosure that may incorporate by reference certain limitations and notices imposed by third parties ...

Страница 4: ... all title and ownership in both the Software and user manuals including any revisions made by Bay Networks or its licensors The copyright notice must be reproduced and included with any copy of any portion of the Software or user manuals Licensee may not modify translate decompile disassemble use for any competitive analysis reverse engineer distribute or create derivative works from the Software...

Страница 5: ... OR FITNESS FOR A PARTICULAR PURPOSE Licensee is responsible for the security of its own data and information and for maintaining adequate procedures apart from the Software to reconstruct lost or altered files data or programs 4 Limitation of liability IN NO EVENT WILL BAY NETWORKS OR ITS LICENSORS BE LIABLE FOR ANY COST OF SUBSTITUTE PROCUREMENT SPECIAL INDIRECT INCIDENTAL OR CONSEQUENTIAL DAMAG...

Страница 6: ...Without limiting the foregoing Licensee on behalf of itself and its subsidiaries and affiliates agrees that it will not without first obtaining all export licenses and approvals required by the U S Government i export re export transfer or divert any such Software or technical data or any direct product thereof to any country to which such exports or re exports are restricted or embargoed under Un...

Страница 7: ...xxvii Chapter 1 Menus and Basic Procedures ISDN Operation 1 2 E mail Clients 1 2 Remotely Mapped Drives 1 3 File and Print Sharing 1 3 Graphical FTP Using Keep Alive 1 4 Web Browsers 1 5 Initial Operations 1 6 The Nautica Wizard Window 1 8 The Nautica Wizard Toolbar 1 9 Enable Disable ISDN Data Calls 1 12 Autocall History 1 13 Show ISDN Call History 1 14 The Nautica Wizard Menus 1 15 File Menu 1 1...

Страница 8: ...1 29 One Step Configuration 1 30 Standard One Step Configuration 1 31 North American One Step Configuration 1 34 Save Configuration on Router 1 40 Erase Configuration 1 41 Reboot 1 44 Launch Nautica Log 1 45 Launch Nautica Watch 1 47 Telnet to Router 1 48 Advanced Menu 1 50 Clock 1 51 Alarms 1 53 Options Menu 1 55 SNMP Community Strings 1 55 Excessive Calls Alarms 1 58 Display SNMP Traps 1 60 Help...

Страница 9: ... Point Protocol PPP 3 2 Nautica Nautica Routers only 3 3 RFC1490 frame relay 3 3 The Paths Table 3 4 The LAN01 Path 3 11 Main Tab 3 12 IPX Tab 3 14 RIP Tab 3 18 OSPF Tab 3 21 DNS Tab 3 24 WINS Tab 3 26 Chapter 4 PPP Paths Path Types 4 2 Ethernet LAN01 4 2 Point to Point Protocol PPP 4 2 Nautica Nautica Routers only 4 3 RFC1490 Frame Relay 4 3 The Paths Table 4 4 PPP Paths 4 10 Main Tab 4 11 Call T...

Страница 10: ...autica Paths Path Types 5 2 Ethernet LAN01 5 2 Point to Point Protocol PPP 5 2 Nautica Not Nautica 200 or CLAM IP 5 3 RFC1490 Frame Relay 5 3 The Paths Table 5 4 Nautica Paths 5 10 Main Tab 5 11 Call Tab 5 13 Bandwidth Tab 5 16 Bridge Tab 5 20 IPX Tab 5 23 RIP Tab 5 25 OSPF Tab 5 29 DNS Tab 5 32 WINS Tab 5 35 Compression Tab 5 37 Chapter 6 Frame Relay Paths Path Types 6 2 Ethernet LAN01 6 2 ...

Страница 11: ...S Tab 6 24 WINS Tab 6 27 Chapter 7 Path Statistics Displaying Path Statistics 7 2 Chapter 8 Changing Device Settings Viewing Devices 8 2 Editing Devices 8 3 Editing a Voice Device 8 4 Editing an ISDN Device 8 10 Editing a WAN Device 8 20 Synchronous WAN Attributes 8 20 Frame Relay WAN Attributes 8 22 Asynchronous WAN Attributes 8 24 Editing a PRI Device 8 28 PRI Mode 8 29 Fractional Mode 8 39 Down...

Страница 12: ...butes 9 9 Chapter 10 ISDN Setup Calling ISDN Numbers 10 2 MSN 10 5 MSN Explained 10 5 Viewing MSNs 10 6 Configuring MSNs 10 8 Callback 10 11 Viewing Callbacks 10 11 Editing Callbacks 10 14 Adding Callbacks 10 14 VPN 10 17 Viewing VPNs 10 17 Editing a VPN 10 19 Adding a VPN 10 19 Timebands 10 22 Viewing the Timeband Table 10 23 Adding and Editing Timebands 10 26 ISDN History 10 30 ISDN Statistics 1...

Страница 13: ...e Filter Addresses 11 24 Chapter 12 IP Operations IP Routes 12 2 Viewing Routes 12 2 Adding and Editing Routes 12 6 IP Filters 12 10 Viewing Filters 12 10 Adding and Editing IP Filters 12 14 Filter Port Numbers 12 18 IP ARP Cache 12 21 IP Route Cache 12 24 Chapter 13 Using IPX Setting Up IPX 13 2 IPX Routes 13 5 Displaying IPX Routes 13 5 Editing and Creating IPX Routes 13 9 IPX Filters 13 13 IPX ...

Страница 14: ...sing RADIUS RADIUS Introduction 14 2 RADIUS Settings 14 3 Security Server 14 6 Accounts Server 14 8 Backup Security Server 14 10 Backup Accounts Server 14 12 Miscellaneous 14 14 Chapter 15 Configuring DHCP Viewing DHCP Clients 15 2 Adding DHCP Configuration Entries 15 6 Editing DHCP Configuration Entries 15 14 Viewing Allocated Addresses 15 16 Displaying Known Clients 15 18 Chapter 16 Using OSPF O...

Страница 15: ...6 20 Viewing Address Ranges 16 20 Adding Address Ranges 16 23 Editing Address Ranges 16 25 Link State Adverts 16 27 OSPF Areas 16 30 Chapter 17 Network Address Translation NAT Outgoing NAT Connections 17 2 Global NAT Settings 17 7 Static NAT Entries 17 10 Viewing Static Entries 17 10 Adding Static Entries 17 13 Editing Static Entries 17 15 NAT Sessions 17 18 PPTP over NAT 17 21 Chapter 18 Using WI...

Страница 16: ... 10 DNS Cache 19 12 Default DNS Rules 19 14 Chapter 20 Using Trace Levels and Nautica Log Editing Trace Levels 20 2 The Trace Modules 20 6 Nautica Log 20 8 The Nautica Log Window 20 8 Chapter 21 Working with Nautica Watch Nautica Watch 21 2 The Nautica Watch Window 21 3 The Nautica Watch Menus 21 4 File Menu 21 4 Device Menu 21 5 Connecting to a Device 21 5 Disconnecting from a Device 21 7 Options...

Страница 17: ...12 Help Menu 21 13 Quick Menus 21 14 Main Window Quick Menu 21 14 View Menu 21 15 Align Menu 21 16 Add Remove 21 16 Remove This 21 17 Hide Show Menu 21 17 System Tray Quick Menu 21 17 View Menu 21 18 Exit Command 21 19 Detail Window Quick Menu 21 19 The Nautica Watch Panels 21 20 ...

Страница 18: ......

Страница 19: ...ure 1 11 Password for TFTP Transfer 1 18 Figure 1 12 Select a File to Download 1 18 Figure 1 13 Download Complete 1 19 Figure 1 14 Nautica Wizard Quick Menu 1 20 Figure 1 15 Save Configuration to File 1 21 Figure 1 16 Password for TFTP Transfer 1 22 Figure 1 17 Save Configuration Shown in Status Bar 1 23 Figure 1 18 Operation Complete 1 23 Figure 1 19 Nautica Wizard Quick Menu 1 24 Figure 1 20 Sel...

Страница 20: ...uick Menu 1 46 Figure 1 40 Nautica Wizard Quick Menu 1 47 Figure 1 41 Nautica Wizard Quick Menu 1 48 Figure 1 42 Telnet Session 1 49 Figure 1 43 The Nautica Wizard Advanced Menu 1 50 Figure 1 44 Time Mismatch Warning 1 51 Figure 1 45 Edit Clock Setup 1 52 Figure 1 46 Router Alarms Table 1 54 Figure 1 47 Nautica Wizard Options Menu 1 55 Figure 1 48 Management Indicator 1 56 Figure 1 49 SNMP Communi...

Страница 21: ...utton 4 7 Figure 4 4 Path Type Window 4 8 Figure 4 5 PPP Path Edit Window 4 10 Figure 4 6 PPP Autolearn IP Parameters 4 14 Figure 4 7 PPP Path Call Tab 4 17 Figure 4 8 PPP Path ISDN Options 4 18 Figure 4 9 PPP Path PPTP Options 4 19 Figure 4 10 PPP Path Bandwidth Tab 4 23 Figure 4 11 PPP Path PPP Parameters 4 27 Figure 4 12 PPP Path IPX Tab 4 34 Figure 4 13 PPP Path RIP Tab 4 37 Figure 4 14 PPP Pa...

Страница 22: ...on Tab 5 37 Figure 6 1 Nautica Wizard Window 6 4 Figure 6 2 Paths Table Window 6 5 Figure 6 3 Windows 95 Exit Button 6 7 Figure 6 4 Path Type Window 6 8 Figure 6 5 Frame Relay Path Parameters Window 6 10 Figure 6 6 Frame Relay Path Main Tab 6 11 Figure 6 7 Frame Relay Path IPX Tab 6 13 Figure 6 8 Frame Relay Path IP Tab 6 15 Figure 6 9 Frame Relay Path OSPF Tab 6 19 Figure 6 10 Frame Relay Path Br...

Страница 23: ...ca Wizard Window 9 2 Figure 9 2 PPP Profile Table 9 3 Figure 9 3 PPP Profile Error Message 9 5 Figure 9 4 Add PPP Profiles Configuration Window 9 8 Figure 10 1 Nautica Wizard Window 10 2 Figure 10 2 Edit ISDN Call Configuration Window 10 3 Figure 10 3 ISDN MSN Table 10 6 Figure 10 4 Add and Edit MSN Windows 10 8 Figure 10 5 ISDN Callback Table 10 12 Figure 10 6 Edit Add ISDN Callback 10 14 Figure ...

Страница 24: ...te Cache Table 12 24 Figure 13 1 The Nautica Wizard Window 13 2 Figure 13 2 Edit System Window 13 3 Figure 13 3 IPX Routes Table 13 6 Figure 13 4 Add Edit IPX RIP Route Windows 13 10 Figure 13 5 IPX Filter Table 13 14 Figure 13 6 Add Edit IPX Network Filter 13 17 Figure 13 7 IPX SAP Table 13 19 Figure 13 8 Add Edit IPX SAP Window 13 22 Figure 13 9 Edit System Restricted SAP Window 13 25 Figure 13 ...

Страница 25: ... 21 Figure 16 11 Add OSPF Address Range Window 16 23 Figure 16 12 Edit OSPF Address Range Window 16 25 Figure 16 13 OSPF Link State Adverts Table 16 27 Figure 16 14 OSPF Areas Table 16 30 Figure 17 1 Nautica Wizard Window 17 2 Figure 17 2 Paths Table 17 3 Figure 17 3 Path Type Window 17 3 Figure 17 4 PPP Path Parameters Window 17 4 Figure 17 5 Edit NAT System Window 17 7 Figure 17 6 NAT Static Tra...

Страница 26: ... 20 8 Figure 21 1 Nautica Watch Button 21 2 Figure 21 2 The Nautica Watch Window 21 2 Figure 21 3 The Overview Window 21 3 Figure 21 4 System Tray Showing Nautica Watch Icon 21 3 Figure 21 5 The File Menu 21 4 Figure 21 6 The Device Menu 21 5 Figure 21 7 Set IP Address Window 21 6 Figure 21 8 SNMP Window 21 6 Figure 21 9 Options Menu 21 7 Figure 21 10 Set Poll Level Window 21 8 Figure 21 11 Nautic...

Страница 27: ... Figure 21 22 Nautica Watch with no Menus 21 17 Figure 21 23 Windows 95 System Tray 21 17 Figure 21 24 Nautica Watch Detailed View 21 18 Figure 21 25 Nautica Watch Overview Window 21 18 Figure 21 26 Nautica Watch List Window 21 18 Figure 21 27 Detail Window Quick Menu 21 19 Figure 21 28 Nautica Watch Detail Panel 21 20 ...

Страница 28: ......

Страница 29: ...umber Modifiers 4 19 Table 5 1 ISDN Number Modifiers 5 14 Table 10 1 ISDN Network Clearing Codes 10 36 Table 10 2 ISDN Internal Clearing Codes 10 37 Table 12 1 Well Known Port Numbers 12 18 Table 13 1 IPX Route Types 13 9 Table 13 2 IPX Filter Sockets 13 16 Table 13 3 Novell Server Types 13 31 Table 20 1 The Trace Modules 20 6 ...

Страница 30: ......

Страница 31: ...you need to read this guide Before You Begin Before using this guide you must complete the following procedures For a new router Install the router refer to the installation manual that came with your router Install the Nautica Configuration Wizard using the CD that accompanies the installation ...

Страница 32: ...e the dinfo command Example ATM DXI Interfaces PVCs identifies the PVCs button in the window that appears when you select the Interfaces option from the ATM DXI menu brackets Indicate optional elements You can choose none one or all of the options ellipsis points Horizontal and vertical ellipsis points indicate omitted information italic text Indicates variable values in command syntax description...

Страница 33: ...leTalk identifies the AppleTalk option in the Protocols menu Example Pin 7 19 20 vertical line Indicates that you enter only one of the parts of the command The vertical line separates choices Do not type the vertical line when entering the command Example If the command syntax is show at routes nets you enter either show at routes or show at nets but not both ...

Страница 34: ...ded ISDN Integrated Services Digital Network LAN local area network MAC media access control MSN Multisubscriber Numbering NAT Network Address Translation OSPF Open Shortest Path First Protocol PPP Point to Point Protocol PPTP Point to Point Tunneling Protocol SNMP Simple Network Management Protocol TCP IP Transmission Control Protocol Internet Protocol Telnet Telecommunication Network TFTP Trivia...

Страница 35: ...ailable through your local Bay Networks sales office or account representative Bay Networks Customer Service You can purchase a support contract from your Bay Networks distributor or authorized reseller or directly from Bay Networks Services For information about or to purchase a Bay Networks service contract either call your local Bay Networks field sales office or one of the following numbers In...

Страница 36: ... that distributor or reseller for assistance If you purchased a Bay Networks service program call one of the following Bay Networks Technical Solutions Centers Technical Solutions Center Telephone number Fax number Billerica MA 800 2LANWAN 978 916 3514 Santa Clara CA 800 2LANWAN 408 495 1188 Valbonne France 33 4 92 96 69 68 33 4 92 96 69 98 Sydney Australia 61 2 9927 8800 61 2 9927 8811 Tokyo Japa...

Страница 37: ...etworks products Training programs can take place at your site or at a Bay Networks location For more information about training programs call one of the following numbers Region Telephone number United States and Canada 800 2LANWAN then enter Express Routing Code ERC 282 when prompted 978 916 3460 direct Europe Middle East and Africa 33 4 92 96 15 83 Asia Pacific 61 2 9927 8822 Tokyo and Japan 81...

Страница 38: ......

Страница 39: ...ou would like to use the Release 5 software refer to the Nautica Router Software Release 5 Reference Guide on the CD that comes with your Nautica product This chapter contains the following sections ISDN Operation page 1 2 Initial Operations page 1 6 The Nautica Wizard Window page 1 8 The Nautica Wizard Menus page 1 15 File Menu page 1 15 Operations Menu page 1 28 Advanced Menu page 1 50 Options M...

Страница 40: ... LED on the front of the router also shows when the router is in use The green LED will flash continuously when the router is in use If this happens when you are not actively using your PC then the PC or an application on the PC is connecting to a remote network resource If you are in any doubt at all about any of the following points or the operation of your router contact your local ISDN supplie...

Страница 41: ...es over a remote ISDN connection problems can occur Every time you open a file or move into a new folder it is likely that the PC may request the current status of all drives and bring up an ISDN call to achieve this For this reason it is recommended that you do not permanently map network drives over a remote ISDN connection File and Print Sharing Many workgroup functions designed to allow resour...

Страница 42: ...ep Alive Traditionally FTP servers time out or end an FTP session if there is no activity after a few minutes Most command line FTP clients take no steps to avoid this timeout Some of the new graphical FTP clients however make frequent read or keepalive requests to keep the FTP sessions alive This option is fine for local network access and leased line Internet browsing but it can cause your remot...

Страница 43: ...a remote router such sites will keep your ISDN connection open Other web sites cause your browser to refresh the screen at regular intervals for example every 30 seconds Again this can cause a link to stay open In order to minimize the effect of these data streams do not leave your PC unattended when it is in a web site and close down all Internet connections when you have finished with them When ...

Страница 44: ...n unconfigured router in which case this unit is selected Thereafter the network is scanned every five seconds Nautica Wizard shows when it is sending out SNMP requests across the local network by displaying a small yellow lightening bolt in the bottom right of the Wizard window Figure 1 2 Nautica Wizard With SNMP Request Icon If a device is found that has no configuration it is displayed as blue ...

Страница 45: ...colours depending on their status The remainder of this chapter deals with procedures that can be performed once a unit has been configured Table 1 1 Router Colour Codes Colour Status Blue Unconfigured Yellow Changes need to be saved Green Router is stable Grey Router is in bootmode ...

Страница 46: ...ica Wizard window become available Right click on an icon to bring up a quick menu of configuration options Nautica Wizard is designed to operate with the matching router code For example version 5 01h of Nautica Wizard runs with NauticaRS 5 001R The Nautica Wizard window shows the version of router software being run at the end of the router line Check the Nautica Wizard version by clicking on He...

Страница 47: ...osing the command itself from the relevant menu Figure 1 4 Nautica Wizard Tool bar The buttons are as follows Note Most of the buttons in the toolbar only become available if a router is selected in the main Nautica Wizard window Button Description Run Installation Assistant page 1 29 One Step Configuration page 1 30 Download New Software page 1 16 Save Router Configuration to a File ncf page 1 20...

Страница 48: ... Configuration from a File ncf page 1 24 Save Router Configuration on Router page 1 40 Reboot the Router page 1 44 Erase the Router s Configuration page 1 41 Enable Disable Outgoing Data Calls page 1 12 Autocall History page 1 13 Show ISDN Call History page 1 14 Button Description ...

Страница 49: ...indows within Nautica Wizard have their own buttons These buttons are explained with the windows throughout the rest of this reference guide Run the Nautica Log Program page 1 45 Start Nautica Watch page 1 47 Open Nautica Wizard Help page 1 63 Button Description ...

Страница 50: ...a router in the Nautica Wizard window Figure 1 3 2 Click on the Enable Disable ISDN Data Calls button 3 The router icon in the Nautica Wizard window displays a No Entry sign Figure 1 5 Nautica Wizard with Data Calls Disabled 4 Select the router and click on the Enable Disable ISDN Data Calls button again to re enable data calls on that router ...

Страница 51: ...router in the Nautica Wizard window Figure 1 3 2 Click on Advanced ISDN Autocall History Chapter 10 OR 3 Click on the Autocall History button 4 The ISDN Autocall Packet Decode window appears Figure 1 6 Figure 1 6 ISDN Autocall Packet Decode Window For more information on this window and ISDN Autocalls refer to Chapter 10 ...

Страница 52: ...s made on your router 1 Select a router in the Nautica Wizard window Figure 1 3 2 Click on Advanced ISDN History Or 3 Click on the Show ISDN Call History button 4 The ISDN Call History Table appears Figure 1 7 Figure 1 7 ISDN Call History Table For more information on the ISDN Call History Table refer to Chapter 10 ...

Страница 53: ...und at the top of the Nautica Wizard window Click on the menu that contains the command in which you are interested File Menu Operations Menu Advanced Menu Options Menu Help Menu File Menu With a unit selected the commands in the File menu are as follows Figure 1 8 The Nautica Wizard File Menu ...

Страница 54: ...ter Configuration to File Restore Router Configuration from File Exit Download New Router Software This command can be accessed with a unit selected and by Clicking on File Download New Router Software Clicking on the Download Software button in the toolbar Right clicking on a router s icon and selecting Download New Router Software from the Quick menu Figure 1 9 The Nautica Wizard Quick Menu ...

Страница 55: ...extracting exe file and extract the file into a folder on your PC To load this new software onto your router do the following 1 In the Nautica Wizard window click on the router to have the new software 2 Click on File Download New Router Software The Downloading New Router Software window appears Figure 1 10 Downloading New Router Software 3 This window appears if the router already has a configur...

Страница 56: ...assword a password that needs to be entered every time the router is configured 6 Enter a password if required and click on OK The existing configuration of the router is now saved to a temporary file using Trivial File Transfer Protocol TFTP 7 Once the configuration is saved or discarded if you chose No in the Downloading New Router Software window the Select a File to Download window appears Fig...

Страница 57: ...is downloaded and the configuration is restored if you answered Yes in the Downloading New Router Software window 10 Once these steps are complete the final window appears Figure 1 13 Download Complete Click on OK in this window and you are returned to Nautica Wizard Downloading Nautica Wizard Software When the Wizard itself is upgraded do the following 1 Download the new zip file from the website...

Страница 58: ...asier it is possible to save the configuration from one router into a file that can then be loaded into other routers This is achieved using Trivial File Transfer Protocol TFTP This command can be accessed with a unit selected and by Clicking on File Save Router Configuration to File Clicking on the Save Configuration to File button in the toolbar Right clicking on a router s icon and selecting Sa...

Страница 59: ...med automatically depending on the type of Nautica router you are using The file names are as follows It is only necessary to change these default names if you plan to save many different configurations for the same router type Table 1 2 Nautica Configuration File Names Router File Name Nautica 200 n200 ncf Nautica CLAM clam ncf Nautica CLAM IP clamip ncf Nautica Marlin marlin ncf Nautica 4000 n40...

Страница 60: ...fast amendment 2 Once you have given the file a name click on the Save button The Password for TFTP Transfer window Figure 1 16 appears Figure 1 16 Password for TFTP Transfer It is only necessary to enter a password here if you want the file to be secure The password has to be entered each time the file is downloaded in future Enter a password and click on the OK button or leave the password field...

Страница 61: ...n is saved to a file and you can see its progress in the status bar of the Nautica Wizard menu Figure 1 17 Save Configuration Shown in Status Bar 3 Once the save is complete the following window appears Figure 1 18 Operation Complete Click on OK to end the operation ...

Страница 62: ...ation from File Clicking on the Restore Router Configuration button in the toolbar Right clicking on a router s icon and selecting Restore Router Configuration from File from the Quick menu Figure 1 19 Nautica Wizard Quick Menu Restoring the Configuration To restore a configuration file to a router 1 Click on the router that is to have the configuration 2 Click on File Restore Configuration from F...

Страница 63: ...uration File 4 Select the file that you saved earlier and click on the Open button 5 The Password for TFTP Transfer window appears Figure 1 21 Password for TFTP Transfer 6 Enter the current password for the unit If the unit is in default state no password is required Note The password is set in the configuration file if any ...

Страница 64: ...r begins You can see the progress in the Status bar at the bottom of the Nautica Wizard window Figure 1 22 Nautica Wizard Configuration Restore 8 When the transfer is complete the final window appears Figure 1 23 Restore Complete Click on OK and you are returned to Nautica Wizard ...

Страница 65: ...utica Wizard Click on File Exit Press the ALT F4 key Click on the Exit button on the right of the Nautica Wizard Title bar Note Closing Nautica Wizard does not turn the Nautica router off it just exits Nautica Wizard Any operations the router is performing carry on ...

Страница 66: ...s in the Operations menu are as follows Figure 1 24 The Nautica Wizard Operations Menu In the list below click on the command for which you require help Run Installation Assistant One Step Configuration Save Configuration on Router Reboot Erase Configuration Launch Nautica Log Launch Nautica Watch Telnet to Router ...

Страница 67: ...Clicking on the Run Installation Assistant button in the toolbar Right clicking on a router s icon and selecting Run Installation Assistant from the Quick menu Figure 1 25 Nautica Wizard Quick Menu For more information on the Installation Assistant refer to the printed document The Nautica Wizard Installation Guide Note To set a unit back to its default state erase the current configuration page 1...

Страница 68: ...ng on the One Step Configuration button in the toolbar Right clicking on a router s icon and selecting One Step Configuration from the Quick menu Figure 1 26 Nautica Wizard Quick Menu One Step Configuration allows you to quickly configure or amend the main features of a router In the table below select the configuration option for which you require further assistance Standard One Step Configuratio...

Страница 69: ... causes the One Step Configuration window to appear Figure 1 27 One Step Configuration Window In the table below click on the parameter for which you require further assistance Router Name IP Address Subnet Mask ISP Account Name Account Password Confirm Account Password ISDN Telephone Number Make Call Immediately Enable NAT ...

Страница 70: ... Function A subnet mask to be used with the IP address Instructions Enter the subnet mask to be used with the router IP address Parameter ISP Account Name Function The account name supplied by the Internet Service Provider ISP or Intranet Manager Instructions Enter any account name you have been given Parameter Account Password Function A password used when connecting with the ISP or corporate int...

Страница 71: ...r Parameter Make Call Immediately Function Immediately calls the ISDN telephone number entered into the ISDN Telephone Number field Instructions Check this option if you want to call the ISP or intranet immediately the One Step Configuration window closes Parameter Enable NAT Function Allows Network Address Translation NAT to operate Instructions Check this option if you want to use NAT For more i...

Страница 72: ...nd causes the One Step Configuration window to appear Figure 1 28 North American One Step Configuration Window In the table below click on the option for which you require further assistance Router Name IP Address Subnet Mask ISP Account Name Account Password Confirm Account Password ISDN Telephone Number Make Call Immediately Enable NAT US ISDN ...

Страница 73: ... A subnet mask to be used with the IP address Instructions Enter the subnet mask to be used with the router IP address Parameter ISP Account Name Function The account name supplied by the Internet Service Provider ISP or Intranet Manager Instructions Enter any account name you have been given Parameter Account Password Function A password used when connecting with the ISP or corporate intranet Ins...

Страница 74: ...one number Parameter Make Call Immediately Function Immediately calls the ISDN telephone number entered into the ISDN Telephone Number field Instructions Check this option if you want to call the ISP or intranet immediately the One Step Configuration window closes Parameter Enable NAT Function Allows Network Address Translation NAT to operate Instructions Check this option if you want to use NAT F...

Страница 75: ...ng on the US ISDN button causes the US ISDN Switch Information window to appear Figure 1 29 US ISDN Switch Information Window In the table below click on the parameter for which you require further assistance Switch Type SPID 1 SPID 2 Area Code Local Number 1 Local Number 2 ...

Страница 76: ...ice Profile Identifiers SPIDs are provided by your telephone company If your switch type is AT T Custom Point to Point you do not have to enter a SPID For all other line types there should be a SPID corresponding to each local ISDN telephone number Instructions Enter any SPID provided by your telephone company Parameter SPID 2 Function Service Profile Identifiers SPIDs are provided by your telepho...

Страница 77: ...telephone company If your switch type is AT T Custom Point to Point you do not have to enter a local number Instructions Enter any local numbers provided by your telephone company Parameter Local Number 2 Function Local numbers are provided by your telephone company If your switch type is AT T Custom Point to Point you do not have to enter a local number Instructions Enter any local numbers provid...

Страница 78: ...Save Configuration on Router button in the toolbar Right clicking on a router s icon and selecting Save Configuration on Router from the Quick menu Figure 1 30 Nautica Wizard Quick Menu When you make changes to the configuration of a router the router colour changes to yellow in the Nautica Wizard window To save the changes you have made 1 Click on the router to be saved 2 Choose Operations Save C...

Страница 79: ...on OK and the configuration changes are saved Erase Configuration This command can be accessed with a unit selected and by Clicking on Operations Erase Configuration Clicking on the Erase Configuration button in the toolbar Right clicking on a router s icon and selecting Erase Configuration from the Quick menu ...

Страница 80: ...ick Menu To erase a unit s configuration and set all the parameters back to the default settings 1 Click on the unit to have its configuration erased 2 Click on Operations Erase Configuration 3 A warning window appears Figure 1 33 Erase Warning 4 Click on Yes to complete the Erase or No to cancel ...

Страница 81: ...n is erased You can see the progress of this action in the Status bar at the bottom of the Nautica Wizard window Figure 1 34 Nautica Wizard with Erase Configuration 6 When this action is completed the confirmation window appears Figure 1 35 Erase Complete 7 Click on OK to end the task ...

Страница 82: ... toolbar Right clicking on a router s icon and selecting Reboot from the Quick menu Figure 1 36 Nautica Wizard Quick Menu Rebooting the router returns it to the condition it was in at the last save Any unsaved changes made to the unit s configuration are lost at the time of rebooting To reboot the router 1 Click on the unit to be rebooted in the Nautica Wizard window 2 Click on Operations Reboot ...

Страница 83: ... the router or Cancel to end the action 5 After the reboot the confirmation window appears Figure 1 38 Reboot Confirmation Click on OK and the action is completed Launch Nautica Log This command can be accessed with a unit selected and by Clicking on Operations Launch Nautica Log Clicking on the Nautica Log button in the toolbar ...

Страница 84: ...nu Figure 1 39 Nautica Wizard Quick Menu Nautica Log allows you to view SysLog information It is similar to running the Trace Window command in BCC Nautica Log should only be used to troubleshoot problems with the router The information it displays is concerned with actual activity on the router For more information on Nautica Log refer to Chapter 20 ...

Страница 85: ...utica router This command can be accessed with a unit selected and by Clicking on Operations Launch Nautica Watch Clicking on the Nautica Watch button in the toolbar Right clicking on a router s icon and selecting Nautica Watch from the Quick menu Figure 1 40 Nautica Wizard Quick Menu For more information on Nautica Watch refer to Chapter 21 ...

Страница 86: ...ions that cannot be set using the router particularly Frame Relay settings By using Telnet to access the router software directly it is possible to configure all the router s features To telnet to a router 1 Right click on the router you want to telnet to 2 In the Quick menu select the Telnet to Router command Figure 1 41 Nautica Wizard Quick Menu 3 A telnet session is opened ...

Страница 87: ...e 1 42 Telnet Session 4 Type in the router password and press enter You are taken into the Bay Command Console BCC For more information on how to use BCC refer to the online manual NauticaRS 5 0 Reference Guide on the CD that accompanied your installation ...

Страница 88: ...1 50 118814 D Rev 00 Nautica Configuration Wizard Reference Guide Advanced Menu With a unit selected the commands in the Operations menu are as follows Figure 1 43 The Nautica Wizard Advanced Menu ...

Страница 89: ...k and the clock in your PC agree If there is a disagreement the following dialog box appears when you click on Advanced System Figure 1 44 Time Mismatch Warning Command Chapter Page Command Chapter Page System Chapter 2 DNS Chapter 19 Clock page 1 51 IPX Chapter 13 Paths Chapter 3 DHCP Server Chapter 15 Devices Chapter 8 OSPF Chapter 16 PPP Profiles Chapter 9 NAT Chapter 17 WINS Chapter 18 RADIUS ...

Страница 90: ...ure 1 45 Edit Clock Setup In the table below click on the parameter for which you require further assistance Parameter Date Default Blank Options The current date Function Allows you to enter the correct date Instructions Enter the date the format must be dd mm yyyy day month year In order to meet year 2000 compliance issues the year has to be entered as four digits for example 1998 Date Time Week...

Страница 91: ... The current day of the week Function Allows you to enter the correct day of the week Instructions Enter the current day of the week Type the day out in full abbreviations are not allowed in this field Alarms Alarms are generated when your router detects an error The alarms are stored in the Alarms Table To display the Alarms table 1 Select a router in the Nautica Wizard window Figure 1 3 2 Click ...

Страница 92: ...4 D Rev 00 Nautica Configuration Wizard Reference Guide Figure 1 46 Router Alarms Table To delete an alarm select it in the table and click on the delete button To clear all the alarms reboot the router page 1 44 ...

Страница 93: ...on the command for which you require further assistance SNMP Community Strings Simple Network Management Protocol SNMP is the protocol Nautica Wizard uses to communicate with all its routers when you update their configuration using the commands in the File Menu the Operations Menu the Advanced Menu and The Nautica Wizard Toolbar SNMP Community Strings Excessive Calls Alarms Display SNMP Traps ...

Страница 94: ...ng a small yellow lightening bolt in the bottom right corner of the Nautica Wizard window Figure 1 48 Management Indicator Setting the SNMP community strings specifies whether or not Nautica Wizard can read or write to a specified router The strings have to agree for any configuration updates to take effect To change or view the SNMP Community strings 1 Click on a router in the Nautica Wizard wind...

Страница 95: ...mmunity string changes the write access to this router The string must match in both the sending and receiving routers for the configuration changes to be made 6 Once you have viewed or amended the SNMP Community Strings click on the OK button to return to Nautica Wizard If you do change the community strings for a router the router icon in the Nautica Wizard window changes to show a small lock to...

Страница 96: ...window 1 Select a router in the Nautica Wizard window Figure 1 3 2 Click on Options Excessive Alarms 3 The Excessive Calls window appears Figure 1 51 Excessive Calls Window In the table below click on the parameter for which you require further assistance Display Warnings Window If Excessive ISDN Calls Excessive Individual Call Time Excessive Total Call Time Restart Counters at Midnight ...

Страница 97: ...tion Parameter Excessive ISDN Calls Default 80 Options A valid number of calls Function Displays a warning window if the number of ISDN calls exceeds the number shown here Instructions Enter your maximum ISDN call limit Parameter Excessive Total Call Time Default 2 0 Options A valid time in hours Function If the total time of all the current ISDN calls exceeds the time here a warning window is dis...

Страница 98: ...inutes if required Parameter Restart Counters at Midnight Default Enabled Options Enabled Disabled Function Restarts all the call alarm counters at midnight Instructions Disable this parameter if you do not want the counters to restart Display SNMP Traps When SNMP detects an error a trap is generated These traps can be displayed on your PC or any other host To display SNMP traps on your PC 1 Selec...

Страница 99: ...n the Edit System window Figure 1 52 enter the IP address of your PC as one of the SNMP Trap Addresses Figure 1 52 Edit System Window 4 Ensure there is a tick against the Display SNMP Traps command in the Options menu If there isn t reselect the command ...

Страница 100: ...e displayed in dialog boxes on your PC Figure 1 53 SNMP Trap Window If you want to display an SNMP Trap now to check that the system is working With your PC set and one of the SNMP Trap addresses in the Edit System window Figure 1 52 reboot the router page 1 44 An SNMP Trap dialog box as in Figure 1 53 appears ...

Страница 101: ...n also be accessed by Clicking on Operations Help Contents Clicking on the Help button in the toolbar Pressing the F1 key Use help to find out more information at a glance on the feature you are working on The Help menu also contains an About command Clicking this screen will display programming information for Nautica Wizard including the version of the software you are using ...

Страница 102: ...ter Select a menu from the list below The Configuration Quick Menu The Standard Quick Menu The Configuration Quick Menu This menu appears when you right click on an unconfigured blue router Figure 1 55 Nautica Wizard Configuration Quick Menu In the table below click on the command for which you require further information Run Installation Assistant One Step Configuration Download New Router Softwa...

Страница 103: ...gure 1 56 The Standard Quick Menu In the table below click on the menu command for which you require further information One Step Configuration Download New Router Software Save Router Configuration to File Restore Router Configuration from File Save Configuration on Router Reboot Erase Configuration Launch Nautica Log Launch Nautica Watch Telnet to Router ...

Страница 104: ...name Where tftp i opens the TFTP client and sets binary mode remote router is the IP address of the remote router from which you want to take the configuration get tells TFTP to take the configuration cfg password is the name of the configuration file Replace password with the remote router s password or enter password here if there is no password file name the name of the file you want to create ...

Страница 105: ...e is called cfg password TFTP Source Files You can use TFTP to put or get the router source code from one host to another Use the following syntax tftp i host get put file bay destination Where tftp i opens the TFTP client and sets binary mode host is the local or remote IP address get takes the destination put sends file bay to the destination file bay is marlin bay for a Nautica Marlin or n4000 ...

Страница 106: ......

Страница 107: ...gs System settings are commands and settings that affect the whole of the Nautica router rather than an individual element like a path or route This chapter contains the following sections The System Settings Window page 2 2 The System Parameters page 2 4 ...

Страница 108: ... Guide The System Settings Window To display the system settings window do the following 1 Select the unit to be configured in the Nautica Wizard window Figure 2 1 The Nautica Wizard Window 2 Click on Advanced System 3 The Edit System window Figure 2 2 appears ...

Страница 109: ...Modifying System Settings 118814 D Rev 00 2 3 Figure 2 2 Edit System Window ...

Страница 110: ...ion Name Manager Timeout s System Up Time Hardware Address Enable DHCP Server IP Enable System Password Enable BOOTP Relay Agent Routing IP SNMP Get BOOTP Relay Server IP Address Filter IP SNMP Set Enable Secure Unit IP Cache Timeouts Trap Addresses Enable WINS Bridging Enable Advanced Manager Options Enable HTML IPX Enable Enable Front Panel Enable PPTP Routing IPX Beep On Alarm Blacklist Timeout...

Страница 111: ...meter cannot be changed by the user Function This is the unit s MAC address Instructions It is not possible to change this number Parameter System Password Default Blank Options A valid password Function This is an optional password that protects the router as a whole Users have to enter the password before they can change the configuration of the router Instructions Enter a password if required N...

Страница 112: ...uters for the configuration information to be read Instructions Enter a new password if required Parameter SNMP Set Default private Options A valid password Function Changing the Set Community string changes the write access to this router The string must match in both the sending and receiving routers for the configuration changes to be made Instructions Enter a password if required Note All pass...

Страница 113: ...Options Disabled Enabled Function To allow more advanced path configuration Instructions Advanced features are always visible in Nautica Wizard Selecting or de selecting this option does nothing in Nautica Wizard but it does display or hide these features in BCC Parameter Enable Front Panel Default Enabled Options Enabled Disabled Function Stops and starts the scrolling of the front panel display ...

Страница 114: ...aRS Router Software BCC Instructions This option does not affect the working of Nautica Wizard It is only valid if you plan to use the manager port on the back of a Nautica Marlin Nautica 4000 CLAM CLAM IP and Nautica 200 or if you Telnet to the router Entering a value of 0 disables the feature Parameter Enable DHCP Server Default Disabled Options Disabled Enabled Function Enables the Nautica Dyna...

Страница 115: ...ge 3 14 For more information on BOOTP Relay refer to the Concepts topic in Nautica Wizard help Parameter BOOTP Relay Server IP Address Default 255 255 255 255 Options The IP address of the BOOTP Relay server to which BOOTP requests are sent Function Forwards BOOTP Relay requests to the specified address Instructions Leaving the default address here will cause the unit to forward BOOTP Relay reques...

Страница 116: ...e unit Calls that do not match any paths will be dropped Parameter Enable WINS Default Enabled Options Enabled Disabled Function Enables the Nautica WINS server Instructions De select this option only if you do not want the Nautica router to act as a WINS server For more information on WINS refer to Chapter 18 Parameter Enable HTML Default Enabled Options Enabled Disabled Function Allows the unit ...

Страница 117: ...nel Instructions If this parameter is enabled then PPTP can also be enabled in a path ISDN Number 1 has to be set to the IP address of the originator terminator of the PPTP tunnel page 3 6 or as an ISDN Multi Subscriber Number MSN to provide the telephone number of the PPTP host and IP address of the PPTP Tunnel terminator page 10 5 For more general information on PPTP and MSN refer to the Concept...

Страница 118: ... to use alternate routes if they are set up A path cannot be used if it is on the blacklist Parameter IP Enable Default Enabled Options Enabled Disabled Function Enables IP routing Instructions If disabled the Telnet facility is not available and only local management of the unit via a terminal connected to the serial port is possible Caution Leaving this parameter at the default of 0 specifies ex...

Страница 119: ...Used in conjunction with the IP Filters page 12 10 this parameter allows you to specify how the Nautica router will use any filter pairs you may have created Instructions Select one of the following values None No Filtering is applied Reject On Match Allows frame types that do not match a predefined filter into the Nautica router Any frames that match the filter are dropped not received by the uni...

Страница 120: ...ons Enabled Disabled Function Allows data to be bridged over the router If bridging is required it must also be allowed on the LAN01 path and also any paths over which data is bridged to a remote site Chapter 3 Instructions Select or de select the parameter Parameter System Up Time Default A unit in time Options Cannot be amended by the user Function The length of time the Nautica router has been ...

Страница 121: ...ing Default Disabled Options Disabled Enabled Restricted SAP Function Specifies how IPX is to run on this router Instructions Select a value Disabled The IPX stack is turned off Enabled The IPX stack is turned on Restricted SAP Allows Restricted SAP With this parameter enabled SAP broadcast from remote sites can be limited by using SAP Filters page 13 25 Note The Nautica 200 and Nautica CLAM IP ca...

Страница 122: ...cify how the Nautica router will use any filter pairs you may have created Instructions Select one of the values None No filtering is used Reject on Match Allows frame types that do not match a predefined filter into the Nautica router Any frames that match the filter are dropped not received by the unit Fwd On Match Allows frame types that match a predefined filter into the unit All other frames ...

Страница 123: ...nd bandwidth are a few of the parameters that can be set on a path Different parameters are available for different path types Nautica Wizard supports all the standard path types and these are explained in this and subsequent chapters This chapter includes the following sections Path Types page 3 2 The Paths Table page 3 4 The LAN01 Path page 3 11 ...

Страница 124: ... as LAN01 in the Paths Table LAN01 is the path that points to the local network All Nautica routers have a path called LAN01 It is system generated and while its parameters can be modified the path cannot be removed from any of the tables For details on the parameters available on the LAN01 path refer to page 3 11 Point to Point Protocol PPP PPP paths are the most common type of path used on a rou...

Страница 125: ... refer to Chapter 5 RFC1490 frame relay If the remote router supports frame relay a frame relay path can be created to communicate with this router Nautica Wizard does not support all the parameters normally associated with frame relay but it does allow you to set up frame relay paths To define frame relay in more detail it is necessary to use the router software BCC For more information on frame ...

Страница 126: ... The Paths Table Paths are added edited and deleted in the Paths table To display the table by 1 Selecting the router to be investigated in the Nautica Wizard window Figure 3 1 Nautica Wizard Window 2 Clicking on Advanced Paths Configuration 3 The Path Table appears ...

Страница 127: ...set up on the router This information is displayed in columns Click on the column or button name in the table below to see an explanation Name Type ISDN Number IP Address Bridging RIP Protocol Ports Enabled OK Button Edit Button Add Button Delete Button Enable Button Disable Button Refresh Button ...

Страница 128: ...on on path types refer to page 3 2 Parameter ISDN Number Function The first ISDN number to be called when this path is used Parameter IP Address Function The IP address associated with this router for this path Parameter Bridging Function If bridging is enabled on the path a Y is shown here If it is disabled an N is shown Parameter RIP Protocol Function The RIP protocol used on this path Unless am...

Страница 129: ...red by this path and 0 channels are being used at the moment Parameter Enabled Function Displays Y yes or N no Shows whether the path is enabled or disabled Parameter OK Button Function Clicking on the OK button closes the Paths table and returns you to the Nautica Wizard window It is also possible to close any Nautica Wizard window by clicking on the Windows 95 Exit button at the top right of the...

Страница 130: ...k on the path type for which you require further details The LAN01 Path PPP Paths Nautica Paths Frame Relay Paths Parameter Add Button Function To add a new path in the Paths table Figure 3 2 click on the Add button The Path Type window appears Figure 3 4 Path Type Window Select the protocol used by the remote router and click on the OK button Depending on the protocol you choose a different param...

Страница 131: ...on Nautica Wizard uses Simple Network Management Protocol SNMP to gather information about the local network and to carry out any instructions you have issued in Nautica Wizard Although an SNMP Get request is sent out by the router every 5 seconds occasionally you may need to see the results of an instruction faster than this Caution There is no undo in Nautica Wizard If a path is deleted in error...

Страница 132: ...3 10 118814 D Rev 00 Nautica Configuration Wizard Reference Guide Clicking on the Get button sends out an SNMP Get request immediately ...

Страница 133: ... 2 select the LAN01 path and click on the Edit Button 4 The LAN Path Edit window appears Figure 3 5 Figure 3 5 LAN Path Edit Window This window contains all the parameters that can be amended for the LAN01 path using Nautica Wizard To make the parameters more manageable they are grouped into separate tabs In the table below click on the tab for which you require further information Main Tab IPX Ta...

Страница 134: ...gure 3 6 LAN01 Main Tab Options The main tab contains general IP parameters In the table below click on the parameter for which you require further assistance Parameter Enable Default Enable Options None Function The LAN01 path is enabled by default it is not possible to change this parameter Enable Name Autolearn IP Address IP Address Mask Length BOOTP Relay Enable ...

Страница 135: ...e None This is the default value Leaving this option set at None means that you have a permanent IP address assigned This address must be entered into the IP Address parameter DHCP If you are assigned an IP address by a DHCP server select the DHCP option for this parameter With DHCP selected do not enter an IP address into the IP Address parameter Parameter IP Address Default An IP address Options...

Страница 136: ...d Enabled Function Allows BOOTP Relay requests to be sent along this path if the Enable BOOTP Relay Agent parameter in the System settings page 2 8 is enabled For more information on BOOTP Relay refer to the Concepts topic in Nautica Wizard Help IPX Tab If you are using IPX and it has been enabled in the System window Chapter 2 use this tab to specify how IPX works on the LAN01 path In the table b...

Страница 137: ... 802 3 802 3 frame types only used on the path 802 3 802 2 802 3 and 802 2 frame types only used on this path 802 3 802 2 Ethernet II 802 3 and 802 2 and Ethernet II frame types only used on this path 802 2 Only 802 2 frame types used 802 2 Eth2 802 2 and Ethernet II frame types used Eth2 Only Ethernet II frame types used Parameter 8023 Net ID Default 00000000 Options A valid network number Functi...

Страница 138: ...t ID Default 00000000 Options A valid network number Function The network number of the Ethernet II network Instructions Enter the network number if applicable Parameter Metric Default 2 Options A valid cost for this path Function A system generated calculation used to work out the cost of this path Instructions Only change this option if you want to over ride the system generated cost Note Differ...

Страница 139: ...ent or received along this path Send Only The unit only sends RIP updates over this path Listen Only RIP updates are only received over this path Parameter Advertise Default All Options All Local LAN Function Specifies which routes and SAPs are to be passed along this path Instructions There are two values that can be set here All This is the default value With All selected all routes and SAPs fro...

Страница 140: ...nfiguration Wizard Reference Guide RIP Tab The RIP tab specifies how IP operates on this path Figure 3 7 LAN01 RIP Tab In the table below click on the parameter for which you require further information Direction Support Type Metric ...

Страница 141: ...sten Only RIP updates will only be received over this path Parameter Support Default RIP1Compat Options RIP1Compat RIP1Subset RIP1 RIP2 None Function The type of Routing Information Protocol RIP support used on this router Instructions The values here are as follows Rip1Compat RIP2 packets are broadcast This option is the RIP1 Compatibility option as specified in RFC 1723 and is most likely to wor...

Страница 142: ...protocol set Parameter Type Default Split Horizon Options Split Horizon Poison Reverse Local LAN Function Determines how routes are passed over this path Instructions The options here are as follows Split Horizon When a remote router sends a broadcast containing route information to the local router the local router does not send those learned routes back to the remote router Poison Reverse When a...

Страница 143: ... calculate the best routes page 12 2 to use for a path Instructions This is a system generated number and does not have to be changed by the user OSPF Tab The OSPF tab contains parameters pertaining to the function of OSPF Chapter 16 Figure 3 8 LAN01 OSPF Tab Note the OSPF Parameters are not available unless OSPF Support is set to the OSPF2 value ...

Страница 144: ...you intend to use OSPF on this router For a description of OSPF refer to the Concepts topic in Nautica Wizard Help For setup options refer to Chapter 16 If you change the OSPF Support option to OSPF2 the OSPF parameters become available Parameter Metric Default 0 Options A valid OSPF metric Function Specifies the distance to the remote router for OSPF calculations Instructions It is not necessary ...

Страница 145: ... Time Default 40 Options A time in seconds Function The time in seconds after which a unit is assumed to be unavailable for routing if an OSPF Hello packet has not been received Instructions Enter a value here or leave it at the default Do not make this value less than the OSPF Hello Time Parameter Priority Default 1 Options 1 Function A system generated number used by OSPF to calculate the design...

Страница 146: ...Name Server DNS allows for domains to be mapped to specific paths For example if the corporate intranet is called Company com using DNS it is possible to specify that this domain company com can only be reached down a specific path The DNS tab in the LAN01 path allows you to specify the DNS addresses that can be reached via this path Figure 3 9 LAN01 DNS Tab Note The DNS mapping is set up in the D...

Страница 147: ...ath is up it is used for DNS requests in preference to one of the default DNS paths set up in the DNS settings part of Nautica Wizard Chapter 19 Parameter I Address 1 Default 0 0 0 0 Options A valid IP address Function The IP address of the first DNS server Instructions Enter the IP address of the first DNS server Parameter IP Address 2 Default 0 0 0 0 Options A valid IP address Function The IP ad...

Страница 148: ...he IP address of the third DNS server that can be reached down this path WINS Tab Windows Integrated Naming Service WINS allows you to map Windows names to IP addresses The WINS tab increases this facility by allowing the router to learn names from a remote WINS server Figure 3 10 LAN01 WINS Tab In the table below click on the parameter for which you require further information Use If Up IP Addres...

Страница 149: ...ons De select this parameter if you do not want WINS information learned when this path is up open Parameter IP Address Default 0 0 0 0 Options A valid IP address Function The IP address of a remote WINS server Instructions Enter the IP address of the remote WINS server or leave this parameter at 0 0 0 0 for the router to find a WINS server across the connection and then learn the names from this ...

Страница 150: ......

Страница 151: ...nd bandwidth are a few of the parameters that can be set on a path Different parameters are available for different path types Nautica Wizard supports all the standard path types and these are explained in this and subsequent chapters This chapter includes the following sections Path Types page 4 2 The Paths Table page 4 4 PPP Paths page 4 10 ...

Страница 152: ... as LAN01 in the Paths table LAN01 is the path that points to the local network All Nautica routers have a path called LAN01 It is system generated and while its parameters can be modified the path cannot be removed from any of the tables For details on the parameters available on the LAN01 path refer to Chapter 3 Point to Point Protocol PPP PPP paths are the most common type of path used on a rou...

Страница 153: ...efer to Chapter 5 RFC1490 Frame Relay If the remote router supports frame relay a frame relay path can be created to communicate with this router Nautica Wizard does not support all the parameters normally associated with frame relay but it does allow you to set up frame relay paths To define frame relay in more detail it is necessary to use the router software BCC For more information on frame re...

Страница 154: ...uide The Paths Table Paths are added edited and deleted in the Paths table To Display the table 1 Select the router to be investigated in the Nautica Wizard window Figure 4 1 Nautica Wizard Window 2 Click on Advanced Paths Configuration 3 The Paths table appears ...

Страница 155: ... up on the router This information is displayed in columns Click on the column or button name in the table below to see an explanation Name Type ISDN Number IP Address Bridging RIP Protocol Ports Enabled OK Button Edit Button Add Button Delete Button Enable Button Disable Button Refresh Button ...

Страница 156: ...more information on path types refer to page 4 2 Parameter ISDN Number Function The first ISDN number to be called when this path is used Parameter IP Address Function The IP address associated with this router for this path Parameter Bridging Function If bridging is enabled on the path a Y is shown here If it is disabled an N is shown Parameter RIP Protocol Function The RIP protocol used on this ...

Страница 157: ...d by this path and 0 channels are being used at the moment Parameter Enabled Function Displays Y yes or N no Shows whether the path is enabled or disabled Parameter OK Button Function Clicking on the OK button closes the Paths table and returns you to the Nautica Wizard window It is also possible to close any Nautica Wizard window by clicking on the Windows 95 Exit button at the top right of the s...

Страница 158: ...k on the path type for which you require further details The LAN01 Path PPP Paths Nautica Paths Frame Relay Paths Parameter Add Button Function To add a new path in the Paths table Figure 4 2 click on the Add button The Path Type window appears Figure 4 4 Path Type Window Select the protocol used by the remote router and click on the OK button Depending on the protocol you choose a different param...

Страница 159: ...es Simple Network Management Protocol SNMP to gather information about the local network and to carry out any instructions you have issued in Nautica Wizard Although an SNMP Get request is sent out by the router every 5 seconds occasionally you may need to see the results of an instruction faster than this Clicking on the Refresh button sends out an SNMP Get request immediately Caution There is no...

Страница 160: ...ss you know the type of router at the remote site PPP is often the only protocol you can use to reach that router When you edit or add a PPP path the PPP Path Edit window appears The window is divided into various different tabs Each tab contains different parameters To move into another tab click its name Figure 4 5 PPP Path Edit Window ...

Страница 161: ...4 5 to display the main PPP parameters for a path The table below lists all twelve parameters available in this window Click on the parameter for which you require more information Main Tab Call Tab Bandwidth Tab PPP Tab IPX Tab RIP Tab OSPF Tab Bridge Tab DNS Tab WINS Tab Compression Tab Enabled Remote Name Authentication Name Remote Name Check Outgoing Calls Autolearn IP Address By IPCP and or D...

Страница 162: ... Enables or disables this path Instructions Only de select this parameter if this path is not to be used Parameter Remote Name Default Blank Options A valid router or account name Function Typically the name of the router or service into which we are calling Instructions Enter the name of the remote site or the ISP for example Compuserve ...

Страница 163: ...te unit during a CHAP challenge is compared against this path name If it is different to the path name the call is dropped With this option disabled the unit ID presented in the CHAP challenge is assumed to be correct and connection continues as normal This parameter is useful when you are dialling into an ISP who has multiple routers attached to one telephone number It is likely that each router ...

Страница 164: ...on if you are unsure of the remote IP address With the Autolearn IP Address parameter selected the next two parameters become available and the IP address and mask length parameters are disabled Figure 4 6 PPP Autolearn IP Parameters These parameters are as follows Parameter By IPCP and or DHCP Default Selected Options Selected De selected Function The IP address is learned using Internet Protocol...

Страница 165: ...ions An IP address of the format xxx xxx xxx xxx Function The IP address of the remote site Instructions Enter the remote IP address or select the Autolearn IP Address parameter if you do not know it Parameter Mask Length Default Blank Options A valid subnet mask Function The subnet mask to be used with the address entered in the IP Address parameter Instructions Enter a subnet mask for the remote...

Страница 166: ... Options Disabled Enabled Function Allows or disallows the use of Network Address Translation NAT along this path Instructions Enable this parameter if you want NAT to run over this path For more information on NAT refer to Chapter 17 Note BootP Relay only operates on the path if this parameter is also enabled in the System Settings window Chapter 2 Note If NAT is enabled Autolearn IP Address must...

Страница 167: ...SDN numbers are specified and also where Call Back Control Protocol CBCP information is set up Figure 4 7 PPP Path Call Tab In the table below click on the parameter for which you require further information ISDN Number Next Number Mode Type Direction Delay Call Back Number ...

Страница 168: ...led and so on After each number has been called the process starts again with the first number If a call fails on all six numbers three times the path is blacklisted for the amount of time set for Blacklist Timeouts in the System Settings window Chapter 2 If you would like this path to run data over voice North America only to take advantage of cheaper voice tariffs then precede the telephone numb...

Страница 169: ...ddress of the originator or terminator of the PPTP tunnel The following syntax is used Figure 4 9 PPP Path PPTP Options In this example the u at the start of the IP address signifies this as a PPTP number Table 4 1 ISDN Number Modifiers Modifier Description V Data over Voice V120 Calls 56k Calls Modem Calls F Fax Calls u PPTP Calls X Match incoming CLI ...

Страница 170: ... backup routers When a path is called the first number is dialled Requests for additional bandwidth should also use this same number The values for this parameter are Next Number When a request for additional bandwidth is received dial the next number in the list North America Start with First When a request for additional bandwidth is received dial the first number again Europe Parameter Type Def...

Страница 171: ...lback Control Protocol CBCP as implemented by Microsoft clients and servers Either Either Caller Specified or Pre Specified is used as the option here Parameter Direction Default Incoming Options Incoming Outgoing Function The direction that the callback works Instructions The default option here is incoming Incoming means callback is only used on calls that come in along this path Outgoing means ...

Страница 172: ...umber being used Instructions The delay allows the remote modem time to reset itself before the callback is made Change this setting if the remote modem needs longer to reset between calls Parameter Call Back Number Default Blank Options A valid callback number Function The callback number that is presented to a remote user when the Direction parameter is set to Outgoing Instructions Enter a callb...

Страница 173: ...Bandwidth allows you to determine exactly how data is sent to the remote site when this path is used Figure 4 10 PPP Path Bandwidth Tab In the table below click on the bandwidth parameter for which you require further assistance Bandwidth Mode Min Bandwidth Max Bandwidth Demand Period Demand Threshold Idle Period Idle Threshold Minimum Call Length ...

Страница 174: ...backup This call lasts as long as the leased line is down Instructions Select the relevant option Parameter Min Bandwidth Default 0 Options A valid bandwidth Function This parameter specifies the minimum number of packets in bits per second that can pass down this path Instructions If a minimum bandwidth has not been set at the other end of this path and you want this parameter set then set it her...

Страница 175: ...er second that can pass along this path Parameter Demand Period Default 10 Options A valid time in seconds Function Set in seconds this parameter is associated with Demand and Idle Thresholds The parameter specifies the time for which the Demand or Idle Threshold must be met in order to bring a link up or down For example Demand Threshold is set to 80 and Demand Period to 30 seconds If a call is m...

Страница 176: ...he idle threshold is met for the amount of seconds set here the first line is brought down Instructions Enter a time in seconds Parameter Idle Threshold Default 0 Options A valid percentage of the total bandwidth used on the path Function When the utilisation of a channel reaches this threshold for the time specified in the Idle Period parameter it is classed as idle and the first channel is broug...

Страница 177: ...ions This function is useful if for example an ISP charges for specific periods of time perhaps the first minute of every call In this example the Minimum Call Duration could be set to 58 seconds PPP Tab The PPP security parameters for a PPP path are accessed by clicking on the PPP tab in the PPP Path Edit window The following window appears Figure 4 11 PPP Path PPP Parameters ...

Страница 178: ... on the path For more information on PPP profiles refer to Chapter 9 Instructions The values here are Either Either Password Authentication Protocol PAP or Challenge Handshake Authentication Protocol CHAP is used for validating incoming calls The remote unit must support PAP or CHAP for the call to be connected Passwords secrets must agree at both ends of the path PAP Password Authentication Proto...

Страница 179: ...s used to validate incoming and outgoing calls The remote unit must use CHAP or Either for the call to be connected Passwords and the CHAP Alternate Name if used must also agree at both ends of the path BWEither Either Password Authentication Protocol PAP or Challenge Handshake Authentication Protocol CHAP is used for validating incoming and outgoing calls The remote unit must support PAP or CHAP ...

Страница 180: ...valid password Function Specifying Password Authentication Protocol PAP or Either as the PPP Profile means you must also specify the outgoing sent call PAP password If the password does not match that on the remote unit then any connections made along this path will not be established Instructions Enter a password if required Parameter CHAP Incoming Secret Default No secret Options A valid secret ...

Страница 181: ...Instructions Enter a secret if required Parameter CHAP Re challenge Interval Default 60 seconds Options A time in seconds Function Specifies the time in seconds after which a CHAP challenge is made by the unit The time entered here represents the amount of time after which a CHAP challenge may be sent to a remote unit on active PPP connections Setting the time to 0 disables CHAP re challenges Inst...

Страница 182: ...when you need extra bandwidth to receive the volume of data requested In these instances the remote unit supplies you with a callback number which your unit will dial to receive extra bandwidth Similarly a remote user may download information from your network and need to receive this information faster In these cases you supply them with a number they call back to achieve extra bandwidth The numb...

Страница 183: ... local units support this option Instructions Enter an alternate name if required Parameter Enable Encapsulation Default Disabled Options Disabled Enabled Function Encapsulates Multi Link PPP MP in PPP when sending data to a remote BayRS router Instructions If MP is enabled page 9 12 and you are communicating with a BayRS router this option must be enabled Encapsulation wraps the MP packet in PPP ...

Страница 184: ...Wizard Reference Guide IPX Tab The IPX tab allows you to specify how IPX operates on this path Figure 4 12 PPP Path IPX Tab In the table below click on the option for which you require further assistance Net ID Metric RIP SAP Direction Advertise ...

Страница 185: ...work out the cost of this path Instructions Only change this option if you want to over ride the system generated cost Parameter RIP SAP Direction Default Send and Listen Options Send and Listen None Send Only Listen Only Function The direction in which IPX RIP SAP is sent across this path Instructions The values here are as follows Send and Listen RIP updates are sent and received along this path...

Страница 186: ...pecify which routes and SAPs are to be passed along this path Instructions There are two values that can be set here All This is the default value With All selected all routes and SAPs from all the known networks are advertised along this path Local LAN Selecting Local LAN only advertises those routes and SAPs from the local network ...

Страница 187: ...PPP Path Edit window Figure 4 5 Routing parameters allow you to specify IP RIP OSPF and IPX RIP options Selecting the Routing tab causes the Routing Parameters to appear Figure 4 13 PPP Path RIP Tab In the table below click on the parameter for which you require further assistance Direction Support Type Metric ...

Страница 188: ...er this path Listen Only RIP updates will only be received over this path Parameter Support Default RIP1Compat Options RIP1Compat RIP1Subset RIP1 RIP2 None Function The type of Routing Information Protocol RIP support used on this router Instructions The values here are as follows Rip1 Compat RIP2 packets are broadcast This option is the RIP1 Compatibility option as specified in RFC 1723 and is mo...

Страница 189: ...Parameter Type Default Split Horizon Options Split Horizon Poison Reverse Local LAN Function Determines how routes are passed over this path Instructions The options here are as follows Split Horizon When a remote router sends a broadcast containing route information to the local router the local router does not send these routes back to the remote router Poison Reverse When a remote router sends ...

Страница 190: ...Guide Parameter Metric Default 1 Options A valid cost Function The cost for this path Nautica Wizard uses the cost to calculate the best routes page 12 2 to use for a path Instructions This is a system generated number and does not have to be changed by the user ...

Страница 191: ...s 118814 D Rev 00 4 41 OSPF Tab The OSPF tab allows you to specify OSPF settings for this path Figure 4 14 PPP Path OSPF Tab Note The OSPF parameters are only available if the Support parameter is set to OSPF2 ...

Страница 192: ...you intend to use OSPF on this router For a description of OSPF refer to the Concepts topic in Nautica Wizard Help For setup options refer to Chapter 16 If you change the OSPF Support option to OSPF2 the OSPF parameters become available Parameter Metric Default 0 Options A valid OSPF metric Function Specifies the distance to the remote router for OSPF calculations Instructions It is not necessary ...

Страница 193: ...me Default 40 Options A time in seconds Function The time in seconds after which a unit is assumed to be unavailable for routing if an OSPF Hello packet has not been received Instructions Enter a value here or leave it at the default Do not make this value less than the OSPF Hello Time Parameter Priority Default 1 Options 1 Function A system generated number used by OSPF to calculate the designate...

Страница 194: ...PF area to which this router belongs Instructions Enter the area of which the router is a part Bridge Tab To view the bridging parameters in the PPP Path Edit window click on the Bridge tab The following window appears Figure 4 15 PPP Path Bridge Tab The Bridging parameter must be enabled for the Frame Filter parameters to be amended ...

Страница 195: ... if the router is to bridge non IP and IPX data This option must be enabled for the Frame Filtering parameters to be set Parameter Frame Filter Profile Number Default 0 Options A valid profile number Function Frame Filters are grouped into profiles one profile can contain up to 99 individual filters Entering a number here specifies which profile group is to be used on this path Instructions If fra...

Страница 196: ...hould take if a packet matches a frame filter Instructions Select one of these values Drop Mismatches If a packet does not match a frame filter from the specified Frame Filter Profile Number the packet is dropped Forward Mismatches If a packet does not match a frame filter from the specified Frame Filter Profile Number the packet is forwarded to its destination For more information on frame filter...

Страница 197: ...net is called company com using DNS it is possible to specify that this domain company com can only be reached down a specific path The DNS tab in the PPP path allows you to specify the DNS addresses that can be reached via this path Figure 4 16 PPP Path DNS Tab Note The DNS mapping is set up in the DNS Settings part of Nautica Wizard Chapter 19 ...

Страница 198: ...ed when this path is up it is used for DNS requests in preference to one of the default DNS paths set up in the DNS settings part of Nautica Wizard Chapter 19 Parameter IP Address 1 Default 0 0 0 0 Options A valid IP address Function The IP address of the first DNS server Instructions Enter the IP address of the first DNS server Parameter IP Address 2 Default 0 0 0 0 Options A valid IP address Fun...

Страница 199: ...rd DNS server Instructions Enter the IP address of the third DNS server that can be reached down this path WINS Tab Windows Integrated Naming Service WINS allows you to map Windows names to IP addresses The WINS tab increases this facility by allowing the router to learn names from a remote WINS server Figure 4 17 PPP Path WINS Tab ...

Страница 200: ...pecified in the IP Address parameter Instructions De select this parameter if you do not want WINS information learned when this path is up open Parameter IP Address Default 0 0 0 0 Options A valid IP address Function The IP address of a remote WINS server Instructions Enter the IP address of the remote WINS server or leave this parameter at 0 0 0 0 for the router to find a WINS server across the ...

Страница 201: ...he PPP Compression parameters click on the Compression tab in the PP Path Edit window The following window appears Figure 4 18 PPP Path Compression Tab In the table below click on the parameter for which you require more information Type Checkmode Version Level ...

Страница 202: ...known as Hi Fn Any Any of the above options apart from WCP will be used WCP WAN Compression Protocol as used by BayRS Routers None No compression will be used Parameter Checkmode Default Extended Options No Check Sequence Function This parameter is only available if StacLZ or Any is selected as the compression Type Instructions The values allowed here are Sequenced The unit will request packets to...

Страница 203: ...ameter Level Default Port Options Port Path Function This parameter is only available if WCP is selected as the compression Type Instructions The two values allowed here are Port Compresses data on the individual ISDN ports If two ports are in use then two compression engines will be used This can reduce the amount of memory available in the unit Path Only one compression engine is used no matter ...

Страница 204: ......

Страница 205: ...nd bandwidth are a few of the parameters that can be set on a path Different parameters are available for different path types Nautica Wizard supports all the standard path types and these are explained in this and subsequent chapters This chapter includes the following sections Path Types page 5 2 The Paths Table page 5 4 Nautica Paths page 5 10 ...

Страница 206: ...path as LAN01 in the Paths table LAN01 is the path that points to the local network All Nautica routers have a path called LAN01 It is system generated and while its parameters can be modified the path cannot be removed from any of the tables For details on the parameters available on the LAN01 path refer to Chapter 3 Point to Point Protocol PPP PPP paths are the most common type of path used on a...

Страница 207: ...ers refer to page 5 10 RFC1490 Frame Relay If the remote router supports frame relay a frame relay path can be created to communicate with this router Nautica Wizard does not support all the parameters normally associated with frame relay but it does allow you to set up frame relay paths To define frame relay in more detail it is necessary to use the router software BCC For more information on fra...

Страница 208: ...uide The Paths Table Paths are added edited and deleted in the Paths table To display the table 1 Select the router to be investigated in the Nautica Wizard window Figure 5 1 Nautica Wizard Window 2 Click on Advanced Paths Configuration 3 The Paths table appears ...

Страница 209: ...et up on the router This information is displayed in columns Click on the column or button name in the table below to see an explanation Name Type ISDN Number IP Address Bridging RIP Protocol Ports Enabled OK Button Edit Button Add Button Delete Button Enable Button Disable Button Refresh Button ...

Страница 210: ...more information on path types refer to page 5 2 Parameter ISDN Number Function The first ISDN number to be called when this path is used Parameter IP Address Function The IP address associated with this router for this path Parameter Bridging Function If bridging is enabled on the path a Y is shown here If it is disabled an N is shown Parameter RIP Protocol Function The RIP protocol used on this ...

Страница 211: ...red by this path and 0 channels are being used at the moment Parameter Enabled Function Displays Y yes or N no Shows whether the path is enabled or disabled Parameter OK Button Function Clicking on the OK button closes the Paths table and returns you to the Nautica Wizard window It is also possible to close any Nautica Wizard window by clicking on the Windows 95 Exit button at the top right of the...

Страница 212: ...k on the path type for which you require further details The LAN01 Path PPP Paths Nautica Paths Frame Relay Paths Parameter Add Button Function To add a new path in the Paths table Figure 5 2 click on the Add button The Path Type window appears Figure 5 4 Path Type Window Select the protocol used by the remote router and click on the OK button Depending on the protocol you choose a different param...

Страница 213: ...uses Simple Network Management Protocol SNMP to gather information about the local network and to carry out any instructions you have issued in Nautica Wizard Although an SNMP Get request is sent out by the router every 5 seconds occasionally you may need to see the results of an instruction faster than this Clicking on the Refresh button sends out an SNMP Get request immediately Caution There is ...

Страница 214: ...unicate between different Nautica routers When you edit or add a Nautica path the Nautica Path Parameters window appears The window is divided into tabs To move into another tab click once on its name Figure 5 5 Nautica Path Edit Window In the table below click on the tab heading for which you require further information Main Tab Call Tab Bandwidth Tab Bridge Tab IPX Tab RIP Tab OSPF Tab DNS Tab W...

Страница 215: ...Nautica Path Main Tab In the table below click on the parameter for which you require further information Parameter Enable Default Enabled Options Enabled Disabled Function Allows or disallows this path Instructions Deselect this option only if you want to stop using this path Enable Name Secure Key BootP Relay ...

Страница 216: ...extra security on Nautica to Nautica connections If a router presents a key that is not entered here that call is dropped Calls are only allowed if the secure key matches on both routers Instructions Enter a key number if required Parameter BootP Relay Default Disabled Options Disabled Enabled Function If this path is to be used to pass BOOTP Relay information enable this option Note BootP Relay o...

Страница 217: ... 5 7 Nautica Path Call Tab In the table below click on the parameter for which you require further assistance Parameter ISDN Numbers Default Blank Options A valid ISDN number Function This parameter consists of six fields The ISDN telephone number s of the remote router are entered here ISDN Numbers Next Number Mode ...

Страница 218: ...ist Timeouts in the System Settings window Chapter 2 If you would like this path to run data over voice North America only to take advantage of cheaper voice tariffs then precede the telephone number entered with a V must be in upper case Figure 5 8 Path ISDN Options Other modifiers that can be entered before telephone numbers are If PPTP has been enabled in the System Settings window page 2 11 th...

Страница 219: ...In North America BRI lines have different numbers for each channel When a path is called the first number is dialled and the second number is used for additional bandwidth calls In Europe BRI lines are given the same number for both channels Additional numbers in the path are generally for backup routers When a path is called the first number is dialled Requests for additional bandwidth should als...

Страница 220: ...th parameters control the way ISDN utilises lines Figure 5 10 Nautica Path Bandwidth Tab In the table below click on the parameter for which you require further information Bandwidth Mode Max Bandwidth Min Bandwidth Demand Period Demand Threshold Idle Period Idle Threshold Min Call Length ...

Страница 221: ... call is opened as a backup This call lasts as long as the leased line is down Instructions Select the relevant option Parameter Max Bandwidth Default 0 Options A valid bandwidth Function Maximum bandwidth prevents the use of all available switched circuits for extra bandwidth A value of 0 entered here causes maximum bandwidth to have no upper limit Instructions Set the maximum bandwidth if you wa...

Страница 222: ...ions A valid time in seconds Function Set in seconds this parameter is associated with Demand and Idle thresholds The parameter specifies the time for which the Demand or Idle threshold must be met in order to bring a link up or down For example Demand Threshold is set to 80 and Demand Period to 30 seconds If a call is made to an ISP and large files are downloaded a call request for extra bandwidt...

Страница 223: ...ion When the idle threshold is met for the amount of seconds set here the first line is brought down Instructions Enter a time in seconds Parameter Idle Threshold Default 0 Options A valid percentage of the total bandwidth used on the path Function When the utilisation of a channel reaches this threshold it is classed as idle and the second channel is brought down automatically Instructions Enter ...

Страница 224: ...nction Allows the user to specify a minimum time for a call to be operational Instructions Enter a time if required Bridge Tab The bridging parameters determine how Nautica paths handle non routable protocols Figure 5 11 Nautica Path Bridge Tab Note For the Bridging parameters to become available bridging has to be enabled on the Bridge tab ...

Страница 225: ... be enabled for the Frame Filtering parameters to be set Parameter Frame Filter Profile Number Default 0 Options A valid profile number Function Frame Filters are grouped into profiles one profile can contain up to 99 individual filters Entering a number here specifies which profile group is to be used on this path Instructions If frame filtering is used enter a profile number For more information...

Страница 226: ...d take if a packet matches a frame filter Instructions Select one of these values Drop Mismatches If a packet does not match a frame filter from the specified Frame Filter Profile Number the packet is dropped Forward Mismatches If a packet does not match a frame filter from the specified Frame Filter Profile Number the packet is forwarded to its destination For more information on frame filtering ...

Страница 227: ...00 5 23 IPX Tab IPX parameters specify how the Nautica path handles IPX Figure 5 12 Nautica Path IPX Tab In the table below click on the parameter for which you require further assistance Net ID Metric RIP SAP Direction Advertise ...

Страница 228: ...to work out the cost of this path Instructions Only change this option if you want to over ride the system generated cost Parameter RIP SAP Direction Default Send and Listen Options Send and Listen None Send only Listen only Function The direction in which IPX RIP will be sent across this path Instructions The values here are as follows Send and Listen RIP SAP updates are sent and received along t...

Страница 229: ...tructions There are two values that can be set here All This is the default value With All selected all routes and SAPs from all the known networks are advertised along this path Local LAN Selecting Local LAN only advertises those routes and SAPs from the local network RIP Tab The RIP tab controls the way IP works over a Nautica path Figure 5 13 Nautica Path RIP Tab ...

Страница 230: ... all Send only Listen only Function The direction in which IP RIP will be sent across this path Instructions The values here are as follows Send and Listen RIP updates are sent and received along this path Block All RIP updates will not be sent or received along this path Send Only The unit will only send RIP updates over this path Listen Only RIP updates will only be received over this path Direc...

Страница 231: ...ion 1 packets are broadcast as per RFC 1508 Rip2 RIP Version 2 packets are multicast to 224 0 0 9 as per RFC 1723 Rip1 Subnet This is a modified version of RIP1 mode which allows Nautica routers to work in networks where RIP1 must be used due to an installed base of older routers RIP1 packets are broadcast but when network routes are learned via RIP the Nautica router applies a subnet mask as foll...

Страница 232: ...ends a broadcast containing route information to the local router the local router sends this information back to the remote router with the metrics of the learned routes set to 16 infinite In this way the remote router does not re send this information to the local router Local LAN The remote router only broadcasts information about routes on the Local LAN and not ISDN or other connections to rem...

Страница 233: ...b If you plan to use Open Shortest Path First OSPF the OSPF parameters for a Nautica path are set up on the OSPF tab Figure 5 14 Nautica Path OSPF Tab Note The OSPF Support option must be set to OSPF2 for the OSPF parameters to become available ...

Страница 234: ...you intend to use OSPF on this router For a description of OSPF refer to the Concepts topic in Nautica Wizard Help For setup options refer to Chapter 16 If you change the OSPF Support option to OSPF2 the OSPF parameters become available Parameter Metric Default 0 Options A valid OSPF metric Function Specifies the distance to the remote router for OSPF calculations Instructions It is not necessary ...

Страница 235: ...Time Default 40 Options A time in seconds Function The time in seconds after which a unit is assumed to be unavailable for routing if an OSPF Hello packet has not been received Instructions Enter a value here or leave it at the default Do not make this value less than the OSPF Hello Time Parameter Priority Default 1 Options 1 Function A system generated number used by OSPF to calculate the designa...

Страница 236: ... Tab Domain Name Server DNS allows for domains to be mapped to specific paths For example if the corporate intranet is called company com using DNS it is possible to specify that this domain company com can only be reached down a specific path The DNS tab in the Nautica path allows you to specify the DNS addresses that can be reached via this path Note The DNS mapping is set up in the DNS Settings...

Страница 237: ...Nautica Paths 118814 D Rev 00 5 33 Figure 5 15 Nautica Path DNS Tab In the table below click on the parameter for which you require further assistance Use If Up IP Address 1 IP Address 2 IP Address 3 ...

Страница 238: ...ngs part of Nautica Wizard Chapter 19 Parameter IP Address 1 Default 0 0 0 0 Options A valid IP address Function The IP address of the first DNS server Instructions Enter the IP address of the first DNS server Parameter IP Address 2 Default 0 0 0 0 Options A valid IP address Function The IP address of the second DNS server Instructions Enter the IP address of the second DNS server Parameter IP Add...

Страница 239: ...llows you to map Windows names to IP addresses The WINS tab increases this facility by allowing the router to learn names from a remote WINS server Figure 5 16 Nautica Path WINS Tab In the table below click on the parameter for which you require further assistance Use If Up IP Address ...

Страница 240: ...structions De select this parameter if you do not want DNS information learned when this path is up open Parameter IP Address Default 0 0 0 0 Options A valid IP address Function The IP address of a remote DNS server Instructions Enter the IP address of the remote DNS server or leave this parameter at 0 0 0 0 for the router to find a WINS server across the connection and then learn the names from t...

Страница 241: ...ica Compression parameters click on the Compression tab in the Nautica Path Parameters window The following window appears Figure 5 17 Nautica Path Compression Tab In the table below click on the option for which you require further assistance Type Checkmode Version Level ...

Страница 242: ...known as Hi Fn Any Any of the above options apart from WCP will be used WCP WAN Compression Protocol as used by BayRS Routers None No compression will be used Parameter Checkmode Default Extended Options No Check Sequence Function This parameter is only available if StacLZ or Any is selected as the compression Type Instructions The values allowed here are Sequenced The unit will request packets to...

Страница 243: ...arameter Level Default Port Options Port Path Function This parameter is only available if WCP is selected as the compression Type Instructions The two values allowed here are Port Compresses data on the individual ISDN ports If two ports are in use then two compression engines will be used This can reduce the amount of memory available in the unit Path Only one compression engine is used no matte...

Страница 244: ......

Страница 245: ...nd bandwidth are a few of the parameters that can be set on a path Different parameters are available for different path types Nautica Wizard supports all the standard path types and these are explained in this and subsequent chapters This chapter includes the following sections Path Types page 6 2 The Paths Table page 6 4 Frame Relay Paths page 6 10 ...

Страница 246: ... as LAN01 in the Paths table LAN01 is the path that points to the local network All Nautica routers have a path called LAN01 It is system generated and while its parameters can be modified the path cannot be removed from any of the tables For details on the parameters available on the LAN01 path refer to Chapter 3 Point to Point Protocol PPP PPP paths are the most common type of path used on a rou...

Страница 247: ...rs refer to Chapter 5 RFC1490 Frame Relay If the remote router supports frame relay a frame relay path can be created to communicate with this router Nautica Wizard does not support all the parameters normally associated with frame relay but it does allow you to set up frame relay paths To define frame relay in more detail it is necessary to use the router software BCC For more information on fram...

Страница 248: ...uide The Paths Table Paths are added edited and deleted in the Paths table To display the table 1 Select the router to be investigated in the Nautica Wizard window Figure 6 1 Nautica Wizard Window 2 Click on Advanced Paths Configuration 3 The Paths table appears ...

Страница 249: ... set up on the router This information is displayed in columns Click on the column or button name in the table below to see an explanation Name Type ISDN Number IP Address Bridging RIP Protocol Ports Enabled OK Button Edit Button Add Button Delete Button Enable Button Disable Button Refresh Button ...

Страница 250: ...more information on path types refer to page 6 2 Parameter ISDN Number Function The first ISDN number to be called when this path is used Parameter IP Address Function The IP address associated with this router for this path Parameter Bridging Function If bridging is enabled on the path a Y is shown here If it is disabled an N is shown Parameter RIP Protocol Function The RIP protocol used on this ...

Страница 251: ...equired by this path and 0 channels are being used at the moment Parameter Enabled Function Displays Y yes or N no Shows if the path is enabled or disabled Parameter OK Button Function Clicking on the OK button closes the Paths table and returns you to the Nautica Wizard window It is also possible to close any Nautica Wizard window by clicking on the Windows 95 Exit button at the top right of the ...

Страница 252: ...k on the path type for which you require further details The LAN01 Path PPP Paths Nautica Paths Frame Relay Paths Parameter Add Button Function To add a new path in the Paths table Figure 6 2 click on the Add button The Path Type window appears Figure 6 4 Path Type Window Select the protocol used by the remote router and click on the OK button Depending on the protocol you choose a different param...

Страница 253: ...d uses Simple Network Management Protocol SNMP to gather information about the local network and to carry out any instructions you have issued in Nautica Wizard Although an SNMP Get request is sent out by the router every 5 seconds occasionally you may need to see the results of an instruction faster than this Clicking on the Refresh button sends out an SNMP Get request immediately Caution There i...

Страница 254: ... Button or Add Button in a frame relay path the frame relay Path Edit window appears The window is divided into tabs To move into another tab click once on its name Figure 6 5 Frame Relay Path Parameters Window In the table below click on the tab for which you require further information Main Tab IPX Tab RIP Tab OSPF Tab Bridge Tab DNS Tab WINS Tab ...

Страница 255: ... Relay Path Main Tab In the table below click on the parameter for which you require assistance Parameter Enable Default Enabled Options Enabled Disabled Function Allows or disallows this path Instructions Only disable this parameter if you no longer wish to use this path Enable Name IP Address Mask Length BootP Relay ...

Страница 256: ...address and mask for the remote router Instructions Enter an IP address Parameter Mask Length Default 0 Options A valid subnet mask Function The subnet mask that is applied to the IP address for this path Instructions Enter a subnet mask Parameter BootP Relay Default Disabled Options Disabled Enabled Function If this path is to be used to pass BOOTP Relay information enable this option Note BootP ...

Страница 257: ...able below click on the parameter for which you require further information Parameter Net ID Default 00000000 Options A valid network address Function If IPX is used along this path then the network number of the remote network is entered here Instructions Enter the network ID if IPX is used on this path Net ID Metric RIP SAP Direction Advertise ...

Страница 258: ...generated cost Parameter RIP SAP Direction Default Send and Listen Options Send and Listen None Send Only Listen Only Function The direction in which IPX RIP will be sent across this path Instructions The values here are as follows Send and Listen RIP updates are sent and received along this path None RIP updates will not be sent or received along this path Send Only The unit will only send RIP up...

Страница 259: ...uctions There are two values that can be set here All This is the default value With All selected all routes and SAPs from all the known networks are advertised along this path Local LAN Selecting Local LAN only advertises those routes and SAPs learned from the local network RIP Tab The RIP tab specifies how IP is routed across this path Figure 6 8 Frame Relay Path IP Tab ...

Страница 260: ... All Send Only Listen Only Function The direction in which IP RIP will be sent across this path Instructions The values here are as follows Send and Listen RIP updates are sent and received along this path Block All RIP updates will not be sent or received along this path Send Only The unit will only send RIP updates over this path Listen Only RIP updates will only be received over this path Direc...

Страница 261: ...IP Version 1 packets are broadcast as per RFC 1508 Rip2 RIP Version 2 packets are multicast to 224 0 0 9 as per RFC 1723 Rip1Subnet This is a modified version of RIP1 mode which allows Nautica routers to work in networks where RIP1 must be used due to an installed base of older routers RIP1 packets are broadcast but when network routes are learned via RIP the Nautica router applies a subnet mask a...

Страница 262: ...ends a broadcast containing route information to the local router the local router sends this information back to the remote router with the metrics of the learned routes set to 16 infinite In this way the remote router does not resend this information to the local router Local LAN The remote router only broadcasts information about routes on the Local LAN and not ISDN or other connections to remo...

Страница 263: ...b If you plan to use Open Shortest Path First OSPF on this path the OSPF parameters are set up on the OSPF tab Figure 6 9 Frame Relay Path OSPF Tab Note The OSPF Support parameter must be changed to OSPF2 for the OSPF parameters to become available ...

Страница 264: ...you intend to use OSPF on this router For a description of OSPF refer to the Concepts topic in Nautica Wizard Help For setup options refer to Chapter 16 If you change the OSPF Support option to OSPF2 the OSPF parameters become available Parameter Metric Default 0 Options A valid OSPF metric Function Specifies the distance to the remote router for OSPF calculations Instructions It is not necessary ...

Страница 265: ...d Time Default 40 Options A time in seconds Function The time in seconds after which a unit is assumed to be unavailable for routing if an OSPF Hello packet has not been received Instructions Enter a value here or leave it at the default Do not make this value less than the OSPF Hello Time Parameter Priority Default 1 Options 1 Function A system generated number used by OSPF to calculate the desig...

Страница 266: ...es the OSPF area to which this router belongs Instructions Enter the area of which the router is part Bridge Tab The bridging parameters determine how frame relay paths handle non routable protocols Figure 6 10 Frame Relay Path Bridge Tab Note For the Bridging parameters to become available bridging has to be enabled on the Bridge Tab ...

Страница 267: ... be enabled for the Frame Filtering parameters to be set Parameter Frame Filter Profile Number Default 0 Options A valid profile number Function Frame filters are grouped into profiles one profile can contain up to 99 individual filters Entering a number here specifies which profile group is to be used on this path Instructions If frame filtering is used enter a profile number For more information...

Страница 268: ...smatches If a packet does not match a frame filter from the specified Frame Filter Profile Number the packet is forwarded to its destination For more information on frame filtering refer to Chapter 11 DNS Tab Domain Name Server DNS allows for domains to be mapped to specific paths For example if the corporate intranet is called company com using DNS it is possible to specify that this domain compa...

Страница 269: ...ult De selected Options De selected Selected Function Specifies whether this path or one of the DNS default paths Chapter 19 is to be used for DNS requests Instructions If selected when this path is up it is used for DNS requests in preference to one of the default DNS paths set up in the DNS settings part of Nautica Wizard Chapter 19 Use If Up IP Address 1 IP Address 2 IP Address 3 ...

Страница 270: ...dress of the first DNS server Parameter IP Address 2 Default 0 0 0 0 Options A valid IP address Function The IP address of the second DNS server Instructions Enter the IP address of the second DNS server Parameter IP Address 3 Default 0 0 0 0 Options A valid IP address Function The IP address of the third DNS server Instructions Enter the IP address of the third DNS server that can be reached down...

Страница 271: ...llows you to map Windows names to IP addresses The WINS tab increases this facility by allowing the router to learn names from a remote WINS server Figure 6 12 Frame Relay Path WINS Tab In the table below click on the parameter for which you require further assistance Use If Up IP Address ...

Страница 272: ...meter Instructions De select this parameter if you do not want WINS information learned when this path is up open Parameter IP Address Default 0 0 0 0 Options A valid IP address Function The IP address of a remote WINS server Instructions Enter the IP address of the remote WINS server or leave this parameter at 0 0 0 0 for the router to find a WINS server across the connection and then learn the n...

Страница 273: ...cs Often you need to see how a particular path is performing or how much information is being passed along a path Path statistics allow you to view this information This chapter contains the following sections Displaying Path Statistics page 7 2 ...

Страница 274: ... Path Statistics Rather than setting up paths it is possible to view the paths in use by the router at any given time 1 Select a router to monitor in the Nautica Wizard window Figure 7 1 The Nautica Wizard Window 2 Click on Paths Stats 3 The PathPorts table appears Figure 7 2 ...

Страница 275: ...PathPorts Table Information on the paths in use is displayed in several columns In the table below click on the part of the table for which you require further information Path Port Type TxUtil RxUtil Bandwidth OK Button Clear Button Refresh Button ...

Страница 276: ...pe of path Parameter TxUtil Function The percentage utilisation on data sent via this path Parameter RxUtil Function The percentage utilisation on data received by this path Parameter Bandwidth Function The current bandwidth used by this path Parameter OK Button Function Closes the PathPorts table and returns to the Nautica Wizard window Parameter Clear Button Function Clears calls along a selecte...

Страница 277: ...Path Statistics 118814 D Rev 00 7 5 Parameter Refresh Button Function Refreshes the data displayed in the PathPorts table immediately ...

Страница 278: ......

Страница 279: ...ports an Ethernet LAN port and an ISDN port These devices are configured using the Devices option in the Advanced menu This chapter includes the following sections Viewing Devices page 8 2 Editing Devices page 8 3 Editing a Voice Device page 8 4 Editing an ISDN Device page 8 10 Editing a WAN Device page 8 20 Editing a PRI Device page 8 28 Downloading Device Software page 8 51 ...

Страница 280: ...do the following 1 In the Nautica Wizard window page 1 8 select the unit that contains the device you want to edit 2 Click on Advanced Devices Configuration 3 The Devices table Figure 8 1 appears The Devices table is a list of all the devices in the Nautica 200 and their current status Figure 8 1 Devices Table ...

Страница 281: ...e ports and the ISDN port The Ethernet LAN port is the port that accesses the local network Its attributes cannot be edited Selecting the LAN01 device and choosing the Edit button will cause the following error to appear Figure 8 2 Device Table Warning Clicking on the OK button will clear this error Click on the device for which you require more information in the table below Editing a Voice Devic...

Страница 282: ...s are numbered Voice01 Voice02 and these ports are displayed in the Devices table In the Nautica 200 the naming of the ports relates to the numbers assigned to the ports on the back panel of the unit Port 1 is Voice01 and Port 2 is Voice02 To edit a voice device select the relevant device Voice01 or Voice02 and click on the Edit button The Edit Voice Channels window Figure 8 3 appears Figure 8 3 E...

Страница 283: ...ions The values for this parameter are as follows Speech If the port is only going to be used for voice or you are unsure as to what this port will receive then set the value to Speech Audio 3 1Khz If this voice port is only going to receive data via a fax or modem set the connection mode to Audio 3 1Khz Connection Mode Reserved B Channel Ring Cadence Select MSN Secondary Ring Cadence Secondary Se...

Страница 284: ...s B2 Channel B2 is reserved for voice calls Either Either channel will be reserved for voice only depending on the usage of the channels Parameter Ring Cadence Default Ring2 Options Ring2 Ring1 Ring3 RingRing Function Ring cadence is the sound the telephone attached to the voice device makes when a call is received Instructions The option is useful for identifying different types of incoming calls...

Страница 285: ...y Ring Cadence Default Ring2 Options Ring2 Ring1 Ring3 RingRing Function This option allows a different ring cadence to be specified for the MSN SET in the Secondary Select MSN parameter Instructions For information on the values that you can specify here refer to the Ring Cadence option above Parameter Secondary Select MSN Default Blank Options A valid MSN Function This parameter allows you to sp...

Страница 286: ...f Function Allows or disallows voice services Instructions Voice services are provided by your ISDN supplier They include options like Call Waiting and Call Holding Parameter Bump Data Default On Demand Calls Options On Demand Calls On Demand Calls CLI On CLI Never Always Function Specifies when to bump or drop a data call to make way for a voice call Instructions There are several values for this...

Страница 287: ...ata call will be dropped to make way for the voice call Never A data call will never be dropped to make way for a voice call Always A data call will always be dropped to make way for a voice call Parameter Bump CLI 1 Default Blank Options A valid telephone number Function Enter a telephone number that can be used with the Bump Data parameter page 8 8 to evaluate whether a data call should be dropp...

Страница 288: ... the Nautica Wizard window page 1 8 select the unit that contains the ISDN device you want to edit 2 Click on Advanced Devices Devices Configuration 3 The Devices table page 8 2 appears To edit the ISDN TA01 device do the following 1 In the Devices table page 8 2 select the ISDN TA01 device 2 Click on the Edit button 3 The Edit Basic Rate ISDN window Figure 8 4 appears Figure 8 4 Edit Basic Rate I...

Страница 289: ...ing as part of its data This is the CLI number that is matched by this parameter Instructions There are three CLI values that you can set depending on the level of security required Informational With Informational set when a call comes in CLI is ignored and the call passes straight to PAP CHAP authentication CLI Mode MSN Subaddress Incoming Reservation Outgoing Reservation CLIP CLIR Mode Switch T...

Страница 290: ...t path If the passwords are authenticated the call is allowed if they are not authenticated the call is dropped If no path is found for the incoming number the receiving unit will challenge the sending unit to identify itself The sending unit responds with its path name and passwords and the receiving unit matches these against the path name and passwords on one of its paths If no match is found t...

Страница 291: ...lt Blank Options A valid MSN Function MSN is an option you buy from your service provider Specifying an MSN in this field limits incoming data calls to this number only Data calls coming in on any other number are ignored by the unit Instructions The format of the MSN specified here is also dependent on your service provider Some providers require that the entire number is entered for example 2020...

Страница 292: ...tions The format of the subaddress specified here is also dependent on your service provider You must check with your provider as to how they require subaddress numbers to be entered Parameter Incoming Reservation Default 0 Options 0 1 2 Function The Nautica 200 has two channels that can be reserved for incoming data calls Specifying 1 or 2 here will reserve the channels If the option is left at 0...

Страница 293: ...er Never Function Calling Line Identification Presentation CLIP and Calling Line Identification Restriction CLIR define how CLI information is set up on the ISDN line Instructions The values here are Network The network presents the CLI depending on its own numbering plan User The CLI is presented as per pre defined MSNs Never The CLI is never presented Note Reserving both channels for outgoing da...

Страница 294: ...used by your local telephone company s central office Parameter Area Code Default Blank Options An area code Function The area code if you are based in North America Instructions Enter your area code only if you are in North America Parameter SPID 1 Default Blank Options A valid SPID number Function If you are using a Nautica 200 with a U ISDN interface North America you will need to specify the f...

Страница 295: ...Instructions The local number is the local directory number assigned by your ISDN supplier Parameter Local Number 2 Default Blank Options A valid local number Function This is the local number for the second B channel Instructions Local directory numbers are assigned by your ISDN supplier Note With certain switch configurations this option need not be set or be set for the first channel only SPID ...

Страница 296: ...here are several values here these are as follows Either Either incoming PAP or CHAP is accepted on this port PAP Only incoming PAP is required CHAP Only incoming CHAP is required BWPAP Incoming and outgoing PAP is required BWCHAP Incoming and outgoing CHAP is required BWEither Both incoming and outgoing PAP and CHAP are required None No security is required Custom Profile A profile you have desig...

Страница 297: ...e default Amend this option according to the information supplied by your service provider Parameter Numbering Plan Default Unknown Options Unknown ISDN Telephony Telephony 5ESS Data Telex National Std Private Use Built in Function The numbering plan for the ISDN line Generally Unknown is used for this parameter but some countries need to know the type of call that is passing along this ISDN line ...

Страница 298: ... Relay WAN Attributes Synchronous WAN Attributes To edit a WAN device in the Devices table Figure 8 1 select the WAN device to be edited and click on the Edit button Nautica Wizard allows you to change WAN devices only To set the more advanced features you need to use the router software BCC For more information on BCC refer to the online document Release 5 0 Reference Guide on the CD that came wi...

Страница 299: ...either directly or via a leased circuit SyncFrameRelay must be selected Parameter Default Path Type Default Nautica Options Nautica PPP RFC1490 Function Select the Path type from the following Nautica PPP RFC 1490 frame relay Parameter Speed Default 64000 Options A valid speed Function The speed in bits second of the interface Instructions Changing this parameter does not change the actual device ...

Страница 300: ...ter software BCC For more information on BCC refer to the online document Release 5 0 Reference Guide on the CD that came with your router To create Permanent Virtual Circuits PVCs once the device mode has been set to SyncFrameRelay exit Nautica Wizard and open BCC Refer to the online document Release 5 Reference Guide for more information on PVC management The Edit WAN Port window appears Figure ...

Страница 301: ...ype Default Nau Options Nau PPP RFC1490 Function Select the path type from the following Nau Nautica PPP Point to Point RFC1490 frame relay Parameter Speed Default 64000 Options A valid speed Function The speed in bits second of the interface Instructions Changing this parameter does not change the actual device speed which is determined by the attached DCE clock rate This parameter should be alte...

Страница 302: ...AN device to be edited and click on the Edit button Asynchronous Mode is used if you are connecting your WAN port to an external modem The Edit WAN Port window appears Figure 8 7 Edit WAN Port Window In the table below click on the parameter for which you require further assistance Mode Default Path Modem Speed AT Init String ATD String ATH String ATA String ...

Страница 303: ...o an external modem Parameter Default Path Default Nautica Options Nautica PPP RFC1490 Function Select the path type from the following Nautica PPP Point to Point RFC1490 Frame Relay PPP should be selected if the mode is set to Async Parameter Modem Default None Options None DTR AT Function Specifies the type of external modem you are using If DTR is set here then the modem will call a pre program...

Страница 304: ...ring Function This is the AT initialisation string for your modem For example you could enter at f here You need to refer to the AT command set for your modem This is usually included with the modem documentation Parameter ATD String Function The AT dial string for example atdt You need to refer to the AT command set for your modem This is usually included with the modem documentation Parameter AT...

Страница 305: ...evice Settings 118814 D Rev 00 8 27 Parameter ATA String Function The AT answer string for example ata You need to refer to the AT command set for your modem This is usually included with the modem documentation ...

Страница 306: ...B channels to virtual WAN ports Using fractional mode you can specify which channels you want attached to which WAN It is also possible to attach multiple B channels to a WAN port increasing the available bandwidth of the port The Nautica Wizard allows you to set the PRI device to Fractional but to amend fractional settings and map B channels it is necessary to use BCC the router software Refer to...

Страница 307: ...s 118814 D Rev 00 8 29 PRI Mode To edit a PRI device click on the PRI device in the Devices table Figure 8 1 and then click on the Edit button The Edit Primary Rate ISDN window appears Figure 8 8 Edit Primary Rate ISDN Window ...

Страница 308: ...three CLI values that you can set depending on the level of security required Informational With Informational set when a call comes in CLI is ignored and the call passes straight to PAP CHAP authentication CLI Mode MSN Subaddress Incoming Reservation Outgoing Reservation CLIP CLIR Mode Default PPP Profile Switch Type BC Map Mode Channels Type of Number Numbering Plan Frame Type Long Haul FDL Type...

Страница 309: ... path If the passwords are authenticated the call is allowed if they are not authenticated the call is dropped If no path is found for the incoming number the receiving unit challenges the sending unit to identify itself The sending unit responds with its NodeID and its passwords The receiving unit matches the NodeID against a path name and then matches the passwords If no match is found the call ...

Страница 310: ...ime of installation Parameter MSN Default Blank Options A valid MSN Function MSN is an option you buy from your service provider Specifying an MSN in this field limits incoming data calls to this number only Data calls coming in on any other number are ignored by the unit Instructions The format of the MSN specified here is also dependent on your service provider Some providers require that the en...

Страница 311: ...e subaddress specified here is also dependent on your service provider You must check with your provider as to how subaddress numbers should be entered Parameter Incoming Reservation Default 0 Options A valid number of channels Function Each ISDN connection has two channels that can be reserved for incoming data calls Specifying a number here will reserve that many channels If the option is left a...

Страница 312: ...equired Parameter CLIP CLIR Mode Default Network Options Network User Never Function Calling Line Identification Presentation CLIP and Calling Line Identification Restriction CLIR define how CLI information is set up on the ISDN line Instructions The values here are Network The network presents the CLI depending on its own numbering plan User The CLI is presented as per pre defined MSNs Never The ...

Страница 313: ...P is required CHAP Only incoming CHAP is required BWPAP Incoming and outgoing PAP is required BWCHAP Incoming and outgoing CHAP is required BWEither Both incoming and outgoing PAP and CHAP are required None No security is required Custom Profile A profile you have designed yourself will be used To design your own PPP profiles refer to Chapter 9 Parameter Switch Type Default NATISDN2 Options NATISD...

Страница 314: ...atch the number of channels supplied by your service provider Parameter Type of Number Default Network Options Unknown International National Network Specific Subscriber Abbreviated Use Built In Function Defines the type of number style used Network is the default Amend this option according to the information supplied by your service provider Parameter Numbering Plan Default Network Options Unkno...

Страница 315: ...d in North America It specifies whether you are running a Customer Service Unit CSU Instructions Your service provider advises you of the Long Haul status for your line Parameter FDL Type Default ANSI Options ANSI AT T Function Facility Data Link FDL is used when the Frame Type is set to Extended Super Frame ESF to provide an extra messaging channel for statistical purposes Instructions The option...

Страница 316: ...de Default b8zs Options b8zs AMI Function Specifies the encoding used on the data transmitted and received across the line Instructions In North America b8zs is the most common option for this parameter Your service provider advises you of the line code for your line Parameter Line Length Default 0 25 Options 0 25 26 65 66 100 101 135 136 165 166 185 186 210 Function Alters the shape of the transm...

Страница 317: ...then click on the Edit button The Edit Primary Rate ISDN window appears Figure 8 9 Edit Primary Rate ISDN Window To change a PRI device to Fractional the only parameter required is Mode Change the mode to Fractional and click on OK Note If you change the mode to Fractional you need to reboot the unit to ensure the change takes effect page 1 44 ...

Страница 318: ...rts against which B channels can be mapped Figure 8 10 Device Table with Fractional PRI In the table below click on the parameter for which you require further information CLI Mode MSN Subaddress Incoming Reservation Outgoing Reservation CLIP CLIR Mode Default PPP Profile Switch Type BC Map Mode Channels Type of Number Numbering Plan Frame Type Long Haul FDL Type Line Build Out Line Code Line Leng...

Страница 319: ...ts PAP CHAP passwords The receiving unit matches this information against the passwords set up on an existing path If the passwords are not matched the call is dropped If the passwords do match then the call is accepted Advisory With this value set for CLI an incoming call is automatically matched against an existing path that contains the CLI number If the path exists then authentication proceeds...

Страница 320: ... set up on a path in the receiving unit If no match is made the call is immediately dropped If a match is found then authentication will take place Parameter Mode Default PRI Options PRI Fractional Function The type of connection PRI the default is used for standard PRI ISDN switched circuits The other option is Fractional page 8 39 Instructions Setting this option to Fractional will remove the D ...

Страница 321: ...equire only the MSN itself for example 6 or 06 You must check with your service provider as to how they require MSNs to be entered Parameter Subaddress Default Blank Options A valid subaddress Function Subaddressing is an option similar to MSNs that you buy from your service provider Specifying a subaddress in this field limits incoming data calls to this number only Data calls received for any ot...

Страница 322: ...quired Parameter Outgoing Reservation Default 0 Options A valid number of channels Function Each ISDN port has two channels that can be reserved for outgoing data calls Specifying a number here will reserve that many channels If the option is left at 0 then all the channels are used for outgoing data calls as required Note Reserving all channels for incoming data calls will mean that the unit can ...

Страница 323: ...ever The CLI is never presented Parameter Default PPP Profile Default Either Options Either PAP CHAP BWPAP BWCHAP BWEither None Custom Profile Function Specifies the default PPP profile that will be used on this ISDN port for incoming calls The PPP profile allows for extra security on the unit Instructions There are several values that you can set Either Either incoming PAP or CHAP is required on ...

Страница 324: ... One to One Options One to One None All to One Unstructured Configure Fract Circ Switched Function With Fractional mode turned on it is possible to map B channels to specific WAN ports In this way a point to point link rather than an ISDN link is created More than one channel can be mapped to a WAN port The default value here of One to One means that one B channel is mapped to one WAN port To incr...

Страница 325: ...sed on Nautica to Nautica connections Configure Each channel is manually directed to a WAN port Parameter Channels Default 30 Options A valid number of channels equal to or less than the number of keyed channels Function Sets the number of channels in use by the router This should match the number of channels supplied by your service provider Parameter Type of Number Default Network Options Unknow...

Страница 326: ... know the type of call that is passing along this ISDN line In these cases select the correct option Parameter Frame Type Default Crc4 Options CRC4 NONCRC4 ESF CRC6 ESF F4 F12 F72 D4 Function The type of Frames used This option is specified by your service provider Parameter Long Haul Default Yes Options Yes No Function This parameter is only used in North America It specifies whether you are runn...

Страница 327: ...e this to run HDLC only Parameter Line Build Out Default 0db Options 0db 7 5db 15db 22 5db Function If Long Haul is set to Yes this parameter changes the pulse shape sent to the switch Instructions Your service provider advises you of the line build out for your line Parameter Line Code Default b8zs Options b8zs AMI Function Specifies the encoding used on the data transmitted and received across t...

Страница 328: ...ide Parameter Line Length Default 0 25 Options 0 25 26 65 66 100 101 135 136 165 166 185 186 210 Function Alters the shape of the transmitted data if the Long Haul parameter is set to No Instructions Your service provider advises you of the line code for your line ...

Страница 329: ...raded When new device software is released it is placed on the following web page http support baynetworks com software router nauticars html Copy this software into a directory onto your PC To download the software to a new device 1 Select the router in the Nautica Wizard window Figure 8 11 Nautica Wizard Window 2 Click on Advanced Devices Download Device Specific Software 3 The Device Selection ...

Страница 330: ...e Guide Figure 8 12 Device Selection Window The Device Selection window is broken down into sections In the table below click on the section for which you require further assistance IP Address Select Download File Supported Devices Device List Download Button ...

Страница 331: ...ifferent router it is possible to change the IP address here without cancelling and going back into Nautica Wizard To change the IP address 1 Click on the Change IP Address button 2 Enter the new address in the format xxx xxx xxx xxx 3 Click on the Accept button If the IP address is entered incorrectly the Device Selection window cannot show the list of devices in the router Select Download File T...

Страница 332: ...b Figure 8 15 Open Window 3 Select the device software file and click on the Open button Supported Devices The Supported Devices section of the Select Devices window appears as follows Figure 8 16 Devices Selection Supported Devices The Supported Devices section displays all the devices available in the router In Figure 8 16 only a Basic Rate TA is shown as the IP address points to a Nautica Marli...

Страница 333: ...e devices in the router unless you select a specific supported device page 8 54 If you have selected a specific device only devices of that type are displayed in the list Select the individual device that you wish to upgrade Download Button After all the selections have been made clicking on the download button loads the new software into the selected device When the software is downloaded it is n...

Страница 334: ......

Страница 335: ... PAP or Challenge Handshake Authentication Protocol CHAP Profiles allow you to Enable security measures such as the Password Authentication Protocol PAP and the Challenge Handshake Authentication Protocol CHAP Take advantage of features such as Bandwidth Allocation Control Protocol BACP and Multilink PPP MPPP This chapter includes the following sections PPP Profile Table page 9 2 Static PPP Profil...

Страница 336: ...d to open the PPP Profile table The table displays the default profiles and also any custom profiles that have been set up on the router To display the PPP Profile table do the following 1 Select a router in the Nautica Wizard window Figure 9 1 Nautica Wizard Window 2 Click on Advanced PPP Profiles 3 The PPP Profile table appears Figure 9 2 ...

Страница 337: ...of preset security and bandwidth features page 9 6 If these profiles do not meet your requirements you can add your own profiles page 9 8 In the table below click on the item in the PPP Profile table for which you require further information Profile List OK Button Edit Button Add Button Delete Button Refresh Button ...

Страница 338: ...tructions Click on this button to close the PPP Profile table and return to the Nautica Wizard window Parameter Edit Button Function Allows you to edit existing static and custom profiles Instructions To edit a profile Select a profile in the PPP Profile table Figure 9 2 Click on the Edit button or double click the profile name When you edit a static profile you can only view the displayed informa...

Страница 339: ... your own custom profiles refer to page 9 8 Parameter Delete Button Function Allows you to delete custom profiles Instructions To delete a custom profile select it in the PPP Profile table Figure 9 2 and then click on the Delete button If you select a static profile and click on the Delete button an error message appears Figure 9 3 PPP Profile Error Message It is not possible to delete or modify s...

Страница 340: ...ws the static PPP profiles You can add these to a path Chapter 3 or an ISDN port Chapter 10 Each profile offers a different level of security and bandwidth control Click on the profile for which you require further information For details on the default profile attributes refer to page 9 9 Parameter Either Function Either incoming CHAP or incoming PAP is requested on incoming calls MultiLink Enabl...

Страница 341: ...able and Fragmentation are all enabled Parameter BWCHAP Function Incoming and outgoing BothWay CHAP is requested MultiLink Enable Short Sequences BACP Enable and Fragmentation are all enabled Parameter BWEither Function Both incoming and outgoing BothWay CHAP and PAP are requested MultiLink Enable Short Sequences BACP Enable and Fragmentation are all enabled Parameter None Function No security is ...

Страница 342: ... bandwidth allocation you can create your own custom PPP profiles and assign them as normal To create your own profile 1 Select a router in the Nautica Wizard window Figure 9 1 2 Click on Advanced PPP Profiles 3 Click on the Add Button in the PPP Profile table Figure 9 2 4 The Add PPP Profiles Configuration window appears Figure 9 4 Figure 9 4 Add PPP Profiles Configuration Window ...

Страница 343: ...change any of the values You can only change the values for profiles you create yourself page 9 8 To view the attributes for a profile 1 Select a router in the Nautica Wizard window Figure 9 1 2 Click on Advanced PPP Profiles 3 In the PPP Profile table Figure 9 2 either select a profile to edit page 9 4 or click on the Add Button 4 The PPP Profile Configuration window appears Figure 9 4 Name Type ...

Страница 344: ...nter a name that you will recognize The name is the profile you assign to a path Chapter 3 or the ISDN port Chapter 10 It also appears in the PPP Profile table Figure 9 2 Parameter Type Default Static Default Profile or Custom Custom Profile Options This parameter is system set and cannot be amended Function Specifies whether a profile is default static or user generated custom Name Type PAP Enabl...

Страница 345: ...er CHAP Enable Default Enabled Options Enabled Disabled Function Enables or disables CHAP authentication Instructions With this parameter enabled CHAP authentication is requested as part of the initial call security With CHAP enabled the CHAP secrets set up on the individual paths are used to allow or disallow a call For more information about CHAP refer to the Concepts section of the Nautica Wiza...

Страница 346: ... None No authentication is required by the unit Bothway Authentication is required on both incoming and outgoing calls Parameter MultiLink Enable Default Enabled Options Enabled Disabled Function Enables or disable Multilink PPP MP Instructions With this option enabled the router tries to negotiate MP to allow for Bandwidth on Demand When the threshold limits are reached for a path MP brings up a ...

Страница 347: ...e numbers to be used Parameter BACP Enable Default Enabled Options Enabled Disabled Function Enables or disables Bandwidth Allocation Control Protocol BACP Instructions BACP can be used to negotiate extra bandwidth but even with BACP disabled it is possible to obtain extra bandwidth using MP The unit receiving the call supplies a BACP callback number to the unit making the call This calling unit d...

Страница 348: ...s MP in PPP when sending data to a remote BayRS router Instructions If Multilink PPP MP is enabled and you are communicating with a BayRS router this option must be enabled Encapsulation wraps the MP packet in PPP allowing the BayRS router to receive the data correctly Parameter Maximum Received Unit Default 1500 bytes Options A value in bytes from 0 to 1580 Function The largest packet size in byt...

Страница 349: ...sponse has been lost Parameter Echo Timeout Default 6 seconds Options A time in seconds from 0 to 4294967 Function Specifies the time in seconds after which LCP attempts to re establish a connection if no response has been received from the remote unit This option works in conjunction with the Restart Timeout attribute LCP echos are sent every six seconds to ensure that the PPP link is still alive...

Страница 350: ... challenge is made by the unit The time entered here represents the amount of time after which a CHAP challenge may be sent to a remote unit on active PPP connections Setting the time to 0 disables CHAP re challenges Instructions Enter a time value in seconds Note Some clients particularly Microsoft Dial Up Networking Services may not support CHAP re challenges in which case this option needs to b...

Страница 351: ...u allows you to place a call to an ISDN number and configure MSNs VPNs and ISDN callbacks This chapter contains the following sections Calling ISDN Numbers page 10 2 MSN page 10 5 Callback page 10 11 VPN page 10 17 Timebands page 10 22 ISDN History page 10 30 ISDN Statistics page 10 32 ISDN Autocall page 10 37 ISDN Charges page 10 40 ...

Страница 352: ...ine or set up the way ISDN calls are to work it is necessary to open the Edit ISDN Calls Configuration window Figure 10 2 To open the window 1 Select a router in the Nautica Wizard window Figure 10 1 Nautica Wizard Window 2 Click on Advanced ISDN Calls 3 The Edit ISDN Calls Configuration window Figure 10 2 appears ...

Страница 353: ... 118814 D Rev 00 10 3 Figure 10 2 Edit ISDN Call Configuration Window Click on the parameter in the table below for which you require further information ISDN Number Make Call Button Clear Call Information Window ...

Страница 354: ...number Instructions If you want to make a manual ISDN call enter the number to be called here no spaces Parameter Make Call Button Function Calls a number specified in the ISDN Number field Parameter Clear Call Function Cancels a call to the number specified in the ISDN Number field Parameter Information Window Function As the call is connecting trace information is displayed in this window enabli...

Страница 355: ...was 123450 the number is now broken down into the following numbers Now when an ISDN call is received by the Nautica router it is presented with the CLI of the caller and a number representing the MSN required by the caller The MSN portion of this information changes depending on the service provider you are using Some providers will show only the MSN 0 to 9 others will show two digits 00 to 09 an...

Страница 356: ...it in the main Nautica Wizard window page 1 8 2 Click on Advanced ISDN MSN Services 3 The ISDN MSN table Figure 10 3 appears Figure 10 3 ISDN MSN Table The MSN table lists all the current MSNs In the table below click on the option for which you require more information Number Service Destination OK Button Edit Button Add Button Delete Button Refresh Button ...

Страница 357: ... IP address of the tunnel terminator page 10 10 Parameter OK Button Function Click on this button to close the MSN table and return to the Nautica Wizard window Parameter Edit Button Function Clicking on the Edit button with an MSN selected allows you to change the details of that MSN page 10 8 Parameter Add Button Function Clicking on the Add button allows you to add new MSN numbers to the router...

Страница 358: ...e Refresh button Configuring MSNs Selecting an MSN and clicking on the Edit Button or clicking on the Add Button in the MSN table Figure 10 3 causes the Add or Edit ISDN MSN window to appear Figure 10 4 Figure 10 4 Add and Edit MSN Windows In the table below click on the parameter for which you require further information MSN Number Service Destination Data Over Voice ...

Страница 359: ...sociates the specified MSN to the address typed into the Destination field This allows the unit to originate a PPTP tunnel and terminate the tunnel at the specified address PPTP allows PPP data to be sent across varying protocols without the need for data translation or encapsulation For more information on PPTP refer to the Concepts section of the online Help files The digital option is designed ...

Страница 360: ...P host that will terminate the PPTP tunnel If the service type is Digital a destination address is not required Parameter Data Over Voice Default Disabled Options Disabled Enabled Function This parameter is only relevant if the Service parameter is set to PPTP Instructions When disabled incoming voice calls to this PPTP MSN are terminated via a modem When enabled all incoming voice calls to this P...

Страница 361: ...page 10 15 and the central site calls this number back along an associated path refer to Dial back Path page 10 15 In this way the central site is charged for the call and not the remote user Viewing Callbacks To enter the Callback window and display the current callback list do the following 1 Select a unit in the main Nautica Wizard window page 1 8 2 Click on Advanced ISDN Callbacks 3 The ISDN C...

Страница 362: ...low click on the parameter for which you require further assistance Parameter Callback Number Function The incoming number against which a callback is made Callback Number Path IP Address OK Button Edit Button Add Button Delete Button Refresh Button Note The line must be provisioned for CLI for this option to work ...

Страница 363: ... Function Edits existing callbacks page 10 14 You must select a callback in the Callback table Figure 10 5 before clicking on this button Parameter Add Button Function Adds a new callback page 10 14 Parameter Delete Button Function Deletes existing callbacks You must select a callback in the Callback table Figure 10 5 before clicking on this button Parameter Refresh Button Function Refreshes the i...

Страница 364: ...Advanced ISDN Callbacks 3 Select the callback to edit 4 Click on the Edit button 5 The Edit Add ISDN Callback window will appear Figure 10 6 Adding Callbacks To add a callback number 1 Select a router in the Nautica Wizard window Figure 10 1 2 Click on Advanced ISDN Callbacks 3 Click on the Add button 4 The Edit Add ISDN Callback window appears Figure 10 6 Figure 10 6 Edit Add ISDN Callback ...

Страница 365: ...er into this field the full telephone number from the client you wish to use the Callback service This is the number Nautica Wizard will match in the Callback table Figure 10 5 and then call back along the dial back path Parameter Dial back Path Default Blank Options A valid path name Function The path along which the unit will call back the user dialling in with the incoming number Instructions E...

Страница 366: ...guration Wizard Reference Guide Parameter IP Address Default Blank Options A valid IP address Function An IP address that is to be called back Instructions If you do not enter a path you can enter an IP address that is to be called back ...

Страница 367: ...th which telephone service provider For example it may be necessary to route international calls through one carrier while national calls are routed through another carrier Viewing VPNs To display the list of current VPNs do the following 1 In the Nautica Wizard window page 1 8 select the unit for which you want to set up VPNs 2 Click on Advanced ISDN VPN Services 3 The VPN table Figure 10 7 appea...

Страница 368: ...meter VPN Function The VPN code that is inserted before the telephone number Parameter OK Button Function Click on the OK button to close the VPN table Figure 10 7 and return to the Nautica Wizard window Figure 10 1 Parameter Edit Button Function Edits a selected VPN page 10 19 in the VPN table Figure 10 7 Parameter Add Button Function Adds a new VPN page 10 19 Number VPN OK Button Edit Button Add...

Страница 369: ...ollowing 1 Select a router in the Nautica Wizard window Figure 10 1 2 Click on Advanced ISDN VPN Services 3 In the VPN table Figure 10 7 select the VPN to edit 4 Click on the Edit button at the bottom of the VPN table 5 The Edit VPN window appears Figure 10 8 Adding a VPN To add a VPN do the following 1 Select a router in the Nautica Wizard window Figure 10 1 2 Click on Advanced ISDN VPN Services ...

Страница 370: ...The search string Nautica Wizard will associate with a particular VPN Instructions This is the number dialled that needs to be associated with a particular VPN For example from Europe you may want all calls to the USA to go through a specific carrier In this case the number entered here would be 001 calls to the USA from Europe start with 001 It may also be prudent to route national calls through ...

Страница 371: ...he Number field For example the account code for the cable operator you want to attach to national calls may be 132 In this case the VPN would read 01 132 All national calls 01 in the UK will be prefixed with 132 the access number with the carrier With VPNs established when a number string is recognized the telephone call is dialled using the VPN account number re routing designated calls through ...

Страница 372: ...eband is defined and any events for that timeband are disabled for example a backup not happening on a specific day of the week then another timeband must be set up allowing this event when required A timeband is inactive if it does not positively allow an event For example if a timeband disabled backup for Monday but the timeband is not active on a Tuesday another timeband must be created allowin...

Страница 373: ...2 Click on Advanced ISDN Timebands 3 The ISDN Timebands table appears Figure 10 9 ISDN Timebands Existing timebands are displayed in this window The data is displayed in columns In the table below click on the column for which you require further information Name Days Start End Allowed OK Button Edit Button Add Button Delete Button RefreshButton ...

Страница 374: ...r Start Function The start time for this timeband Parameter End Function The end time for this timeband Parameter Allowed Function The options allowed on this timeband Parameter OK Button Function Click on this button to close the ISDN Timebands table Parameter Edit Button Function To edit an existing button select the timeband in the ISDN Timebands table Figure 10 9 then click on the Edit button ...

Страница 375: ...the Add button For more information on adding timebands refer to page page 10 26 Parameter Delete Button Function To delete an existing timeband select it in the ISDN Timebands table Figure 10 9 then click on the Delete button Parameter RefreshButton Function To refresh the ISDN Timebands table Figure 10 9 click on the Refresh button ...

Страница 376: ...he Edit button To add a new timeband click on the Add button in the ISDN Timebands table The Add ISDN Timebands window appears Figure 10 10 Add ISDN Timebands Window In the table below click on the parameter for which you require further information Name Days Start End Allow Backup Allow Demand Allow Automatic Allow Manual Backup Time Allocated Demand Time Allocated Auto Time Allocated Manual Time...

Страница 377: ...on which the timeband is active Days are entered using the first two letters of their name separated by a colon The last day in the list must also end in Parameter Start Default 09 00 Options A valid start time Function The time in hours minutes and seconds that the timeband will start on each day Use the 24 hour clock Parameter End Default 17 00 Options A valid end time Function The time in hours...

Страница 378: ...tions Disabled Enabled Function Extra bandwidth on demand calls can be allowed or disallowed here The default option is Disabled This option is for switched or leased circuit lines Parameter Allow Automatic Default Disabled Options Disabled Enabled Function The settings here determine whether automatic switched circuit calls can be made Parameter Allow Manual Default Disabled Options Disabled Enab...

Страница 379: ...o Time Allocated Default 0 0 0 Function The amount of time hours mins secs allocated to automatically made switched circuit calls 0 0 0 means this option is turned off Parameter Manual Time Allocated Options A valid time Function The amount of time hours mins secs allocated to manual calls 0 0 0 means this option is turned off Note If you want a timeband to run over midnight you need to set up two...

Страница 380: ...you want to check 2 Click on Advanced ISDN History 3 The ISDN Call History table appears Figure 10 11 Figure 10 11 ISDN Call History Table If ISDN calls have been placed on the router in this session they are displayed here The information is displayed in columns In the table below click on the column or button for which you require further information Destination Type No Calls Total Longest Short...

Страница 381: ...dow page 10 2 Parameter No Calls Function The number of calls made to this destination Parameter Total Function The total time in hh mm ss spent calling this destination Parameter Longest Function The time in hh mm ss of the longest call to the destination Parameter Shortest Function The time in hh mm ss of the shortest call to the destination Parameter Total Charges Function The total call charge...

Страница 382: ...elected entry from the ISDN Call History window Parameter RefreshButton Default Updates the information displayed in the ISDN Call History window ISDN Statistics There are times when you need to know what is happening to the ISDN ports on your router The ISDN Statistics window shows such information To display ISDN statistics 1 Select a router in the Nautica Wizard window Figure 10 1 2 Click on Ad...

Страница 383: ...Figure 10 12 ISDN Ports Table The information displayed in the ISDN Ports table is in columnar format In the table below click on the column or button for which you require further information Name Destination State Uptime BChan RCode Rate OK Button Cancel Button Refresh Button ...

Страница 384: ...The telephone number being called on this port Parameter State Function The state of the port The values displayed here are Answered The call is being answered Called The number has been called Calling The number is being called Idle The port is currently idle Disabled The port is disabled It can be enabled once more by changing the ISDN TA01 settings in the Advanced Device page 8 10 Reset The por...

Страница 385: ... Result or Clearing codes Parameter Rate Function The rate at which data is being transferred Parameter OK Button Function Closes the ISDN Statistics window and returns you to the Nautica Wizard window Parameter Cancel Button Function Selecting an ISDN port and clicking on the Cancel button cancels any calls along that port Parameter Refresh Button Function To instantly refresh the data displayed ...

Страница 386: ... being delivered in an existing channel 16 Normal Call Clearing 17 User Busy 18 No User Responding 19 No Answer from User user alerted 21 Call Rejected 22 Number Changed 26 Non selected User Clearing 27 Destination out of order 28 Invalid Number Format 29 Facility Rejected 30 Response to status enquiry 31 Normal unspecified 34 No circuit Channel not Available 38 Network Out Of Order 41 Temporary F...

Страница 387: ...pears 50 Requested Facility Not Subscribed To 63 Service or Option not available 84 Call Identity in use 88 Incompatible Destination 90 Destination Address incomplete 102 Recovery on Timer Expiry 127 Internetworking Unspecified Table 10 2 ISDN Internal Clearing Codes Reason Description 128 143 Call Control Timer Expiry 145 Data Link Failure Cable unplugged 146 TEI or SPID USA negotiation Failure 1...

Страница 388: ...Nautica Configuration Wizard Reference Guide Figure 10 13 ISDN Autocall Packet Decoder Window In the table below click on the parameter for which you require further assistance Index Decoded Packet Data OK Button Get Button ...

Страница 389: ...e SAdr The source IP address DAdr The destination IP address DLen The length of the packet at the destination SPrt The source port DPrt The destination port Parameter OK Button Function Click on the OK button to close the ISDN Autocall Packet Decoder window Figure 10 13 and return to the Nautica Wizard window Figure 10 1 Parameter Get Button Function To refresh the data displayed in the ISDN Autoc...

Страница 390: ...he cost for the last ten calls made on the router To display the ISDN call charges 1 Select a router in the Nautica Wizard window Figure 10 1 2 Click on Advanced ISDN Charges 3 The ISDN Call History table appears Figure 10 14 ISDN Call History Table In the table below click on the parameter for which you require further assistance Number Type Charges Time Unit Status OK Button Refresh Button ...

Страница 391: ...unction The charge for this call Parameter Time Unit Function The time the call lasted in seconds Parameter Status Function The state of the port The values displayed here are Answered The call is being answered Called The number has been called Calling The number is being called Idle The port is currently idle Disabled The port is disabled It can be enabled once more by changing the ISDN TA01 set...

Страница 392: ...tton Function Click on the Refresh button to refresh the data in the ISDN Call History window Figure 10 14 Blacklist When calls fail on paths the paths are added to the Blacklist table for the time specified by the Blacklist timeout parameter set in the Edit System window Chapter 2 Nautica Wizard allows you to view and delete paths on the blacklist 1 Select a router in the Nautica Wizard window Fi...

Страница 393: ...ISDN Destination Blacklist table Figure 10 15 appears Figure 10 15 ISDN Destination Blacklist Table In the table below click on the parameter for which you require further assistance Destination Reason OK Button Delete Button Refresh Button ...

Страница 394: ... Reason Function The reason the path is on the blacklist Parameter OK Button Function Closes the ISDN Destination Blacklist table Parameter Delete Button Function Removes a selected path from the blacklist Parameter Refresh Button Function Refreshes the data in the ISDN Destination Blacklist table ...

Страница 395: ...u to specify exactly what sort of bridge traffic is allowed into the router This chapter contains the following sections The Frame Filter Table page 11 2 Editing Frame Filters page 11 7 Adding Frame Filters page 11 12 Bridge Autocalls page 11 17 Spanning Tree page 11 21 Frame Filter Addresses page 11 24 ...

Страница 396: ...ame Filter Table To view existing frame filters or to add new filters 1 Select a unit in the Nautica Wizard window Figure 11 1 The Nautica Wizard Window 2 Click on Advanced Bridge frame filters 3 The Frame Filter table appears Figure 11 2 Figure 11 2 Frame Filter table ...

Страница 397: ...n frame filters are applied they are generally applied in groups rather than individually To make this easier the filters are grouped into profiles Profiles can contain up to 100 frame filters numbered from 0 to 99 Profile numbers themselves range from 0 to 5 Parameter ID Function Identification number Instructions This is the number of the frame filter within the profile There can be up to 100 fi...

Страница 398: ...re is a number in bytes Length is the amount of the incoming packet against which the filter is matched Parameter Offs Function Offset Instructions Length tells you how much of a packet is to be matched against this filter offset tells you where this matching begins in the packet As with Length it is a number in bytes Parameter Mask Function The mask is applied by the filter to the filtered portio...

Страница 399: ...ge 11 11 Parameter En Function Enable Instructions If this column reads Enable the filter is used when a profile group is applied to a packet Parameter Match Function If this option is enabled the packet is forwarded if a match is made If no match is made the packet is dropped Parameter Next Function If this option is enabled after this filter has run the next filter in the profile group that is e...

Страница 400: ...1 12 in the frame filter Table Figure 11 2 click on the Add button Instructions Click on the Add button to make a new frame filter Parameter Delete Button Function To delete an existing frame filter in the frame filter table Figure 11 2 select the filter to delete by clicking on it once then click on the Delete button Instructions Click on the Delete button to delete the selected filter Parameter ...

Страница 401: ...frame filter table or click on it once and then click on the Edit button The Edit frame filter Configuration window appears Figure 11 3 Edit frame filter Configuration In the table below click on the parameter for which you require further information Profile Number ID Length Offset Mask Value Type Enable Forward on Match And Next ...

Страница 402: ... Instructions The ID is the number of a filter within a profile group Parameter Length Options A valid length in bytes Function This parameter specifies the length of the packet to be matched Instructions Enter a valid length in bytes Using this parameter allows you to specify what portion of the packet needs to be matched for the filter to work Parameter Offset Options A valid offset in bytes Fun...

Страница 403: ... The filter is only applied to outgoing packets Bothway The filter works on both in and outgoing filters Call If a match is made with the packet an ISDN call is raised Parameter Enable Options Enable Disable Function Select this option to enable this filter Deselect it to disable the filter Parameter Forward on Match Options Enable Disable Function If this option is enabled the packet is forwarded...

Страница 404: ...e whole part just a section Applying a mask allows you to specify exactly which part of the frame specified by the offset and length you want to match Instructions For example within the byte shown below we only want to match on the first bit shown in red Masks are entered in hex format As shown in the example the portion of this byte that we want to match is in position 8 The hex value for this m...

Страница 405: ...t to match a value in position 8 of the first half of a byte The value that we want to match here is 0 The value entered into the Value parameter then is 00 This specifies that we want to match a zero against the first position of the byte as specified in the Mask parameter In this next example a mask value of 96 has been entered The mask specifies that we are checking positions 8 and 1 in the fir...

Страница 406: ...ick on Advanced Bridge frame filters 3 In the Frame Filter table Figure 11 2 click on the Add button 4 The Add frame filter Configuration window appears Figure 11 4 Add Frame Filter Configuration Window In the table below click on the parameter for which you require further information Profile Number ID Length Offset Type Enable Forward on Match And Next Mask Value ...

Страница 407: ...ers and IDs allows you to group filters together and have all the filters that are enabled in a group run consecutively using the And Next parameter Parameter Length Options A valid length in bytes Function This parameter specifies the length from the offset to be matched Instructions Enter a valid length in bytes Using this parameter allows you to specify what length of the packet needs to be mat...

Страница 408: ...ckets Out The filter is only applied to outgoing packets Bothway The filter works on both in and outgoing filters Call If a match is made with the packet an ISDN call is raised Parameter Enable Options Enable Disable Function Select this option to enable this filter Deselect it to disable the filter Parameter Forward on Match Options Enable Disable Function If this option is enabled the packet is ...

Страница 409: ...art just a section Applying a mask allows you to specify exactly which part of the frame specified by the offset and length you want to match Instructions For example within the byte shown below we only want to match on the first bit shown in red Masks are entered in hex format As shown in the example the portion of this byte that we want to match is in position 8 The hex value for this mask is 80...

Страница 410: ...t we want to match a value in position 8 of the first half of a byte The value that we want to match here is 0 The value entered into the Value parameter then is 00 This specifies that we want to match a zero against the first position of the byte as specified in the mask parameter In this next example a mask value of 96 has been entered The mask specifies that we are checking positions 8 and 1 in...

Страница 411: ...destination To display any autocalls that are already set up 1 Select a router in the Nautica Wizard Window 2 Click on Advanced Bridge Autocalls 3 The Bridge Autocall table Figure 11 5 appears Figure 11 5 Bridge Autocall Table In the table below click on the parameter for which you require further assistance Type Address OK Button Edit Button Add Button Delete Button Refresh Button ...

Страница 412: ... Parameter OK Button Function Click on OK to close the bridge Autocall table Parameter Edit Button Function Edits a selected Autocall For information on editing Bridge Autocalls refer to page 11 19 Parameter Add Button Function Adds a new Bridge Autocall Entry to the table For information on editing Bridge Autocalls refer to page 11 19 Parameter Delete Button Function Deletes a selected Bridge Aut...

Страница 413: ...ption if you are going to use this entry for general bridge information Parameter IP Function Select IP if you are going to use this entry to bridge IP Parameter MAC Address Instructions This parameter is only available if you selected MAC as your type Enter the MAC address that you want to call Parameter IP Address Instructions This parameter is only available if you selected IP as the type Enter...

Страница 414: ... makes an autocall if the IP address specified in the MAC Address parameter matches the IP address in the packet Setting ipinvert to yes makes an autocall if the two IP addresses do not match Instructions Change to yes to make a call if the IP address in the MAC Address parameter does not match the address in the packet received Parameter Path Default unknown Options A path name Function Specifies...

Страница 415: ...into service To set Spanning Tree parameters 1 Select a router in the Nautica Wizard window 2 Click on Advanced Bridge Spanning Tree 3 The Edit Spanning Tree Configuration window Figure 11 6 appears Figure 11 6 Edit Spanning Tree Configuration Caution It is not advisable to enable STP on a bridge that uses ISDN connections The time taken for STP to recognise that a new path has been added to the n...

Страница 416: ...lows you to enable or disable Spanning Tree on this router Instructions Select this parameter to enable Spanning Tree Parameter Priority Default 32768 Options A value from 0 to 65535 Function Helps the STP decide which bridge in the network is the root bridge If bridges have equal priority then the root bridge is decided on MAC address Instructions Enter a priority if required Enable Priority Hell...

Страница 417: ...abilises following a change before bridges once more forward changes Instructions Too long a delay may degrade network performance and too short a delay may result in duplicated frames due to inconsistencies in a bridge s picture of the network Parameter Max Age Default 20 Options A value in seconds from 0 to 65535 Function Determines the maximum age in seconds of a packet which if received is tre...

Страница 418: ...along which path these packets came To display the Bridge Mac table 1 Select a router in the Nautica Wizard window 2 Click on Advanced Bridge Addresses 3 The Bridge Mac table appears Figure 11 7 Bridge MAC Table The Bridge MAC table is comprised of 3 columns In the table below click on the parameter for which you require more help MAC Address Path Time Since Last Used OK Button Refresh Button ...

Страница 419: ...th along which the bridge packet came Parameter Time Since Last Used Instructions The time passed since this path and MAC address were last used Parameter OK Button Instructions Click on the OK button to close the Bridge MAC table and return to the Nautica Wizard window Parameter Refresh Button Instructions To instantly update the data displayed in the Bridge MAC table click on the Refresh button ...

Страница 420: ......

Страница 421: ...ote network and which router to use on that network As the router operates it can learn new routing information which is stored in the routing table for viewing editing and deleting Nautica routers also allow the filtering of IP information limiting which nodes may communicate and which may not This chapter contains the following sections IP Routes page 12 2 IP Filters page 12 10 Filter Port Numbe...

Страница 422: ...be called and the PPP security to be used A route is the way the router reaches that destination and contains information like the IP address of the remote network or host and the gateway the router must use to reach the remote network Viewing Routes To view IP routes do the following 1 Select a router in the Nautica Wizard window Figure 12 1 The Nautica Wizard Window 2 Click on Advanced IP Routes...

Страница 423: ...r there is only one route showing in the IP Routes table the route for LAN01 You cannot delete the LAN01 route it is a system generated route and points to the way to the local network As you start using your Nautica unit other routes appear in this table These are also system generated and point the way to other networks that you have called ...

Страница 424: ...on the item in the table below Parameter Address Function The IP address of the destination network Parameter Gateway Function The gateway to the remote network Parameter Path Function The path which is to be used with this route Parameter Cost Function The cost associated with this route Nautica routers always use routes with the lowest cost Address Gateway Path Cost Pri Type Age OK Button Edit B...

Страница 425: ...e Nautica Wizard window Parameter Edit Button Function To edit an existing static route select the route by clicking on it once in the IP Routes window Figure 12 2 then click on the Edit button For more information on editing routes refer to page 12 6 Parameter Add Button Function To add a new static route in the IP Routes window Figure 12 2 click on the Add button For more information on adding r...

Страница 426: ...ances you can create your own static routes Static routes remain in the IP Routes table They are the only routes you can add edit or delete 1 In the Nautica Wizard window Figure 12 1 click on the unit for which you want to add edit a route 2 Click on Advanced TCP IP Routes 3 To add a route click on the Add button 4 To edit a route select the route in the IP Routes table Figure 12 2 then click on t...

Страница 427: ... you wish to reach Parameter Gateway Default 0 0 0 0 Options A valid IP address Function This optional parameter represents the address of the unit that is acting as a gateway to forward data to its destination Instructions Enter into this parameter the valid IP address of the next hop unit to which data is forwarded for transmission IP Address Gateway Path Cost Proxy Arp Cul de sac Route Radius V...

Страница 428: ... parameter Function Displays the cost as determined by the routing protocol specified on the path see page 3 6 Instructions This parameter is generated by the unit once the route has been used It cannot be amended by the user unless the Advanced Manager Options have been enabled in the Edit System Settings window Figure 2 2 Parameter Proxy Arp Default Disabled Options Enabled or Disabled Function ...

Страница 429: ...rk that uses the same subnet as the local LAN If you set up a cul de sac route you must also select the Proxy Arp parameter Parameter Radius Virtual Path Route Default Disabled Options Disabled Enabled Function Allows the router to request a path name from a RADIUS server Instructions Leave the Path parameter at the default as this information is supplied by the server For more information on RADI...

Страница 430: ... information going to or received from IP addresses specified in the Advanced TCP IP Filters parameter will be rejected If IP filtering is set to Forward on Filter Match only information going to or received from IP addresses specified in Advanced TCP IP Filters will be forwarded Viewing Filters To view existing filters do the following 1 Select a router in the main Nautica Wizard window Figure 12...

Страница 431: ...ially the window is empty unless you add filters page 12 14 The data in the IP Filter table is displayed in columns For more information on these columns and also the buttons at the bottom of the table click on the relevant item in the table below Name Adder Port Drab Port Protocol Flags OK Button Edit Button Add Button Delete Button Refresh Button ...

Страница 432: ...on The second IP address in the filter pair Parameter Port Function The second port in the filter pair For more information on ports refer to page 12 15 Parameter Protocol Function The protocol if any that is to be filtered For more information on protocols refer to page 12 16 Parameter Flags Function The flags if any used with this filter For more information on flags refer to page 12 18 Paramete...

Страница 433: ...n Function To add a new filter in the IP Filter table Figure 12 4 click on the Add button For more information on adding filters refer to page 12 14 Parameter Delete Button Function To delete an existing filter in the IP Filter table Figure 12 4 select the filter to be deleted by clicking on it once then click on the Delete button Parameter Refresh Button Function To instantly update the informati...

Страница 434: ...lter in the IP Filter table Figure 12 4 click on the Add button 4 To edit an IP Filter select it in the IP Filter table Figure 12 4 then click on the Edit button 5 The Add Edit IP Filter Pairs window appears Figure 12 5 Add Edit IP Filter Pairs Windows For more information on a parameter in the Add Edit Filter Pairs window click on the heading in the table below Name IP Address A Mask Length Port ...

Страница 435: ...ress for the filter pair Instructions Enter a valid IP address into this filed This is the first IP address for the filter pair that will be rejected or forwarded according to the settings in Advanced System page 2 13 Parameter Port A Default Blank Options A valid port number Function Enter the port number for the filter to match For a list of valid ports refer to Table 12 1 at the end of this sec...

Страница 436: ...t number for the filter to match For a list of valid ports refer to Table 12 1 at the end of this section Instructions This is an optional parameter A value of 0 matches all ports Parameter Protocol Default None Options None icmp icmp tcp tcp udp udp ospf ospf Function To narrow down the filtering it is possible although not necessary to enter a protocol here The filtering will then only happen if...

Страница 437: ...ans NOT With this option set information passed between these IP addresses will only be matched if this protocol is NOT used UDP User Datagram Protocol With this option set information passed between these IP addresses will only be matched if this protocol is used As an example SNMP uses UDP UDP The exclamation mark here means NOT With this option set information passed between these IP addresses ...

Страница 438: ...ort Numbers Table 12 1 below lists all the port numbers for well known services as per RFC 1060 Assigned Numbers Table 12 1 Well Known Port Numbers Service Name Port Number Service Name Port Number echo 7 tcp daytime 13 udp echo 7 udp netstat 15 tcp discard 9 tcp qotd 17 tcp discard 9 udp quotd 17 udp systat 11 tcp chargen 19 tcp systat 11 udp chargen 19 udp daytime 13 tcp ftp data 20 tcp ftp 21 t...

Страница 439: ...nmp trap 162 udp hostnames 101 tcp print srv 170 tcp iso tsap 102 tcp vmnet 175 tcp dictionary 103 tcp load 315 udp x400 103 tcp vmnet0 400 tcp x400 snd 104 tcp sytek 500 udp csnet ns 105 tcp biff udp pop 109 tcp exec 512 tcp login 513 tcp acctslave 701 udp who 513 udp acct 702 udp shell 514 tcp acctlogin 703 udp syslog 514 udp acctprinter 704 udp printer 515 tcp elcsd 704 udp talk 517 udp acctinf...

Страница 440: ...kshell 544 tcp ingreslock 1524 tcp new rwho 550 udp maze 1666 udp remotefs 556 tcp nfs 2049 udp rmonitor 560 udp knetd 2053 tcp monitor 561 udp eklogin 2105 tcp garcon 600 tcp rmt 5555 tcp maitrd 601 tcp mtb 5556 tcp busboy 602 tcp man 9535 tcp acctmaster 700 udp w 9536 tcp mantst 9537 tcp rscs7 10007 udp bnews 10000 tcp rscs8 10008 udp rscs0 10000 udp rscs9 10009 udp gateway 10003 tcp rscsa 10010...

Страница 441: ...local LAN This information is statistical only but the addresses here can be deleted To view the ARP cache do the following 1 In the main Nautica Wizard window page 12 2 select the unit for which you wish to view the ARP cache 2 Click on Advanced TCP IP ARP Cache 3 The Bridge ARP Cache window will appear Figure 12 6 Figure 12 6 Bridge ARP Cache Window Addresses displayed here are cleared every 15 ...

Страница 442: ...ry here is blank then the device is on a remote network If the entry is aaaaaaaaaaaa then an ARP request has been sent but no reply has been received as yet If the entry is ffffffffffff then this is a broadcast in the local LAN Parameter OK Button Function Click the OK button to close the Bridge ARP Cache table Figure 12 6 and return to the Nautica Wizard window Parameter Delete Button Function To...

Страница 443: ...IP Operations 118814 D Rev 00 12 23 Parameter RefreshButton Function To instantly refresh the information in the Bridge ARP Cache window Figure 12 6 click once on the Refresh button ...

Страница 444: ...re held in the route cache table Entries in this table are re evaluated every 15 minutes To change the time between cache flushes amend the IP Cache Timeouts parameter in the System window To display the Route Cache table do the following 1 In the main Nautica Wizard window Figure 12 1 select the unit for which you wish to view the route cache 2 Click on Advanced TCP IP Route Cache 3 The IP Route ...

Страница 445: ...eway router to the destination address Parameter MAC Address Function The MAC address of the local destination host or gateway if the destination is on the LAN Parameter Packets Function Number of packets transferred for this route Parameter Byte Function Number of bytes transferred for this route Parameter Path Function The path over which the connection is routed Destination Gateway MAC Address ...

Страница 446: ...n to the Nautica Wizard window Parameter Delete Button Function To delete a route cache entry in the IP Route Cache window Figure 12 7 select the route to be deleted by clicking on it once then click on the Delete button Parameter Refresh Button Function To instantly update any of the information displayed in the IP Route Cache window Figure 12 7 click on the Refresh button ...

Страница 447: ...he Nautica 200 and Nautica CLAM IP do not support IPX This chapter includes the following sections Setting Up IPX page 13 2 IPX Routes page 13 5 IPX RIPs page 13 5 IPX Filters page 13 13 IPX SAPs page 13 19 IPX SAP Filters page 13 25 IPX RIP Cache page 13 32 IPX Default Route page 13 35 ...

Страница 448: ...eference Guide Setting Up IPX By default IPX is not enabled on your router To enable IPX 1 Select the router that is to use IPX in the Nautica Wizard window Figure 13 1 The Nautica Wizard Window 2 Click on Advanced System the Edit System window appears ...

Страница 449: ...PX routing frame so that it is checked as in Figure 13 2 4 Set the IPX Routing parameter to Enabled as well as this turns on the IPX stack Caution If the IP Enable parameter is de selected Nautica Wizard stops working To turn IP off set the IP Routing parameter in the Edit System window to Disabled ...

Страница 450: ...s here are as follows Enabled Turns on the IPX stack Disabled Turns off the IPX stack Restricted SAP SAPs are advertisements for services on the local network like printers and file servers On large networks your router can become clogged with constant SAP broadcasts Restricted SAP allows you to restrict the SAP broadcasts received by your unit to only those from servers you specify in the Advance...

Страница 451: ...fined filter into the Nautica router Any frames that match the filter will be dropped not received by the unit Fwd on Match Only allows frame types that match a predefined filter into the unit All other frames will be dropped IPX Routes As calls are placed on the unit IPX will learn the routes along which those calls have passed You may also create your own routes page 13 9 Displaying IPX Routes T...

Страница 452: ...igure 13 3 IPX Routes Table The information in this table is displayed in columns In the table below click on the parameter for which you require further information Net Node IPX Path Hops Ticks PRI Type Age OK Button Edit Button Add Button Delete Button RefreshButton ...

Страница 453: ...h this route is attached Parameter Hops Ticks Function Hops represents the number of routers passed through to reach this network Ticks is the time in ticks 1 18 seconds taken to reach this network Parameter PRI Function The priority of this route This is a system generated number and cannot be changed by the user Parameter Type Function This column contains a letter denoting the type of route In ...

Страница 454: ...n click on the Edit button For more information on editing IPX routes refer to page 13 9 Parameter Add Button Function To add a new static IPX route in the IPX Routes table Figure 13 3 click on the Add button For more information on adding new IPX routes refer to page 13 9 Parameter Delete Button Function To delete an existing static Type S route select the route in the IPX Routes table Figure 13 ...

Страница 455: ...k on the Add Button to create a new route Table 13 1 IPX Route Types Route Type Description Static S A manually created permanent route Path P A system created permanent route RIP R Learned by the IPX RIP protocol and is non permanent unless received over an ISDN path ISDN I Learned over an ISDN line and is semi permanent If the link is up and this route is not updated it will time out and eventua...

Страница 456: ...lick on the Edit Button 5 The Add Edit IPX RIP Route window appears Figure 13 4 Add Edit IPX RIP Route Windows The Add Edit IPX RIP Routes window displays the settings for the route selected in the IPX Routes table For more information on the parameters displayed in this window click on the option in the table below Net Node Hops Ticks Path Network Type Radius Virtual Path ...

Страница 457: ...This option is set up with the creation of the route Parameter Hops Default 1 Options A valid hop count Function The number here represents the number of routers passed through to reach this network Parameter Ticks Default 1 Function A system generated number Ticks is a time unit 1 18 of a second This parameter specifies how long in ticks it takes to reach the network Parameter Path Default A path...

Страница 458: ...The default network is 8022 Instructions The values for this parameter are as follows 8022 802 2 IPX 8023 802 3 IPX Ether Ethernet II IPX Parameter Radius Virtual Path Default Disabled Options Disabled Enabled Function Selecting this option means that no path is associated with this route apart from those held on the RADIUS server For more information on RADIUS refer to Chapter 14 ...

Страница 459: ...r When set to Fwd on Match only those connections defined in the IPX Filter table are allowed through All others are rejected A connection must also be allowed between the external address of the client and both the target file server internal and external network addresses at each router in the link that has filtering enabled To view existing IPX filters 1 In the Nautica Wizard window Figure 13 1...

Страница 460: ...w only displays information if you have created your own filters The information displayed in the IPX Filter table is displayed in columns Click on the option in the table below for which you require further information Name NetA SockA NetB SockB OK Button Edit Button Add Button Delete Button Refresh Button ...

Страница 461: ... number of the second network Parameter SockB Function The second socket port to be filtered page 13 16 Parameter OK Button Function Click on the OK button to close the IPX Filter table Figure 13 5 and return to the Nautica Wizard window Figure 13 1 Parameter Edit Button Function To edit an existing filter select it in the IPX Filter table Figure 13 5 and then click on the Edit button For more inf...

Страница 462: ...te an existing filter select it in the IPX Filter table Figure 13 5 then click on the Delete button Parameter Refresh Button Function To instantly refresh the data in the IPX Filter table Figure 13 5 click on the Refresh button IPX Packet Filter Sockets The following table lists the main filter sockets Table 13 2 IPX Filter Sockets Socket Description 0451 Netware Core Protocol NCP This should not ...

Страница 463: ...PX Filter table Figure 13 5 select the filter to be edited and click on the Edit Button 4 To add a new filter in the IPX Filter table Figure 13 5 click on the Add Button 5 The Add Edit IPX Network Filter window appears Figure 13 6 Figure 13 6 Add Edit IPX Network Filter In the table below click on the parameter for which you require more information Name Net Address A Socket A Net Address B Socket...

Страница 464: ... The number of the first network in the filter pair Parameter Socket Default 0000 Options A valid socket number Function The socket or port to be filtered on the first half of the filter pair page 13 16 Parameter Net Address Default 00000000 Options A valid network number Function The network number of the second network in the filter pair Parameter Socket Default 0000 Options A valid socket numbe...

Страница 465: ...for system resources such as printers and servers Viewing the SAP table shows you of which services the unit is aware Displaying IPX SAPs To view all the SAPs 1 Select the route in the Nautica Wizard window page 13 2 2 Click on Advanced IPX SAPs 3 The IPX SAP table appears Figure 13 7 IPX SAP Table ...

Страница 466: ...l server IPX network number automatically learned Parameter Node Default The network node for the SAP Parameter Type Function Novell IPX frame type automatically learned Parameter Name Function Novell server name automatically learned Parameter Path Function The path along which the SAP was learned Net Node Type Name Path OK button Edit Button Add Button Delete Button RefreshButton ...

Страница 467: ...e information on editing IPX SAPs refer to page 13 22 Parameter Add Button Function To add a new IPX SAP in the IPX SAP table Figure 13 7 click on the Add button For more information on adding new SAPS refer to page 13 22 Parameter Delete Button Function To delete an existing IPX SAP in the IPX SAP table Figure 13 7 select the SAP to be deleted then click on the Delete button Parameter RefreshButt...

Страница 468: ...route in the Nautica Wizard window Figure 13 1 2 Click on Advanced IPX SAPs 3 The IPX SAP Table appears Figure 13 7 In this table select the SAP to be edited and click on the Edit Button 4 To add a new SAP in the IPX SAP table Figure 13 7 click on the Add Button 5 The Add Edit IPX SAP window appears Figure 13 8 Add Edit IPX SAP Window ...

Страница 469: ... located Parameter Node Function The entry here must be a twelve digit alphanumeric field The node is the Ethernet address MAC address of the router advertising the network specified in Net Parameter Socket Function The socket number is a port number Port numbers allow even more defined levels of filtering as the filter can be made specific to a port or socket on the unit For a list of valid port ...

Страница 470: ... Function The number here represents the number of routers passed through to reach this network This is a learned option and is updated by BCC although you can enter your own hop count here if you wish Parameter Path Function An existing path which is associated with this SAP The path must be set up for IPX see Chapter 3 Parameter Network Type Function The type of IPX network used 802 2 802 3 or E...

Страница 471: ...c set of servers in order to cut down on system time Setting the Restricted SAP option in the Edit System window restricts the SAPs the router receives from a list of servers you specify in the SAP Filter table Figure 13 9 Edit System Restricted SAP Window With this option selected it is then possible to define the filters by which the SAPS are restricted ...

Страница 472: ...dow Figure 13 1 2 Click on Advanced IPX SAP Filters 3 The IPX SAP Filter table appears Figure 13 10 IPX SAP Filter Table The IPX SAP Filter table displays data in columns In the table below click on the parameter for which you require further information Server Name Type Net OK Button Add Button Edit Button Delete Button Get Button ...

Страница 473: ...AP Filter table Figure 13 10 and open the Nautica Wizard window Figure 13 1 Parameter Edit Button Function To edit an existing IPX SAP filter in the IPX SAP Filter table Figure 13 10 click on the SAP filter to edit and then click on the Edit button For more information on editing SAP filters refer to page 13 28 Parameter Add Button Function To add a new IPX SAP filter in the IPX SAP Filter table F...

Страница 474: ...the data shown in the IPX SAP Filter table Figure 13 10 click on the Get button Creating and Editing IPX SAP Filters To create or edit an IPX SAP filter 1 Select a router in the Nautica Wizard window Figure 13 1 2 Click on Advanced IPX SAP Filters 3 In the IPX SAP Filter table Figure 13 10 click on the filter to be edited and then click on the Edit Button 4 To add a new IPX SAP filter in the IPX S...

Страница 475: ...Using IPX 118814 D Rev 00 13 29 Figure 13 11 Add Edit IPX SAP Filter Window In the table below click on the parameter for which you require further information Server Name Type Network ...

Страница 476: ... that is entered though must match exactly the server name in text as well as case For example Test Server can be entered as Test Parameter Type Default 0000 A server type number Options A valid server type Function The type of server that is being filtered For a list of common server types refer to page 13 31 This parameter can be left blank if the server s Network number is known Instructions En...

Страница 477: ...tion 0004 File Server 0005 Job Server 0007 Print Server 0009 Archive Server 000A Job Queue 0021 NAS SNA Gateway 002E Dynamic SAP 0047 Advertising Print Server 004B Btrieve VAP 5 0 004C SQL VAP 007A TES NetWare VMS 0098 Netware Access Server 009A Named Pipes Server 009E Portable Netware UNIX 0107 Netware 386 0111 Test Server 0166 Netware Management 026A Netware Management 026B Time Synchronization ...

Страница 478: ...ute has been selected the details of the route are held in the IPX Route Cache table Entries in this table are re evaluated every 15 minutes To view the IPX Cache Table 1 Select a router in the Nautica Wizard window Figure 13 1 2 Click on Advanced IPX RIP Cache 3 The IPX Route Cache table appears Figure 13 12 IPX Route Cache Table In the table below click on the parameter for which you require fur...

Страница 479: ...twork port Parameter Packets Function Number of packets transferred for this route Parameter Bytes Function Number of Bytes transferred for this route Parameter Path Function The path over which the connection is routed Parameter OK Button Function Click here to close this window and return to the Nautica Wizard window Figure 13 1 Net Node Packets Bytes Path OK Button Delete Button Refresh Button ...

Страница 480: ...ica Configuration Wizard Reference Guide Parameter Delete Button Function Select a cache entry and click this button to delete it Parameter Refresh Button Function Click on this button to refresh the data displayed in the window ...

Страница 481: ...n turn can connect into other IPX servers The CLAM does not have enough memory to hold all these SAPs but all it really needs to know is how to get to the server that does know them Creating an IPX Default Route To set up an IPX default route 1 Select a router in the Nautica Wizard window Figure 13 1 2 Click on Advanced IPX Routes 3 In the IPX Route table Figure 13 3 click on the Add button 4 The ...

Страница 482: ...ffe Also Restricted SAP has to be set as the mode in the System window Figure 13 14 Edit System Window A SAP filter page 13 28 must also be set up that filters the server on the central site the server into which you want to connect If you don t set up Restricted SAP then a static SAP for the server on the central site has to be set up page 13 22 ...

Страница 483: ...n authentication authorisation and accounting system which can be adapted to a broad range of different network requirements The RADIUS implementation in a Nautica router allows you to specify where the RADIUS server is located on your network and which services it provides This chapter contains the following sections RADIUS Introduction page 14 2 RADIUS Settings page 14 3 ...

Страница 484: ...the services Distributed security allows the separation of the communications process from the user authentication This allows a central point of authentication configuration and a single database which many NAS devices can access without the need to hold the authentication information for all dial in accounts at the NAS The use of this central repository makes RADIUS more secure and more scalable...

Страница 485: ...er NAS in a secure network A NAS receives incoming call requests and then relays them to a RADIUS server for authentication Once authenticated the connection is made and data transfer can take place Your Nautica router can operate with most standards based servers but to enable the extra Nautica specific features dynamic configuration download outgoing calls etc it must be used in conjunction with...

Страница 486: ...d Reference Guide To display the settings 1 In the Nautica Wizard window click on the router that contains the RADIUS settings Figure 14 1 The Nautica Wizard Window 2 Click on Advanced Radius 3 The Edit RADIUS Configuration window Figure 14 2 appears ...

Страница 487: ...ration window holds a lot of information To make these settings more logical they are broken down into smaller groups In the table below click on the group heading for which you require further information Security Server Accounts Server Backup Security Server Backup Accounts Server Miscellaneous ...

Страница 488: ... click on the parameter for which you require further information Parameter IP Address Default 0 0 0 0 Options A valid IP address Function The IP address of the security server to which connection requests should be diverted for authentication A value of 0 0 0 0 disables this feature Instructions Enter the IP address of the security server Note In the Nautica implementation of RADIUS the security ...

Страница 489: ...ction Your RADIUS security server has levels of quality set up These service quality options specify the priority for access to the server and options like which days the service can be used and at what times If you are connecting into a Nautica RADIUS server then this option must be set to Yes If you are connecting into another RADIUS server it is not necessary to activate this option although yo...

Страница 490: ...le below click on the parameter for which you require further information Parameter IP Address Default 0 0 0 0 Options A valid IP address Function IP address of the accounts server to which common statistics should be sent for logging A value of 0 0 0 0 disables this feature Instructions Enter the IP address of the accounts server Note In the Nautica implementation of RADIUS the security server is...

Страница 491: ...tructions Enter a valid password Parameter Session Logging Default no Options no yes Function Set this parameter to Yes to turn on session logging In this way information about the time a user has been on the network and the amount of data transferred is logged by the server Instructions Set this option to Yes if you want to track users use of the network Caution Passwords are case sensitive ...

Страница 492: ...P address of the security server to which connection requests should be diverted for authentication A value of 0 0 0 0 disables this feature Instructions Enter the IP address of the security server Parameter Password Default Blank Options A valid password Function The secure password shared secret to be used for communication with the security server Passwords are encrypted and displayed on the sc...

Страница 493: ...to the server and options like which days the service can be used and at what times If you are connecting into a Nautica RADIUS server then this option must be set to Yes If you are connecting into another RADIUS server it is not necessary to activate this option although you may be denied access to the security server at certain times Instructions If you are using a Nautica RADIUS server change t...

Страница 494: ...Default 0 0 0 0 Options A valid IP address Function IP address of the accounts server to which common statistics should be sent for logging A value of 0 0 0 0 disables this feature Instructions Enter the IP address of the accounts server Parameter Password Default Blank Options A valid password Function The secure password shared secret to be used when communicating with the accounts server Instru...

Страница 495: ... no yes Function Set this parameter to Yes to turn on session logging In this way information about the time a user has been on the network and the amount of data transferred is logged by the server Instructions Set this option to Yes if you want to track users use of the network ...

Страница 496: ...ault 0 0 0 0 Options A valid IP address Function The master NAS is responsible for advertising routes that can be reached by this cluster and also acts as a default router to the cluster and its routes This must be configured for outgoing call support An address of 0 0 0 0 disables this feature Instructions Enter the IP address of the unit which acts as the master NAS for this cluster of Nautica s...

Страница 497: ...utgoing call support An address of 000000000000 disables this feature Instructions If your network is using IPX then enter the node address of the unit which acts as the master NAS for this cluster Parameter Authenticate Acks Default yes Options yes no Function This parameter is used for accounting servers that do not send an encrypted key in the acknowledgement for the receipt of the accounting r...

Страница 498: ...tion pool Parameter Length Default 0 Options The length of the allocation pool Function This is the number of increments allowed from the First Pool IP Address Parameter DNS Server Default 0 0 0 0 Options A valid IP address Function RFC1877 provides a method for a single dial in host to request and be supplied automatically with the addresses of the primary and backup DNS domain name servers durin...

Страница 499: ...d for a single dial in host to request and be supplied automatically with the addresses of the Primary and Backup DNS Domain Name Servers during the PPP negotiation stage Instructions Enter the address of the backup DNS should the DNS Server go off line An address of 0 0 0 0 disables this feature Parameter NBNS Backup Default 0 0 0 0 Options A valid IP address Function RFC1877 provides a method fo...

Страница 500: ......

Страница 501: ...ally In this way limited IP addresses can be controlled and allocated in a more logical manner This chapter deals with how to set up the Nautica router as a DHCP server For more general information on DHCP refer to the Concepts topic in Nautica Wizard help This chapter includes the following sections Viewing DHCP Clients page 15 2 Adding DHCP Configuration Entries page 15 6 Editing DHCP Configurat...

Страница 502: ...Clients DHCP is setup using the DHCP table Figure 15 2 To view the table do the following 1 In the Nautica Wizard window select the unit to be the DHCP host Figure 15 1 Nautica Wizard Window 2 Click on Advanced DHCP Server Client Configurations 3 The DHCP table Figure 15 2 appears ...

Страница 503: ...Table Unless DHCP server information has been set up already the DHCP table is blank In the table below click on the item for which you require more information Type IP Address Number Lease Time OK Button Edit Button Add Button Delete Button Refresh Button ...

Страница 504: ...r Function The number of IP addresses starting with the address shown in the IP Address field that are to be allocated to clients Parameter Lease Time Function The time in seconds that a client can own the allocated IP address Parameter OK Button Function Click on the OK button to close the DHCP table Figure 15 2 and return to the Nautica Wizard window Figure 15 1 Parameter Edit Button Function Cl...

Страница 505: ...ars Figure 15 3 Parameter Delete Button Function To delete an existing DHCP configuration entry select it in the DHCP table Figure 15 2 and click once on the Delete button Parameter Refresh Button Function To instantly update the information displayed in the DHCP table Figure 15 2 click once on the Refresh button An SNMP Get request is sent out to router ...

Страница 506: ...a new DHCP configuration do the following 1 Select a router in the Nautica Wizard window Figure 15 1 2 Click on Advanced DHCP Server Client Configurations 3 In the DHCP table Figure 15 2 click on the Add Button 4 The Add DHCP Configuration window Figure 15 3 appears Figure 15 3 Add DHCP Configuration Window ...

Страница 507: ...supplied to the client where the information supplied by the client MAC address etc matches that held by the DHCP server Automatic A permanent IP address is automatically allocated to the client Dynamic IP addresses are given to clients for a specified Lease Time This value is recommended if a pool of IP addresses is to be shared Allocation Type IP Address Mask Client Hardware Address Client ID Cl...

Страница 508: ...ubnet mask to be applied to the IP address specified in the previous parameter Parameter Client Hardware Address Default Blank Options A valid hardware specific Ethernet address Function Entering the client MAC address here ensures that the information passed to the client from the DHCP server is only passed to this client In this way specific IP addresses can be reserved for specific clients This...

Страница 509: ... This option can be left blank Parameter Class ID Default Blank Options A valid class ID for the client Function The class ID number of the client Enter this only if the information passed by the DHCP server to clients is to be limited only to clients with this class ID In this way specific IP addresses can be reserved for specific clients This option can be left blank Note This setting is only us...

Страница 510: ...ntial addresses from 192 168 1 1 to 198 168 1 6 Parameter Allocated Default Blank Options A system generated number showing how many entries have been provided to clients Function Displays the number of entries allocated thus far Parameter Lease Time Default Blank Options A valid time in seconds Function The time in seconds for which the client can use the allocated IP address This is relevant onl...

Страница 511: ...This option can be left blank Parameter Router Default Blank Options A valid IP address Function The IP address entered here will be returned to the client as the IP address of the router to be used as the default gateway This option can be left blank Parameter Domain Name Default Blank Options A valid domain name Function The name of the Internet domain of which the client is part This option can...

Страница 512: ...P address of this router or another router running DNS proxy server This option can be left blank Parameter Name Server Default Blank Options A valid IP address Function The IP address of the NetBios name server from which the client can receive further information This option can be left blank Parameter Data Distribution Server Default Blank Options A valid IP address Instructions The preferred D...

Страница 513: ...lution used on Microsoft networks PNode Hosts configured for PNode use WINS for name resolution PNode types register themselves with the WINS server which then functions as a NetBIOS server MNode MNode computers will first use BNode name resolution which succeeds only if the desired host is on the local network If this fails MNode will then attempt a PNode to resolve the name HNode HNode is a comb...

Страница 514: ...n receive further information This option can be left blank Editing DHCP Configuration Entries To edit an existing DHCP Configuration entry 1 Select a router in the Nautica Wizard window Figure 15 1 2 Click on Advanced DHCP Server Client Configurations 3 In the DHCP table Figure 15 2 select the DHCP configuration to edit then click on the Edit Button 4 The Edit DHCP Configuration window Figure 15 ...

Страница 515: ...the table below click on the option for which you require further assistance Allocation Type IP Address Mask Client Hardware Address Client ID Class ID Number of Entries Allocated Lease Time Host Name Router Domain Name DNS Server Name Server Data Distribution Server Node Type Scope ID ...

Страница 516: ...ted to clients it is possible to view statistics for DHCP The first statistic allows you to look at all the allocated addresses To see these addresses do the following 1 Select the DHCP Server in the Nautica Wizard window Figure 15 1 2 Click on Advanced DHCP Server Allocated Addresses 3 The DHCP Allocated Addresses table window appears Figure 15 5 DHCP Allocated Addresses Table ...

Страница 517: ...ion The allocation type used by this client page 15 7 Parameter Allocated Hardware Address Function The MAC address of the client to which this information has been passed Parameter OK Button Function Click on the OK button to close the DHCP Known Clients table Figure 15 6 Parameter Refresh Button Function Click on the Refresh button to refresh the data shown in the DHCP Allocated Addresses table ...

Страница 518: ... statistic allows you to view the clients which have received configuration information To view the current DHCP clients do the following 1 Select a unit in the Nautica Wizard window Figure 15 1 2 Click on Advanced DHCP Server Known Clients The DHCP Known Clients table appears Figure 15 6 DHCP Known Clients Table In the table below click on the option for which you require further information Hard...

Страница 519: ...as been assigned Parameter Name Function The Host Name to which the client is attached Parameter OK Button Function Click on the OK button to close the DHCP Allocated Addresses table Figure 15 5 Parameter Refresh Button Function Click on this button to update the information displayed in the DHCP Known Clients table Figure 15 5 ...

Страница 520: ......

Страница 521: ...trictions of RIP in large networks especially in the IP environment For more information on OSPF refer to the Concepts topic of the Nautica Wizard help file This chapter includes the following sections OSPF Fundamentals page 16 2 OSPF Paths page 16 5 OSPF Virtual Links page 16 14 OSPF Address Ranges page 16 20 Link State Adverts page 16 27 OSPF Areas page 16 30 ...

Страница 522: ...mmon link to all areas The basic rule of thumb with OSPF is that all the areas need to see the backbone Area 0 but they do not have to see each other The routers that link the various areas into the backbone are known as Area Border Routers ABRs An ABR is a router that can see at least 2 other areas one of which must be the backbone OSPF can be divided into two distinct forms Intra Area OSPF where...

Страница 523: ...her It also allows more efficient distribution of routing information such as routing tables between networks OSPF is set up primarily on the paths that interface the ABRs to the various areas An ABR has at least two OSPF paths in addition to LAN01 one that links it to Area 0 and one that links it to another area Area 0 Path The path linking the ABR and Area 0 can have any relevant path type see p...

Страница 524: ...Additional Area Path The path linking the ABR to an additional area can have any relevant path type see page 3 2 but several attributes must be set RIP SUPPORT none Chapter 3 OSPF SUPPORT ospf2 OSPF Paths OSPF AREA not 0 OSPF Paths RIP SUPPORT needs to be turned off as this path is for OSPF OSPF SUPPORT needs to be set to OSPF2 to turn OSPF on OSPF AREA must be set to the number of the area into w...

Страница 525: ...vanced Manager Options parameter in the Edit System Window Figure 16 1 Edit System Window The Advanced Manager Options parameter does not affect the workings of Nautica Wizard but if it is de selected the OSPF path parameters are not visible in BCC In the table below click on the option for which you require further help Viewing OSPF Paths Editing OSPF Paths ...

Страница 526: ...ide Viewing OSPF Paths To view any existing OSPF paths 1 In the Nautica Wizard window select the router which is configured for OSPF Figure 16 2 Nautica Wizard Window 2 Click on Advanced OSPF Path Metrics 3 The OSPF Paths table appears Figure 16 3 OSPF Paths Table ...

Страница 527: ...Path names are assigned by selecting a router in the Nautica Wizard window Figure 16 2 and clicking on Advanced Paths Chapter 3 Parameter Type Function The type of path Paths have different identifying types depending on the protocols they are using For more information on path types refer to Chapter 3 Parameter OSPF Function One of two values is displayed here OSPF2 or None If a path is set to OS...

Страница 528: ... OSPF area Parameter OK button Function Click on the OK button to close the OSPF Paths table Figure 16 3 and return to the Nautica Wizard window Figure 16 2 Parameter Edit Button Function Allows you to edit a selected path To edit an OSPF path select it in the OSPF Paths table Figure 16 3 and either double click the path or click once on the Edit button For more information on editing OSPF paths r...

Страница 529: ...button in the Paths table to add a new path Figure 16 4 The Paths Table For information on how to set up a new path refer to Chapter 3 To edit the settings for an existing path 1 Select the router that holds the path in the Nautica Wizard window Figure 16 2 2 Click on Advanced OSPF Path Metrics 3 In the OSPF Paths table Figure 16 3 double click the path to be edited or click once on the path and t...

Страница 530: ...ndow The parameters displayed in the Edit Path OSPF Parameters window can also be accessed by selecting a path in the Paths table Figure 16 4 and clicking on the Edit button Figure 16 6 OSPF Parameters Window It does not matter in which screen the parameters are set The Edit Path OSPF Parameters window does group these parameters more efficiently however ...

Страница 531: ...d Options Disabled OSPF2 Function Allows or disallows OSPF on this path Instructions If OSPF is to be used on this path change this parameter to OSPF2 For a more detailed description of OSPF refer to the Concepts topic in the Nautica Wizard help Parameter Area ID Default 00000000 Options A valid OSPF area number Function This configures the path to be a part of an OSPF area OSPF Area 0 is always t...

Страница 532: ...ptions A valid number of seconds Function The frequency in seconds at which OSPF Hello packets are sent to indicate that the unit is available for routing Instructions Only change this number if you wish to change the frequency of the Hello packets Parameter Dead Time Default 40 Options A valid time in seconds Function The period in seconds after which a unit is assumed to be unavailable for routi...

Страница 533: ...OSPF 118814 D Rev 00 16 13 Parameter Priority Default 1 Options A valid priority Function the priority is used by OSPF to calculate the Designated Router A designated router is the preferred router to an area ...

Страница 534: ...the ABR via another area the transit area into the backbone The transit area must have its own direct link into Area 0 In the table below select the option you require Viewing Virtual Links To set up and create Virtual links 1 Select a router in the Nautica Wizard window Figure 16 2 2 Click on Advanced OSPF Vlinks 3 The OSPF Virtual Links table appears Figure 16 7 OSPF Virtual Links Table Viewing ...

Страница 535: ...hich this virtual link passes to reach the backbone Area 0 For information on calculating the value for Transit Area ID refer to page 16 19 Parameter OK Button Function Click on the OK button to close the OSPF Virtual Links table Figure 16 7 and return to the Nautica Wizard window Figure 16 2 Parameter Edit Button Function To edit an existing virtual link double click on it in the OSPF Virtual Lin...

Страница 536: ...tton Parameter Refresh Button Function To update the information displayed in the OSPF Virtual Links table Figure 16 7 click once on the Refresh button Editing Virtual Links To edit an existing Virtual Link 1 Select the router that contains the link in the Nautica Wizard window Figure 16 2 2 Click on Advanced OSPF VLinks 3 In the OSPF Virtual Links table Figure 16 7 double click on the link to be ...

Страница 537: ...D Function The ID of the transit area through which this link passes to reach the backbone page 16 19 Adding Virtual Links To add a virtual link 1 Select a router in the Nautica Wizard window Figure 16 2 2 Click on Advanced OSPF VLinks 3 In the OSPF Virtual Links window Figure 16 7 click once on the Add Button 4 The Add OSPF Virtual Link window appears Figure 16 9 Add OSPF Virtual Link Window Dest...

Страница 538: ...to reach the backbone page 16 19 Router ID The ID of a router is derived from its IP address Router ID is a hexadecimal number For example if a router has an IP address of 192 1 1 1 the Router ID is calculated as follows 1 Calculate the hex value of 192 C0 2 Calculate the value 0f 1 01 3 Router ID C0010101 Destination Router ID Transit Area ID Note The decimals in the IP address do not form part o...

Страница 539: ... link to Area 0 a virtual link could be created from an ABR in Area 3 through an adjacent area Area 2 in this example to an ABR that can see Area 0 The parameters in this scenario are as follows Destination Router ID C6C80103 IP address 198 200 1 3 Transit Area ID 2 The IP address in this example is of an ABR in Area 2 that has a path pointing to Area 0 Note The router ID must be a router that has...

Страница 540: ... all the areas but the areas themselves only need to know the address ranges of the areas they border This cuts down on the amount of information passed around the network In the table below click on the option for which you require further information Viewing Address Ranges To view the current address ranges 1 Select a router in the Nautica Wizard window Figure 16 2 2 Click on Advanced OSPF Range...

Страница 541: ...ndow In the table below click on the option for which you require further information Parameter Address Range Default An IP address Function The first IP address in the range Address Range Area ID Advertising OK Button Edit Button Add Button Delete Button Refresh Button ...

Страница 542: ... not this address range is broadcast to other ABRs Parameter OK Button Function Click on the OK button to close the OSPF Address Ranges table Figure 16 10 and return to the Nautica Wizard window Figure 16 2 Parameter Edit Button Function Allows you to edit a selected address range in the OSPF Address Ranges table Figure 16 10 Parameter Add Button Function Allows you to manually add an address rang...

Страница 543: ...ddress Ranges Address ranges are learned automatically by the router but you can add your own manual range To add a manual address range 1 Select a router in the Nautica Wizard window Figure 16 2 2 Click on Advanced OSPF Ranges 3 In the OSPF Address Ranges table Figure 16 10 click on the Add Button 4 The Add OSPF Address Range window appears Figure 16 11 Add OSPF Address Range Window ...

Страница 544: ...ter a valid IP address Parameter Area ID Default 0 Options A valid area ID Function This is the ID assigned to the area in which this address range resides Instructions Enter the area number here Remember Area 0 is always the backbone the central area for the corporation Parameter Advertising Options selected deselected Function If this parameter is deselected or not selected the IP address shown ...

Страница 545: ...le Figure 16 10 click on the Edit Button 4 The Edit OSPF Address Range window appears Figure 16 12 Edit OSPF Address Range Window In the table below click on the parameter for which you require further information Parameter Address Range Default An IP address Options A valid IP address Function The first IP address in the OSPF address range Instructions Enter a valid IP address Address Range Area ...

Страница 546: ...to the area in which this address range resides Instructions Enter the area number here Remember Area 0 is always the backbone the central area for the corporation Parameter Advertising Options selected deselected Function If this parameter is deselected or not selected the IP address shown here is not shown in any of the summaries passed to other ABRs ...

Страница 547: ... view of the network Chapter 12 OSPF uses the Link State Adverts table Figure 16 13 To open the Link State Adverts table 1 Select a router in the Nautica Wizard window Figure 16 2 2 Click on Advanced OSPF LSAs 3 The OSPF Link State Adverts table appears Figure 16 13 OSPF Link State Adverts Table ...

Страница 548: ...er Options Function The OSPF protocol options Parameter Type Function The type of advertisement for example an entry of 1 means this is an advert from a router Parameter LSID Function Link state identifier This is a hexadecimal number based on the Type Parameter AdvRtr Function The IP address in hexadecimal of the advertising router Age Options Type LSID AdvRtr SeqNum Len AreaID OK Button Delete B...

Страница 549: ... Button Function Click on the OK button to close the OSPF Link State Adverts table Figure 16 13 and return to the Nautica Wizard window Figure 16 2 Parameter Delete Button Function To delete a link state advert select it in the OSPF Link State Adverts table Figure 16 13 and click once on the Delete button Parameter Refresh Button Function Click once on the Refresh button to update the information ...

Страница 550: ...lect the router in the Nautica Wizard window Figure 16 2 2 Click on Advanced OSPF Areas 3 The OSPF Areas table appears Figure 16 14 OSPF Areas Table In the table below click on the parameter for which you require further assistance Area Ranges RtrIfs VLinks RtrLAs NetLAs SumLAs SPEnts Flushes Installs StubDef OK Button Refresh Button ...

Страница 551: ...ther routers Parameter VLinks Function Count of virtual links currently supported across this area Virtual links directly connect areas that cannot directly reach the backbone into area 0 To set up a virtual link refer to page 16 14 Parameter RtrLAs Function Count of router link advertisements in the area database To set up router address ranges refer to page 16 20 One of the attributes for Addres...

Страница 552: ... Count of flushes discard advertisements outstanding Parameter Installs Function Count of advertisements waiting to be installed in the database Parameter StubDef Function The default metric to be applied to a stub network a network with a single exit point from the area Parameter OK Button Function Click on this button to close the OSPF Area table Parameter Refresh Button Function Click on this b...

Страница 553: ...sses and not needing to re address the internal network when connecting to the Internet or a corporate network For a Nautica product the most important benefit is the ability to be assigned an IP address by a service provider without the need to reconfigure the local network For more general information on NAT refer to the Concepts section of the Help file This chapter includes the following secti...

Страница 554: ...en translate to specific addresses on the private side of the router the local LAN Generally you only need to create incoming NAT entries and this can be done automatically on an individual path To create a NAT outgoing path 1 In the Nautica Wizard window select the router that is to be the NAT gateway Figure 17 1 Nautica Wizard Window 2 Click on Advanced Paths Configuration 3 The Paths table appe...

Страница 555: ...ion NAT 118814 D Rev 00 17 3 Figure 17 2 Paths Table 4 Click on the Add button to add a new path 5 In the Path Type window Figure 17 3 select the Remote PPP Router option and click on the OK button Figure 17 3 Path Type Window ...

Страница 556: ...three parameters in the Main tab that need to be set to enable NAT on this path The other path parameters need to be set as per Chapter 3 Once all the parameters are set click on the OK button to add this path to the router In the table below click on the parameter for which you require further information Remote Name Autolearn IP Address NAT Enable ...

Страница 557: ...tolearning of IP addresses Instructions If you are setting this path up for outgoing NAT connections it is recommended that you enable this option Once it is enabled the two options become available these are as follows By IPCP and or DHCP DHCP only Selecting By IPCP and or DHCP the default means that the IP address is learned using Internet Protocol Control Packet IPCP and or Dynamic Host Configu...

Страница 558: ...autica Configuration Wizard Reference Guide Parameter NAT Enable Default Disabled Options Disabled Enabled Function Enables NAT on this path Instructions Select this option if this path is to carry an outgoing NAT connection ...

Страница 559: ...lay the global NAT settings 1 In the Nautica Wizard window Figure 17 1 select the router that is the NAT gateway 2 Click on Advanced NAT Configuration 3 The Edit NAT System window appears Figure 17 5 Edit NAT System Window In the table below click on the parameter for which you require further information Enable Enable Passing Unknown Protocols Default IP Address Timeout for Dynamic Entries ...

Страница 560: ...abled Enabled Function To allow or disallow the passing of unknown protocols through the NAT gateway Instructions Enabling this parameter means that outgoing connections are allowed for any TCP or UDP port Leaving it disabled the default only allows connections for ports and protocols that NAT is aware of Caution Disabling NAT in the Edit NAT System window Figure 17 5 disables NAT on any paths tha...

Страница 561: ...want all incoming connections to be mapped to your workstation but it takes effect for all TCP UDP paths This can cause problems if remote managers need to get into the NAT router for configuration purposes they are directed to the new IP address not the router itself If you want to direct specific protocols to specific IP addresses use Static NAT entries page 17 10 Instructions Leave the default ...

Страница 562: ... clients behind the NAT gateway you most likely do not need to define any static NAT table entries In the table below click on the option for which you require further assistance Viewing Static Entries To create or view static NAT entries 1 Select the NAT gateway in the Nautica Wizard window Figure 17 1 2 Click on Advanced NAT Static Entries 3 The NAT Static Translation table appears Caution As th...

Страница 563: ...nslation Table The NAT Static Translation Table Figure 17 6 lists all the existing static entries In the table below click on the parameter for which you require further information Path Ext Port Int IP Address Int Port OK Button Edit Button Add Button Delete Button Refresh Button ...

Страница 564: ...DP is to be mapped Parameter Int Port Function The internal port usually the same as the external port to which the connection or packet is to be mapped Parameter OK Button Function Click on the OK button to close the NAT Static Translation table Figure 17 6 and return to the Nautica Wizard window Figure 17 1 Parameter Edit Button Function Select a static entry in the NAT Static Translation table ...

Страница 565: ...nction To refresh the information displayed in the NAT Static Translation table click on the Refresh button Adding Static Entries To add a new static NAT entry 1 In the Nautica Wizard window Figure 17 1 click on the NAT gateway router 2 Click on Advanced NAT Static Entries 3 In the NAT Static Translation table Figure 17 6 click once on the Add Button 4 The Add Edit NAT Xlat Entry window appears Fi...

Страница 566: ...AT runs Instructions Select a path from the drop down list Parameter External Port Default 0 Options A port number to which this entry connects for example 80 is HTTP Function The port external users of this entry are aiming at Instructions Enter a valid port number For a list of port numbers refer to page 12 18 Path External Port Internal IP Address Internal Port Note If the path does not exist y...

Страница 567: ...valid port number Function The internal port to which users connect Instructions Enter a valid internal port number This is generally the same as the port number used in the external port For a list of port numbers refer to page 12 18 Editing Static Entries To edit an existing NAT static entry 1 Select the NAT gateway in the Nautica Wizard window Figure 17 1 2 Click on Advanced NAT Static Entries ...

Страница 568: ... table below click on the parameter for which you require further assistance Parameter Path Default Current path name Options A valid path name Function The path over which NAT runs Instructions Select a path from the drop down list Path External Port Internal IP Address Internal Port Note If the path does not exist you need to create it first Chapter 3 ...

Страница 569: ... Parameter Internal IP Address Default Current IP address Options A valid IP address Function The internal IP address to which users are directed Instructions Enter an internal IP address for example the IP address of a web server Parameter Internal Port Default Current Port Options A valid port number Function The internal port to which users connect Instructions Enter a valid internal port numbe...

Страница 570: ...1 Select the NAT gateway in the Nautica Wizard window Figure 17 1 2 Click on Advanced NAT Sessions 3 The NAT Dynamic Translation table appears Figure 17 9 NAT Dynamic Translation Table In the table below click on the parameter for which you require further assistance Type Protocol Path Ext Port Int IP Address Int Port Idle OK Button Refresh Button ...

Страница 571: ...A user defined NAT entry Dynamic A system learned NAT entry Parameter Protocol Options UDP TCP SMTP ICMP Function The type of protocol used over this NAT entry Parameter Path Options A valid path name Function The path over which this NAT entry operates Parameter Ext Port Options A valid port number Function The external port used by this session Parameter Int IP Address Options A valid IP address...

Страница 572: ...e Instructions This values counts up to the timeout set in the NAT entry parameters page 17 9 It stays at 0 for static and connected TCP sessions Parameter OK Button Function Click on the OK button to close the NAT Dynamic Translation table Figure 17 9 and return to the Nautica Wizard window Figure 17 1 Parameter Refresh Button Function To refresh the data in the NAT Dynamic Translation table Figu...

Страница 573: ...on 3 The Edit NAT System window appears Figure 17 10 Edit NAT System Window In Figure 17 10 the internal IP address has been set to an example address of 10 0 0 10 24 In this example this is the PC that is to initiate the PPTP tunnel Any traffic sent to the termination of the PPTP tunnel has to be sent via this NAT connection To this end at least one static route is required on the PC client to en...

Страница 574: ...IP Routes table click on the Add button 5 The Add IP Static Route window appears Figure 17 11 Add IP Static Route Window Into this window enter the IP address of the remote PPTP server and also the address of any gateways if necessary Click on the OK button to create the route ...

Страница 575: ...point your PC s NetBIOS name server s address at the Nautica router This can be done using DHCP or by using the Network Properties in the Windows 95 Control Panel The WINS server responds to queries for any address that it knows If an unknown name is asked for it requests that name from the LAN by a broadcast or from the address configured in the WINS address in the LAN01 path If the LAN query fai...

Страница 576: ...es can be learned or created WINS needs to be enabled on the router To enable WINS 1 Select a router in the Nautica Wizard window Figure 18 1 Nautica Wizard Window 2 Click on Advanced WINS Configuration 3 The Edit WINS Global Configuration window appears Figure 18 2 Edit WINS Global Configuration Window ...

Страница 577: ...uctions Check the Enable box to allow WINS over this router or deselect it to stop WINS being used by the router Parameter Max Number of Entries Default 100 Options A valid number of entries Function Sets a limit on the number of WINS entries the unit can learn This is useful in smaller units where memory might be a problem Instructions Enter the maximum number of entries to be used on this router...

Страница 578: ...tomatically you can add your own entries and also edit existing entries Viewing WINS Entries To view existing WINS Local Manager Host LMHost entries and to add new ones 1 Select a router in the Nautica Wizard window Figure 18 1 2 Click on Advanced WINS Entries LM Hosts 3 The WINS LMHosts table appears Figure 18 3 WINS LMHosts Table ...

Страница 579: ...tries Dynamic and Group entries are learned by the router Parameter Description Function This field is not used by WINS but is useful for entering a longer description of the WINS entry itself Parameter IP Address Function The IP address associated with this entry Parameter OK Button Function Click on the OK button to close the WINS LMHosts table Figure 18 3 and return to the Nautica Wizard window...

Страница 580: ...tion Deletes a WINS entry that is selected in the WINS LMHosts table Figure 18 3 Parameter Refresh Button Function Refreshes the data displayed in the WINS LMHosts table Figure 18 3 Editing WINS Entries To edit an existing WINS entry 1 Select the router that contains the entry in the Nautica Wizard window Figure 18 1 2 Click on Advanced WINS Entries LMHosts 3 In the WINS LMHosts table Figure 18 3 ...

Страница 581: ... below click on the parameter for which you require further assistance Parameter Name Default WINS name Options Up to a fifteen character name for the entry Function An identifying name for the entry Instructions Enter a name that describes the entry Name Type Description IP Address ...

Страница 582: ...at define where the entry belongs either to a group or a domain Instructions Leave this option as specific Parameter Description Options A description of the entry Function As the Name field is only 15 characters long the Description field allows you to enter more information about the entry Instructions Enter a description if necessary Parameter IP Address Options A valid IP address Function The ...

Страница 583: ...dow Figure 18 1 2 Click on Advanced WINS Entries LM Hosts 3 In the WINS LMHosts table Figure 18 3 click on the Add button 4 The Add Edit WINS LMHosts window appears Figure 18 5 Add Edit WINS LMHosts Window In the table below click on the parameter for which you require further assistance Name Type Description IP Address ...

Страница 584: ...entries should always be specific Group and Domain are system entries that define where the entry belongs either to a group or a domain Instructions Leave this option as specific Parameter Description Default Blank Options A description of the entry Function As the Name field is only 15 characters long the Description field allows you to enter more information about the entry Instructions Enter a ...

Страница 585: ... by 1 Selecting a router in the Nautica Wizard window Figure 18 1 2 Clicking on Advanced WINS NetBIOS Entries 3 The WINS NetBIOS table appears Figure 18 6 WINS NetBIOS Table In the table below click on the parameter for which you require further assistance Name IP Address TTL Originator Path OK Button Refresh Button ...

Страница 586: ...pecifies how many seconds remain before this entry times out Parameter Originator Path Function The path down which this entry was learned Parameter OK Button Function Click on the OK button to close the WINS NetBIOS table Figure 18 6 and return to the Nautica Wizard window Figure 18 1 Parameter Refresh Button Function Click on the Refresh button to refresh the information displayed in the WINS Ne...

Страница 587: ... Client PCs or workstations can be configured to use the Nautica router as the DNS server The router then applies some rules to the DNS request and decides over which path the request should be sent Replies are cached so repeated lookups are extremely efficient It is possible to use the DNS Proxy feature even if you have a single path as you can benefit from the name caching This chapter contains ...

Страница 588: ...S Proxy it is important to ensure that it is set up on your router To enable DNS Proxy 1 Select a router in the Nautica Wizard window Figure 19 1 The Nautica Wizard Window 2 Click on Advanced DNS Configuration 3 The Edit DNS Proxy Cache Global Config window appears Figure 19 2 Edit DNS Proxy Cache Global Config Window ...

Страница 589: ...nction Allows or disallows the DNS Proxy Instructions Only de select this option if you want to stop the DNS proxy from working Parameter Max DNS Cache Entries Default 10 Options A valid number Function The number of DNS cache entries the router can store Instructions Increase or decrease this number depending on the amount of DNS entries your router uses Enable Max DNS Cache Entries ...

Страница 590: ...a DNS name it uses these rules to decide which path and thereby which DNS server it should send the request to A special entry can be used as the default page 19 14 To set up DNS rules 1 Select a router in the Nautica Wizard window Figure 19 1 2 Click on Advanced DNS Rule Entries 3 The DNS Proxy Cache Rules table appears Figure 19 3 DNS Proxy Cache Rules Table ...

Страница 591: ...is used if there is no other match page 19 14 Parameter Path Function This is the path down which DNS lookups for that domain can be sent Parameter OK Button Function Click on the OK button to close the DNS Proxy Cache Rules table Figure 19 3 and return to the Nautica Wizard window Figure 19 1 Domain Path OK Button Edit Button Add Button Delete Button Refresh Button Note The DNS settings for the p...

Страница 592: ...ete an existing DNS rule select the rule in the DNS Proxy Cache Rules table Figure 19 3 then click once on the Delete button Parameter Refresh Button Function To refresh the data shown in the DNS Proxy Cache Rules table Figure 19 3 click once on the Refresh button Adding DNS Rules DNS rules allow you to place specific domains such as a company intranet or an ISP at the end of specific paths To add...

Страница 593: ... In the table below click on the parameter for which you require further assistance Parameter Domain Default Blank Options A valid domain name Function The name of the domain you want to resolve using this rule For example a company intranet could be called something like company com or company co uk Instructions Enter the domain name Domain Path ...

Страница 594: ...he drop down list Editing DNS Rules To edit an existing DNS rule 1 Select a router in the Nautica Wizard window Figure 19 1 2 Click on Advanced DNS Rule Entries 3 In the DNS Proxy Cache Rules table Figure 19 3 click once on the rule you wish to edit then click on the Edit button 4 The Edit DNS Proxy Cache Rules window appears Figure 19 5 Edit DNS Proxy Cache Rules Window Note The path must already...

Страница 595: ...e domain you want to resolve using this rule For example a company intranet could be called something like company com or company co uk Instructions Enter the domain name Parameter Path Default A path name Options A valid path name Function The path down which DNS lookups for this domain should be sent Instructions Select a path name from the drop down list Domain Path Note The path must already b...

Страница 596: ...have created on the router do the following 1 Select a router in the Nautica Wizard window Figure 19 1 2 Click on Advanced DNS Rules 3 The DNS Rules window appears Figure 19 6 DNS Rules Window In the table below click on the parameter for which you require further assistance Domain Path Servers OK Button Refresh Button ...

Страница 597: ... Function The IP addresses of the DNS servers for this domain These addresses are taken from the DNS tab in the path page 4 48 Parameter OK Button Function Click on the OK button to close the DNS Rules window Figure 19 6 and return to the Nautica Wizard window Figure 19 1 Parameter Refresh Button Function To refresh the information displayed in the DNS Rules window Figure 19 6 click once on the Re...

Страница 598: ...d This enables the router to find these names again To view the DNS cache 1 Select a router in the Nautica Wizard window Figure 19 1 2 Click on Advanced DNS Cache 3 The DNS Cache window appears Figure 19 7 DNS Cache Window In the table below click on the parameter for which you require further assistance Cache TTL Data OK Button Refresh Button ...

Страница 599: ...ry This time is supplied by the domain server itself Parameter Data Function The IP address associated with the domain name Parameter OK Button Function Clicking on the OK button closes the DNS Cache window Figure 19 7 and returns you to the Nautica Wizard window Figure 19 1 Parameter Refresh Button Function To refresh the information displayed in the DNS Cache window Figure 19 7 click once on the...

Страница 600: ...he DNS Proxy Cache Rules table Figure 19 3 click once on the Add button 4 In the Add DNS Proxy Cache Rules window Figure 19 4 enter Default into the Domain name field 5 Select a default path from the drop down list 6 Click on OK to close the window Now when you request a domain for which you do not have a specific rule this default rule is used Note If the Use If Up parameter is selected on the DN...

Страница 601: ... used by qualified engineers to test the operation of the router Tracing allows you to see the actual operations and commands the router performs for a given task It is used in conjunction with Nautica Log This chapter includes the following sections Editing Trace Levels page 20 2 The Trace Modules page 20 6 Nautica Log page 20 8 ...

Страница 602: ...ace Levels Trace levels allow you to specify which information is displayed in Nautica Log To view and amend trace levels 1 Select a router in the Nautica Wizard window Figure 20 1 The Nautica Wizard Window 2 Click on Advanced Trace Levels 3 The Edit Syslog Trace Window appears ...

Страница 603: ...race Levels and Nautica Log 118814 D Rev 00 20 3 Figure 20 2 Edit Syslog Trace Level Window In the table below click on the parameter for which you require further assistance IP Address Local Log Trace Modules ...

Страница 604: ...nt to log 0 IPX errors to log 1 and so on Nautica Wizard allows you to set log levels for individual modules so this functionality is only necessary if you are sending logs to another Syslog daemon other than Nautica Wizard Instructions Only change this option if you are sending logs to a remote Syslog daemon If you change the value and use Nautica Log to read the logs the local log number is igno...

Страница 605: ...To change a group of modules that are together in the list click on the first one then hold down the SHIFT key on the keyboard and click on the last module All the modules are selected Change the level as necessary To set all the modules back to the default level of 0 click once on the Set All Default button To stop a module reporting select it and click once on the Off option To set all the modul...

Страница 606: ...nfiguration Protocol DNS Domain Name Service Proxy FR Frame Relay HDLC High Level Data Link Control HTML Hyper Text Mark up Language ICMP Internet Control Message Protocol IPCP IP Control Protocol IPRoute IP Routing Information IPXCP IPX Control Protocol IPXRIP IPX Routing Information Protocol IPX Route IPX Routing Information IPXSAP IPX Service Advertising Protocol ISDN Integrated Services Digita...

Страница 607: ... Controller Chip RADIUS Remote Access Dial In User Service RIP Routing Information Protocol SNMP Simple Network Management Protocol SYSTEM System Output TFTP Trivial File Transfer Protocol V120 V120 WCP WAN Control Protocol WINS Windows Internet Naming Service Table 20 1 The Trace Modules Module Description ...

Страница 608: ...zard although it is generally easier to launch it from within the Wizard To open Nautica Log Click on Operations Launch Nautica Log Or right click on a router in the Nautica Wizard Window and choose Launch Nautica Log from the Quick menu Or click once on the Nautica Log button in the toolbar The Nautica Log Window Once opened the Nautica Log window appears Figure 20 3 The Nautica Log Window ...

Страница 609: ...utica Log and check the version of the software you are running Parameter Unit Function The IP address of the router performing the action Parameter Seq Number Function When a router begins operating actions are performed in sequence The sequence number shows where in the sequence a specific action occurred If sequence numbers appear to be missing then the router may be too busy to output debug In...

Страница 610: ...iseconds since the action happened This is counted from the time the router was last rebooted Parameter Module Function The module Table 20 1 being used Parameter Message Function The action being performed Note When an ISDN call fails the message displays a reason code These reason codes are listed in Table 10 1 ...

Страница 611: ...ter deals with NauticaWatch a virtual LED system that you can use to monitor your Nautica router The chapter includes the following sections Nautica Watch page 21 2 The Nautica Watch Window page 21 3 The Nautica Watch Menus page 21 4 The Nautica Watch Panels page 21 20 ...

Страница 612: ...ched in one of several ways In Nautica Wizard click on Operations Launch Nautica Watch Or right click on a router and select Launch Nautica Watch from the Quick menu Or click on the Nautica Watch icon in the toolbar Figure 21 1 Nautica Watch Button Opening Nautica Watch causes two windows to appear the Nautica Watch window Figure 21 2 and the Overview window Figure 21 3 Figure 21 2 The Nautica Wat...

Страница 613: ...ad a small Bay Networks logo is displayed in the system tray If Nautica Watch disappears from your screen double clicking this icon re displays the Nautica Watch window Figure 21 4 System Tray Showing Nautica Watch Icon The Nautica Watch window displays all the connections on your router Each connection ISDN WAN and so on is given its own panel page 21 20 Note The windows shown in this chapter are...

Страница 614: ...n the table below click on the menu for which you require help File Menu The File menu allows you to close Nautica Watch Figure 21 5 The File Menu There is only one command in this menu Exit Selecting Exit closes Nautica Watch File Menu Device Menu Options Menu Align Menu View Menu Help Menu ...

Страница 615: ...connect or disconnect to a different router Figure 21 6 The Device Menu In the table below click on the option you require Connecting to a Device To connect to another router 1 In the Nautica Watch window Figure 21 2 click on Device Connect Connecting to a Device Disconnecting from a Device ...

Страница 616: ...en click on the OK button Nautica Watch connects to the new device It is also possible to change the SNMP community strings from the Set IP Address window Click on the Change Strings button and the SNMP window appears Figure 21 8 SNMP Window Changing the public community string sets the read access to this router The string must match in both the sending and receiving routers for the configuration...

Страница 617: ... once you have viewed or amended these strings Disconnecting from a Device To disconnect from a device 1 In the Nautica Watch window Figure 21 2 click on Device Disconnect 2 Nautica Watch disconnects from the device and displays a blank screen Options Menu The Options menu controls the way Nautica Watch works Figure 21 9 Options Menu In the table below click on the menu command for which you requi...

Страница 618: ...ica Watch window Figure 21 2 click on Options Set Poll Rate 2 The Set Poll Level window appears Figure 21 10 Set Poll Level Window 3 The default setting is for Nautica Watch to check the router status every one second This is done by sending out an SNMP request to the router 4 To increase this interval some accuracy will be lost change the setting here and click on OK ...

Страница 619: ... click on Options Configuration 2 The Nautica Watch Configuration window appears Figure 21 11 Nautica Watch Configuration Window 3 Select how you would like Nautica Watch to resize and click on the OK button 4 Clicking on the Clear IP List button clears all but the current router s IP address out of the drop down list in the Devices Connect window page 21 5 ...

Страница 620: ...string sets the read access to this router The string must match in both the sending and receiving routers for the configuration information to be read Changing the private community string changes the write access to this router The string must match in both the sending and receiving routers for the configuration changes to be made Click on the OK button once you have viewed or amended these stri...

Страница 621: ...tica Watch displays its panels Figure 21 13 Align Menu The default option is to have the panels arranged vertically If this takes up too much space select the Align Horizontal option Figure 21 14 Nautica Watch Horizontally Aligned Selecting Align Vertical returns the display to the standard view ...

Страница 622: ...ew Window There are two windows here the Overview window and the List window The Overview window Figure 21 3 opens with the Nautica Watch window Clicking on View Overview closes or opens the window depending on its current status To open the List window 1 In Nautica Watch Figure 21 2 click on View List 2 The List window appears Figure 21 16 List Window ...

Страница 623: ...Ds that confirm the status of a device If a device LED is grey or yellow the device is idle If the device LED is green the device is active Close the List window by clicking on View List once more Help Menu The Help menu allows you to enter the Nautica Help system and also displays the version of Nautica Watch that you are using ...

Страница 624: ... which you require further assistance Main Window Quick Menu When you first open Nautica Watch clicking one with the right mouse button on any of the panels displays the Main Window Quick menu Figure 21 17 Main Window Quick Menu In the table below click on the menu command for which you require further assistance Main Window Quick Menu System Tray Quick Menu Detail Window Quick Menu View Menu Alig...

Страница 625: ... displayed There are three options here 1 Detailed Displays the panel you have clicked on in detailed view Figure 21 18 Nautica Watch Detailed View 2 Overview Hides or displays the small Overview panel Figure 21 19 Nautica Watch Overview Window 3 List Displays or hides the List window Figure 21 20 Nautica Watch List Window ...

Страница 626: ...ow are aligned There are two options here Vertical and Horizontal Add Remove Allows you to add or remove selected panels Selecting this option causes the Link Select window to appear Figure 21 21 Nautica Watch Link Select Window Use this menu to control which panels to display Use the View and Remove buttons to move visible panels to invisible and vice versa ...

Страница 627: ... this option to hide the menu and status bars in the Nautica Watch window To re display the menu and status bar right click on any panel and select the Show Menu option Figure 21 22 Nautica Watch with no Menus System Tray Quick Menu The system tray is located on the right hand side of the Windows 95 taskbar Whenever Nautica Watch is running a small Bay Networks logo is displayed in the tray Figure...

Страница 628: ...specifies how the information in Nautica Watch is displayed There are three options here 1 Detailed Displays the panel you have clicked on in detailed view Figure 21 24 Nautica Watch Detailed View 2 Overview Hides or displays the small Overview panel Figure 21 25 Nautica Watch Overview Window 3 List Displays or hides the List window Figure 21 26 Nautica Watch List Window ...

Страница 629: ...licking on any panel displays the Detail Window Quick menu Figure 21 27 Detail Window Quick Menu There are two options here Align and Remove Panel Align allows you to change the way the panels are displayed there are two options here horizontal and vertical Remove Panel hides the panel you clicked on To re display the panel return to Nautica Watch and select it again ...

Страница 630: ...y this information in more detail for any panel double click the panel itself The Nautica Watch Details panel is displayed Figure 21 28 Nautica Watch Detail Panel The LEDs on this panel are either grey if the option is idle or green if the option is running The utilisation section of the Detail window shows how much data is being transmitted Tx or received Rx on the port Close this window by click...

Страница 631: ...DIUS Authentication Name 4 13 Autocall See ISDN Autolearn See IP or IPX B B Channel 8 6 10 35 Mapping 8 40 Reserved 8 6 Backbone See OSPF BACP 4 32 9 13 Bandwidth Maximum 4 25 5 17 Minimum 4 24 5 18 Mode 4 24 5 17 Used by a Path 7 4 Bandwidth Allocation Control Protocol See BACP Beep on Alarm 2 8 Blacklist Timeouts 2 12 4 18 Block all See IP Support Blue See Router Status BNode See DHCP Node Type ...

Страница 632: ... 11 8 30 8 41 10 5 Colours See Router Status Compression See Paths Configure Erasing Configuration 1 41 Restoring router configuration 1 24 Connection Mode 8 5 Cost 12 4 12 8 Cul de sac Route See Routes Custom PPP Profiles See PPP Customer Support Programs xxxv Technical Solutions Centers xxxvi D Data Over Voice See ISDN Number or MSN Days See Time Bands Dead Time See OSPF Debug See Tracing Defaul...

Страница 633: ... 10 Router 15 11 Scope ID 15 14 Server See Servers WINS 18 1 Dial Back Path 10 15 Digital 10 9 Direction IP 3 19 IPX 3 17 4 35 Distributed Security See RADIUS DNS 19 1 Cache 19 1 19 3 19 12 Default 19 4 19 5 19 14 Domain 19 5 19 7 19 9 Dual homed 19 1 Global 19 2 Lookups 19 1 Mapping 19 4 Multi homed 19 1 Path 19 5 19 8 19 9 Rules 19 1 19 4 19 10 TTL 19 13 Domain Dotted Domain 19 5 Domain Name See...

Страница 634: ...s See Filtering Forward Mismatches See Frame Filter On Filter Match 13 5 13 13 On Match See Frame Filter Forward On Filter Match 12 10 Fractional 8 28 8 39 to 8 50 Fragmentation 9 14 Frame Filter 4 44 to 4 46 6 23 to 6 24 11 2 to 11 25 Addresses 11 24 to 11 25 Path 11 25 Time Since Last Used 11 25 And Next 11 5 11 10 11 15 Default Action 4 46 5 22 6 24 Delete 11 6 Enable 11 5 11 9 11 14 Forward On...

Страница 635: ...ilter Mask Value HNode See DHCP Node Type Hops 13 7 13 11 13 24 Host Name See DHCP HTML See Enable HTML HTTP NAT 17 9 I ICMP 12 16 Icons 1 8 ID See Frame Filter Idle Period 5 19 Threshold 4 26 In See Frame Filter Type Incoming Number 10 15 Reservation 8 14 8 33 8 44 Installation Assistant 1 29 Internal IPX Address 13 13 IP 12 1 Autolearn 4 14 17 5 By DHCP 4 15 By IPCP and orDHCP 4 14 Cache Timeout...

Страница 636: ...Nautica Watch Length See Frame Filter Level WCP 4 53 5 39 Link State Adverts See OSPF Listen Only 3 19 4 38 Local Log See Tracing Local Number 8 17 Longest 10 31 LSA See OSPF M MAC Address 2 5 11 25 12 21 Mail Server See Servers Manager Timeouts 2 8 Manual Polling See Polling Mapped Drives 1 3 Mapping See B Channel Mask See Frame Filter Match See Frame Filter Maximum Bandwidth See Bandwidth Receiv...

Страница 637: ...DN Number 5 13 Minimum Call Length 5 20 Name 5 12 Parameters 5 10 Secure Key 5 12 Nautica Watch 1 2 1 47 21 2 Connecting 21 5 Disconnecting 21 7 List Window 21 12 Overview Window 21 2 Poll Rate 21 8 Quick Menu 21 14 SNMP 21 10 System Tray 21 3 Nautica Wizard 1 8 NCP 13 13 NetA 13 15 13 18 NetB 13 15 13 18 NetBIOS 18 1 NetBios Name Server See Servers NBNS Netware Core Protocol See NCP Network Acces...

Страница 638: ... 4 2 5 2 6 2 Blacklisting 2 12 Bridging 3 6 4 6 5 6 6 6 Cancelling a call 7 4 Compression 4 52 5 38 Default Path Type 8 21 Delete 3 9 4 9 5 9 6 9 DNS See DNS Edit 3 8 4 8 5 8 6 8 Ethernet See Ethernet Frame Relay See Frame Relay IPX 13 7 13 11 LAN01 See Ethernet Nautica See Nautica Path OSPF See OSPF Paths Table 3 4 4 4 5 4 6 4 Ports 3 7 4 7 5 7 6 7 7 3 7 4 PPP 4 4 RIP 3 6 4 6 5 6 6 6 Route Cache ...

Страница 639: ...2 Pool Length 14 16 Security Server 14 6 Virtual Path Route See Routes Rate 10 35 RCode 10 35 Rebooting the router 1 10 1 44 Reject On Filter Match 12 10 13 5 13 13 Remote Name 4 12 17 5 Check Outgoing Calls 4 13 Reserved B Channel See B Channel Restart Timeout 9 15 Restoring Router Configuration See Configure Restricted SAP 13 4 13 25 RFC 1490 3 3 4 3 5 3 6 3 8 23 1877 14 16 Right Mouse Button Se...

Страница 640: ... 2 10 15 12 NBNS 14 17 WINS 18 1 Service Profile Identifier See SPID Service Quality See RADIUS Service See MSN Session Logging See RADIUS Short Sequences 9 13 Shortest 10 31 SNMP 21 6 Get 2 6 NAT 17 9 Set 2 6 SockA 13 15 13 18 SockB 13 15 13 18 Socket 13 23 Speed 8 21 8 23 SPID 8 16 StacLZ 4 52 5 38 Static Route See Routes Subaddress 8 14 8 33 8 43 Support See IP Switch Type 8 16 8 35 8 46 SYN AC...

Страница 641: ...Type 9 10 See Frame Filter See Routes U Unknown Protocols See NAT Up Time 10 35 See also System Up Time Use If Up 4 48 4 50 18 1 19 14 V V120 See ISDN Number Value See Frame Filter Version WCP 4 53 5 39 Virtual Drives 1 3 Virtual Link See OSPF Virtual Private Network See VPN Voice 8 3 Port 8 4 to 8 9 Services 8 8 VPN 10 17 to 10 21 Configuration 10 19 Number 10 20 Table 10 17 W WAN Port 8 3 Asynch...

Страница 642: ......

Отзывы: