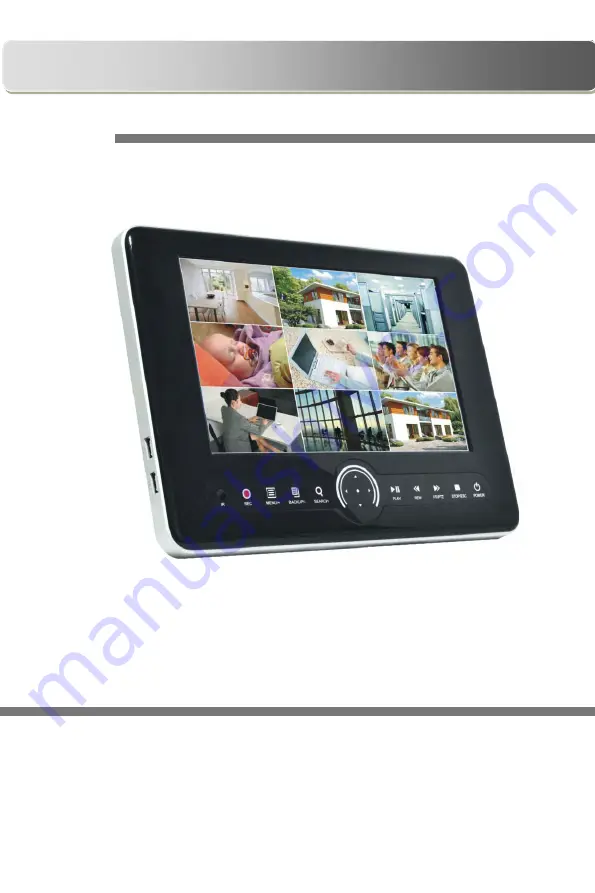
VDT7008
Combo DVR with 10.2 Inch LCD
8-Channel Digital Video Recorder
USER MANUAL
Страница 1: ...VDT7008 Combo DVR with 10 2 Inch LCD 8 Channel Digital Video Recorder USER MANUAL...
Страница 2: ...o not place objects on the DVR 4 Qualified Service Technicians Any examination and repair work should be done only be a qualified service engineer We are not liable for any problems caused by unauthor...
Страница 3: ...lusions Any product malfunction or abnormalities in operation or damage caused by the following reasons are not within the free service scope of our company 1 Equipment damage caused by improper opera...
Страница 4: ...ouse 12 2 6 2 Use Mouse 12 3 BASIC FUNCTION 14 3 1 Power On Off 14 3 1 1 Power On 14 3 1 2 Power Off 14 3 2 Login 15 3 3 Live Preview 15 3 4 Live Playback 16 4 MAIN MENU SETUP GUIDE 17 4 1 Basic Confi...
Страница 5: ...t Configuration 44 4 8 P T Z configuration 45 4 9 Reset 49 5 SEARCH PLAYBACK BACKUP 50 5 1 Time Search 50 5 2 Event Search 51 5 3 File Management 51 5 4 Image 52 5 5 Backup 53 6 DVR MANAGEMENT 54 6 1...
Страница 6: ...h Windows Mobile 70 8 2 Phones with Symbian 72 8 3 For iPhone iPad Mobile Clients 74 8 4 The installation operation methods for Android mobile clients 81 8 5 Installation and operation Methods for Bla...
Страница 7: ...warehouses residences etc 1 2 Main Features COMPRESSION FORMAT Standard H 264 compression with low bit rate and high image quality LIVE SURVEILLANCE Supports channel security by hiding live display D...
Страница 8: ...through internet SECURITY Customize user rights log search system setup two way audio file management disk management remote login live view manual record playback PTZ control and remote live view Sup...
Страница 9: ...ATA hard drive up to 2TB Calculate HDD capacity according to the recording settings Please refer to Appendix B Calculate Recording Capacity Step 1 Unscrew and Open the HDD cover Step 2 Place the HDD o...
Страница 10: ...ange direction to select items 2 Change screen display mode from 1 4 9 channel 7 ENTER BUTTON Confirm selection 8 PLAY Enter into Play Interface 9 REW Rewind Key 10 FF PTZ 1 Fast Forward 2 Enter into...
Страница 11: ...GETTING STARTED User Manual 9 2 4 Rear Panel Instructions An illustration of the rear Panel interface is shown as Fig 2 5 Fig 2 5 Rear Panel 1 power switch...
Страница 12: ...5 Remote Control The remote control uses two AAA size batteries Instructions for operation are as follows Step 1 Open the cover of the Remote Control Step 2 Place batteries making sure the poles are c...
Страница 13: ...Power Soft switch off to stop firmware running Use this prior to turning off the DVR 2 Info Get information about the DVR like firmware version HDD information 3 REC To record manually 4 Number butto...
Страница 14: ...9 after that press ENTER button to confirm Step2 User can check the device ID by enter into System configuration Basic configuration device ID User also can set other DVRs with the same device ID For...
Страница 15: ...Fig 2 7 It supports numbers letters and symbols Users can change some values by the wheel such as time Move cursor onto the value and roll the wheel when the value blinks Also supports mouse drag I e...
Страница 16: ...m the corresponding chapters If users don t want to setup Wizard please click Exit button to exit After the device powers on if there is no menu or only displays live image user can hold down ESC butt...
Страница 17: ...3 2 Login User can login and logout of the DVR system User cannot do any other operations except changing the multi screen display once logout Admin has full control over DVR Fig 3 1 Login Notice the...
Страница 18: ...e Symbol Meaning Symbol Meaning Green Manual record Red Alarm recording Yellow Motion detection recording Blue Schedule record 3 4 Live Playback Click the Play button to playback the record Refer to F...
Страница 19: ...minutes ago Dwell Range of selecting to dwell is from single picture preview mode to 1 4 6 8 picture preview mode Color Click this button to adjust the color of live pictures E Zoom Single channel lar...
Страница 20: ...p as shown in Fig 4 2 press MENU button on the front panel or remote control will also display the main interface Fig 4 2 Main Menu 4 1 Basic Configuration Basic configuration includes three sub menus...
Страница 21: ...umber of network connections Video Output the resolution of live display interface options are VGA800 600 VGA1024 768 VGA1280 1024 and CVBS Note Switching between VGA and CVBS will change the menu out...
Страница 22: ...o system configuration basic configuration DST refer to Fig 4 5 Fig 4 5 Basic Configuration DST Step 2 In this interface you can enable daylight saving time time offset mode start end month week date...
Страница 23: ...6 Fig 4 6 Live Configuration Live Step 2 Checkmark camera name click setting button a window will pop up shown as Fig 4 7 Fig 4 7 Live Color Adjustment Step 3 In this interface user can adjust bright...
Страница 24: ...in Monitor Step 2 Select split mode 1 1 2 2 2 3 3 3 4 4 and channel Step 3 Dwell time the time interval for a certain picture display before switching to next picture display Step 4 Select the split m...
Страница 25: ...ious channel groups of pictures click button to set the latter channel groups of pictures Step 5 Click default button to restore default setting click apply button to save the setting click exit butto...
Страница 26: ...Mask Area select a certain mask area click left mouse button to delete that mask area click Apply button to save the setting Setup Mask Area Live Image Mask Area 4 3 Record Configuration Record confi...
Страница 27: ...er into system configuration record configuration record bit rate refer to Fig 4 12 Step 2 Setup rate resolution quality encode and max bit stream Step 3 User can setup all channels with same paramete...
Страница 28: ...60seconds Expire time the hold time of saved records When the set date has passed the record files will be deleted automatically Step 2 User can setup all channels with same parameters checkmark all...
Страница 29: ...tamp click Set button user can use cursor to drag the camera name and time stamp to random positions as shown below Before Drag After Drag Step 3 User can setup all channels with same parameters check...
Страница 30: ...y button to save the setting click exit button to exit current interface 4 3 6 Snap In this interface User can set up Resolution quality snap interval snap number 4 4 Schedule Configuration Schedule c...
Страница 31: ...her or all channels just only select channel and click Copy button Step 3 Click default button to restore default setting click apply button to save the setting click exit button to exit current inter...
Страница 32: ...e interface is all blue Fig 4 18 Schedule Configuration Sensor 4 5 Alarm Configuration Alarm configuration includes five sub menus sensor motion video loss other alarm and alarm out 4 5 1 Sensor To se...
Страница 33: ...ck default button to restore default setting click apply button to save the setting click exit button to exit current interface Alarm Handling Step 1 Enter into system configuration alarm configuratio...
Страница 34: ...cluding trigger events time snap pictures device name ID camera name etc Snap Select channels When an alarm is trigged the system will automatically save the captured pictures from the selected channe...
Страница 35: ...he time that is the color of schedule interface is all blue Fig 4 22 Sensor Schedule 4 5 2 Motion Motion includes two sub menus motion and schedule Motion Step 1 Enter into Setup alarm motion refer to...
Страница 36: ...by color and time day or night user can adjust its value according to the practical conditions click icon set the whole area as detection area click icon the set detection area will be cleared click i...
Страница 37: ...r into system configuration alarm configuration video loss refer to Fig 4 26 Fig 4 26 Alarm Configuration Video Loss Step 2 The setup steps of video loss trigger are familiar with alarm handling user...
Страница 38: ...r options If the selected event is Disk Full then use the drop down box for Disk Shortage Alarm to choose a threshold value for remaining HDD space If the threshold value is reached the system will tr...
Страница 39: ...chedule for details Note the default schedule of motion detection is all of the time that is the color of schedule interface is all blue Buzzer Step 1 Enter into system configuration buzzer Step 2 Che...
Страница 40: ...and password click TEST button to test the effectively of relevant information 4 6 2 Sub stream Parameter Meaning HTTP port The port number of accessing IE browser The default port is 80 Server port T...
Страница 41: ...ave the setting click exit button to exit current interface Note After selecting Resolution and Fps the rest fps will be shown 4 6 3 Email Step1 enter into system configuration network configuration e...
Страница 42: ...k configuration email 4 6 4 Server This function is mainly used for connecting ECMS The user needs to enable the active report first in the ECMS when adding a new device Then enter into the server int...
Страница 43: ...ly for a domain name on line for the server After successfully setting up the account the user can access the server through Internet Explorer by inputting that domain name Enable UPnP User may select...
Страница 44: ...on Take www dyndns com for example Note Users can self define the hostname username and password Input www dyndns com in the IE address bar user can access the domain name registration interface Click...
Страница 45: ...uration Network other settings tick off DDNS and select Dyndns at the DDNS Sever pull down list box and input user name and password Step 2 Enter into configuration interface of the router to map the...
Страница 46: ...gement Configuration Step2 Click Add button a dialog box will pop up shown as Fig 4 35 Fig 4 35 Add General General Input user name password select user type normal or advance If you only want the use...
Страница 47: ...n to modify the password click Exit button to exit the current interface 4 8 P T Z configuration P T Z configuration includes two submenus serial port and advance Serial Port Step 1 Enter into system...
Страница 48: ...600 115200 230400 460800 21600 Protocol Communication protocol of the PTZ device Supported Protocols are NULL PELCOP PELCOD LILIN MINKING NEON STAR VIDO DSCP VISCA SAMSUNG RM110 HY N control Simulativ...
Страница 49: ...lect the serial number of the preset point Click button to enable the PTZ wiper and click button to enable the PTZ light Note PTZ must support wiper and light these two functional buttons can take eff...
Страница 50: ...int click Modify icon to modify the setting of a preset point User can click icons to adjust the position of preset point Click Preview button to preview the cruise line click OK button to save the se...
Страница 51: ...o record the moving track of PTZ click this button again to stop recording click Start track button to play recorded track click this button again to stop play b Click icon to hide the tool bar right...
Страница 52: ...n display mode the highlighted dates on the calendar means the days have recorded data Step 3 Select a date press Search button click the time grid to set the play start time or input play time manual...
Страница 53: ...nfiguration Event Search Step 2 Click Search button the searched event information will be displayed in the event list box Select date channel checkmark Motion Sensor or All accordingly Step 3 Double...
Страница 54: ...gement column Step 4 Double click an unlocked item to playback Note when the monitor resolution is VGA 800 600 the file management interface will display a hide button Click this button to expand the...
Страница 55: ...d data will be displayed in the data backup list box Step 3 Check a data file or checkmark All to select all data files click Backup button a dialog box will pop up shown as Fig 5 5 Fig 5 5 Backup Inf...
Страница 56: ...es to USB flash drives and USB hard drives using the backup function Network information In this interface user can check relevant parameters of network Online Information In this interface user can c...
Страница 57: ...is the potential problems of the disk and warn so as to protect its data 6 4 Upgrade At present it only supports USB update Get the software from your vendor when there is a new software version and m...
Страница 58: ...E will download ActiveX component automatically Enter the username and password in the subsequent window Notice If HTTP port is not 80 other number instead need add the port number after IP address Fo...
Страница 59: ...s up and asks for user name and password Input name and password correctly and enter to view Note If you cannot download and install ActiveX please refer to Appendix A FAQ Q8 2 Connect the DVR to inte...
Страница 60: ...bit mode If the browser is the earlier MACOS version the default setting is 32 bit mode and the setting can be skipped The Setting steps are as follows First Right click safari icon and select Show in...
Страница 61: ...s Main Menu Setup Network interface to manually input IP address Subnet Mask and Gateway according to the configuration of PC The network segment should be the same as the PC If using DHCP please enab...
Страница 62: ...ng installing the Active X control please quit from the Safari browser Right click Safari icon on the desktop and then select Quit button to quit the browser Then restart Safari browser Input the IP a...
Страница 63: ...face Once you have setup Internet Explorer you can access the DVR through a browser window If you are accessing the DVR over the network you would enter the IP address of the DVR into the address bar...
Страница 64: ...beside the screen display mode channel select dialog will appear as shown below Fig 7 3 Channel Select Dialog User can checkmark channels form 1 ch to 8 ch at random to display the live pictures Then...
Страница 65: ...trol the dome up down right left or stop rotating in Control Center adjust rotation speed Iris and zoom focus on the dome and set the presets etc Buttons definition BUTTON DESCRIPTION move the dome up...
Страница 66: ...m this DVR supports master stream and sub stream Master stream has higher frame rate max 25FPS PAL 30FPS NTSC for every channel However to ensure optimal function an increased network bandwidth is hig...
Страница 67: ...ck Click button to enter into record playback interface refer to Fig 7 5 Select the record date and channels double click the file name in the record file list box user can play that file and preview...
Страница 68: ...a as required Fig 7 6 Time Search Interface Step 4 Select an item from the data information list box click play button to playback Step 5 Click the relevant buttons in the interface user can do operat...
Страница 69: ...ton Step 3 The events will be display in the event list box double click an item to playback File Management Step 1 Enter into Search file management refer to Fig 7 9 Lock select a file in the file li...
Страница 70: ...efer to Fig 7 10 Fig 7 10 Remote Backup Interface Step 1 Select channels set the start and end time then click search button the file information will be displayed in the file list box Step 2 Select b...
Страница 71: ...relative parameters While one user is setting up parameters of a certain item others cannot set it up Click Config to enter into the below interface refer to Fig 7 11 Fig 7 11 Remote Menu Setup The su...
Страница 72: ...eed to setup the network configuration on the DVR refer to Chapter 4 6 Network configuration Below are instructions for accessing the DVR from phones running Windows Mobile Pro Symbian iPhones iPads A...
Страница 73: ...once the install process is complete Step 5 Input the DVR s address ID and password respectively in the columns of Server User and Password and click Go to log on the DVR It will show the picture if a...
Страница 74: ...e mobile phone Then run Web browser Step 2 Input the DVR s IP address in a new built bookmark Click this bookmark to connect to the DVR Step 3 A welcome window will pop up and requires a package Click...
Страница 75: ...in interface Step 8 Input the DVR s address ID and password respectively Then save Notice About Access point there may be different access points in different countries or from service providers Step...
Страница 76: ...iPad Mobile Clients 1 Installing through iphone iPad Step 1 Open App Store function of iphone Step 2 Select search function to search for SuperLive Step 3 Click SuperLive enter into introduce interfac...
Страница 77: ...the software will be installed automatically Note If this is the first time you are accessing the Store you need to enter user ID if you do not have a Store account you need to create one 1 Installing...
Страница 78: ...6 Step 3 Select search function to search for SuperCam Step 4 Click free application button Step 5 Input apple ID and password then click acquire Step 6 Checkmark synchronously apply program and Super...
Страница 79: ...s or domain name user name and password Click Remember server to save the setting clicking button can quickly input saved server address user name and password 2 Main Interface NOTE If you click on th...
Страница 80: ...ew Settings software settings Information device information view Help software help center Logoff logoff and return to login interface 3 Live View Interface Symbol Current viewing channel Symbol Chan...
Страница 81: ...the PTZ to the Right Stop rotating the PTZ Zoom In Focus In Iris Add Zoom Out Focus Out Iris Sub Preset Select the preset point Group Set the cruise line Speed Rotate speed of the PTZ H Reserv e Horiz...
Страница 82: ...Card disk space when the available disk space is less than setup value the video will be stopped Display mode User can select one live picture display or four live picture displays Remember display or...
Страница 83: ...roid mobile clients Software Installation Step 1 run Google Market program Step 2 search for SuperCam Step 3 press Install button Step 4 click OK button Step 5 user can view the download and install p...
Страница 84: ...ser name and password Main menu Playback playback record file Image image view Log log record Server List device list Live live view Settings software setting Information device information view Help...
Страница 85: ...k to switch to Fig 2 interface Snap record talk Live audio Full screen Return Move PTZ up Move PTZ down Move PTZ left Move PTZ right Stop rotates the PTZ Zoom In Focus In Iris Add Zoom Out Focus Out I...
Страница 86: ...Fig 3 Fig 4 Click the record file Fig 3 to playback Fig 4 Play pause stop Full screen Return to record file interface Fig 3 Server list Configuration interface Add a server to list Modify a server on...
Страница 87: ...of mobile video This function only works with an inserted SD card Path Save path for mobile video files the default catalog is SDCard Click button to change path Reserved disk space Reserved SDCard di...
Страница 88: ...nload button on the popup interface and the download progress will be shown 4 Once finished downloading the software will be installed automatically If the software fails to download please check the...
Страница 89: ...l be a compatibility problem Solution Enter into Options Menu Advance options Applications SuperCam and click Disable Compatibility button This problem will be solved 1 Login Enter IP address to acces...
Страница 90: ...to login interface 3 Live view Mark 1 Current viewing channel Mark 2 Channel status Switch channels PTZ click to switch to Fig 2 interface Snap Full screen Background alarm Stop rotating the PTZ Upwa...
Страница 91: ...ensor Motion Alarm output type Setup prompt type of background alarm sound alarm vibrate 5 Information view Device Device Name name of the current device Device ID the current connection device ID Sof...
Страница 92: ...S PAL 240FPS NTSC Record Frame Rate 200FPS PAL 240FPS NTSC Audio Audio Input RCA x 4 Audio Output RCA x 1 Alarm Alarm Input 4 ch alarm input Alarm Output 1CH Storage Record Mode Manual Sensor Timer Mo...
Страница 93: ...ports of camera and DVR b Camera problem Please check the cameras by attaching them directly to TV or working port on DVR c The video format NTSC PAL of the DVR is different from that of the cameras P...
Страница 94: ...ect number or letter to input the default password is 123456 or you can use the digital keys on the front panel or the digital keys on the remote control 10 How do I upgrade the firmware on the DVR Af...
Страница 95: ...real time access with fully open mainstream channel PC MODULE PARAMATERS CPU Intel Core TM 2 Duo CPU E4600 MOTHERBOAR D G41 P41 chip HDD 80G RAM 1GB VGA GMA3100 NVIDIA GeForce 8400 ATI RADEON HD3450...
Страница 96: ...ual 94 Control refer to 15 1 click Turn User Account on or off Cancel Use User Account Control UAC to help protect your computer 15 1 b Right click IE browser refer to Fig 15 2 select Run as administr...
Страница 97: ...PAL 25 Highest 1M 466 Higher 768k 295 Medium 512k 235 Low 384k 175 Lower 256k 112 Lowest 128k 56 4 The calculation format is Total Recording capacity Used space per hour MB h coverage rate of hard dri...
Страница 98: ...after Testing BRAND CAPACITY SSK 512MB 1G 2GB NETAC 4GB KINGSTON 2GB AIGO 2GB SMATTER VIDER 1GB SANDISK 4GB Compatible HDD after Testing BRAND CAPACITY Seagate Momentus5400 6 5000C5003717D4D2 500G Sea...
Страница 99: ...450017000002 A0...