


Physical Features
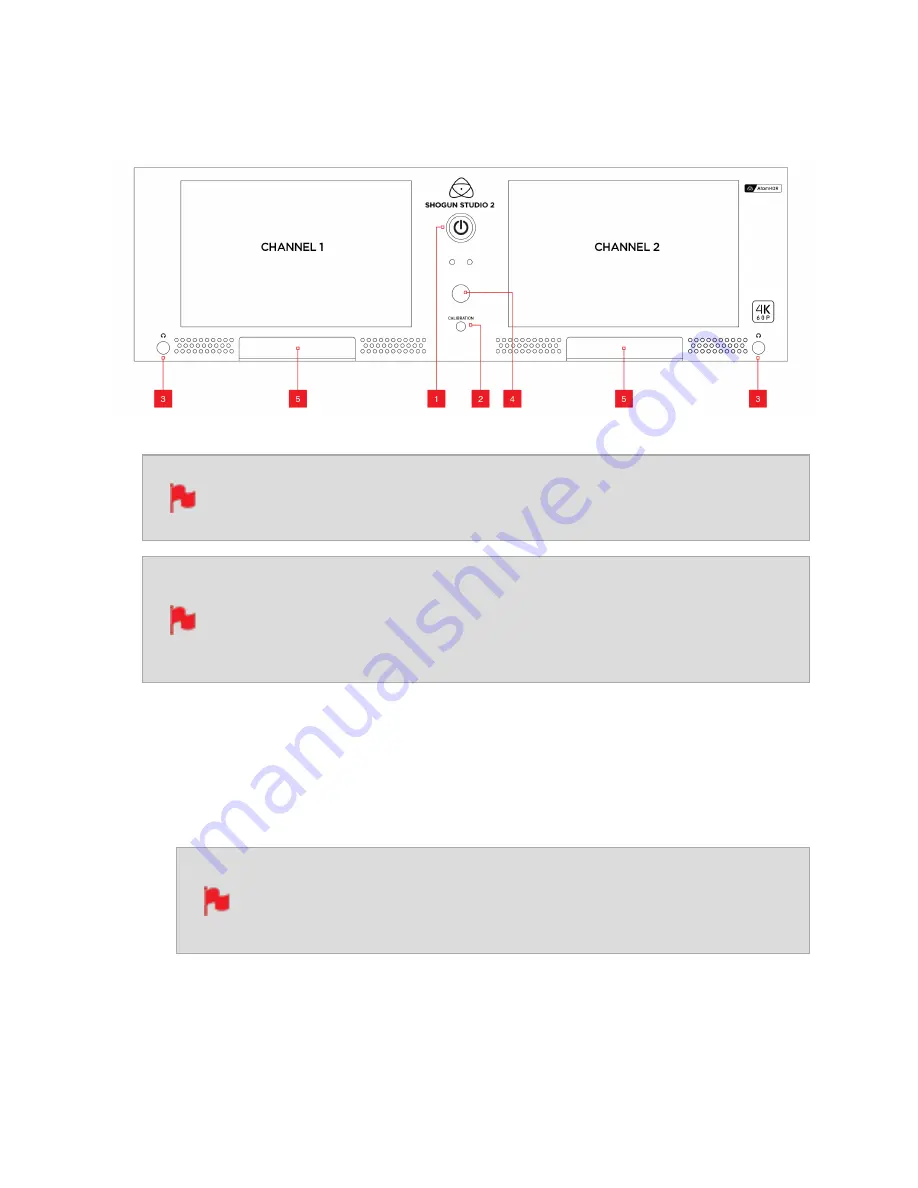
Looking at SHOGUN STUDIO 2 from the front, recorder channel 1 is on your
left side and recorder channel 2 is on your right side.
Some screen printing/labelling on the front and rear of unit as illustrated
above may differ from actual unit. When connecting any input or other
device please ensure you are connecting to the correct connection by refer-
ring to the labelling on your actual unit.
1.
Power Button
The power button as described earlier controls the simultaneous turning on or off
both recorder channels. With both power supplies connected press the Power button
and both units will power up.
On initial connection of power the controller will go through a boot
phase and the fan will spin up. Once this has happened the power but-
ton can be used to turn on the device.
Once powered, pressing the power button for 4 seconds will turn both units off. After
power down the unit’s fan will remain on whilst the internal controller of the SHOGUN
STUDIO 2 shuts down.
Содержание Shogun Studio 2
Страница 1: ...U S E RMA N U A L S H O G U NS T U D I O2...
Страница 18: ...13 RJ45 connection For SERVICE ONLY and should only be used if instructed to do so as part of firmware updates...
Страница 51: ......
Страница 79: ...Red Arri file naming is only supported when the signal is connected via SDI...
Страница 85: ...Phantom Power You can choose to deliver phantom power over the XLR MIC input Tap Off to toggle Phantom Power On...
Страница 96: ...Ready to Record monitor mode features No Input No Disk No Disk Formatted...
Страница 110: ...l 2x l 1 8x l 1 5 l 1 33x l 1 25x Scopes are not available when anamorphic de squeeze is activated...
Страница 115: ...Outline Width Adjusts the width used focus peaking indicators on screen Tap to select the desired width...
Страница 122: ...Remember that you can remove all overlays by simply tapping in the center of the screen Tap again to reveal the overlays...
Страница 131: ......
Страница 137: ......
Страница 169: ...Choose the Event you wish to import the footage into or create a new event Click on Import...
Страница 170: ...Your Scene Shot and Take files now appear in the project window ready for use in your FCP project...
Страница 171: ......
Страница 174: ...You can also filter the view to only see specific tags e g favorite etc...


