


29
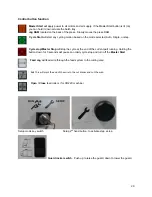
Shortcut to the Data Error window.
Print a paper label. Only valid if a paper label printer and label printing software are installed on the
machine.
Opens up the operator instructions for the part.
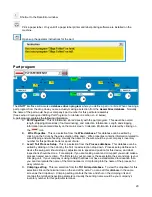
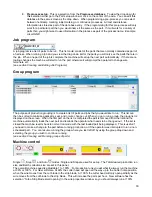
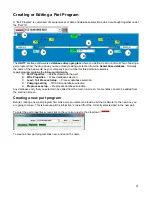
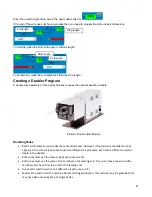
Part program
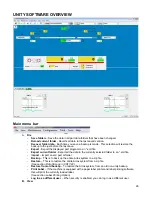
The
UNITY
interface software is a
database driven program
where you define a part or article. When choosing a
part program from the drop down you are actually making a selection from the
Assemblies database
. Normally
the name of the part would be your company’s part number for this particular assembly.
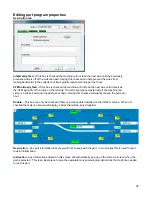
(See section Creating and Editing Part Programs, for details on section A – E below)
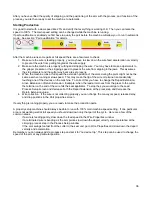
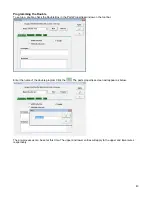
A part program contains the following information.
A.
Part Properties
. This is information stored directly with the part program. This would be overall
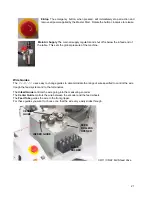
length, stripping dimensions (if not terminating), and collection information. Length and stripping
information are entered directly on the main screen. Collection information is entered by clicking on
the
icon.
B.
Wire Properties
. This is a selection from the
Wire database.
This database can be edited by
clicking on the 3 dots by the wire selection drop down. Wire properties contains information related to
wire stripping and wire feeding. Usually the name for the wire would be your company’s inventory
number for this particular barrel or spool of wire.
C.
Lead / Tail Process Setup
. This is a selection from the
Process database
. This database can be
edited by clicking on the 3 dots by the Tail / Lead selection drop down. Process setup defines each
device the swing arm should stop at, adjustments to speed and position for this device, and what
inspections should be done. For example, if you are making a seal and crimp part you would make a
process named seal x crimp. The first step in your process is the seal station the second step is your
crimping unit. If your company is using tooling that does not have a standardized tool location then
you can incorporate the name of the terminal seal or crimp tooling into the name of the process, for
easy reference.
D.
Crimping setting
. This is a selection from the
TU10crimp database
. To view the dropdown for this
selection click on the terminal icon on the end of the wire. You can edit this database in the same
screen as the drop down. Crimping setting controls the ram and shut on the crimping unit and
contains the terminal inspection parameters. Usually the setting name would be your company’s
inventory number for this particular terminal.
A
E
C
D
C
D
B
Содержание CR.11
Страница 129: ...129 8M Sec guard Notice this transition ...
Страница 145: ...145 ...
Страница 174: ...174 Spacer block not installed Spacer block installed Spacer block ...
Страница 178: ...178 Installing the monitor Use the 4 screws provided to mount the monitor Plug in the cords UBS cord from computer ...
Страница 182: ...182 The wiring diagram in shows the main power connection coming into the machine ...


