


165
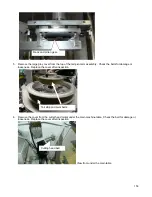
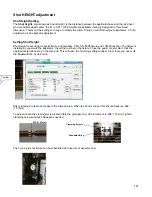
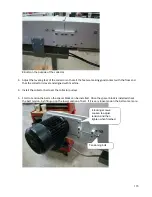
3.
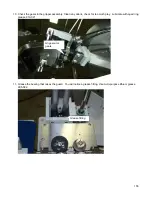
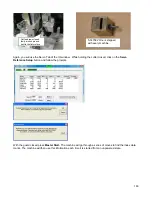
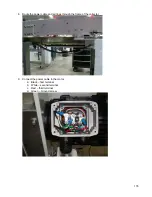
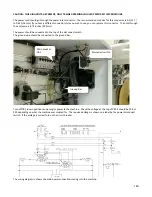
Manually turn the crank clockwise (using the hex on the back) until the light on the reference prox turns
off. Watch the index data on the I/O screen, very slowly continue to turn the crank clockwise until the
Index data increments. Check the distance between the edge of the cam and the center of the prox
target it should be between 4 and 12mm. If you cannot get this distance then loosen the cam and
rotate it slightly into position.
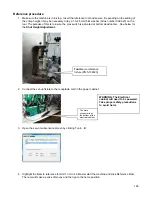
4.
Manually turn the crank counter clockwise until the light on the reference prox turns on. Watch the
index data on the I/O screen, very slowly continue to turn the crank until the Index data increments.
Check the distance between the edge of the cam and the center of the prox target it should be between
4 and 12mm
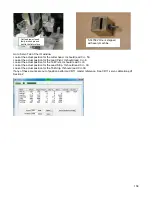
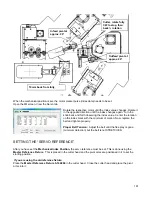
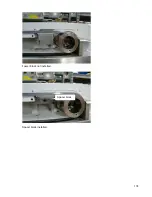
Reference Prox
Cam edge
4 to 12mm
Содержание CR.11
Страница 129: ...129 8M Sec guard Notice this transition ...
Страница 145: ...145 ...
Страница 174: ...174 Spacer block not installed Spacer block installed Spacer block ...
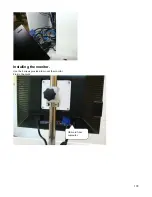
Страница 178: ...178 Installing the monitor Use the 4 screws provided to mount the monitor Plug in the cords UBS cord from computer ...
Страница 182: ...182 The wiring diagram in shows the main power connection coming into the machine ...


