

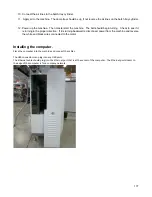


181
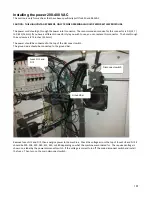
Installing the power 200-480 VAC
This section is only for machines that have been specifically built for 440 and 480VAC
CAUTION: THIS HIGH VOLTAGE PRESENT, ONLY TRAINED PERSONAL SHOULD PERFORM THIS PROCEDURE.
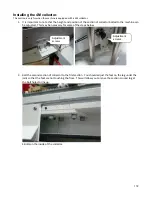
The power cord should go through the power inlet connector. The recommended cord size for this connector is 0.5 (12.7)
to 0.625 (16mm). If you have a different connector style you wish to use, you can replace this connector. The hole through
the enclosure is .875 inches (22.2mm).
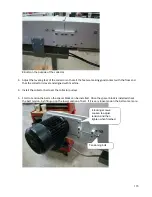
The power should be connected to the top of the disconnect switch.
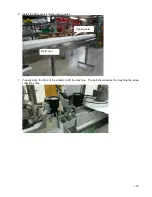
The ground wire should be connected to the ground bar.
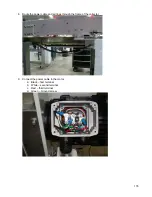
Remove fuses FU1 and FU2, then energize power to the machine. Check the voltage across the top of fuses FU1 and FU2 it
should be 200, 208, 230, 380, 415, 440, or 480 depending on what the machine was ordered for. The required voltage is
shown on a label by the power disconnect switch. If the voltage is correct turn off the main disconnect switch and install
the fuses. Then turn on the main disconnect switch.
Disconnect switch
Ground Bar
Fuses FU1 and
FU2
Содержание CR.11
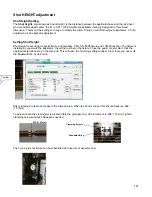
Страница 129: ...129 8M Sec guard Notice this transition ...
Страница 145: ...145 ...
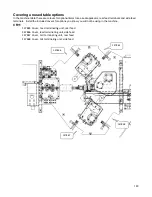
Страница 174: ...174 Spacer block not installed Spacer block installed Spacer block ...
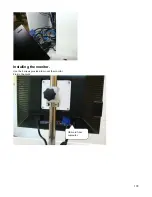
Страница 178: ...178 Installing the monitor Use the 4 screws provided to mount the monitor Plug in the cords UBS cord from computer ...
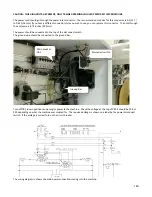
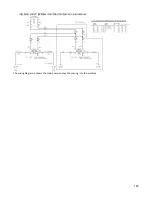
Страница 182: ...182 The wiring diagram in shows the main power connection coming into the machine ...


