1-11
Hardware Specifications and Configurations
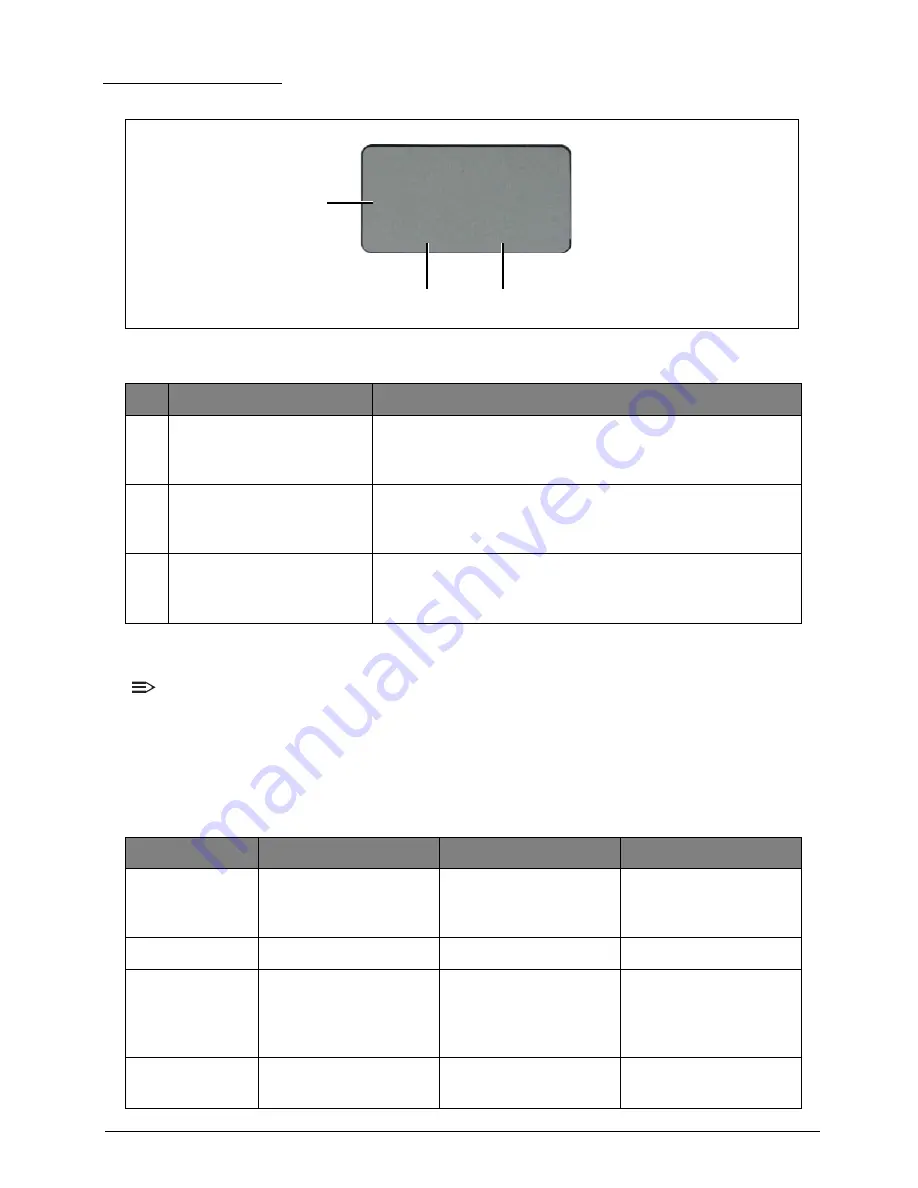
Touchpad Basics
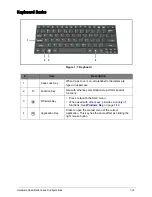
Figure 1:6. Touchpad
Using the Touchpad
NOTE:
•
The touchpad is sensitive to finger movements; hence, the lighter the touch, the better the
response. Tapping too hard will not increase the touchpad sensitiveness.
•
When using the touchpad, keep the touchpad and your fingers dry and clean.
Below is a description of basic touchpad operations:
Table 1:1. Touchpad Operations
#
Item
Description
1
Touchpad
Move your finger across the touchpad to move the cursor.
Tapping on the touchpad is the same as clicking the left
mouse button.
2
Left Button
Press the left button to perform selection and execution
functions. This button is equivalent to the left button on a
mouse.
3
Right Button
Press the right button to perform selection and execution
functions. This button is equivalent to the right button on a
mouse.
Function
Touchpad
Left Button
Right Button
Execute
Tap twice (same speed
as double-clicking a
mouse button).
Quickly click twice.
Select
Tap once.
Click once.
Drag
Tap twice; on the
second tap, rest your
finger on the touchpad
and drag the cursor.
Press and hold, then
use your finger on the
touchpad to drag the
cursor.
Access context
menu
Click once.
2
1
3
Содержание AO756
Страница 1: ...AO756 V5 171 S E R V I C E G U I D E G U I D E ...
Страница 109: ...Service and Maintenance 5 14 Table 5 8 Base Door Screw Screw Name Screw Type Quantity M 2 0 x 6 0 1 ...
Страница 117: ...Service and Maintenance 5 22 4 Lift the fan by the fan cable to remove from its bay Figure 5 25 Removing the Fan ...
Страница 139: ...Service and Maintenance 5 44 4 Lift to remove the IO board from the lower case Figure 5 58 Removing the IO Board ...
Страница 147: ...Service and Maintenance 5 52 3 Lift to remove the left speaker Figure 5 70 Removing the Speakers 2 of 2 ...
Страница 151: ...Service and Maintenance 5 56 3 Lift to remove the keyboard Figure 5 76 Removing the Keyboard ...
Страница 160: ...5 65 Service and Maintenance Table 5 18 Thermal Module Screws Screw Name Screw Type Quantity M 2 0 x 3 0 4 ...
Страница 163: ...Service and Maintenance 5 68 5 Lift to remove the LCD module from the lower case Figure 5 94 Removing the LCD Module ...
Страница 170: ...5 75 Service and Maintenance 3 Lift to remove the LCD bezel Figure 5 104 Removing the LCD Bezel 3 of 3 ...
Страница 188: ...5 93 Service and Maintenance 3 Remove the main antenna from the LCD cover Figure 5 138 Removing the Main Antenna 3 of 3 ...
Страница 198: ...FRU Field Replaceable Unit List 6 6 Upper Case Assembly Figure 6 3 Upper Case Assembly Exploded Diagram 1 2 3 4 5 ...
Страница 200: ...FRU Field Replaceable Unit List 6 8 LCD Assembly Figure 6 4 LCD Assembly Exploded Diagram 1 2 3 4 5 8 9 6 7 ...
Страница 212: ...CHAPTER 7 Test Compatible Components Test Compatible Components 7 2 Microsoft Windows 7 Environment Test 7 2 ...
Страница 217: ...CHAPTER 8 Online Support Information Online Support Information 8 2 Introduction 8 2 ...
Страница 219: ......

