Chapter 4 Tutorials
MAX208M2W Series User’s Guide
43
2
Manually change the IP address of your computer that your are using to
192.168.100.x (for example, 192.168.100.5) and keep the subnet set to
255.255.255.0.
3
Type http://192.168.100.1 in your browser after the MAX208M2W Series finishes
starting up completely.
4
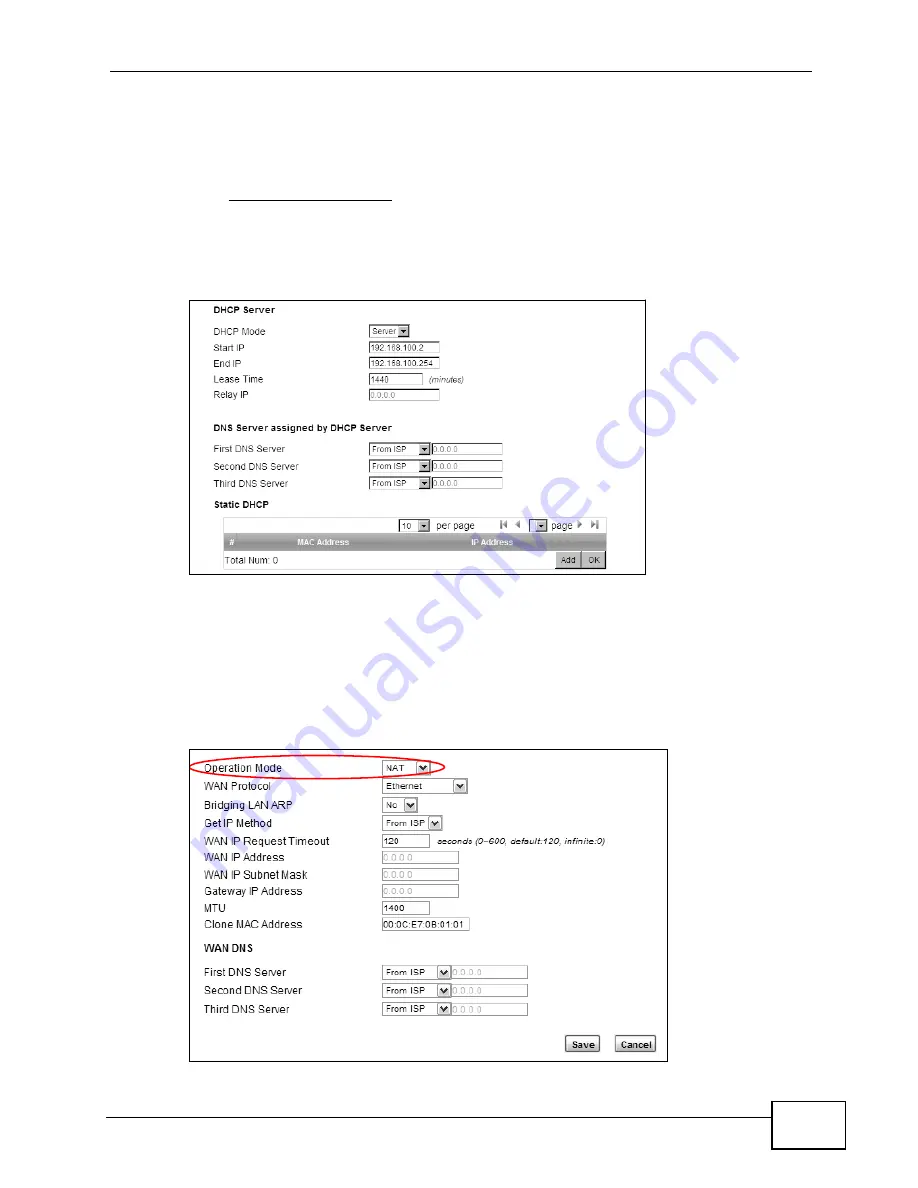
Log into the Web Configurator and open the Networking Setting > LAN >
DHCP screen.
5
Select Server for the DHCP mode, then enter 192.168.100.10 and
192.168.100.30 as your DHCP starting and ending IP addresses.
6
Leave the other settings as their defaults and click Save.
7
Next, go to the Networking Setting > WAN screen and select NAT in the
Operation Mode field. Click Save.
Summary of Contents for MAX218M2W
Page 2: ......
Page 10: ...Contents Overview MAX208M2W Series User s Guide 10...
Page 16: ...Table of Contents MAX208M2W Series User s Guide 16 Index 297...
Page 17: ...17 PART I User s Guide...
Page 18: ...18...
Page 24: ...Chapter 1 Getting Started MAX208M2W Series User s Guide 24...
Page 42: ...Chapter 3 Setup Wizard MAX208M2W Series User s Guide 40...
Page 62: ...Chapter 4 Tutorials MAX208M2W Series User s Guide 60...
Page 63: ...61 PART II Technical Reference...
Page 64: ...62...
Page 90: ...Chapter 6 WiMAX MAX208M2W Series User s Guide 88...
Page 134: ...Chapter 8 Security MAX208M2W Series User s Guide 132...
Page 158: ...Chapter 10 The VoIP Account Screens MAX208M2W Series User s Guide 156...
Page 206: ...Chapter 14 Product Specifications MAX208M2W Series User s Guide 202...
Page 238: ...Appendix B Setting Up Your Computer s IP Address MAX208M2W Series User s Guide 234...
Page 248: ...Appendix C Pop up Windows JavaScript and Java Permissions MAX208M2W Series User s Guide 244...
Page 292: ...Appendix E Importing Certificates MAX208M2W Series User s Guide 288...


