background image

27

Dear Customers!

We urge that you read this user’s manual carefully. Special 

attention needs to be paid to the safety precautions. Please 

save this manual so it can be referred to in the future use of 

the product.

Safety precautions and instructions on the 

proper use of the electric kettle

Always abide by the following basic safety measures during 

the operation of the electric appliance:

The kettle is intended for household use only.


Plug  the  kettle  into  a  220÷240  V    alternating  current 


socket equipped with an earth pin only.

Place the kettle on a stable, even and flat surface; the 


connecting  cord  may  not  hang  over  the  edge  of  the 

surface on which the kettle is placed.

If  the  non-detachable  part  of  the  cord  is  damaged, 

it  should  be  replaced  by  the  producer  or  at  a  proper 

service point or by a qualified person in order to avoid 

any hazards.

Only qualified staff may make repairs of the appliance. 

A wrongly done repair my cause a serious threat to the 

user. It may also result in a cancellation of the warranty. 

In case any defects occur, we recommend that you take 

the appliance to a specialist service point.

The appliance is intended for domestic use.


 In case it is 

used for food business purposes, the warranty conditions 

shall change.

The kettle can only be operated with the original power 


base, each base is type-specific.

Do not fill the kettle beyond the maximum fill indicator 


max

” – water might spatter out of the kettle.

Use the kettle for boiling water only.


Special attention is necessary when the kettle is used in 


the presence of children.

Do  not  operate  the  appliance  if  the  power  cord  is 


damaged or the kettle body is visibly damaged.

Do not remove the plug from the outlet by pulling by the 


cord.

Do not open the lid immediately after water has boiled 


– steam might condense and appear on the exterior of 

the kettle.

Do not place the kettle on or near hot objects.


Do not immerse the kettle or the power base in water 


when filling or washing the electric kettle.

Be careful not to wet the plug of the connecting cord.


In  the  event  that  water  gets  into  the  inside  electric 


elements of the kettle, or onto the power base, carefully 

dry  these  elements  before  plugging  the  kettle  into  the 

mains.

Mind the steam coming out of the kettle while water is 


boiling.

Do not operate the kettle when empty.


Do not use the kettle without a filter.


Do not use the kettle with the lid open – the automatic 


shut off will not work then.

Allow the kettle to cool completely before cleaning it.


Do  not  use  any  abrasive  cleaning  agents  such  as 


emulsions,  creams,  pastes,  etc  for  cleaning  the  kettle 

body.  They  might  remove  graphic  information  symbols 

such as: scales, marks, warning signs, etc.

This  appliance  is  not  intended  for  use  by  persons 


(including  Children)  with  reduced  physical,  sensory  or 

mental capabilities, or lack of experience and knowledge, 

unless they have been given supervision or instruction 

concerning use of the appliance by a person responsible 

for their safety. 

Children should be supervised to ensure that they do not 


play with the appliance.

The appliance is not intended to be operated by means 


of an external timer or separate remote-control system.

Technical data

The technical parameters are given on the data plate of the 

product.

1.5 liter capacity.

Zelmer electric kettles are built in I class insulation and they 

are  equipped  with  supplying  cord  with  grounding  wire  and 

grounding plug.

The ZELMER kettle meets the requirements of the standards 

in force.

The  appliance  is  compliant  with  the  requirements  of  the 

following directives:

The Low Voltage Directive (LVD) – 2006/95/EC.


Electromagnetic Compatibility (EMC) – 2004/108/EC.


The product is affixed with a CE Mark on the data plate.

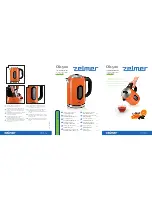
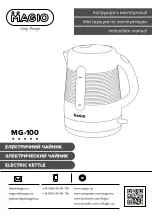
Structure of the kettle 

(Fig. A)

1

 Control light

2

 Housing

3

 Kettle body

4

 Spout

5

 Lid

6

 Handle

7

 Water level indicator

8

 On/off switch

9

 Supplying cord

10


Storage space for the connecting cord

11


Anti-deposit filter

12

 Base

EN

Summary of Contents for 432

Page 1: ...er com 4 5 6 7 8 9 10 11 12 13 14 15 16 17 18 20 21 22 23 24 25 26 27 28 PL Pod wietlany wy cznik CZ Podsv cen vyp na SK Podsvieten vyp na HU Megvil g tott kikapcsol gomb RO ntrerup tor iluminat RU BG...

Page 2: ...st pi sp ywanie skroplonej pary wodnej na zewn trz czajnika Nie stawiaj czajnika na gor cych przedmiotach i w ich pobli u Nie zanurzaj czajnika ani podstawki zasilaj cej w wodzie podczas nape niania l...

Page 3: ...anek czajnika przetrzyj je ciereczk zwil on w occie 4 Czajnik wyp ucz czyst wod Wymiana filtra rozpuszczanie kamienia W przypadku pojawienia si osadu wapiennego na dnie czajnika nale y kamie usun Do t...

Page 4: ...y kapky sra en vodn p ry by stekly mimo konvici Nepokl dejte konvici na hork povrchy ani v jejich bl z kosti P i napl ov n vodou nebo p i myt nepono ujte konvici ani podstavec do vody Dbejte aby nedo...

Page 5: ...ran te 6 nebo 10 octov m roztokem Otev ete v ko 5 konvice Vyjm te filtr 11 a omyjte jej pod tekouc vodou Nalijte 0 5 litru octov ho roztoku do konvice a zapn te konvici Ocet uva te a ponechte v konvic...

Page 6: ...eotv raj veko bezprostredne po uvaren vody m e nasta stekanie kondenzovanej vodnej pary po vonkaj ej strane kanvice Nestavaj kanvicu na hor ce predmety alebo do ich bl zkosti Nepon raj kanvicu ani nap...

Page 7: ...str ku pr pojn ho k bla z nap jacej z suvky 2 Vyber filter 11 3 Vonkaj ie plochy isti m kkou handri kou navlh enou pr pravkom na um vanie riadu Na odstr nenie usaden n vodn ho kame a z vn torn ch i v...

Page 8: ...en a kicsap d v zg z lefolyhat a k sz l k k lsej n Ne haszn lja a k sz l ket forr t rgyakon s ne is t rolja forr t rgyak k zel ben A k sz l ket s az aljzatot felt lt s vagy lemos s k z ben tilos v zb...

Page 9: ...sor n gyeljen arra hogy ne l pje t l a k sz l k tart ly nak n vleges rtartalm t res k sz l k bekapcsol sa eset n a biztons gi termoszt t automatikusan megszak tja az ramell t st A k sz l ket hagyja k...

Page 10: ...i n ap nici baza de alimentare nici fierb torul atunci c nd l umple i sau l sp la i Fi i atent s nu uda i tec rul cablului de alimentare n cazul n care a i turnat ap peste elementele electrice intern...

Page 11: ...de alimentare Pentru a utiliza din nou fierb torul dup r cirea sa cca 15 minute trebuie s l lua i de pe baza deta abil s l repune i la loc i s l pune i n func iune ap s nd buto nul nr 9 R cirea fierb...

Page 12: ...14 220 240 V max o 1 5 I ZELMER LVD 2006 95EC EMC 2004 95 EC CE A 1 C 2 op yc 3 e a e op yc 4 5 6 7 RU...

Page 13: ...15 8 on off 9 10 11 12 a B 1 O po e p y 5 a 2 11 3 7 7 4 5 12 6 7 on 8 o 15 8 C o 1 2 11 3 4 6 10 O po e p y 5 a 11 0 5 8 60 11 K PE...

Page 14: ...16 220 240 V max 1 5 e o o a I a a a oe o o e e e a o o a e a a e e a e o a ZELMER LVD 2006 95 EC EMC 2004 108 EC CE A 1 2 3 Me a e a 4 5 6 7 8 on off 9 10 11 12 BG...

Page 15: ...17 B 1 O op o p e o 5 a a 2 11 3 7 7 4 5 12 6 7 on 8 15 8 C 1 2 11 3 4 6 10 O op o p e o 5 a a 11 0 5 8 60 11...

Page 16: ...18 220 240 V max 1 5 ZELMER LVD 2006 95 EC EMC 2004 108 EC A 1 2 3 Me a e op yc 4 5 6 7 8 on off UA...

Page 17: ...19 9 10 11 12 a i B 1 i p p y 5 a a 2 11 3 7 7 4 5 12 6 7 on 8 15 8 C 1 2 11 3 4 6 10 i p p y 5 a a 11 0 5 i 8 i 60 11...

Page 18: ...20 26663 19848 5 40 1 15150 c...

Page 19: ...gti ant virdulio i orinio pavir iaus Nestatykite virdulio ant kar t pavir i ar arti j Plovimo ar pildymo metu nemerkite virdulio ir maitinimo pagrindo vanden Saugokit s kad nesu lapintum te maitinimo...

Page 20: ...o lizdo 2 I imkite filtr 11 3 I orinius pavir ius valykite mink tu skudur liu sudr kintu ind plovimo skys iu Nor dami i valyti vandens nuos das nuo vidinio ir i orinio pavir i patrinkite juos skudur l...

Page 21: ...iet k rsti tvaiki Neiesl dziet t jkannu bez dens Neizmantojiet t jkannu bez filtra Neizmantojiet t jkannu ar atv rtu v ku t jkanna neiz sl dzas autom tiski Pirms t r anas t jkannai j atdziest T jkanna...

Page 22: ...sto deni Filtra mai a katlakme a no em ana Ja t jkannas diben parad s ka u nos dumi tie j likvid Izmantojiet 6 vai 10 eti u Atv ret t jkannas v ci u 5 No emiet filtru 11 Nomazg jiet filtru zem dens Ie...

Page 23: ...e sissevalamisel v i pesemisel rge laske sisemisel vooluringil m rjaks saada Kui sisemised elektriosad v i alus ise on saanud m r jaks siis enne teekannu sissel litamist tuleb neid kor ralikult kuivat...

Page 24: ...maldamiseks kannu seest ja v ljastpoolt kasutage dikas niisutatud lappi 4 Loputage kann puhta veega Filtri vahetamine katlakivi lahustamine Katlakivi eemaldamiseks kannu p hjas kasutage dikas 6 v i 10...

Page 25: ...on or near hot objects Do not immerse the kettle or the power base in water when filling or washing the electric kettle Be careful not to wet the plug of the connecting cord In the event that water g...

Page 26: ...e automatically In order to switch the kettle on again after it has cooled down approx 15 minutes take it off the base replace it and switch the kettle on by pressing the lever 8 The cooling down of t...

Reviews: