


Administrator’s Guide for SIP-T2 Series/T19(P) E2/T4 Series/CP860 IP Phones
78
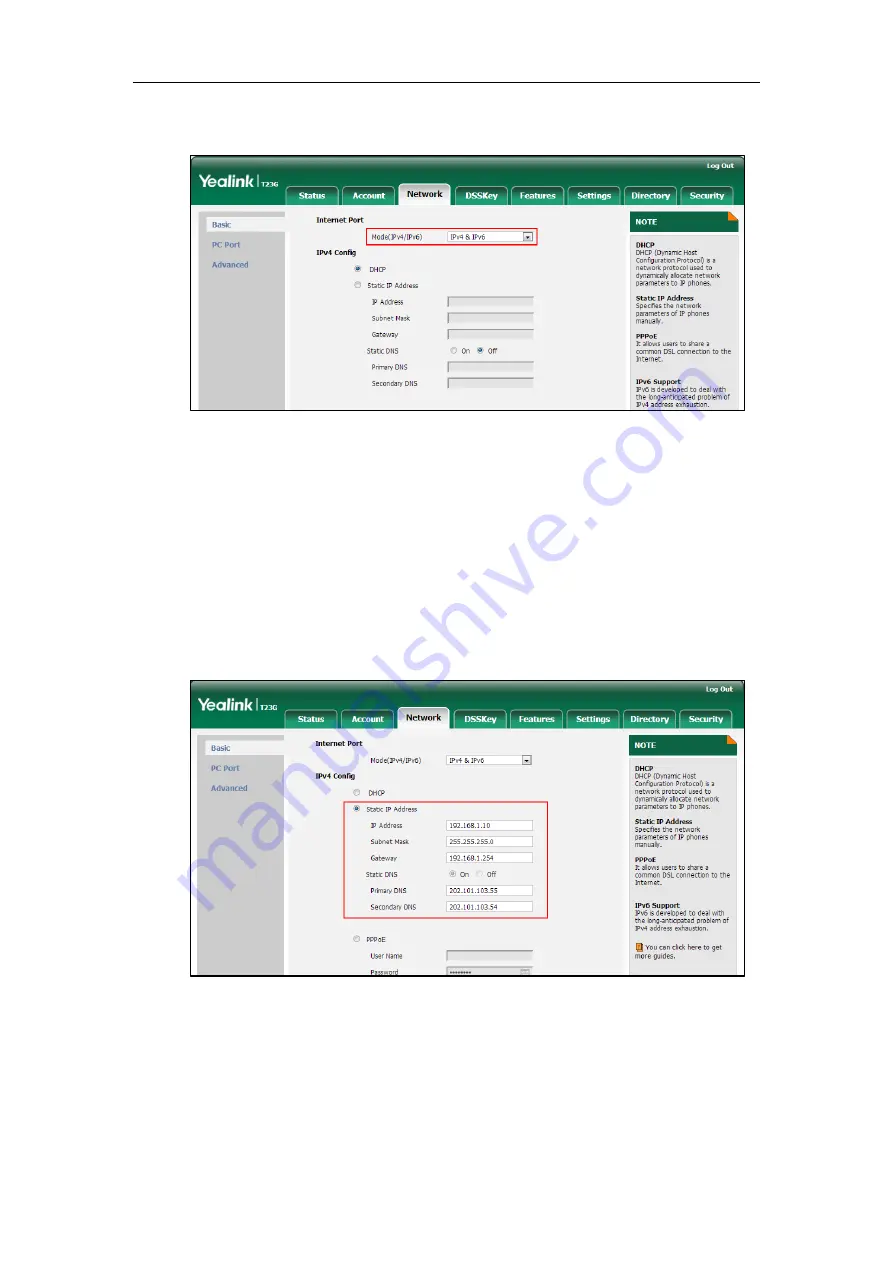
2.
Select desired value from the pull-down list of Mode(IPv4/IPv6).
3.
Click Confirm to accept the change.
A dialog box pops up to prompt that settings will take effect after a reboot.
4.
Click OK to reboot the phone.
To configure a static IPv4 address via web user interface:
1.
Click on Network->Basic.
2.
In the IPv4 Config block, mark the Static IP Address radio box.
3.
Enter the desired values in the IP Address, Subnet Mask, Gateway, Primary DNS
and Secondary DNS fields.
4.
Click Confirm to accept the change.
A dialog box pops up to prompt that settings will take effect after a reboot.
5.
Click OK to reboot the phone.
To configure the IP address mode via phone user interface:
1.
Press Menu->Settings->Advanced Settings (default password: admin)
Summary of Contents for Yealink SIP-T42G
Page 1: ......
Page 12: ...Administrator s Guide for SIP T2 Series T19 P E2 T4 Series CP860 IP Phones xii ...
Page 20: ...Administrator s Guide for SIP T2 Series T19 P E2 T4 Series CP860 IP Phones xx ...
Page 41: ...Getting Started 21 For SIP T46G Desk Mount Method Wall Mount Method Optional ...
Page 43: ...Getting Started 23 For SIP T29G T27P Desk Mount Method Wall Mount Method Optional ...
Page 45: ...Getting Started 25 For SIP T21 P E2 Desk Mount Method Wall Mount Method Optional ...
Page 678: ...Administrator s Guide for SIP T2 Series T19 P E2 T4 Series CP860 IP Phones 658 ...


