background image

Customizing Your Phone 

19 

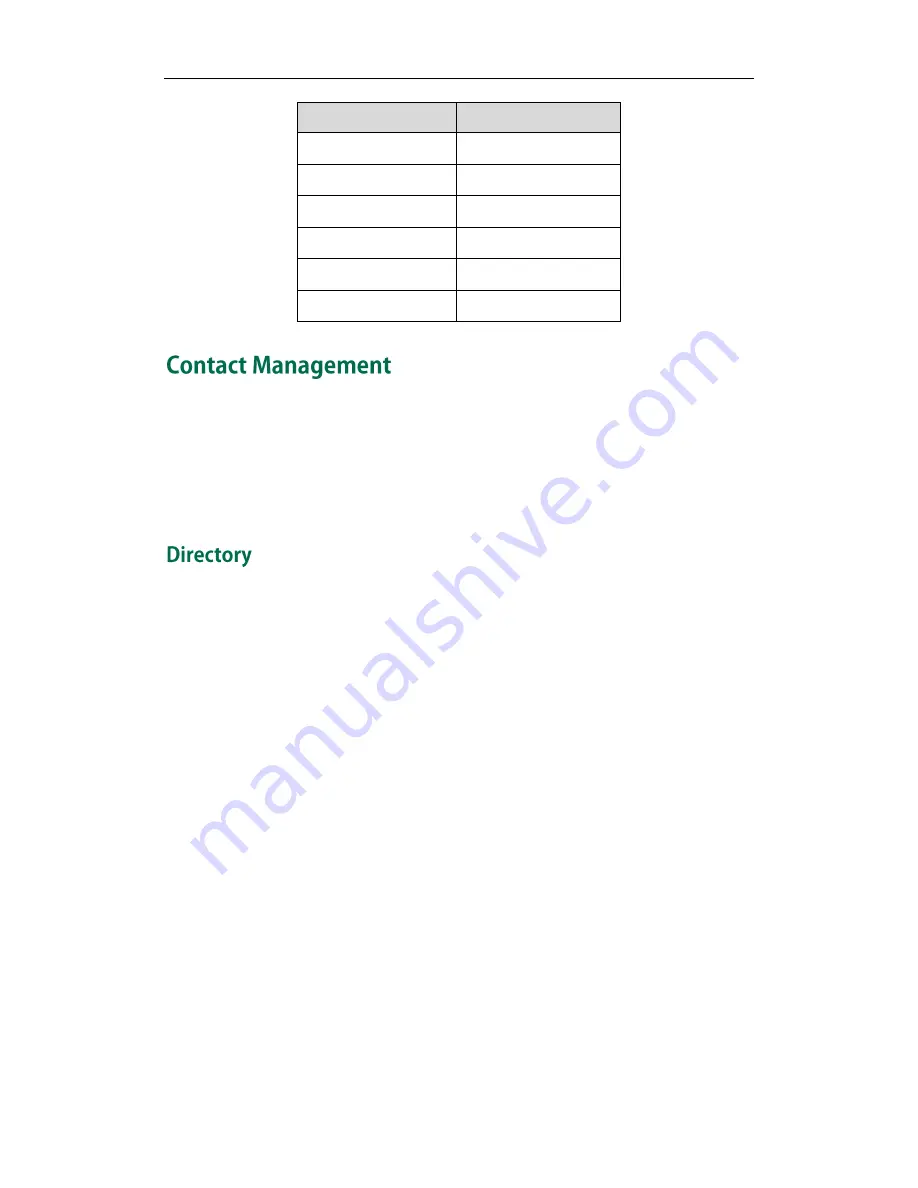
Date Format 

Example (2015-03-24) 

DD-MMM-YY 

24-Mar-15 

YYYY-MM-DD 

2015-03-24 

DD/MM/YYYY 

24/03/2015 

MM/DD/YY 

03/24/15 

DD MMM YYYY 

24 Mar 2015 

WWW DD MMM 

Tue 24 Mar 

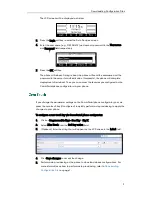
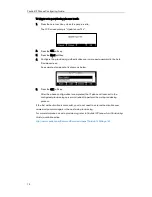
This section provides the operating instructions for managing contacts. Topics include: 


Directory 


Remote Phone Book 


Search Source List in Dialing 

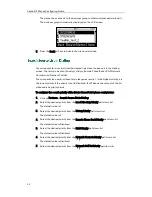
Directory provides easy access to frequently used lists. The lists may contain Local 
Directory, History, Remote Phone Book, LDAP, Network Contacts and Network Call List. 

You can configure the display priority of these lists in the Directory. 1 is the highest 
priority, 6 is the lowest priority. If the priority is set to Disabled, the list will not be 
displayed in the Directory. Once the configuration is completed, you can press the Dir 
soft key on the phone to access these lists. 

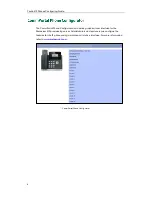
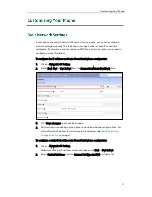
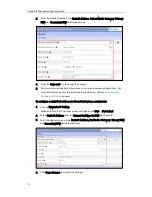
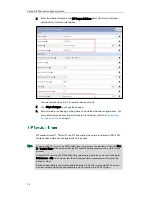
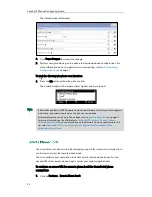
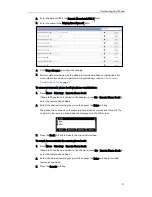
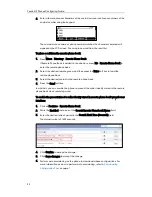
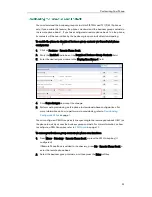
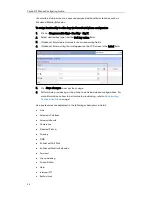
To configure the display priority of the list via CommPortal phone configurator: 

1.


Click on Features-> Directory. 

2.


Select the desired priority from the Local Directory Priority pull-down list. 

The default value is 1. 

3.


Select the desired priority from the History Priority pull-down list. 

The default value is Disabled. 

4.


Select the desired priority from the Remote Phone Book Priority pull-down list. 

The default value is Disabled. 

5.


Select the desired priority from the LDAP Priority pull-down list. 

The default value is Disabled. 

6.


Select the desired priority from the Network Contacts Priority pull-down list. 

The default value is Disabled. 

7.


Select the desired priority from the Network Call List Priority pull-down list. 

Summary of Contents for Yealink SIP-T41P

Page 1: ......

Page 2: ...SUBJECT TO CHANGE WITHOUT NOTICE ALL STATEMENTS INFORMATION AND RECOMMENDATIONS IN THIS GUIDE ARE BELIEVED TO BE ACCURATE AND PRESENTED WITHOUT WARRANTY OF ANY KIND EXPRESS OR IMPLIED USERS MUST TAKE...

Page 3: ...ion reception which can be determined by turning the equipment off and on the user is encouraged to try to correct the interference by one or more of the following measures 1 Reorient or relocate the...

Page 4: ...under the specific terms of the GPL Please refer to the GPL for the exact terms and conditions of the license The original GPL license source code of components licensed under GPL and used in Yealink...

Page 5: ...P IP phones including Yealink T2 Series T23P G T21 P E2 Yealink T4 Series T48G T46G T42G T41P Note Topics provided in this guide include Chapter 1 Getting Started Chapter 2 Configuring your Phone Chap...

Page 6: ...Yealink IP Phones Configuring Guide vi...

Page 7: ...figurator 6 Downloading Configuration Files 7 Obtaining the Provisioning Server Address 7 Configuring the Update Mode 7 Power On 7 Auto Provision Now 8 Zero Touch 9 Customizing Your Phone 11 Basic Net...

Page 8: ...Transfer 47 Conference Call 48 Call Park 49 Call Pickup 52 Advanced Phone Features 53 Enhanced Monitor Extension 54 Intercom and Push to Talk 56 Multicast Paging 59 DTMF 64 Call Jump 66 Resetting the...

Page 9: ...two options for power and network connections AC power Optional Power over Ethernet PoE AC Power To connect the AC power 1 Connect the DC plug on the power adapter to the DC5V port on the phone and c...

Page 10: ...status includes Network status e g IPv4 status IP mode MAC address Phone status e g product name hardware version firmware version product ID MAC address and device certificate status Account status...

Page 11: ...Getting Started 3 2 Press or to scroll through the list and view the specific information...

Page 12: ...Yealink IP Phones Configuring Guide 4...

Page 13: ...se IP phones via phone user interface If the administrator wants to deploy small number of phones this method can be used However if the administrator wants to deploy and maintain a mass of IP phones...

Page 14: ...is an online graphical user interface for the Metaview SIP provisioning server Administrators and end users can configure the features for the IP phones using a simple and intuitive interface For mor...

Page 15: ...ning server address e g by detecting DHCP options 66 contacting Redirection Provisioning Server RPS manual settings When using DHCP option 66 or RPS to obtain the provisioning server address make sure...

Page 16: ...ter reboot Then you can access the features you configured on the CommPortal phone configurator via your phone Note You can use Auto Provision Now method to trigger the IP phone to perform the auto pr...

Page 17: ...CommPortal phone configurator via your phone If you change the parameter settings on the CommPortal phone configurator you can press the zero touch key if configured to quickly perform auto provision...

Page 18: ...f screenshot is shown as below 5 Press the OK soft key After the above configuration is completed the IP phone will connect to the configured provisioning server and reboot to perform the auto provisi...

Page 19: ...on Network IP Setting 2 Select IPv4 IPv6 or IPv4 IPv6 from the Internet Port Mode IPv4 IPv6 field 3 Click Save changes to accept the change 4 Perform auto provisioning on the phone to download above...

Page 20: ...n on how to perform auto provisioning refer to Downloading Configuration Files on page 7 To configure a static IPv6 address via CommPortal phone configurator 1 Click on Network IP Setting Make sure th...

Page 21: ...ctory Number and Display Name fields respectively 3 Select the desired value from the Description field 4 Depending on your selection If you select Use directory number the directory number will act a...

Page 22: ...imers T1 T2 and T4 are SIP transaction layer timers defined in RFC 3261 These session timers are configurable on IP phones Note In previous EP V3 version the SIP session timer parameters are located a...

Page 23: ...of Timer T1 0 5 will continue until the retransmitting time reaches the Timer T2 4 The total registration request retry time will be less than 64 times of T1 64 0 5 32 The re transmitting interval in...

Page 24: ...ences Time Date 2 Select NTP from the Obtain Time Method pull down list 3 Select the desired time zone that applies to your area from the Time Zone pull down list The default time zone is Match My Acc...

Page 25: ...te field Value format is Month Day of Week Day of Week Last in Month Hour of Day The mapping is For Month 1 Jan 2 Feb 12 Dec For Day of Week 1 Jan 2 Feb 12 Dec For Day of Week Last in Month 1 the firs...

Page 26: ...urator 1 Click on Preferences Time Date 2 Mark the desired radio box of the Time Format field 3 Select the desired date format from the Date Format pull down list 4 Click Save changes to accept the ch...

Page 27: ...st will not be displayed in the Directory Once the configuration is completed you can press the Dir soft key on the phone to access these lists To configure the display priority of the list via CommPo...

Page 28: ...te phone book You can configure your new phone to access up to 5 remote phone books For the access URL of the remote phone book contact your system administrator To configure an access URL for a remot...

Page 29: ...is added to the directory press Dir Remote Phone Book to enter the remote phone book 2 Select the desired remote group and then press the Enter soft key The phone then connects to the remote phone bo...

Page 30: ...ook 3 Select the desired contact in the remote phone book 4 Press the Send soft key In addition you can enable the phone to present the caller identity stored in the remote phone book when receiving a...

Page 31: ...Display Item Name 1 field 4 Click Save changes to accept the change 5 Perform auto provisioning on the phone to download above configurations For more information on how to perform auto provisioning...

Page 32: ...e IP phone cannot search the list when searching for contacts To configure the search priority of the list via CommPortal phone configurator 1 Click on Features Search Source List in Dialing 2 Select...

Page 33: ...en You can press or to scroll to the desired entry and then place a call to the entry Note You can assign predefined functionalities to line keys You can also define a label for a line key feature whi...

Page 34: ...elds 4 Optional Enter a string that will appear on the LCD screen in the Label field 5 Click Save changes to accept the change 6 Perform auto provisioning on the phone to download above configurations...

Page 35: ...action Line Line the account this feature will be applied to Mode Default Lock Label key label displayed on the LCD screen Usage When receiving an incoming call the Line key LED flashes green 1 Press...

Page 36: ...cess code the automatic recall access code Label key label displayed on the LCD screen Usage Press the DSS key to place a call to the last received call Conference You can use this key feature to set...

Page 37: ...access frequently used lists Dependencies Soft key action Directory Label key label displayed on the LCD screen Usage Press the DSS key to immediately access to frequently used lists Note DND Do Not...

Page 38: ...pecified in the Park Orbit field Retrieved Parked Call You can use this key feature to retrieve a parked call by pressing the retrieved parked call key on the phone For more information refer to Retri...

Page 39: ...played on the LCD screen Usage 1 During a call press the DSS key to activate the group listening mode You can then speak and listen through the handset headset while other people at your side can only...

Page 40: ...label displayed on the LCD screen Usage Press the DSS key to lock the phone immediately when the phone is idle Last Caller ID Erasure You can use this key feature to delete the record of the last rec...

Page 41: ...ort Label key label displayed on the LCD screen Usage Press the DSS key to send a Real Time Transport Protocol RTP stream to the pre configured multicast address es Paging List You can use this key fe...

Page 42: ...er the call This produces a record that the Service Provider can access and will contain the calling party ID if this is available regardless of whether the caller withheld their number The service pr...

Page 43: ...0 Dependencies Soft key action XML Group XML Group the remote group URL you want to access if remote phone book is configured Label key label displayed on the LCD screen Usage Press the DSS key to acc...

Page 44: ...y access network contacts For more information refer to Yealink SIP Phones Integrated with Metaswitch CommPortal Phone Applications User Guide Dependencies Soft key action Log Out Label key label disp...

Page 45: ...locked For SIP T46G IP phones MESSAGE REDIAL HOLD MUTE TRANSFER OK X navigation keys soft keys and line keys key type is not Line are locked All Keys All keys are locked except the volume key and digi...

Page 46: ...Perform auto provisioning on the phone to download above configurations For more information on how to perform auto provisioning refer to Downloading Configuration Files on page 7 Note To unlock the...

Page 47: ...ance to logically combine two or more patterns Example 1 9 2 7 3 would match 923 153 773 etc The followed by the sequence number of a parenthesis means the characters placed in the parenthesis The seq...

Page 48: ...Out for all Dial Now Rules You can configure the delay time for all dial now rules That is you can configure your phone to automatically dial out the phone number which matches a dial now rule after...

Page 49: ...l out the phone number automatically after the designated period of time To enable the live dialpad via CommPortal phone configurator 1 Click on Features Dial Plan 2 Mark the Enabled radio box of the...

Page 50: ...Yealink IP Phones Configuring Guide 42...

Page 51: ...r If multiple accounts are registered on the phone then you can involve in more than one call on your IP phone For example when an account is in a call you can press another line key to make a new cal...

Page 52: ...ne is idle The icon on the status bar indicates that DND is enabled Incoming calls will be rejected automatically and n New Missed Call s n indicates the number of missed calls will prompt on the LCD...

Page 53: ...ounts 3 Press the Save soft key to accept the change The icon appears on the status bar and all line icons change to Incoming calls will be rejected automatically and n New Missed Call s n indicates t...

Page 54: ...feature must be enabled in advance If DND Sync for Shared Line feature is enabled for an account when you change the account s DND status its shared lines will synchronously change the DND status If D...

Page 55: ...a call 2 Do one of the following Enter the number you want to transfer the call to Press the Dir soft key and then select the desired group and search for the contact Press or to dial out 3 Press the...

Page 56: ...and then place the second call using account 2 2 Press or to select the call for conference and ensure that the call is active for example select the call on account 1 3 Press the Conf soft key to joi...

Page 57: ...r to Downloading Configuration Files on page 7 You can use call park feature to park a call and then retrieve the parked call from another phone for example a phone in another office or conference roo...

Page 58: ...nload above configurations For more information on how to perform auto provisioning refer to Downloading Configuration Files on page 7 To configure an enhanced call park key via the CommPortal phone c...

Page 59: ...er to Downloading Configuration Files on page 7 To use call park 1 User on phone A places a call to phone B 2 User on phone A wants to take the call in a conference room for privacy and so presses the...

Page 60: ...ickup key via the CommPortal phone configurator 1 Click on Programmable Keys Line Key Key X 2 Select Directed Pickup from the Soft key action field 3 Enter the directed pickup code in the Access Code...

Page 61: ...field 3 Enter the group pickup code in the Access Code field 4 Enter the string that will appear on the LCD screen in the Label field 5 Click Save changes to accept the change 6 Perform auto provisio...

Page 62: ...es an incoming call Solid red The monitored user is busy The monitored user s conversation is placed on hold This LED status requires server support Slow flashing red 1s The call is parked against the...

Page 63: ...ferently depending on the transfer mode via DSS key To configure Transfer Mode via Dsskey feature via CommPortal phone configurator 1 Click on Features Transfer 2 Select the desired type from the Tran...

Page 64: ...Talk Mode Enable You can enable or disable the push to talk mode for the phone If push to talk mode is enabled you can long press the Intercom PTT key for 1 5 seconds to automatically connect with a...

Page 65: ...oading Configuration Files on page 7 The phone automatically plays a warning tone when it receives an incoming intercom call In addition you can enable the phone to mute the microphone when it automat...

Page 66: ...play a warning tone before answering the intercom call If Intercom Tone is disabled the phone will automatically answer the intercom call without warning Intercom Tone is enabled by default Intercom...

Page 67: ...abled 1 Long press the Intercom PTT key for 1 5 seconds when the phone is idle The called destination plays a warning tone and automatically answers the call in the speakerphone mode by default 2 Keep...

Page 68: ...on how to perform auto provisioning refer to Downloading Configuration Files on page 7 To configure a paging list key via the CommPortal phone configurator 1 Click on Programmable Keys Line Key Key X...

Page 69: ...d codec from the pull down list of Outgoing Page Codec The default codec is G722 3 Click Save changes to accept the change 4 Perform auto provisioning on the phone to download above configurations For...

Page 70: ...hone handles incoming multicast paging calls when there is already a multicast paging call on the phone If enabled the phone will ignore incoming multicast paging calls with lower priorities otherwise...

Page 71: ...multicast paging key when the receiver s phone is idle 1 Press the multicast paging key when the phone is idle The phone sends RTP to a preconfigured multicast address IP Port Both the sender s and re...

Page 72: ...DTMF Dual Tone Multi frequency better known as touch tone is used for telecommunication signaling over analog telephone lines in the voice frequency band DTMF is the signal sent from the IP phone to t...

Page 73: ...bytes The 4 bytes are distributed over several fields denoted as Event End bit R bit Volume and Duration If the End bit is set to 1 the packet contains the end of the DTMF event You can configure the...

Page 74: ...is that when you transfer a call via call jump the current call will stay connected instead of being placed on hold The following table lists the default call jump hotkeys configured by Metaswitch In...

Page 75: ...ave home In this case A can dial 96 to quickly jump the current call to a wireless number without interrupting the conversation Before A uses the mobile phone to answer the call the call will stay con...

Page 76: ...Yealink IP Phones Configuring Guide 68...

Page 77: ...ace 1 Press Menu Settings Advanced Settings Reset to Factory 2 Press the Enter soft key The LCD screen prompts the following warning 3 Press the OK soft key The LCD screen prompts the following The LC...

Page 78: ...Yealink IP Phones Configuring Guide 70...

Page 79: ...and the Ethernet cable is not loose Ensure that the switch or hub in your network is operational Why doesn t the phone display time and date correctly Check if you have configured the phone to obtain...

Page 80: ...vated on your phone Refer to Do Not Disturb on page 43 Why is my handset not working Check that the handset cord is fully connected to both the handset jack on the phone and handset Refer to Phone Ins...

Page 81: ...er the new user password in the User Password field 4 Click Save changes to accept the change 5 Perform auto provisioning on the phone to download above configurations For more information on how to p...

Page 82: ...Yealink IP Phones Configuring Guide 74...

Page 83: ...OF ITS ESSENTIAL PURPOSE Save these instructions Read these safety instructions before use The following basic safety precautions should always be followed to reduce the risk of fire electrical shock...

Page 84: ...must meet the requirements of the input voltage of the device Please use the provided surge protection power socket only Before plugging or unplugging any cable make sure that your hands are complete...

Page 85: ...cleaning the device stop using it and disconnect it from the power supply Use a piece of soft dry and anti static cloth to clean the device Keep the power plug clean and dry Using a dirty or wet powe...

Page 86: ...Yealink IP Phones Configuring Guide 78...

Page 87: ...au 05 00 Canada Montreal Ottawa Quebec 05 00 Cuba Havana 05 00 United States Eastern Time 04 30 Venezuela Caracas 04 00 Canada Halifax Saint John 04 00 Chile Santiago 04 00 Paraguay Asuncion 04 00 Uni...

Page 88: ...nkara 02 00 Ukraine Kyiv Odessa 03 00 East Africa Time 03 00 Iraq Baghdad 03 00 Russia Moscow 03 30 Iran Teheran 04 00 Armenia Yerevan 04 00 Azerbaijan Baku 04 00 Georgia Tbilisi 04 00 Kazakhstan Akta...

Page 89: ...Name 10 00 Russia Vladivostok 10 30 Australia Lord Howe Islands 11 00 New Caledonia Noumea 11 30 Norfolk Island 12 00 New Zealand Wellington Auckland 12 45 New Zealand Chatham Islands 13 00 Tonga Nuk...

Page 90: ...Yealink IP Phones Configuring Guide 82...

Page 91: ...Started 1 I In This Guide v Incoming Intercom PTT Calls 57 Intercom and Push to Talk 56 K Keypad Lock 37 L Limitation of Liability 75 Line Keys 14 Live Dialpad 41 P Phone Initialization 2 Phone Insta...

Reviews: