4 - 14
Watkiss Automatic SpineMaster Service Manual - Edited 17/06/04
Service Procedures
•
Machine Adjustments
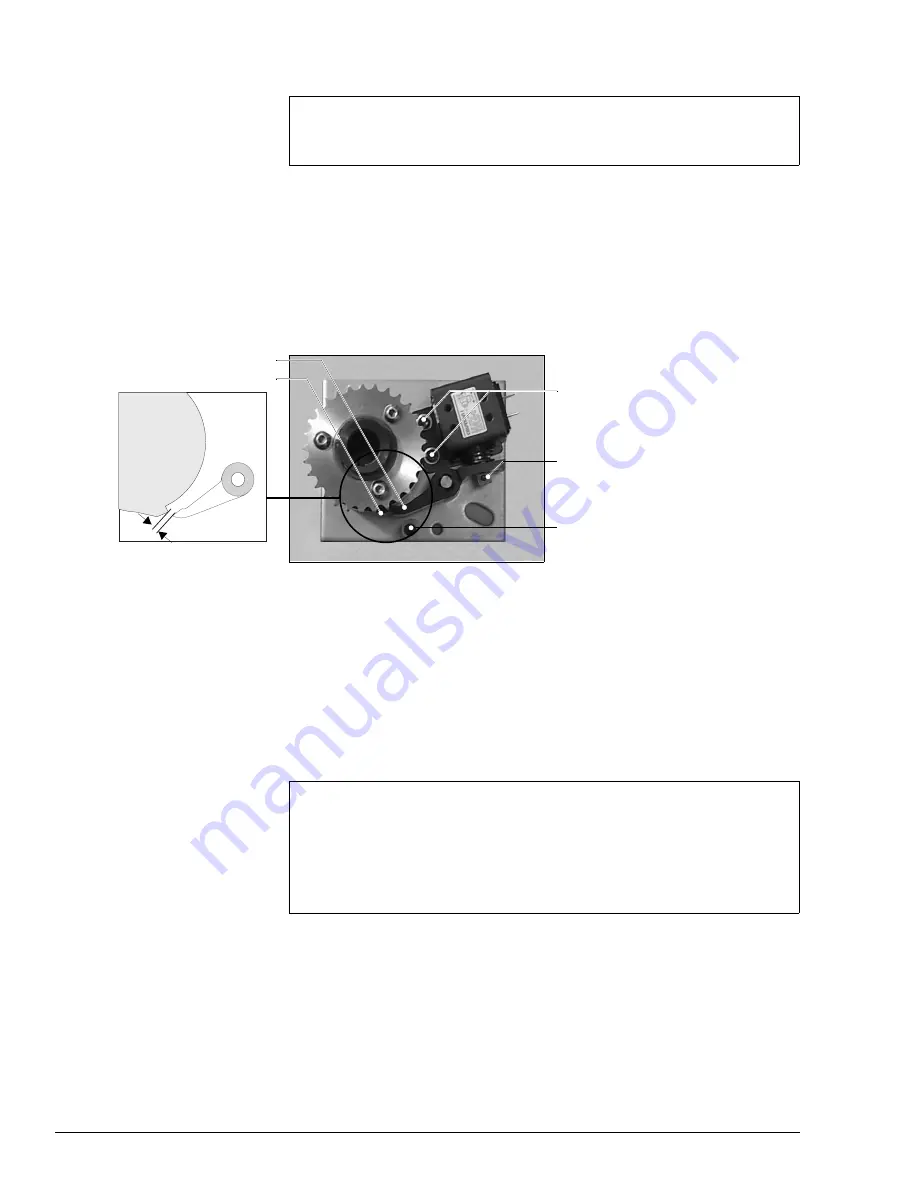
4.7.6 Setting the Solenoid
Procedure
1. Loosen the Solenoid mounting screws slightly. You should be able to
move the Solenoid, but the screws should be just tight enough to allow the
Solenoid to stay in position.
2. Loosen the Eccentric Cam.
3. Fully depress the Plunger (see Figure 4:22) and adjust the position of the
Solenoid to give an air gap of 2.0mm between the tip of the Actuator Pawl
and the tip of the Stop on the Control Collar.
4. Rotate the Eccentric Cam until the airgap is limited to 1.5mm. Tighten the
Eccentric Cam.
5. Tighten the Solenoid mounting screws, and recheck the airgap.
4.7.7 Adjusting the Stop
If booklet spines are being formed unevenly, it is possible that the Stop needs
adjusting. It is essential that the Stop is parallel with the Clamp, and that the
minimum depth is correctly set.
Procedure
1. Switch off the power and disconnect the mains input.
2. Remove the Side Covers.
3. Rotate the Adjuster Shaft (265-835) anti-clockwise, to bring the Stop to its
minimum depth. Use a 13mm spanner to loosen the Trantorque Bush on
the end of the Adjuster Shaft.
PARTS REQUIRED
TOOLS REQUIRED
None
4mm Allen Key
952-382 Feeler Gauges, Metric
Figure 4:22 Solenoid Adjustment
Solenoid Mounting screws
Plunger
Eccentric Cam
Actuator Pawl
2mm Airgap (once set, this
should be limited to 1.5mm
by the Eccentric Cam.
Stop
PARTS REQUIRED
TOOLS REQUIRED
Locktite 242
3mm Allen Key
4mm Allen Key
8mm Spanner
13mm Spanner
952-421 0.5mm Feeler Gauge


