Chapter 2 Hardware Installation 9
RDU-A G2 Intelligent Monitoring Unit User Manual
2.2 Installing RDU-A G2 Host
2.2.1 Mechanical Installation
The RDU-A G2 host can be installed in a cabinet.
The installation procedures are as follows:
1. Confirm that the cabinet has been secured, with no obstacles inside or outside it.
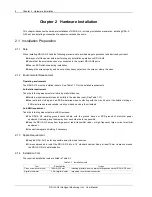
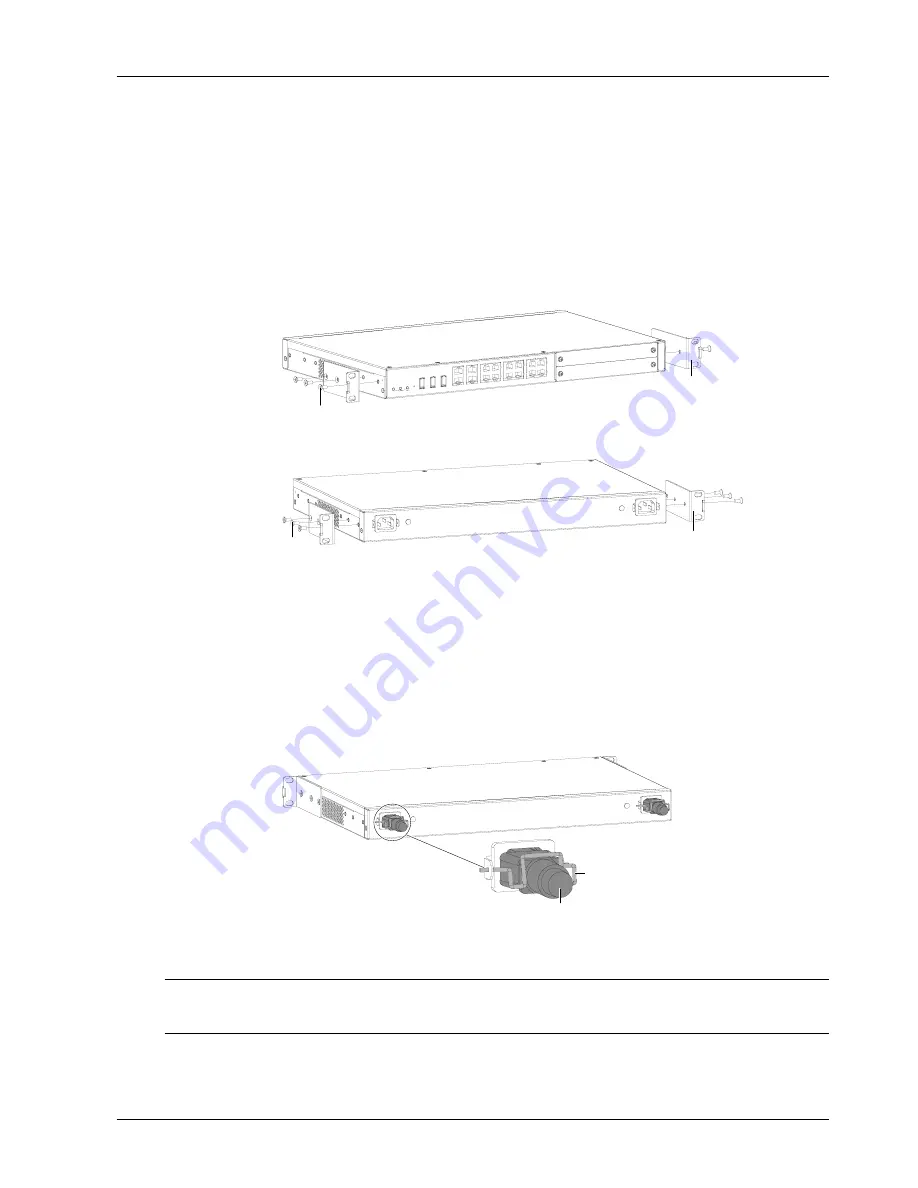
2. Fasten the hangers onto both sides of the RDU host with accessory M4 screws; there are two methods for
installing the hangers: installing on the front end and installing on the back end, as shown in Figure 2-2 and
Figure 2-3.
Hanger (2 pcs)
M4 screw (6 pcs)
Figure 2-1 Installing the hangers on the front end
Hanger (2 pcs)
M4 screw
(6 pcs)
Figure 2-2 Installing the hangers on the back end
3. Use M6 floating nuts to fasten the hangers of RDU-A G2 host to the cabinet.
2.2.2 Electrical Connection
The electrical connection procedures of the RDU-A G2 host are as follows:
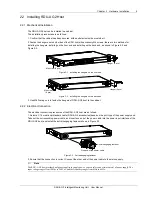
1. Select a C14 or national standard cable (RDU-A G2 accessories) based on the port type of the power supply end.
Take out the corresponding power cable, and insert one end of the power cable into the power input interface of the
RDU-A G2 host, and install the anti-disengaging fastener shown in Figure 2-3.
Anti-disengaging fastener
One end of the power cable
Figure 2-3 Anti-disengaging fastener
2. Ensure that the connection is correct. Connect the other end of the power cable to the mains supply.
Note
The RDU-A G2 host provides dual power supplies to supply power; you can select one or two route(s) of power supply. The
input voltage ranges from 100Vac to 240Vac, and the frequency ranges from 45Hz to 66Hz.


