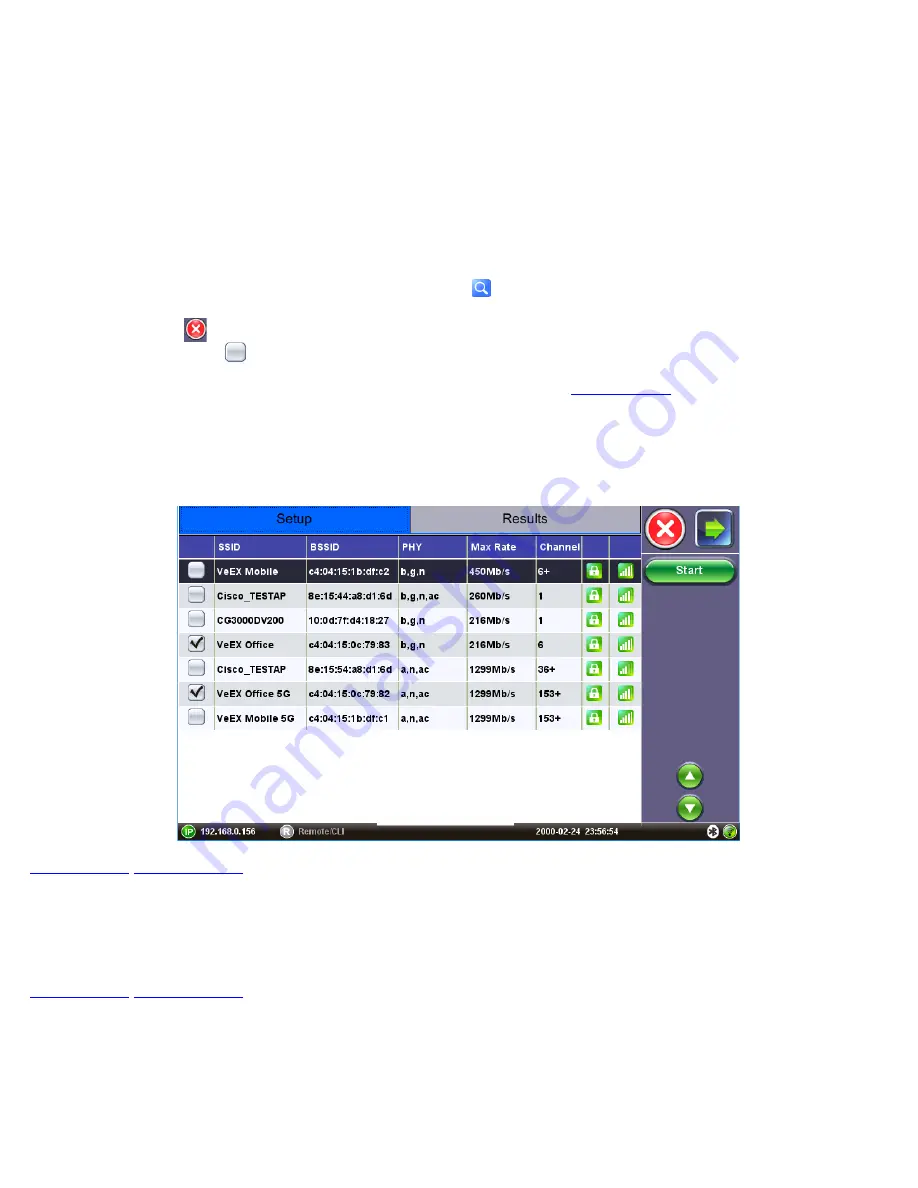
6.1.1 AP Filter Setup
When enabled, the AP Filter allows users to select the list of APs that will be included in the Auto-test. When disabled, all APs
detected by the Auto-Test scan function are included in the Auto-test Pass/Warning and Fail results.
Why is AP Filter necessary? When analyzing the WiFi environment, the Auto-Test Scan function detects APs belonging to the
network under test, but also APs that belong to neighboring offices or buildings. In order to focus the Auto-Test Pass/Warning
and Fail results to APs belonging to the networks under test, use the AP filter to select
only
the SSIDs from the APs belonging to
the network under test.
Configuring the AP Filter List
1. Access the AP Filter list by using the magnifying glass icon
and place a check mark next to the SSIDs belonging to
the network under test. Enter the password for the AP and tap
OK
.
2. Press the red
X
to close the AP filter selection and return to the Setup menu.
3. Tap on the check box
next to AP Filter to enable it.
Note that the AP filter list is first populated by running a regular AP scan (refer to
). Make sure to run an AP scan
prior to setting up AP Filter.
Note
: If
Connectivity Check
Auto-Test is enabled, enter the password information when prompted to do so, to connect to an AP
under test. Ensure that the AP filter is enabled and only the APs from the network under test are selected.
AP Filter Selection
6.2 Auto-Test Results
After pressing
Start
, the Auto-Test Summary results tab is automatically displayed. Additional details are accessible in individual
auto tests tabs.
6.2.1 Auto-Test Results Summary
The Auto-Test Summary screen gives a summary for each of the individual Auto-test categories.
Tap on the test category to go directly to the corresponding tab and review detailed results.
Auto-Test Results Summary
WiFiAirExpertSeries_eManual_D07-00-120P_Rev A00


