


-18-
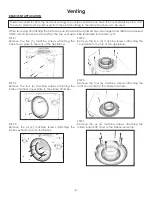
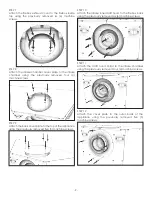
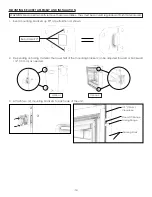
STEP 1
Remove the two middle panel
brackets.
STEP 2
Remove the top brick panel.
STEP 3
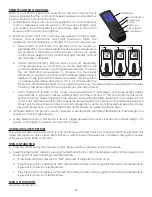
Slightly loosen the two button head
screws and adjust the restrictor as shown.
OPEN
CLOSED
Button Head Screws
RESTRICTOR ADJUSTMENT
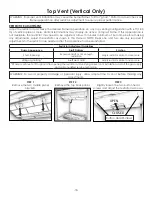
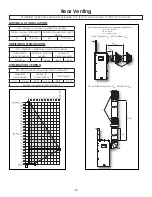
Adjust the restrictor to achieve the desired flame appearance on any top venting configuration with 6 ft (1.83
m) of vertical pipe or more. Vertical terminations may display an active, compact flame. If this appearance is
not desirable, the restrictor may need to be adjusted. Allow 15 minutes minimum of burn time before making
any adjustments. Adjust the restrictor as shown in this manual. NOTE: Steps one and two are only required if
adjustments to the restrictor are needed after the appliance has been installed.
Restrictor Adjustment Guidelines
Flame Appearance
Draft Problem
Solution
Short, flickering
Excessive draft or not enough
restriction
Adjust restrictor plate to close more
Lifting or ghosting*
Insufficient draft
Adjust restrictor plate to open more
*If flames continue to lift or ghost after opening the restrictor and verifying correct vent installation, shut off the gas supply
and call a qualified service technician.
WARNING: To avoid property damage or personal injury, allow ample time to cool before making any
adjustments.
WARNING: Improper vent installation may cause the burner flames to lift or “ghost.” Perform a visual check on
flame appearance after restrictor adjustment to ensure proper performance.
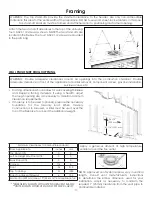
Top Vent (Vertical Only)


