39
the button again.
Power off screen when holding down the
mode
button (
1
).
UniGo will also turn itself off if no button
is pressed and no RPM, speed or trigger is
detected after a preselected time. Please see
“AUTO POWER OFF TIME” on page 33.
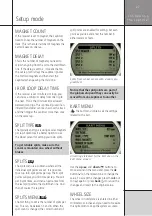
BUILT-IN HELP
When you move around in menus, UniGo will
display one line of help text at the bottom of
the display. Use this line to get familiar with
the different settings in UniGo.
Example on the help text describing the
♥current selection.
WARNING LEDS
The warning LEDs are an important features of
the Laptimer. A total of five LEDs are located
at the top, and the idea is to warn the driver
about something that needs attention.
Each LED is totally programmable and flexible.
Please see how to do it under “WARNING LED
SETUP” on page 32.
The LEDs can either be constant on, blink
slowly or blink fast. If the RPM shift light is
used, it will use the fast blink, and the warning
LEDs should use constant or slow to avoid any
confusions. The warning LEDs do have the
lowest priority and if shift lights are used, the
warnings are not active until gear is shifted.
Warning LEDs 1 and 5 are active.
showing which buttons to press to use the
different functions.
WARNING. Do not look directly into the
LEDs when they are set to high bright-
ness. They are very bright!
SHIFT LIGHT
Unigo can use the five LEDs as gear shift light.
Even if warning lights are active, the shift light
have priority and will take control of the LEDs.
First LED turned on in the shift light.
If RPM Shift Type is set to “single LED” (see
“RPM SHIFT TYPE” on page 30) each LED
will turn on individually. Two different settings
are needed. The first is the optimal engine
revolution at which gear should be shifted.
This will be indicated with the yellow LED.
The second is the distance between the LEDs.
Operating UniGo
R e f e r e n c e
G u i d e
Summary of Contents for UniGo 5005
Page 1: ...UniGo 3005 5005 Laptimer User Guide...
Page 6: ...VI This page was intentionally left blank...
Page 10: ...10 I n t r o d u c t i o n Examples...
Page 18: ...18 I n s t a l l i n g t h e L a p t i m e r Installation...
Page 24: ...24 Q u i c k G u i d e Quick guide...
Page 55: ...55 I n d e x...


