42
XI. BOILER CLEANING (continued)
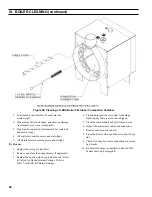
Figure 28: Cleaning of LEDV Boiler Firetubes / Combustion Chamber
3. Terminal and wall thimbles (if used) must be
weather-tight.
4. Pipe must be full round shape, and show no damage
from impact or excessive temperature.
5. Pipe must be supported at minimum 5 foot intervals
and must not sag.
6. All vent joints must be secure and watertight.
7. All air intake joints must be secure and airtight.
G.
Burner.
1. Replace the oil supply line filter.
2. Remove and clean the pump strainer (if applicable).
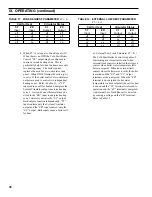
3. Replace the nozzle with an equivalent nozzle. Refer
to Table 6 for Beckett Burner Settings. Refer to
Table 7 for Riello BF Burner Settings.
4. Clean and inspect the electrodes for damage,
replacing any that are cracked or chipped.
5. Clean the combustion head of all lint and soot.
6. Inspect the transformer cables and connectors.
7. Remove and clean the cad cell.
8. Clean the blower wheel and the air control of any
lint.
9. Check all wiring for secure connections or insula-
tion breaks.
10. Re-adjust the burner as detailed in Section VIII:
System Start-up, Paragraph E.
Summary of Contents for LE DV Series
Page 5: ...5 I General Information Figure 1A LEDV Packaged Water Boiler with Beckett AFII Burner ...
Page 6: ...6 I General Information continued Figure 1B LEDV Packaged Water Boiler with Riello BF Burner ...
Page 19: ...19 v venting continued Figure 11 Vent Installation Figure 12 Vent Connector Un Assembled ...
Page 20: ...20 v venting continued Figure 13 Vent Connector Assembled Figure 14 Air Intake Installation ...
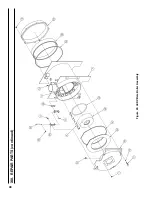
Page 48: ...48 xiii Repair Parts continued Figure 29 LEDV Bare Boiler Assembly ...
Page 50: ...50 xiii Repair Parts continued Figure 30 LEDV Boiler Jacket Insulation ...
Page 55: ...55 xiii Repair Parts continued Figure 33 Vent Kit Repair Parts ...
Page 60: ...60 U S Boiler Company Inc P O Box 3020 Lancaster PA 17604 1 888 432 8887 www usboiler net ...

