Triumph Adler P-C2660 User Manual Download Page 291

Default Setting (System Menu) 

8-35

8

Use the procedure below to select the default quality setting for originals for copying.

1

In the Sys. Menu/Count. menu, press the 

 or 


key to select [Common Settings].

2

Press the 

OK

 key. The Common Settings menu 

appears. 

3

Press the 

 or 

 key to select [Function Default]. 

4

Press the 

OK

 key. The Function Default menu 

appears. 

5

Press the 

 or 

 key to select 

[Orig.Image(Copy)]. 

6

Press the 

OK

 key. Orig.Image(Copy) appears. 

7

Press the 

 or 

 key to select [Text+Photo], 

[Photo], [Text], [Map] or [Printed Document].

8

Press the 

OK

 key. 

Completed.

 is displayed and the 

screen returns to the Function Default menu. 
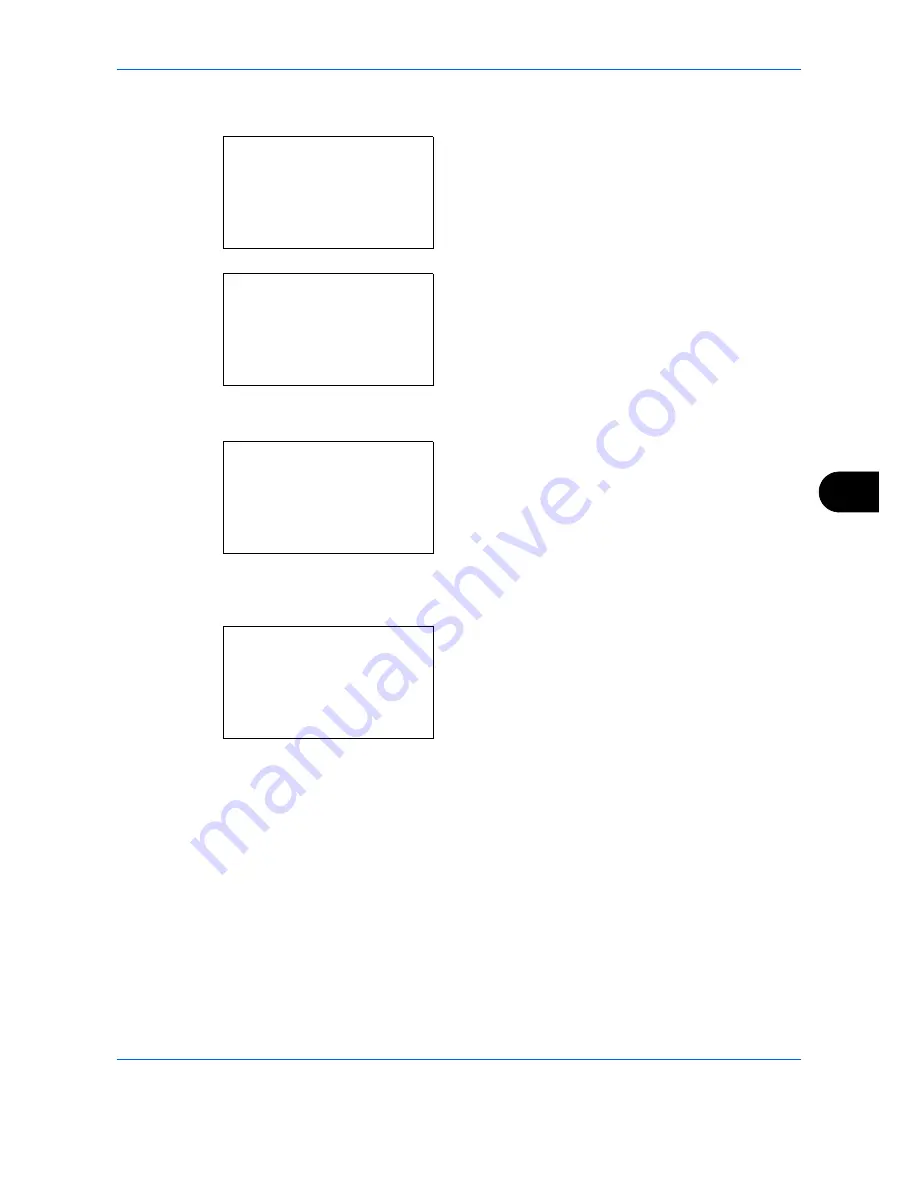
Sys. Menu/Count.:

a


b


4

  User/Job Account

5

  User Property

*********************

[ Exit

]

6

  Common Settings

Common Settings:

a


b


*********************

2

  Default Screen

3

  Sound

[ Exit

]

1

  Language

Function Default:

a


b


*********************

2

  Scan Resolution

3

  FAX Resolution

[ Exit

]

1

  Color Selection

Orig.Image(Copy):

a


b


*********************

2

  Photo

3

  Text

1

 *Text+Photo

Summary of Contents for P-C2660

Page 1: ...P C2660 MFP P C2665 MFP User Manual P C2660 MFP P C2665 MFP Digital Multifunctional Colour System Copy Print Scan Fax A4 EN...

Page 2: ...Guide Describes the procedures for installation of the machine frequently used operations routine maintenance and troubleshooting action Safety Guide Provides safety and cautionary information for th...

Page 3: ...side the symbol The symbol indicates that the related section includes information on prohibited actions Specifics of the prohibited action are indicated inside the symbol The symbol indicates that th...

Page 4: ...lling Software 2 23 Embedded Web Server RX 2 36 Loading Paper 2 47 Loading Originals 2 65 3 Basic Operation Login Logout 3 2 One Touch Keys and Program Keys 3 3 Message Display 3 6 Copying 3 7 Printin...

Page 5: ...6 Document Box Printing Documents Stored in USB Memory 6 2 Saving Documents to USB Memory Scan to USB 6 5 Removing USB Memory 6 7 Printing from a Custom Box 6 8 Printing from a Job Box 6 16 7 Status...

Page 6: ...oubleshooting Solving Malfunctions 10 2 Responding to Error Messages 10 8 Clearing Paper Jams 10 16 11 Management User Login Administration 11 2 Job Accounting 11 13 Checking the Counter 11 35 Appendi...

Page 7: ...ory Be sure to read Legal and Safety Information before using this machine Administrator tasks It copies It prints Copying with specific settings Printing Documents Stored in Removable USB Memory Prin...

Page 8: ...ten Plug the USB memory 1 If the destination is not stored in the address book you can send by entering the address directly Setup Send as E mail Send to Folder SMB Saving Documents to USB Memory What...

Page 9: ...achine Selection of Telephone Line Inch version only Network Setup LAN Cable Connection Install the Network FAX Driver on your computer 1 1 For more information refer to the Network FAX Driver Operati...

Page 10: ...ge 4 17 JobFinish Notice page 4 15 Print Override page 4 18 Color Selection page 4 19 Color Balance page 4 20 Sharpness page 4 22 Backgrnd Density page 4 23 Saturation page 4 25 Send key Continued on...

Page 11: ...Delayed TX FAX OPERATION GUIDE FAX Direct TX FAX OPERATION GUIDE FAX RX Polling FAX OPERATION GUIDE Density page 5 16 Duplex page 5 8 FTP Encrypted TX page 5 29 File Separation page 5 14 Sharpness pa...

Page 12: ...Box key Other than USB printing Function Menu key File Name Entry page 4 17 JobFinish Notice page 4 15 Print Override page 4 18 Del after Print Document Box key Scan to Polling Box Function Menu key O...

Page 13: ...5 20 JobFinish Notice page 5 27 Density page 5 16 Duplex page 5 8 Sharpness page 5 22 Backgrnd Density page 5 23 Status Job Cancel key Print Job Status page 7 2 Send Job Status page 7 2 Store Job Sta...

Page 14: ...Rpt Set Send Result E mail Folder page 8 121 FAX page 8 121 CancelBefore Send page 8 121 Dest Info page 8 121 FAX RX Result FAX OPERATION GUIDE JobFinish Notice Do Not Attach Attach SendImage Job Log...

Page 15: ...e 8 177 Protocol Detail page 8 181 WSD SCAN page 8 178 WSD PRINT page 8 179 IPSec page 8 194 Secure Protocol SSL page 8 185 IPP Security page 8 186 HTTP Security page 8 187 LDAP Security page 8 189 SM...

Page 16: ...214 Restart page 8 173 Op Functions page 8 215 User Job Account Continued on next page User Login Set User Login page 11 3 Local User List page 11 3 IC Card Settings Key Login Password Login Group Au...

Page 17: ...e page 8 3 Default Screen page 8 5 Sound Buzzer Key Confirmation page 8 6 Job Finish page 8 6 Ready page 8 6 Warning page 8 6 Keyboard Confirm page 8 6 FAX Speaker FAX OPERATION GUIDE FAX Monitor FAX...

Page 18: ...ource page 8 22 SpcialPaper Act page 8 24 Preset Limit page 8 26 Measurement page 8 27 Error Handling DuplexPaperError page 8 28 PaperMismatchErr page 8 28 Date Setting Date Time page 8 141 Date Forma...

Page 19: ...page 8 45 Orig Orientation page 8 30 Backgrnd Copy page 8 31 Backgrnd Send page 8 32 EcoPrint page 8 46 File Name Entry page 8 42 Subject Body page 8 43 Con scan ExptFAX page 8 33 Con scan FAX FAX OP...

Page 20: ...age 7 8 FAX Log page 7 8 TonerAlert Level page 8 68 Copy Paper Selection page 8 69 AutoPaperSelect page 8 70 Auto Priority page 8 71 DP Read Action page 8 72 Select Key Set Left page 8 73 Right page 8...

Page 21: ...eck beforeSend page 8 77 Check New Dest page 8 77 Default Screen page 8 78 Send and Forward Forward page 8 79 Destination page 8 80 FAX FAX OPERATION GUIDE Document Box Custom Box Detail Edit page 8 9...

Page 22: ...8 128 Adjust Magenta page 8 128 Adjust Cyan page 8 128 Adjust Yellow page 8 128 Detail Print Chart page 8 130 Adjust Magenta page 8 130 Adjust Cyan page 8 130 Adjust Yellow page 8 130 Correct Bk Line...

Page 23: ...fluctuations Avoid locations with direct exposure to hot or cold air Avoid poorly ventilated locations If the floor is delicate against casters when this machine is moved after installation the floor...

Page 24: ...appen to inhale toner move to a place with fresh air and gargle thoroughly with a large amount of water If coughing develops contact a physician If you do happen to ingest toner rinse your mouth with...

Page 25: ...ine in a place where the temperature stays below 40 C while avoiding sharp changes of temperature and humidity If the machine will not be used for an extended period of time remove the paper from the...

Page 26: ...ng Scanning the following items is prohibited and may be penalized by low It may not be limited to these items Do not knowingly copy scan the items that are not to be copied scanned Paper money Bank n...

Page 27: ...ter provides information on the following topics Legal Information xxvi Regarding Trade Names xxvii Energy Saving Control Function xxxi Automatic 2 Sided Copy Function xxxi Paper Recycling xxxi Energy...

Page 28: ...xxvi Legal Information Copying or other reproduction of all or part of this guide without the prior written consent of Copyright owner is prohibited...

Page 29: ...d other countries TrueType is a registered trademark of Apple Computer Inc TypeBankG B TypeBankM M and Typebank OCR are trademarks of TypeBank All European language fonts installed in this machine are...

Page 30: ...olkit and OpenSSL Project must not be used to endorse or promote products derived from this software without prior written permission For written permission please contact openssl core openssl org 5 P...

Page 31: ...following disclaimer in the documentation and or other materials provided with the distribution 3 All advertising materials mentioning features or use of this software must display the following ackn...

Page 32: ...all copies of the Software and Typefaces and documentation as requested 6 You agree that you will not modify alter disassemble decrypt reverse engineer or decompile the Software 7 Monotype Imaging war...

Page 33: ...5 minutes have passed since the device was last used Automatic authentication does not take place in sleep mode or energy saver mode To continue the installation press the Energy Saver key to wake the...

Page 34: ...apter 7 Status Job Cancel Explains how to check the job status and job history and how to cancel jobs being printed or waiting to print Also explains how to check the remaining paper and device status...

Page 35: ...additional information For details on Network FAX refer to the FAX Operation Guide Note Indicates supplemental information or operations for reference NOTE Important Indicates items that are required...

Page 36: ...xxxiv...

Page 37: ...1 1 1 Part Names This chapter identifies the machine parts and operation panel keys Operation Panel 1 2 Machine 1 4...

Page 38: ...h the one touch key numbers 1 to 11 and 12 to 22 Indicator is lit while shifted 12 to 22 Displays the Address Book screen where you can add edit and delete destinations Calls the previous destination...

Page 39: ...ymbols Returns the Message Display to the previous screen Lights or blinks when an error occurs Clears entered numbers and characters Resets settings and displays the basic screen Puts the machine to...

Page 40: ...t Tray Section of the Multi Purpose Tray 8 USB Memory Slot 9 Paper Cassette 10 Paper Gauge 11 Main Power Switch 12 Lower Feed Cover 13 Black Toner Container K 14 Magenta Toner Container M 15 Cyan Tone...

Page 41: ...nnector 26 USB Interface Connector 27 USB Memory Slot 28 Network Interface Connector Indicators 29 Option Interface Slot 2 30 Right Cover 31 Power Cord Connector 32 Rear Cover 33 Rear Cover Lever Only...

Page 42: ...Stopper 39 Original Eject Table 40 Top Cover Lever 41 Handles for moving 42 Platen 43 Slit Glass To prevent toppling the top tray and document processor cannot be opened at the same time 44 Cassette 1...

Page 43: ...iginals Check bundled items 2 2 Determining the Connection Method and Preparing Cables 2 3 Connecting Cables 2 5 Power On Off 2 7 Energy Saver Function 2 9 Switching the Language for Display Language...

Page 44: ...ry Documents Contained in the Included DVD The following documents are contained in the included DVD Product Library Refer to them as necessary Documents Operation Guide This Guide Fax Operation Guide...

Page 45: ...ed image as a data file on the FTP Send E mail Sends the image data of scanned originals to the desired recipient as a file attached to an E mail message Send SMB Saves the scanned image as a data fil...

Page 46: ...Function Interface Necessary Cable Printer Scanner TWAIN Scanning WIA Scanning Network FAX Network FAX and FAX functions available only on products with the fax function installed For details on Netwo...

Page 47: ...on press the Energy Saver key on the operation panel and make sure that the message displayed and memory light are off Then press the main power switch to turn off the power 2 Connect the machine to...

Page 48: ...ower outlet IMPORTANT Only use the power cable that comes with the machine 5 Replace the Power Cord Connector Cover 6 Turn the main power switch on The machine begins to warm up 7 When connecting the...

Page 49: ...turning off the main power switch do not turn on the main power switch again immediately Wait more than 5 seconds and then turn on the main power switch Power Off Before turning off the main power sw...

Page 50: ...itch If the machine will not be used for an even longer period of time e g vacation remove the power plug from the outlet as a safety precaution If using the products equipped with the fax function no...

Page 51: ...within 11 seconds Note that ambient environmental conditions such as ventilation may cause the machine to respond more slowly For information on the Low Power Mode settings refer to Low Power Timer on...

Page 52: ...display remains unlit To use the machine press any key on the operation panel For more information about configuring settings refer to Sleep Level models except for Europe on page 8 150 Energy Saver...

Page 53: ...in Network Setting press Menu the Left Select key to authenticate Refer to Character Entry Method on Appendix 9 for details on entering characters 2 In the Sys Menu Count menu press the or key to sele...

Page 54: ...g the date and time 1 Turn on the main power switch 2 Press the System Menu Counter key on the main unit operation panel When you are performing user management and have not logged in a login screen w...

Page 55: ...ed is displayed and the screen returns to the Date Setting menu 11 Press the or key to select Summer Time 12 Press the OK key Summer Time appears 13 Press the or key to select On or Off and then press...

Page 56: ...the screen returns to the Date Setting menu 18 Press the or key to select Date Format 19 Press the OK key Date Format appears 20 Press the or key to select the desired display format and then press th...

Page 57: ...abled by default Specify the settings below when Network Setup on page 8 174 have been changed from their default state Use the procedure below to setup the TCP IP IPv4 setting 1 Press the System Menu...

Page 58: ...e OK key TCP IP appears 9 Press the or key to select On and then press the OK key Completed is displayed and the screen returns to the TCP IP Settings menu 10 Press the or key to select IPv4 Setting S...

Page 59: ...displayed and the screen returns to the IPv4 Setting menu TCP IP IPv4 Setup by Entering IP Addresses Set up TCP IP to connect to the Windows network Set the IP addresses subnet masks and gateway addre...

Page 60: ...have logged in using a Login User Name with administrator privileges The default settings of the Login User Name and Login Password are both 2600 If you have logged in using a Login User Name without...

Page 61: ...and the screen returns to the TCP IP Settings menu 10 Press the or key to select IPv4 Setting 11 Press the OK key The IPv4 Setting menu appears 12 Press the or key to select DHCP 13 Press the OK key D...

Page 62: ...then press the OK key 18 Press the or key to select IP Address 19 Press the OK key IP Address appears 20 Use the arrow keys to enter the IP address Press the or key to move the cursor position horizo...

Page 63: ...or key to move the cursor position horizontally Press the or key or the numeric keys to enter the Subnet Mask Each 3 digits can be set between 000 and 255 IMPORTANT When the DHCP Setting page 2 15 is...

Page 64: ...the numeric keys to enter the Default Gateway Each 3 digits can be set between 000 and 255 IMPORTANT When the DHCP Setting page 2 15 is On the current Default Gateway is displayed and cannot be chang...

Page 65: ...supported by a single driver This printer driver allows you to take full advantage of the features of the machine Use this driver to print PDF files Printing System XPS Driver This printer driver sup...

Page 66: ...Installation on Windows must be done by a user logged on with administrator privileges If the Welcome to the Found New Hardware Wizard dialog box displays select Cancel If the autorun screen is displ...

Page 67: ...ard TCP IP port A USB connection cannot be used NOTE The machine cannot be detected unless it is on If the computer fails to detect the machine verify that it is connected to the computer via a networ...

Page 68: ...evice Settings in the Printing System Driver User Guide on the DVD If a system restart message appears restart the computer by following the screen prompts This completes the printer driver installati...

Page 69: ...buttons can be used This changes the display to icon and text display Use this to select multiple items If the desired device does not appear press this button to directly select the device 5 Select...

Page 70: ...evice settings in Windows XP the dialog box for device setting will appear after Finish is clicked Configure the settings for options installed on the machine Device settings can be configured after t...

Page 71: ...set the machine s emulation to KPDL or KPDL Auto For details refer to Emuration Set on page 8 99 If connecting by Bonjour enable Bonjour in the machine s network settings For details refer to Bonjour...

Page 72: ...ed by the instructions in the installation software This completes the printer driver installation If a USB connection is used the machine is automatically recognized and connected If an IP connection...

Page 73: ...in Address will automatically appear in Name Change if needed NOTE When using a Bonjour connection select Default and click the item that appears in Printer Name The driver with the same name as the m...

Page 74: ...of offer company and Uninstall Product Library to display the Uninstall Wizard 2 Place a check in the check box of the software to be deleted Click Uninstall If a system restart message appears resta...

Page 75: ...dows 8 select Search in charms Apps and then TWAIN Driver Setting 2 Click Add 3 Enter the machine name in the Name field 4 Click next to the Model field and select this machine from the list 5 Enter t...

Page 76: ...Driver Windows Vista Windows Server 2008 and Windows 7 Register this machine to the WIA Driver NOTE The following is not necessary to register when using the machine possesses an IP address or host na...

Page 77: ...n the machine is connected with the USB cable click the Settings tab and select Image Compression and the Compression Level If user login administration is invalid go to Step 5 When the machine is con...

Page 78: ...inis trator General User Device Information The machine s structure can be checked Configuration Counter About Embedded Web Server RX Job Status Displays all device information including print and sca...

Page 79: ...if the host name is MFP001 The web page displays basic information about the machine and Embedded Web Server RX as well as their current status NOTE If the screen There is a problem with this website...

Page 80: ...menu select the setting you want to configure The configurable settings are Device Security Send Security Network Security and Certificates NOTE The configurable settings within Device Security Send...

Page 81: ...sing Embedded Web Server RX on page 2 37 2 From the Device Settings menu select System 3 Enter the device information and then click Submit IMPORTANT After changing the setting restart the network or...

Page 82: ...this machine to the mail server A full time connection via a LAN is recommended SMTP settings Use Embedded Web Server RX to register the IP address or host name of the SMTP server If limits have been...

Page 83: ...r times outs This can be set when POP before SMTP is selected in Authentication Protocol Connection Test Tests to confirm that the settings are correct Domain Restriction Set whether or not domains ar...

Page 84: ...address of the person responsible for the machine such as the machine administrator so that a reply or non delivery report will go to a person rather than to the machine The sender address must be ent...

Page 85: ...to Accessing Embedded Web Server RX on page 2 37 2 From the Address Book menu click Machine Address Book 3 Click Add 4 Enter the destination information Enter the information for the destination you w...

Page 86: ...referring to Accessing Embedded Web Server RX on page 2 37 2 From the Document Box menu click Custom Box 3 Click Add 4 Enter the box details Enter the information for the custom box you want to regist...

Page 87: ...ment stored in a Custom Box A document stored in a Custom Box can be printed from Embedded Web Server RX 1 Access Embedded Web Server RX by referring to Accessing Embedded Web Server RX on page 2 37 2...

Page 88: ...ber or name of the Custom Box in which the document is stored 4 Select the document you wish to print Select the checkbox of the document to be printed 5 Click Print For settings that are configurable...

Page 89: ...traighten it before loading Paper that is curled or folded may cause a jam CAUTION If you copy onto used paper paper already used for copying do not use paper that is stapled or clipped together This...

Page 90: ...r Size and Media Type for the Cassette 1 on page 2 57 The cassettes can hold paper with weights up to 163 g m2 Do not load thick paper that is heavier than 163 g m2 in the cassettes Use the multi purp...

Page 91: ...er be sure that it is not curled or folded Paper that is curled or folded may cause paper jams Ensure that the loaded paper does not exceed the level indicator see illustration below When loading the...

Page 92: ...to the level of empty NOTE If the machine will not be used for a prolonged period protect all paper from humidity by removing it from the cassettes and sealing it in the paper storage bag IMPORTANT Wh...

Page 93: ...more set the media type to Thick The capacity of the multi purpose tray is as follows A4 or smaller plain paper 80 g m2 recycled paper or color paper 50 sheets Hagaki 15 sheets OHP film 1 sheet Envel...

Page 94: ...ORTANT Keep the side that was closest the package seal facing up Curled paper must be uncurled before use Straighten the top edge if it is curled When loading paper into the multi purpose tray check t...

Page 95: ...2 When using legal size paper pull out the support tray section of the multi purpose tray Acceptable Envelope Size Hagaki 148 100 mm Oufuku Hagaki 148 200 mm Youkei 2 162 114 mm Youkei 4 235 105 mm Mo...

Page 96: ...ar as it will go 5 For landscape form envelopes close the flap Insert the envelope all the way along the width guides keeping the printing side face up and the edge with the flap left For portrait for...

Page 97: ...a before putting it in the multi purpose tray NOTE When you load envelopes in the multi purpose tray select the envelope type by referring to Specifying Paper Size and Media Type for the Multi Purpose...

Page 98: ...Preparation before Use 2 56 Paper stopper To use the sheet ejection stopper open as shown below Example Legal...

Page 99: ...e paper sizes and media types are shown in the table below Cassette 1 Paper feeder For instructions on how to specify the custom paper size refer to Original Paper Settings on page 8 8 Only on product...

Page 100: ...OTE Refer to Character Entry Method on Appendix 9 for details on entering characters 3 In the Sys Menu Count menu press the or key to select Common Settings 4 Press the OK key The Common Settings menu...

Page 101: ...ssette 1 Operate in a similar fashion when you select an optional cassette Cassette 2 or 3 8 Press the OK key The Cassette 1 Set menu appears 9 Select Cassette 1 Type 10 Press the OK key Cassette 1 Ty...

Page 102: ...TE Refer to Character Entry Method on Appendix 9 for details on entering characters 3 In the Sys Menu Count menu press the or key to select Common Settings 4 Press the OK key The Common Settings menu...

Page 103: ...u appears 9 Press the or key to select Cassette 1 Size NOTE When the Paper Size Dial on the cassette is set to a standard paper size this setting does not appear 10 Press the OK key Cassette 1 Size ap...

Page 104: ...pes are as shown below Plain Labels Recycled Bond Vellum Color Rough Envelope Cardstock Coated Thick High Quality and Custom Cassette 1 Type a b 2 Rough 3 Recycled 1 Plain Item Description Paper Size...

Page 105: ...Common Settings 3 Press the OK key The Common Settings menu appears 4 Press the or key to select Orig Paper Set 5 Press the OK key The Orig Paper Set menu appears 6 Press the or key to select MP Tray...

Page 106: ...ss the or key to select MP Tray Type 12 Press the OK key MP Tray Type appears 13 Press the or key to select the desired paper type and then press the OK key Completed is displayed and the screen retur...

Page 107: ...s opened Keep the document processor open if the original is 25 mm or thicker 2 Place the original Put the scanning side facedown and align it flush against the original size indicator plates with the...

Page 108: ...sheets Transparencies such as OHP film Carbon paper Originals with very slippery surfaces Originals with adhesive tape or glue Wet originals Originals with correction fluid which is not dried Irregul...

Page 109: ...document processor as far as it will go IMPORTANT Confirm that the original width guides exactly fit the originals If there is a gap readjust the original width guides The gap may cause the originals...

Page 110: ...Preparation before Use 2 68...

Page 111: ...and Program Keys 3 3 Message Display 3 6 Copying 3 7 Printing Printing from Applications 3 21 Sending 3 24 Preparation for sending a document to a PC 3 31 Confirm Destination Screen 3 40 Specifying De...

Page 112: ...in User Name 2600 Login Password 2600 Access Level Administrator It is recommended to periodically change the user name Login User Name and Login Password regularly for your security Login NOTE Refer...

Page 113: ...ress the one touch key where the destination is registered 2 Complete appears and the stored address is retrieved Program Keys Settings of various functions frequently used for copying and sending can...

Page 114: ...Put the scanning side facedown in the center of Statement or A5 size scanning area NOTE For loading instructions refer to Loading Originals on page 2 65 3 Press the Program 1 The ID Card Copy functio...

Page 115: ...Press Yes the Left Select key to change the settings To delete the registered settings press the or key to select Delete and then press the OK key A confirmation screen appears Press Yes the Left Sele...

Page 116: ...feeder is currently selected When this icon is displayed as H or I there is no paper is the cassette F The Multi Purpose Tray is currently selected When this icon is displayed as L there is no paper...

Page 117: ...e document processor NOTE For loading instructions refer to Loading Originals on page 2 65 3 The paper source for copying is the location displayed on the panel When you need to change the paper sourc...

Page 118: ...or key Automatically detects whether the original is color or black white and scans accordingly Full Color key Scans all documents in full color Black White key Scans all documents in black white 5 Us...

Page 119: ...nction Menu key Function Menu appears 2 Press the or key to select Density 3 Press the OK key Density appears 4 Press the or key to select your desired density 5 Press the OK key Completed is displaye...

Page 120: ...select Original Image 3 Press the OK key Original Image appears 4 Press the or key to select the image quality suited to the type of original Image Quality Option Description Text Photo For originals...

Page 121: ...Basic Operation 3 11 3 5 Press the OK key Completed is displayed and the screen returns to the basic screen 6 Press the Start key Copying begins...

Page 122: ...able Part that is operated Auto Zoom Automatically reduces or enlarges the original image suitably to the selected paper size Zoom Entry Manually reduces or enlarges the original image in 1 increments...

Page 123: ...alCopy Inch Models Standard 100 400 Max 200 129 Statement Letter 78 Legal Letter 64 Letter Statement 50 25 Min Other 141 A5 A4 115 B5 A4 90 Folio A4 86 A4 B5 70 A4 A5 Metric Models Standard 100 400 Ma...

Page 124: ...press the OK key you can select from additional magnifications To enter a magnification select Zoom Entry and press the OK key Zoom Entry appears Use the numeric keys to enter the any magnification 5...

Page 125: ...last copy will be blank The following binding options are available A Original Left Right to Binding Left Right Images on the second sides are not rotated B Original Left Right to Binding Top Images...

Page 126: ...e for using two sided duplex copying is explained below 1 Press the Function Menu key Function Menu appears 2 Press the or key to select Duplex 3 Press the OK key Duplex appears 4 Press the or key to...

Page 127: ...the binding edge of the original and the original setting orientation After pressing the OK key select the binding edge of the finished copies and the original setting orientation After pressing the...

Page 128: ...Start key Copying begins When 1 sided 2 sided is selected press End Scan the Right Select key when original scanning finishes Scanning Job No 9999 Page s 1 Cancel Set original and press Start key Job...

Page 129: ...deliver complete sets of copies as required according to page number The procedure for using collate copying is explained below 1 Press the Function Menu key Function Menu appears 2 Press the or key t...

Page 130: ...Basic Operation 3 20 5 Press the OK key Completed is displayed and the screen returns to the basic screen 6 Press the Start key Copying begins...

Page 131: ...reate a document using an application 2 Click File and select Print in the application The Print dialog box appears 3 Click the button next to the Name field and select this machine from the list 4 En...

Page 132: ...ource NOTE If you choose Auto Select papers are supplied automatically from the paper source loaded with paper of optimum size and type To print on special paper such as envelope or thick paper place...

Page 133: ...out Click the item you want to know about and press the F1 key on your keyboard Printing by AirPrint AirPrint is a printing function that is included standard in iOS 4 2 and later products and Mac OS...

Page 134: ...host name of the SMTP server and the recipient Register the destination in the Address Book or One touch keys When the PC Folder SMB FTP is selected it is necessary to share the destination folder For...

Page 135: ...nect to the mail server at any time over a LAN Access the Embedded Web Server RX beforehand and specify the settings required for sending e mail For details see Embedded Web Server RX on page 2 36 Ref...

Page 136: ...ional destinations Up to 100 destinations can be specified Press Exit the Right Select key to return to the basic screen Press the Confirm Add Destination key to confirm or delete the registered desti...

Page 137: ...Help of your operating system for details on how to share a folder Be sure that SMB Protocol or FTP in the Embedded Web Server RX is On For details refer to the Embedded Web Server RX User Guide Refer...

Page 138: ...as to be typed in 7 Press the OK key Login User Name appears 8 Enter the Login User Name You have to enter the account name of the destination PC 9 Press the OK key Login Password appears 10 Enter the...

Page 139: ...If saving in a folder in the shared folder share name folder name in shared folder Up to 128 characters Login User Name User name to access the PC For example abcdnet james smith Up to 64 characters L...

Page 140: ...steps 2 to 12 to enter additional destinations Up to 100 destinations can be specified 14 Press the Confirm Add Destination key to confirm the registered destinations Press the or key to select a dest...

Page 141: ...rs In Windows XP right click My Computer and select Properties The System Properties dialog box appears Click the Computer Name tab in the window that appears and check the computer name In Windows 8...

Page 142: ...hen click Enter Screen example user name james smith and domain name ABCDNET Creating a Shared Folder Create a shared folder to receive the document in the destination computer NOTE If there is a work...

Page 143: ...al disk C NOTE For example create a folder with the name scannerdata on the local disk C 2 Right click the scannerdata folder and click Share and Advanced sharing Click the Advanced Sharing button The...

Page 144: ...lect the Change and Read permissions and click the OK button In Windows XP go to step 8 NOTE Everyone gives sharing permission to everyone on the network To strengthen security it is recommended that...

Page 145: ...k the Edit button In Windows XP click the Security tab and then click the Add button 9 Proceed in the same way as in step 5 to add a user to Group or user names 10 Select the added user select the Mod...

Page 146: ...king file and printer sharing 1 From the Start menu select Control Panel System and Security and Allow a program through Windows Firewall NOTE If the User Account Control dialog box appears click the...

Page 147: ...Basic Operation 3 37 3 2 Click Advanced settings 3 Click Inbound Rules 4 Click New Rule 5 Select Port and click Next...

Page 148: ...Basic Operation 3 38 6 Select TCP select Specific local ports enter 445 and click Next 7 Select Allow the connection and click Next 8 Make sure all checkboxes are selected and click Next...

Page 149: ...click the Continue button 2 Click the Exceptions tab and then the Add port button 3 Specify Add a Port settings Enter any name in Name example Scan to SMB This will be the name of the new port Enter 4...

Page 150: ...details or delete the selected address To add a destination press Cancel the Left Select key to return to the previous screen 2 After the checking is finished press Next the Right Select key Press St...

Page 151: ...t Addr Book menu appears NOTE If external address book is not registered Ext Address Book is not displayed 2 Press the or key to select Address Book and then press the OK key Address Book appears To u...

Page 152: ...ned below Search in Address Book 1 In Address Book press Menu the Right Select key Menu appears 2 Press the or key to select Search Name and then press the OK key A search screen appears 3 Enter the c...

Page 153: ...book appears with the user that starts with the entered character string at the top NOTE If you first open the external address book the search screen appears first Then operate from step 3 Choosing...

Page 154: ...g This is useful for sending to different types of destination e mail addresses folders etc in a single operation No of broadcast items E mail Up to 100 Folders SMP FTP Total of 5 SMB and FTP FAX Up t...

Page 155: ...cation 2 Select the machine using the application and display the TWAIN dialog box NOTE For selecting the machine see the Operation Guide or Help for each application software 3 Select scanning settin...

Page 156: ...job type is displayed 3 Press the or key to select the job you want to stop and then press Menu the Right Select key Menu appears 4 Press the or key to select Cancel Job and then press the OK key A co...

Page 157: ...evels Checking Remaining Paper 1 Press the Status Job Cancel key The Status menu appears 2 Press the or key to select Paper Status 3 Press the OK key Paper Status appears Press the or key to switch th...

Page 158: ...Basic Operation 3 48...

Page 159: ...ing Original Size 4 2 Paper Selection 4 4 Original Orientation 4 8 EcoPrint 4 10 Combine Mode 4 11 Continuous Scan 4 14 Job Finish Notice 4 15 File Name Entry 4 17 Print Override 4 18 Color Selection...

Page 160: ...elect Original Size Item How to Select Sizes Standard Sizes Select from standard sizes envelope postcard or the custom sized originals For instructions on how to specify the custom original size refer...

Page 161: ...ey to select the desired original size and then press the OK key Completed is displayed and the screen returns to the basic screen for copying 7 Press the Start key to start copying Original Size a b...

Page 162: ...supply cassette 1 Press the Copy key 2 Place the originals on the platen or in the document processor 3 Press the Function Menu key Function Menu appears 4 Press the or key to select Paper Selection 5...

Page 163: ...elope Monarch Envelope DL Envelope C5 Hagaki Oufuku Hagaki Youkei 4 Youkei 2 and Custom For instructions on how to specify the custom paper size Custom refer to Adding a Custom Size and Media Type for...

Page 164: ...Entry and press the OK key select the desired paper size and then press the OK key If you select Size Entry using the numeric keys to enter the Y vertical size and press the OK key and then enter the...

Page 165: ...e paper in the multi purpose tray 11 Press the Start key to start copying If Add paper in Multi Purpose tray is displayed during the copying process add paper in the multi purpose tray and then press...

Page 166: ...e following functions Duplex Combine mode When placing originals on the platen When placing originals on the document processor NOTE To change the default setting for the original orientation refer to...

Page 167: ...Function Menu appears 4 Press the or key to select Orig Orientation 5 Press the OK key Orig Orientation appears 6 Press the or key to select Top Edge Top or Top Edge Left 7 Press the OK key Completed...

Page 168: ...2 Place the originals on the platen or in the document processor 3 Press the Function Menu key Function Menu appears 4 Press the or key to select EcoPrint 5 Press the OK key EcoPrint appears 6 Press t...

Page 169: ...ble for the copy paper sizes of Folio A4 B5 Legal Oficio II Letter Statement and 16K 2 in 1 Mode For copying two originals onto a single sheet This mode can be used with Duplex mode to copy four origi...

Page 170: ...output orientations are available NOTE When placing the original on the platen be sure to copy the originals in page order Types of Page Boundary Lines The following types of the boundary lines are a...

Page 171: ...OK key 10 Press the or key to select the orientation of the original and then press the OK key Completed is displayed and the screen returns to the basic screen for copying 11 Press the Start key Scan...

Page 172: ...Function Menu appears 3 Press the or key to select Continuous Scan 4 Press the OK key Continuous Scan appears 5 Press the or key to select On and then press the OK key Completed is displayed and the s...

Page 173: ...of Job Finish Notice Use the procedure below to enable job finish notification when making copies 1 Press the Copy key 2 Place the originals on the platen or in the document processor 3 Press the Func...

Page 174: ...ess the OK key to view the details of the selected notice destination If you select Address Entry enter the address of the notice destination NOTE Refer to Character Entry Method on Appendix 9 for det...

Page 175: ...ears 4 Press the or key to select File Name Entry 5 Press the OK key File Name Entry appears 6 Enter the file name press the OK key Additional Info appears NOTE Refer to Character Entry Method on Appe...

Page 176: ...e or key to select Print Override 3 Press the OK key Print Override appears 4 Press the or key to select On 5 Press the OK key Completed is displayed the machine is put into the interruption copy mode...

Page 177: ...r 3 Press the Function Menu key Function Menu appears 4 Press the or key to select Color Selection 5 Press the OK key Color Selection appears 6 Press the or key to select the desired color mode and th...

Page 178: ...ey 2 Place the originals on the platen or in the document processor 3 Press the Function Menu key Function Menu appears 4 Press the or key to select Color Balance 5 Press the OK key Color Balance appe...

Page 179: ...color intensity A larger negative value makes the color fainter and a larger positive value makes the color more intense 11 Press the OK key Completed is displayed and the screen returns to the basic...

Page 180: ...er to the sample image in Appendix 24 Follow the steps below to adjust sharpness 1 Press the Copy key 2 Place the originals on the platen or in the document processor 3 Press the Function Menu key Fun...

Page 181: ...tected The setting items are as follows Follow the steps below to use background density adjust 1 Press the Copy key 2 Place the originals on the platen or in the document processor 3 Press the Functi...

Page 182: ...l 7 Press the OK key When Manual is selected Manual appears Press the or key to select 1 Lighter to 5 Darker and then press the OK key Completed is displayed and the screen returns to the basic screen...

Page 183: ...select Saturation 5 Press the OK key Saturation appears 6 Press the or key to adjust the color saturation A larger negative value reduces the saturation resulting in paler color in the copy A larger p...

Page 184: ...Copying Functions 4 26...

Page 185: ...ntation 5 10 File Format 5 12 File Separation 5 14 Original Image 5 15 Adjusting Density 5 16 Scan Resolution 5 17 Color Grayscale Black and White Selection 5 18 Continuous Scan 5 19 File Name Entry 5...

Page 186: ...or in the document processor 3 Press the Function Menu key Function Menu appears 4 Press the or key to select Original Size Item Detail Size Standard Sizes Select from standard sizes Hagaki and Custom...

Page 187: ...he desired original size and then press the OK key Completed is displayed and the screen returns to the basic screen for sending 7 Specify the destination and press the Start key to start sending Orig...

Page 188: ...ze Standard Sizes Select from Same as Original Size Standard Size envelope postcard or the custom sized originals For instructions on how to specify the custom original size refer to Custom Original S...

Page 189: ...key to select Sending Size 5 Press the OK key Sending Size appears 6 Press the or key to select the desired sending size 7 Press the OK key Completed is displayed and the screen returns to the basic s...

Page 190: ...ding on the combination of original size and sending size the image is placed at the edge of the paper Use the procedure below to enlarge or reduce the original to match the transmission size 1 Press...

Page 191: ...om appears 7 Press the or key to select 100 or Auto and then press the OK key Completed is displayed and the screen returns to the basic screen for sending 8 Specify the destination and press the Star...

Page 192: ...when sending scanned originals 1 Press the Send key 2 Place the originals on the platen or in the document processor 3 Press the Function Menu key Function Menu appears 4 Press the or key to select D...

Page 193: ...tail the Right Select key select the binding edge and press the OK key and then select the original setting orientation on the next screen 7 Press the OK key Completed is displayed and the screen retu...

Page 194: ...inal on the platen When placing the original on the document processor Use the procedure below to select the orientation when placing the originals on the platen for sending 1 Press the Send key 2 Pla...

Page 195: ...ss the or key to select Top Edge Top or Top Edge Left 7 Press the OK key Completed is displayed and the screen returns to the basic screen for sending 8 Specify the destination and press the Start key...

Page 196: ...B W Full Color Grayscale 1 Low Quality High Comp to 5 High Quality Low Comp Black and White PDF A 1b Auto Color Gray Auto Color B W Full Color Grayscale 1 Low Quality High Comp to 5 High Quality Low...

Page 197: ...file format from PDF TIFF XPS JPEG or High Comp PDF Details the Right Select key can be pressed to select the PDF A file format If full color or grayscale is selected for the scanning color mode press...

Page 198: ...4 Press the or key to select File Separation 5 Press the OK key File Separation appears 6 Press the or key to select Each Page 7 Press the OK key Completed is displayed and the screen returns to the...

Page 199: ...r key to select Original Image 5 Press the OK key Original Image appears 6 Press the or key to select the desired image quality 7 Press the OK key Completed is displayed and the screen returns to the...

Page 200: ...essor 3 Press the Function Menu key Function Menu appears 4 Press the or key to select Density 5 Press the OK key Density appears 6 Press the or key to select your desired density 7 Press the OK key C...

Page 201: ...ng the scanning resolution when sending a scanned image is explained below 1 Press the Send key 2 Place the originals on the platen or in the document processor 3 Press the Function Menu key Function...

Page 202: ...e originals on the platen or in the document processor 3 Press the Function Menu key Function Menu appears 4 Press the or key to select Color Selection 5 Press the OK key Color Selection appears 6 Pre...

Page 203: ...tion Menu key Function Menu appears 3 Press the or key to select Continuous Scan 4 Press the OK key Continuous Scan appears 5 Press the or key to select On and then press the OK key Completed is displ...

Page 204: ...y 5 Press the OK key File Name Entry appears 6 Enter the file name press the OK key Additional Info appears NOTE Refer to Character Entry Method on Appendix 9 for details on entering characters 7 Ente...

Page 205: ...nu appears 3 Press the or key to select Subject Body 4 Press the OK key Subject Entry appears 5 Enter the subject and press the OK key NOTE Up to 60 characters can be entered for the subject 6 Enter t...

Page 206: ...image in Appendix 24 Follow the steps below to adjust sharpness 1 Press the Send key 2 Place the originals on the platen or in the document processor 3 Press the Function Menu key Function Menu appear...

Page 207: ...etting items are as follows Follow the steps below to use background density adjust 1 Press the Send key 2 Place the originals on the platen or in the document processor 3 Press the Function Menu key...

Page 208: ...When Manual is selected Manual appears Press the or key to select 1 Lighter to 5 Darker and then press the OK key Completed is displayed and the screen returns to the basic screen for copying 8 Speci...

Page 209: ...d Multifunctional Devices and then right click Install Installing of the driver starts 3 After installing the driver click Close Procedure using this machine 1 Press the Send key 2 Place the originals...

Page 210: ...nation and then press the Start key Transmission starts NOTE To change the destination computer press the Back key and then press Yes the Left Select key This brings you back to step 6 NOTE To use WSD...

Page 211: ...ars 6 Press the or key to select On and then press the OK key 7 Press the or key to select Address Book or Address Entry and then press the OK key 8 If you select Address Book select Address Book on t...

Page 212: ...ppendix 9 for details on entering characters 9 Press the OK key Completed is displayed and the screen returns to the basic screen for sending 10 Specify the destination and press the Start key to star...

Page 213: ...rs 4 Press the or key to select FTP Encrypted TX 5 Press the OK key FTP Encrypted TX appears 6 Press the or key to select On and then press the OK key Completed is displayed and the screen returns to...

Page 214: ...ws 7 on page 2 34 The following procedure is an example for scan operation using the TWAIN Driver Operate the WIA Drivers in the same manner 1 Connect the machine to a PC via a network NOTE For WIA in...

Page 215: ...explains the typical procedure for utilizing Document Box Printing Documents Stored in USB Memory 6 2 Saving Documents to USB Memory Scan to USB 6 5 Removing USB Memory 6 7 Printing from a Custom Box...

Page 216: ...pdf Files to be printed should be saved no further down than the top 3 folder levels Plug the USB memory directly into the USB memory slot We do not guarantee that USB memory printing is error free if...

Page 217: ...basic screen appears Change the number of copies 1 sided 2 sided printing etc as necessary For changing print settings refer to Copying on page 3 7 and Copying Functions on page 4 1 10 Press the Star...

Page 218: ...setting XPS data is scaled to fit the paper size during printing If you select Off the data is printed at its original size 1 Follow steps 1 to 8 of Printing on page 6 2 2 Press the Function Menu key...

Page 219: ...ug the USB memory into the USB memory slot 2 Press the Document Box key The Document Box menu appears 3 Press the or key to select USB Memory 4 Press the OK key USB Memory appears 5 Press the or key t...

Page 220: ...can settings refer to Sending Functions on page 5 1 7 Press the Start key The original is scanned and the data is stored in the USB memory IMPORTANT When removing the USB memory ensure that you use th...

Page 221: ...A menu appears NOTE This is the image on the screen when a folder is selected Open is not displayed when a file is selected 5 Press the or key to select Remove Memory 6 Press the OK key A confirmatio...

Page 222: ...the Embedded Web Server RX User Guide Custom Box display 1 Press the Document Box key The Document Box menu appears 2 Press the or key to select Custom Box 3 Press the OK key The Custom Box menu appea...

Page 223: ...ars Searching is possible using the methods below Searching with Box numbers 6 9 Searching with Box names 6 10 Searching with Box numbers 1 In the Custom Box list screen press Menu the Left Select key...

Page 224: ...operations are possible Box number Box name Select a File 6 11 Select Deselect All Files 6 11 Print a File 6 12 Print a File Changes to the print settings 6 12 Delete a File 6 14 Moving files 6 14 Ch...

Page 225: ...n page 6 11 Select Deselect All Files All files in the Custom Box are selected 1 Press Menu the Left Select key The Menu screen appears 2 In the Custom Box list screen press the or key to select Selec...

Page 226: ...e Copies menu screen appears after login 4 Press the Start key The message Accepted appears and printing begins When On is selected in the Del afterPrint Setting for file deletion after printing on pa...

Page 227: ...the Del afterPrint Setting for file deletion after printing on page 8 94 the selected file will be deleted from the Custom Box after it is printed Del after Print Delete data after printing setting Us...

Page 228: ...No the Right Select key returns to the file list menu screen without deleting the file Moving files A file can be moved to a different Custom Box 1 In the file list screen select the item and press t...

Page 229: ...ct key 2 Press the or key to select Detail 3 Press the OK key Details for the file that is selected with the cursor appears The details for the file cover 5 pages in all Press the key to view to the n...

Page 230: ...rint Private Print is used to allow printing only after the same 4 digit ID that was entered in the printer driver at the time of printing is entered at the operation panel The data is erased after pr...

Page 231: ...lect Clear All To show file details select Detail 9 Press the OK key The file print and delete selection menu appears 10 Press the or key to select Print and press the OK key NOTE To delete the select...

Page 232: ...ion panel If more documents than the set maximum are stored the oldest job will be overwritten each time a new job is stored When the machine power is turned off jobs stored in this mode are erased Fo...

Page 233: ...file print and delete selection menu appears 10 Press the or key to select Print and press the OK key NOTE To delete the selected file without printing it select Delete and press the OK key The file...

Page 234: ...Document Box 6 20...

Page 235: ...the status and history of jobs and cancel the jobs being processed or waiting to be printed Checking Job Status 7 2 Checking Job History 7 8 Sending the Job Log History 7 13 Pause and Resumption of J...

Page 236: ...ars 2 Press the or key to select Print Job Status 3 Press the OK key Print Job Status appears Press the or key to check the print queue Screen Job statuses to be displayed Print Job Copy Printer FAX r...

Page 237: ...al Page number of pages of the original Color Mode When complete job name not displayed in detailed information When the job name in Job Name is displayed in a short form press Detail the Right Select...

Page 238: ...to switch the display to other information items The items displayed are as follows Status status of job Accepted Time Job Name Job Type User Name Original Pages number of pages of the original Color...

Page 239: ...and press the OK key This displays the complete name of the destination Press the OK key to return to the destination list Pressing Exit the Right Select key while the destination list is displayed br...

Page 240: ...sing Menu the Right Select key and selecting Detail in the menu that appears Press the or key to switch the display to other information items The items displayed are as follows Status status of job A...

Page 241: ...led information Press Detail the Right Select key in Sender Info to see the complete destination information Press the OK key to return to the original screen The table below lists the items displayed...

Page 242: ...bs Send Jobs Store Jobs and Scheduled Jobs The following job histories are available Displaying Print Job Log 1 Press the Status Job Cancel key The Status menu appears 2 Press the or key to select Pri...

Page 243: ...Name Job Type User Name Page and Copy number of pages and copies to be printed Original Page number of pages of the original Color Mode Sender Info destination information When complete job name not d...

Page 244: ...o Send Job Status screen on page 7 4 Press the OK key or Detail the Right Select key to check the detailed information of the selected send log Press the or key to switch the display to other informat...

Page 245: ...desired destination and press the OK key This displays the complete name of the destination Press the OK key to return to the destination list Pressing Exit the Right Select key while the destination...

Page 246: ...iginal Color B W color mode of the original Sender Info destination information When complete job name not displayed in detailed information Press Detail the Right Select key in Job Name to see the co...

Page 247: ...Password to log in NOTE Refer to Character Entry Method on Appendix 9 for details on entering characters 2 In the Sys Menu Count menu press the or key to select Report 3 Press the OK key The Report m...

Page 248: ...ss the or key to select Destination 2 Press the OK key The Destination menu appears Confirming Current Destination 1 In the Destination menu press the or key to select Confirmation Report a b 2 Admin...

Page 249: ...ss book press the or key to select Address Book and then press the OK key This displays the address book Select your desired destination NOTE For selecting a destination from the address book refer to...

Page 250: ...sion 1 In the Job Log History menu press the or key to select Auto Sending 2 Press the OK key Auto Sending appears 3 Press the or key to select Off or On If you select On and press the OK key Jobs app...

Page 251: ...ting E mail Subject Set the subject automatically entered when sending job log histories by e mail Use the procedure below to set the subject 1 In the Job Log History menu press the or key to select S...

Page 252: ...automatic job log history transmission 1 In the Job Log History menu press the or key to select Personal Info 2 Press the OK key Personal Info appears 3 Press the or key to select Include or Exclude 4...

Page 253: ...ft Select key Printing is paused When you press Resume the Left Select key to resume printing NOTE When you press the Back key a confirmation screen appears Press Yes the Left Select key to resume pri...

Page 254: ...nu appears 2 Press the or key to select Scanner Printer FAX or SSD 3 Press the OK key This displays the status of the device selected in step 2 4 Press the OK key The screen returns to the Status menu...

Page 255: ...pears 2 Press the or key to select USB Memory 3 Press the OK key This displays the status of the USB memory Press the or key to switch the display to other information items The items displayed are as...

Page 256: ...yboard can be used 1 Press the Status Job Cancel key The Status menu appears 2 Press the or key to select USB Keyboard 3 Press the OK key Indicates whether the USB keyboard can be used 4 Press the OK...

Page 257: ...cument Box Settings 8 83 Printer Settings 8 99 Printing Reports Sending Notice 8 117 Adjustment Maintenance 8 123 Date Timer 8 141 Editing Destination Address Book Adding One Touch Keys 8 158 Restarti...

Page 258: ...ode 8 63 Format SSD 8 64 Format SD Card 8 65 Optional Memory 8 66 TonerAlert Level 8 68 How to display the Sys Menu Count menu 1 Press the System Menu Counter key on the main unit operation panel When...

Page 259: ...The Common Settings menu appears 3 Press the or key to select Language 4 Press the OK key The Language menu appears The available languages are as follows English Deutsch Fran ais Espa ol Italiano Ne...

Page 260: ...yed in place of Portugues 5 Press the or key to select a language 6 Press the OK key Completed is displayed and the screen returns to the Common Settings menu Swedish Svensk Danish Dansk Norwegian Nor...

Page 261: ...the or key to select the default screen Item Description Status The Status Job Cancel screen the screen shown when the Status Job Cancel key is pressed appears Copy The Copy screen the screen shown w...

Page 262: ...s 3 Press the or key to select Sound 4 Press the OK key Sound appears 5 Press the or key to select Buzzer Item Value Description Key Confirmation Off On Emit a sound when the control panel are pressed...

Page 263: ...procedure below to adjust the display brightness 1 In the Sys Menu Count menu press the or key to select Common Settings 2 Press the OK key The Common Settings menu appears 3 Press the or key to sele...

Page 264: ...ustom original size 1 In the Sys Menu Count menu press the or key to select Common Settings 2 Press the OK key The Common Settings menu appears 3 Press the or key to select Orig Paper Set 4 Press the...

Page 265: ...ic keys to enter the paper length Y 8 Press the OK key Size Entry X appears 9 Use the numeric keys to enter the paper width X 10 Press the OK key Completed is displayed and the screen returns to the O...

Page 266: ...Press the or key to select Orig Paper Set 4 Press the OK key The Orig Paper Set menu appears 5 Press the or key to select Def Orig Size 6 Press the OK key Def Orig Size appears 7 Press the or key to...

Page 267: ...m paper size and media type 1 In the Sys Menu Count menu press the or key to select Common Settings 2 Press the OK key The Common Settings menu appears Input units Dimensions Inch models Cassette X 4...

Page 268: ...press the OK key Size Entry Y appears 8 Use the numeric keys to enter the paper length Y 9 Press the OK key Size Entry X appears 10 Use the numeric keys to enter the paper width X 11 Press the OK key...

Page 269: ...and media type for each cassette 1 In the Sys Menu Count menu press the or key to select Common Settings Selection Item Selectable Size Type Paper Size Inch size Letter Legal Statement and Oficio II...

Page 270: ...you select an optional cassette Cassette 2 or 3 6 The Cassette 1 Set menu appears 7 Press the or key to select Cassette 1 Size NOTE This item does not appear when the Paper Size Dial on the cassette i...

Page 271: ...ey to select Cassette 1 Type 12 Press the OK key Cassette 1 Type appears 13 Press the or key to select the paper type 14 Press the OK key Completed is displayed and the screen returns to the Cassette...

Page 272: ...Letter Legal Statement Executive Oficio II A4 A5 A6 B5 B6 Folio 216x340 mm 16K ISO B5 Envelope 10 Envelope 9 Envelope 6 Envelope Monarch Envelope DL Envelope C5 Hagaki Oufuku Hagaki Youkei 4 Youkei 2...

Page 273: ...select the paper size 10 Press the OK key The screen returns to the MP Tray Set menu 11 Press the or key to select MP Tray Type 12 Press the OK key MP Tray Type appears Orig Paper Set a b 2 Def Orig S...

Page 274: ...efault value Available X Not available Can be selected when the setting is Light to Heavy 2 Paper Weight Light Normal 1 Normal 2 Normal 3 Heavy 1 Heavy 2 Heavy 3 Extra Heavy Duplex Weight g m2 Media t...

Page 275: ...OK key Media Type Set menu appears 7 Press the or key to select the paper type for which you want to make settings Item Description Duplex Prohibit Duplex printing not allowed Permit Duplex printing a...

Page 276: ...nu for the selected paper type When the selected paper type is Custom 1 to 8 you can further set whether to enable or disable duplex and the name of the custom paper type 13 Press the or key to select...

Page 277: ...OK key Name Entry is displayed Enter the name of the custom paper type NOTE Refer to Character Entry Method on Appendix 9 for details on entering characters 19 Press the OK key Completed is displayed...

Page 278: ...select Orig Paper Set 4 Press the OK key The Orig Paper Set menu appears 5 Press the or key to select Def PaperSource 6 Press the OK key Def PaperSource appears 7 Press the or key to select the paper...

Page 279: ...or key to select Common Settings 2 Press the OK key The Common Settings menu appears 3 Press the or key to select Orig Paper Set 4 Press the OK key The Orig Paper Set menu appears 5 Press the or key...

Page 280: ...ation is not important select Speed Priority The table below lists the available settings and their details If you select Adj PrintDirect load paper according to the steps below Example copying on Let...

Page 281: ...y to select SpcialPaper Act 6 Press the OK key SpcialPaper Act appears 7 Press the or key to select Adj PrintDirect or Speed Priority 8 Press the OK key Completed is displayed and the screen returns t...

Page 282: ...Settings 2 Press the OK key The Common Settings menu appears 3 Press the or key to select Preset Limit 4 Press the OK key The Preset Limit menu appears 5 Press the or key to enter the number of copies...

Page 283: ...s 2 Press the OK key The Common Settings menu appears 3 Press the or key to select Measurement 4 Press the OK key The Measurement menu appears 5 Press the or key to select inch or mm 6 Press the OK ke...

Page 284: ...in the paper source when printing from your computer Use the procedure below to specify the settings for error handling 1 In the Sys Menu Count menu press the or key to select Common Settings 2 Press...

Page 285: ...n returns to the Error Handling menu 9 Press the or key to select PagerMismatchErr 10 Press the OK key PagerMismatchErr appears 11 Press the or key to select the method to handle paper mismatch 12 Pre...

Page 286: ...default orientation when originals are placed on the platen 1 In the Sys Menu Count menu press the or key to select Common Settings 2 Press the OK key The Common Settings menu appears 3 Press the or k...

Page 287: ...unt menu press the or key to select Common Settings 2 Press the OK key The Common Settings menu appears 3 Press the or key to select Function Default 4 Press the OK key The Function Default menu appea...

Page 288: ...elow Use the procedure below to select the default Backgrnd Send 1 In the Sys Menu Count menu press the or key to select Common Settings 2 Press the OK key The Common Settings menu appears 3 Press the...

Page 289: ...continuous scan defaults The available default settings are shown below Refer to page 4 14 for Continuous Scan Use the procedure below to select the default settings for continuous scanning 1 In the...

Page 290: ...s displayed and the screen returns to the Function Default menu Original Image Copy Set the default original document type for copying The available default settings are shown below Common Settings a...

Page 291: ...enu appears 5 Press the or key to select Orig Image Copy 6 Press the OK key Orig Image Copy appears 7 Press the or key to select Text Photo Photo Text Map or Printed Document 8 Press the OK key Comple...

Page 292: ...ct Function Default 4 Press the OK key The Function Default menu appears 5 Press the or key to select Orig Image Send 6 Press the OK key Orig Image Send appears Item Description Text Photo Text and ph...

Page 293: ...or key to select Common Settings 2 Press the OK key The Common Settings menu appears 3 Press the or key to select Function Default 4 Press the OK key The Function Default menu appears 5 Press the or k...

Page 294: ...l Color Scan document in full color Black White Scan document in black and white Color mode Description Auto Color Gray Color and black white originals are automatically detected Color originals are s...

Page 295: ...y Color Selection appears 9 If the or key was pressed to select Copy select Auto Color Full Color or Black White If Send or Save was selected select Auto Color Gray Auto Color B W Full Color Grayscale...

Page 296: ...enu appears 3 Press the or key to select Function Default 4 Press the OK key The Function Default menu appears 5 Press the or key to select File Format File Format Description PDF Send files in PDF fo...

Page 297: ...zoom setting 1 In the Sys Menu Count menu press the or key to select Common Settings 2 Press the OK key The Common Settings menu appears 3 Press the or key to select Function Default 4 Press the OK ke...

Page 298: ...dditional information available NOTE Refer to page 4 17 and page 5 20 for name entry Refer to Character Entry Method on Appendix 9 for details on entering characters Use the procedure below to set the...

Page 299: ...ss the OK key Completed is displayed and the screen returns to the Function Default menu Subject Body Set the subject and body automatically entered default subject and body when sending the scanned o...

Page 300: ...nction Default menu 7 Press the OK key Body Entry appears Enter e mail body text up to 500 characters If you press the Back key you can return to Subject Entry 8 Press the OK key Completed is displaye...

Page 301: ...s menu appears 3 Press the or key to select Function Default 4 Press the OK key The Function Default menu appears 5 Press the or key to select Collate 6 Press the OK key Collate appears 7 Press the or...

Page 302: ...w to set the default EcoPrint setting 1 In the Sys Menu Count menu press the or key to select Common Settings 2 Press the OK key The Common Settings menu appears 3 Press the or key to select Function...

Page 303: ...he procedure below to set the default JPEG TIFF Print setting 1 In the Sys Menu Count menu press the or key to select Common Settings 2 Press the OK key The Common Settings menu appears 3 Press the or...

Page 304: ...lected paper size when printing XPS file Use the procedure below to set the default XPS FitTo Page setting NOTE Refer to page 6 4 for XPS FitTo Page 1 In the Sys Menu Count menu press the or key to se...

Page 305: ...w to split scanned original data into separate files when sending scanned originals 1 In the Sys Menu Count menu press the or key to select Common Settings 2 Press the OK key The Common Settings menu...

Page 306: ...o select the default value for layout 1 In the Sys Menu Count menu press the or key to select Common Settings 2 Press the OK key The Common Settings menu appears 3 Press the or key to select Function...

Page 307: ...is selected for Combine Items available for the default value are as follows Use the procedure below to select the default value for layout 1 In the Sys Menu Count menu press the or key to select Com...

Page 308: ...8 Press the OK key 4 in 1 Layout appears 9 Press the or key to select h Right then Down i Down then Right j Left then Down or k Down then Left 10 Press the OK key Completed is displayed and the screen...

Page 309: ...ss the OK key The Function Default menu appears 5 Press the or key to select Detail Setting 6 Press the OK key The Detail Setting menu appears 7 Press the or key to select Border Line Item Description...

Page 310: ...Duplex Items available for the default value are as follows Use the procedure below to select the default value for the binding edge of the original 1 In the Sys Menu Count menu press the or key to s...

Page 311: ...ey to select Orig Binding 8 Press the OK key Orig Binding appears 9 Press the or key to select o Left Right or p Top 10 Press the OK key Completed is displayed and the screen returns to the Detail Set...

Page 312: ...e Common Settings menu appears 3 Press the or key to select Function Default 4 Press the OK key The Function Default menu appears 5 Press the or key to select Detail Setting 6 Press the OK key The Det...

Page 313: ...ompression Use the procedure below to select the default value for image quality 1 In the Sys Menu Count menu press the or key to select Common Settings 2 Press the OK key The Common Settings menu app...

Page 314: ...for compression method for TIFF images handled by this machine Use the procedure below to set the default value for color TIFF compression method 1 In the Sys Menu Count menu press the or key to selec...

Page 315: ...is displayed and the screen returns to the Detail Setting menu PDF A setting You can set the default PDF A setting used in the machine The procedure for specifying the default PDF A setting is explai...

Page 316: ...ars 7 Press the or key to select PDF A 8 Press the OK key The PDF A menu appears 9 Press the or key to select Off PDF A 1a or PDF A 1b 10 Press the OK key Completed is displayed and the screen returns...

Page 317: ...y The Function Default menu appears 5 Press the or key to select Detail Setting 6 Press the OK key The Detail Setting menu appears Item Description Compression Ratio Priority Compression Ratio is give...

Page 318: ...ed Use the procedure below to adjust the Login Operation 1 In the Sys Menu Count menu press the or key to select Common Settings 2 Press the OK key The Common Settings menu appears 3 Press the or key...

Page 319: ...rom a Job Box The procedure for setting the RAM Disk Mode is explained below 1 In the Sys Menu Count menu press the or key to select Common Settings 2 Press the OK key The Common Settings menu appears...

Page 320: ...cument Box will be available Formatting will destroy any existing data on a storage device including a used SSD Formatting of the SSD must be executed from the machine When the SSD has not yet been fo...

Page 321: ...d IMPORTANT Format SD Card is only displayed when an SD card is installed in the machine and protection is disabled NOTE Formatting will destroy any existing data on a storage device including a used...

Page 322: ...onal Memory 1 In the Sys Menu Count menu press the or key to select Common Settings Format Are you sure z SD Card Yes No Item Description Normal The optional memory is allocated to the copy function o...

Page 323: ...ptional Memory appears 5 Press the or key to select Normal Printer Priority or Copy Priority 6 Press the OK key A confirmation screen appears 7 Press Yes the Left Select key The machine is restarted C...

Page 324: ...evel appears 5 Press the or key to select Off or On 6 If On is selected and the OK key is pressed the Toner Level screen appears If Off is selected and the OK key is pressed proceed to step 8 7 Press...

Page 325: ...paper selection The table below shows the available settings Use the procedure below to set the default paper selection 1 In the Sys Menu Count menu press the or key to select Copy 2 Press the OK key...

Page 326: ...Use the procedure below to specify the action performed for Auto Paper Selection 1 In the Sys Menu Count menu press the or key to select Copy 2 Press the OK key The Copy menu appears 3 Press the or ke...

Page 327: ...rmed The table below shows the available settings The default setting is Off Use the procedure below to specify the automatic zoom priority 1 In the Sys Menu Count menu press the or key to select Copy...

Page 328: ...is Speed Priority Use the procedure below to specify the DP Read Action 1 In the Sys Menu Count menu press the or key to select Copy 2 Press the OK key The Copy menu appears 3 Press the or key to sel...

Page 329: ...nction when using copy functions You can register one of the following functions to each key None Paper Selection Collate Duplex Zoom Combine Original Size Orig Orientation Original Image Density EcoP...

Page 330: ...one when Left is selected 7 Press the or key to select the function you want to register to the flexible key 8 Press the OK key Completed is displayed and the screen returns to the Select Key Set men...

Page 331: ...inistrator privileges Select Key Set If you register a function to the Left Select key or Right Select key you can quickly set the function when using sending functions You can register one of the fol...

Page 332: ...een shown is the one when Left is selected 7 Press the or key to select the function you want to register to the flexible key 8 Press the OK key Completed is displayed and the screen returns to the Se...

Page 333: ...menu appears 3 Press the or key to select DestinationCheck 4 Press the OK key The destination confirmation menu appears 5 Press the or key to select Check before Send or Check New Dest Item Detail Ch...

Page 334: ...d when you press the Send key 1 In the Sys Menu Count menu press the or key to select Send 2 Press the OK key The Send menu appears 3 Press the or key to select Default Screen 4 Press the OK key The D...

Page 335: ...ress the or key to select Send and Forward 4 Press the OK key The Send and Forward menu appears Forward Select whether to forward the original 1 In the Send and Forward menu press the or key to select...

Page 336: ...rd Rule repeat steps 4 to 5 to select them 6 Press the OK key Completed is displayed and the screen returns to the Send and Forward menu Setting the destination Set the destination to which the origin...

Page 337: ...t a destination from the address book press the or key to select Address Book and then press the OK key This displays the address book Select your desired destination NOTE For selecting a destination...

Page 338: ...selected destination has been changed after you selected the destination from the address book is displayed before Address Entry Refer to Confirming Current Destination on 8 81 and reconfirm the dest...

Page 339: ...from or saving to a document box You can register one of the following functions to each key for either of printing from and saving to a document box Print None Collate Paper Selection Duplex EcoPrint...

Page 340: ...Press the OK key This displays the flexible key selection screen for the function selected in step 5 The screen shown is the one when Print is selected 7 Press the or key to select Left or Right 8 Pr...

Page 341: ...ine The SSD must be formatted from the machine For more information refer to Format SSD on 8 64 NOTE On network compatible models the creation and setting of Custom Boxes is also possible from Embedde...

Page 342: ...1 In the Custom Box menu press the or key to select Detail Edit 2 Press the OK key The Custom Box list appears 3 Press Menu the Right Select key Menu appears 4 In the Menu screen select the Add Box a...

Page 343: ...Detailed box settings on page 8 87 If the details of the Box will not be set then select Exit and finish the operation Detailed box settings Set the details of the Box when necessary The items to set...

Page 344: ...88 Owner Yes No Owner Owner settings on 8 89 Permission Yes Yes Permission settings for the sharing of a Box on 8 90 Box Password Yes Yes Yes Box Password Box password setting on 8 90 Box Number Yes...

Page 345: ...to select Owner 2 Press Change the Right Select key The Owner setting screen appears 3 Press the or key to select Local User or Network User NOTE When Local User is selected select the user that you w...

Page 346: ...ss the OK key The Detail menu screen reappears Box Password Box password setting It is possible to set a password for a box and restrict the users who have access to it Enter one if necessary NOTE Thi...

Page 347: ...ws Incorrect password and returns to the New Password screen so enter again from the new password Box number Change of the Box number Change the Box number 1 In the Detail menu screen press the or key...

Page 348: ...screen appears 3 Enter the limit value using the numeric keys the or key 4 Press the OK key The Detail menu screen reappears Auto File Del Setting for automatic file deletion This automatically delet...

Page 349: ...appears Overwrite Set Setting of overwrite storage This setting is used to permit or prohibit the overwriting of old documents that have been stored for the storage of new documents 1 In the Detail me...

Page 350: ...It is possible to change the detailed settings of the Custom Boxes 1 In the Custom Box list screen press the or key to select the Box to edit 2 Press Menu the Right Select key The Menu screen appears...

Page 351: ...ox to delete 2 Press Menu the Right Select key The Menu screen appears 3 Press the or key to select Delete 4 Press the OK key A confirmation screen appears 5 To proceed with deleting the custom box pr...

Page 352: ...5 Press the or key to select File Del Time 6 Press the OK key The File Del Time screen appears 7 Use the numeric keys or press the or key to enter the hours and minutes Press the or key to increase o...

Page 353: ...1 In the Sys Menu Count menu press the or key to select Document Box 2 Press the OK key The Document Box menu appears 3 Press the or key to select Job Box 4 Press the OK key The Job Box screen appear...

Page 354: ...s the OK key The Job Box screen appears 5 Press the or key to select Job Ret Deletion 6 Press the OK key The Job Retention Deletion screen appears 7 Press the or key to select the period that jobs are...

Page 355: ...Timeout 8 109 LF Action 8 110 CR Action 8 111 Job Name 8 112 User Name 8 113 Paper Feed Mode 8 114 Auto Cass Change 8 115 NOTE If user login administration is enabled you can only change the settings...

Page 356: ...s the or key to select the printer you want to emulate 6 Press the OK key Completed is displayed and the screen returns to the Printer menu NOTE If you select KPDL or KPDL Auto the operation after sel...

Page 357: ...d and the screen returns to the Printer menu When KPDL Auto Is Selected for Emulation When you select KPDL Auto set whether or not to output KPDL error reports The default setting is Off Use the proce...

Page 358: ...the or key to select to select Color or Black White 6 Press the OK key Completed is displayed and the screen returns to the Printer menu EcoPrint EcoPrint conserves toner when printing This is recomme...

Page 359: ...in size as the same size when printing The table below shows the available settings Use the procedure below to specify the override A4 Letter setting The default setting is On 1 In the Sys Menu Count...

Page 360: ...e Printer menu Duplex Select binding orientation for duplex mode The table below shows the available settings Use the procedure below to select a duplex setting 1 In the Sys Menu Count menu press the...

Page 361: ...nter menu Copies Set the default number of copies from 1 to 999 Use the procedure below to specify the default number of copies 1 In the Sys Menu Count menu press the or key to select Printer 2 Press...

Page 362: ...8 106 4 Press the OK key Copies appears 5 Press the or key or the numeric keys to set the default number of copies 6 Press the OK key Completed is displayed and the screen returns to the Printer menu...

Page 363: ...s the OK key The Printer menu appears 3 Press the or key to select Orientation 4 Press the OK key Orientation appears 5 Press the or key to select Portrait or Landscape 6 Press the OK key Completed is...

Page 364: ...paper To reduce wrinkle try using thicker paper Use the procedure below to select Gloss mode 1 In the Sys Menu Count menu press the or key to select Printer 2 Press the OK key The Printer menu appears...

Page 365: ...or key to select Off or On 6 Press the OK key Completed is displayed and the screen returns to the Printer menu FormFeed Timeout Receiving print data from the computer the machine may sometimes wait...

Page 366: ...he Printer menu LF Action Set the line feed action when the machine receives the line feed code character code 0AH The table below shows the available settings The default setting is LF Only Use the p...

Page 367: ...machine receives the character return code character code 0DH The table below shows the available settings The default setting is CR Only Use the procedure below to specify a CR action 1 In the Sys Me...

Page 368: ...Job Name Set whether the job name set in the printer driver is displayed Use the procedure below to specify a Job Name 1 In the Sys Menu Count menu press the or key to select Printer 2 Press the OK ke...

Page 369: ...No 8 Press the OK key Completed is displayed and the screen returns to the Printer menu User Name Set whether the user name set in the printer driver is displayed Use the procedure below to specify th...

Page 370: ...low to set Paper Feed Mode 1 In the Sys Menu Count menu press the or key to select Printer 2 Press the OK key The Printer menu appears 3 Press the or key to select Paper Feed Mode 4 Press the OK key P...

Page 371: ...ress the OK key The Printer menu appears 3 Press the or key to select Auto Cass Change Item Description Off The printer displays Load Cassette is a cassette number or Load MP Tray and stops printing L...

Page 372: ...ystem Menu 8 116 4 Press the OK key Auto Cass Change appears 5 Press the or key to select Off or On 6 Press the OK key Completed is displayed and the screen returns to the Printer menu Auto Cass Chang...

Page 373: ...can only print by logging in with administrator privileges You can select whether status reports are printed in color or black white Refer to Color Setting on 8 102 Printing Reports Printable reports...

Page 374: ...t a Menu Map Status Page Font List Optional Network Status 1 In the Sys Menu Count menu press the or key to select Report 2 Press the OK key The Report menu appears 3 Press the or key to select Report...

Page 375: ...the machine is prohibited to be used is displayed and the output is canceled Service Status Page More detailed information is available than on the Status Page Service personnel usually print the serv...

Page 376: ...shown is the one when Network Status is selected 7 Press Yes the Left Select key The selected report is output Accepted is displayed and the screen returns to the Service Setting menu NOTE When accept...

Page 377: ...t Rpt Set 4 Press the OK key The Result Rpt Set menu appears Item Description Off No result report printed On Result report automatically printed Transmitted images can also be attached Error Only Res...

Page 378: ...s the U or V key to select Off On or Error Only When selecting FAX press the U or V key to select Off On Error Only or Specify Each Job When On Error Only or Specify Each Job is selected and the OK ke...

Page 379: ...8 137 MC Main charger output setting 8 138 Mem Diagnostics 8 139 NOTE If user login administration is enabled you can only change the settings by logging in with administrator privileges Copy Denst Ad...

Page 380: ...u Count menu press the or key to select Adjust Maint 2 Press the OK key The Adjust Maint menu appears 3 Press the or key to select Send Box Density 4 Press the OK key Send Box Density appears 5 Press...

Page 381: ...he OK key Backgrnd Density appears 5 Press the or key to select Copy Auto or Send Box Auto 6 Press the OK key This displays the density selection screen for the mode selected in step 5 The screen show...

Page 382: ...appears 5 Press the or key to select a value from 5 to 1 6 Press the OK key Completed is displayed and the screen returns to the Adjust Maint menu ColorCalibration This machine contains a calibration...

Page 383: ...or drift Normal registration and detailed settings are available for Color Registration Color drift can be largely corrected through normal registration However if it is not resolved or to perform mor...

Page 384: ...r Regist appears 5 Press the or key to select Normal 6 Press the OK key The normal registration appears Press the or key to select Print Chart 7 Press the OK key The chart print confirmation menu appe...

Page 385: ...ach of the colors M magenta C cyan and Y yellow Chart Example I H G F E D C B A 0 1 2 3 4 5 6 7 8 9 MH L I H G F E D C B A 0 1 2 3 4 5 6 7 8 9 CH L I H G F E D C B A 0 1 2 3 4 5 6 7 8 9 YH L I H G F E...

Page 386: ...ection is performed After a brief interval you will return to the standard menu of color print position correction Press key to increase the value from 0 to 9 To decrease press By pressing the value c...

Page 387: ...nfirmation menu appears 8 Press Yes the Left Select key to execute chart printing After the charts are printed you will return to the detail menu of color print position correction Two charts H 1 to H...

Page 388: ...Default Setting System Menu 8 132 Chart Example 9 Press the or key to select Adjust Magenta Press the OK key The magenta correction menu appears Detail a b 2 Adjust Magenta 3 Adjust Cyan 1 Print Chart...

Page 389: ...3 Press or key to enter the value read from the chart and press OK Magenta correction is performed After a brief interval you will return to the detail menu of color print position correction Press ke...

Page 390: ...e default Off Use the procedure below to specify the setting for correcting fine black lines 1 In the Sys Menu Count menu press the or key to select Adjust Maint Item Description Off No correction per...

Page 391: ...er scanner When the printing quality declines cleaning the laser scanner can restore the printing quality Use the procedure below to set the laser scanner cleaning mode setting 1 In the Sys Menu Count...

Page 392: ...e printing quality declines refreshing the drum can restore the printing quality Use the procedure below to set the drum refresh mode setting 1 In the Sys Menu Count menu press the or key to select Ad...

Page 393: ...1500 m or higher and print quality has deteriorated the Altitude Adjustment mode setting can be used to restore print quality Use the procedure below to set the altitude adjustment setting 1 In the S...

Page 394: ...n charger can be changed to restore print quality NOTE This menu only appears when the Altitude Adj Altitude adjustment setting on page 8 137 is set to Normal Use the procedure below to set the main c...

Page 395: ...ow to set the Memory Diagnostics mode setting 1 In the Sys Menu Count menu press the or key to select Adjust Maint 2 Press the OK key The Adjust Maint menu appears 3 Press the or key to select Service...

Page 396: ...Diagnostics 6 Press the OK key A confirmation screen appears 7 Press Start the Left Select key Turn the main power switch off and on to run this function is displayed Turn the main power switch off an...

Page 397: ...ogging in with administrator privileges Date Time Set the date and time for the location where you use the machine If you perform Send as E mail the date and time set here will be displayed on the hea...

Page 398: ...te Press the or key to move to the item Year Month Day you want to enter Press the or key to set each item 8 Press the OK key The screen to enter the time of Date Time appears 9 Set the time Press the...

Page 399: ...ess the or key to select Common Settings 2 Press the OK key The Common Settings menu appears 3 Press the or key to select Date Setting and press the OK key When you are performing user management and...

Page 400: ...the OK key The Common Settings menu appears 3 Press the or key to select Date Setting and press the OK key When you are performing user management and have not logged in a login screen will appear Th...

Page 401: ...ure below to set Summer Time 1 In the Sys Menu Count menu press the or key to select Common Settings 2 Press the OK key The Common Settings menu appears 3 Press the or key to select Date Setting and p...

Page 402: ...Refer to page 8 30 for the default settings Auto Panel Reset ON OFF Select to use Auto Panel Reset or not Use the procedure below to specify the auto panel reset setting The default setting is On 1 In...

Page 403: ...o the Timer Settings menu Panel Reset Timer If you select On for Auto Panel Reset set the amount of time to wait before Auto Panel Reset Options are between 5 and 495 seconds every five seconds The de...

Page 404: ...s the or key to select Panel Reset Timer 6 Press the OK key Panel Reset Timer appears 7 Press the or key to set the Panel Reset Timer Set the amount of time before resetting the message display on the...

Page 405: ...een will appear Then enter the user ID and password with administrator privileges to log in and press Login the Right Select key 4 The Timer Settings menu appears 5 Press the or key to select Low Powe...

Page 406: ...the function When Quick Recovery is specified the machine wakes from sleep mode when any kind of data is received Example When print data is sent from a PC connected by Network Use the procedure belo...

Page 407: ...ings menu Select Energy Saver and press the OK key The detailed settings screen of Energy Saver mode appears 9 Press the or key to select the desired function for energy saver 10 Press the OK key The...

Page 408: ...ress the OK key When you are performing user management and have not logged in a login screen will appear Then enter the Login User Name and Login Password to log in and press Login the Right Select k...

Page 409: ...Cannot connect to Authentication Server Incorrect account ID Job is canceled Job Accounting restriction exceeded Cannot print Job Accounting restriction exceeded Cannot scan Job not stored Press OK Jo...

Page 410: ...and press Login the Right Select key 4 The Timer Settings menu appears 5 Press the or key to select Auto Err Clear 6 Press the OK key Auto Err Clear appears 7 Press the or key to select Off or On 8 P...

Page 411: ...the or key to select Common Settings 2 Press the OK key The Common Settings menu appears 3 Press the or key to select Timer Setting and press the OK key When you are performing user management and hav...

Page 412: ...ess the or key to select Common Settings 2 Press the OK key The Common Settings menu appears 3 Press the or key to select Timer Setting and press the OK key When you are performing user management and...

Page 413: ...10 Press the OK key End Time appears 11 Press the or keyto set the End Time 12 Press the OK key Unlock Code appears 13 Press the or key or numeric keys to set the unlock code 14 Press the OK key Comp...

Page 414: ...enabled you can only edit destinations in the Address Book by logging in with administrator privileges Refer to Character Entry Method on Appendix 9 for details on entering characters Use the procedu...

Page 415: ...hen press the OK key Registered is displayed and the screen returns to the Address Book list screen Refer to the descriptions below for how to enter each item Entering Contact Name 1 Press the or key...

Page 416: ...ss The table below explains the items to be entered Detail C b p E mail Address 3 6 t_maury N Edit Address Entry B b ABC Text Item Description Max No of Characters Host Name If you specify a port numb...

Page 417: ...s Host Name If you specify a port number other than the default 21 use the Hostname port number format E g FTPhostname 140 Host name or IP address of the sending computer 64 chars Path Path for the fi...

Page 418: ...ss the OK key A confirmation screen appears NOTE If the screen for confirming the entry of a new destination page 8 77 is set to On screens to confirm the entered host name and path name appear Enter...

Page 419: ...When creating a new destination the smallest unused address number is automatically allocated You can select any available number out of 200 numbers for individuals and 50 numbers for groups 1 Press t...

Page 420: ...sses Among them 5 destinations can be assigned for a FTP or SMB address The available addresses will then be 95 in total for email and or fax addresses Use the procedure below to register a group 1 In...

Page 421: ...stered is displayed and the screen returns to the Address Book list screen Refer to the descriptions below for how to enter each item Entering Group Name 1 Press the or key to display Group Name 2 Pre...

Page 422: ...e already been registered in the group the screen will display Registered numbers exceeded and return to the Group Member 6 Press the or key to select the destination you want to add to the group 7 Pr...

Page 423: ...f destinations registered to the group 2 Press the or key to select the destination you want to delete 3 Press Menu the Right Select key The group editing menu appears 4 Press the or key to select Del...

Page 424: ...mber is already registered and return to the screen of step 2 Editing a Destination Edit delete the destinations individuals you added to the Address Book Use the procedure below to edit a destination...

Page 425: ...n an individual s destination is selected 9 Edit items as necessary For how to edit each item refer to Adding an Individual Destination on page 8 158 and Adding a Group on page 8 164 10 After completi...

Page 426: ...reen shown is the one when No 1 No 12 is pressed and held 2 Press the or key to select the key number to which you want to register the destination 3 Press the OK key The Address Book list screen appe...

Page 427: ...touch key the key edit screen will not appear the address book screen will appear instead Go to step 6 4 Press the or key to select Edit NOTE If you select Delete here and press the OK key you can del...

Page 428: ...confirmation screen appears 8 Press Yes the Left Select key The selected destination is registered to the one touch key overwriting the previous one Registered is displayed and the screen returns to...

Page 429: ...in a login screen will appear Then enter the Login User Name and Login Password to log in and press Login the Right Select key 2 The System Network menu appears 3 Press the or key to select Restart 4...

Page 430: ...s Auto Use the procedure below to select the interface 1 In the Sys Menu Count menu press the or key to select System Network and press the OK key When you are performing user management and have not...

Page 431: ...o Network Setup LAN Cable Connection on page 2 15 about the procedures TCP IP IPv6 Setup Set up TCP IP IPv6 to connect to the network The default setting is Off Use the procedure below to setup the TC...

Page 432: ...rs 7 Press the or key to select IPv6 Setting 8 Press the OK key IPv6 Setting appears 9 Press the or key to select On or Off 10 Press the OK key Completed is displayed and the screen returns to the TCP...

Page 433: ...and press Login the Right Select key 2 The System Network menu appears 3 Press the or key to select Network Setting 4 Press the OK key The Network Setting menu appears 5 Press the or key to select TC...

Page 434: ...SD Scan Setup Select whether or not to use WSD Scan The default setting is On Use the procedure below to setup the WSD SCAN setting The machine must be restarted after the setting is changed 1 In the...

Page 435: ...urns to the Network Settings menu WSD Print Setup Select whether or not to use WSD Print The default setting is On Use the procedure below to setup the WSD PRINT setting The machine must be restarted...

Page 436: ...k Setting 4 Press the OK key The Network Setting menu appears 5 Press the or key to select WSD PRINT 6 Press the OK key The WSD PRINT menu appears 7 Press the or key to select On or Off 8 Press the OK...

Page 437: ...ng SMB and the number of the port to be used On Port number 139 SNMP Select whether or not to communicate using SNMP On SMTP E mail TX Select whether or not to send e mail using SMTP Off POP3 E mail R...

Page 438: ...unicate using HTTPS SSL must be set to On in SSL Setting on page 8 185 On LDAP Select whether or not to use LDAP Off ThinPrint Select whether or not to use ThinPrint On ThinPrintOverSSL Select whether...

Page 439: ...item selected in step 9 The screen shown is the one when FTP Client is selected 11 Press the or key to select On or Off If you select On for each of FTP Client and IPP and press the OK key a port num...

Page 440: ...Press the or key to select Network Setting 4 Press the OK key The Network Setting menu appears 5 Press the or key to select Restart Network 6 Press the OK key A confirmation screen appears 7 Press Yes...

Page 441: ...e this setting Make this setting when you use SSL The default setting is On Use the procedure below to make the setting 1 In the Sys Menu Count menu press the or key to select System Network and press...

Page 442: ...IPP The default setting is IPP IPP over SSL Use the procedure below to make the setting 1 In the Sys Menu Count menu press the or key to select System Network and press the OK key When you are perform...

Page 443: ...or key to select IPP IPP over SSL or IPPoverSSL only 10 Press the OK key Completed is displayed and the screen returns to the Secure Protocol menu HTTP Security Specify the protocol to be used for HT...

Page 444: ...ting 4 Press the OK key The Network Setting menu appears 5 Press the or key to select Secure Protocol 6 Press the OK key Secure Protocol appears 7 Press the or key to select HTTP Security 8 Press the...

Page 445: ...management and have not logged in a login screen will appear Then enter the Login User Name and Login Password to log in and press Login the Right Select key 2 The System Network menu appears 3 Press...

Page 446: ...etting is Off The table below shows the available settings You can change the port number using Embedded Web Server RX Use the procedure below to make the setting Network Setting a b 6 Host Name 7 LAN...

Page 447: ...ng 4 Press the OK key The Network Setting menu appears 5 Press the or key to select Secure Protocol 6 Press the OK key Secure Protocol appears 7 Press the or key to select SMTP Security 8 Press the OK...

Page 448: ...er management and have not logged in a login screen will appear Then enter the Login User Name and Login Password to log in and press Login the Right Select key 2 The System Network menu appears 3 Pre...

Page 449: ...ty appears 9 Press the or key to select Off SSL TLS or STARTTLS 10 Press the OK key Completed is displayed and the screen returns to the Secure Protocol menu SNMPv3 Setting Sets up SNMPv3 The default...

Page 450: ...ill appear Then enter the Login User Name and Login Password to log in and press Login the Right Select key 2 The System Network menu appears 3 Press the or key to select Network Setting 4 Press the O...

Page 451: ...e or key to select On or Off If you select On and press the OK key Rule Setting appears Press the or key to select On or Off 8 Press the OK key Completed is displayed and the screen returns to the Net...

Page 452: ...ity settings can be conveniently changed and checked from your PC For more information refer to the Embedded Web Server RX User Guide TCP IP Settings This selects the TCP IP settings The options avail...

Page 453: ...twork settings For details refer to TCP IP IPv4 Setup on page 8 175 IPv4 Setting This selects the settings for TCP IP IPv4 The method for setting is the same as for the standard Network settings For d...

Page 454: ...and press Login the Right Select key 2 The System Network menu appears 3 Press the or key to select Optional Network 4 Press the OK key The Optional Network screen appears 5 Press the or key to selec...

Page 455: ...In the Sys Menu Count menu press the or key to select System Network and press the OK key A login screen will appear Then enter the user ID and password with administrator privileges to log in and pr...

Page 456: ...etWare Setup Make this setting when you use NetWare The default settings is Off Use the procedure below to setup the NetWare setting 1 In the Sys Menu Count menu press the or key to select System Netw...

Page 457: ...key The Basic menu screen appears 7 Press the or key to select NetWare 8 Press the OK key NetWare appears 9 Press the or key to select On or Off 10 Press the OK key Completed is displayed and the scre...

Page 458: ...rator privileges to log in and press Login the Right Select key 3 The System Network menu appears 4 Press the or key to select Optional Network 5 Press the OK key The Optional Network screen appears 6...

Page 459: ...lect System Network and press the OK key A login screen will appear Then enter the user ID and password with administrator privileges to log in and press Login the Right Select key 2 The System Networ...

Page 460: ...the Basic menu MAC Address Filter Select whether to use MAC Address Filter The default setting is On Use the procedure below to setup the MAC Address Filter setting 1 In the Sys Menu Count menu press...

Page 461: ...reen appears 7 Press the or key to select MAC Address Filter 8 Press the OK key The MAC Address Filter screen appears 9 Press the or key to select On or Off 10 Press the OK key Completed is displayed...

Page 462: ...og in and press Login the Right Select key 2 The System Network menu appears 3 Press the or key to select Optional Network 4 Press the OK key The Optional Network screen appears 5 Press the or key to...

Page 463: ...e OK key A confirmation screen appears Press Yes the Left Select key The message Restarting appears and the network is restarted Pressing No the Right Select key returns to the Basic menu without rest...

Page 464: ...hen enter the user ID and password with administrator privileges to log in and press Login the Right Select key 2 The System Network menu appears 3 Press the or key to select NW InterfaceSend 4 Press...

Page 465: ...procedure below to specify the USB Host setting 1 In the Sys Menu Count menu press the or key to select System Network and press the OK key When you are performing user management and have not logged...

Page 466: ...key to select System Network and press the OK key When you are performing user management and have not logged in a login screen will appear Then enter the Login User Name and Login Password to log in...

Page 467: ...lock Use the procedure below to specify the USB Host setting 1 In the Sys Menu Count menu press the or key to select System Network and press the OK key When you are performing user management and hav...

Page 468: ...key to select USB Storage 6 Press the OK key USB Storage appears 7 Press the or key to select Unblock or Block 8 Press the OK key Completed is displayed and the screen returns to the I F Block Set me...

Page 469: ...ght Select key 2 The System Network menu appears 3 Press the or key to select I F Block Set 4 Press the OK key The I F Block Set menu appears 5 Press the or key to select Option I F 1 or Option I F 2...

Page 470: ...tting System Menu 8 214 Security Level Security Level setting The Security Level setting is primarily a menu option used by service personnel for maintenance work There is no need for customers to use...

Page 471: ...Default Setting System Menu 8 215 8 Optional Functions You can use the optional applications installed on this machine Opt Functions See Optional Function on page Appendix 6...

Page 472: ...Default Setting System Menu 8 216...

Page 473: ...9 1 9 Maintenance This chapter describes cleaning and toner replacement Cleaning 9 2 Toner Container Replacement 9 4 Replacing the Waste Toner Box 9 6...

Page 474: ...t use thinner or other organic solvents Document Processor If black streaks or dirt appears in copies when using the document processor clean the slit glass with the supplied cleaning cloth The messag...

Page 475: ...l as when the toner container is replaced It should also be cleaned if streaking or lines appear on printed copies or if printouts appear faint or blurred 1 Pull up the rear cover lever and open the r...

Page 476: ...ay CAUTION To prevent toppling the top tray and document processor cannot be opened at the same time Open the top tray to the position shown If the tray is not opened to this position it will not be p...

Page 477: ...TE Make sure that the projections of the toner container fit to the slots inside the machine 5 Push down on the top of the toner container to install it firmly in place 6 Close the top tray When closi...

Page 478: ...ause burns Replacing the Waste Toner Box 1 Open the waste toner cover 2 Press the lock button and gently remove the waste toner box NOTE Remove the waste toner box as gently as possible so as not to s...

Page 479: ...figure When the box is set correctly it will snap into place 6 Make sure that the waste toner box is correctly inserted and close the waste toner cover After replacing the toner containers and the was...

Page 480: ...avoid spilling toner inside the machine Be sure to consult a service technician before attempting long distance transportation of the machine Lock the lock lever Yellow for the optical system It is l...

Page 481: ...10 1 10 Troubleshooting This chapter explains how to solve problems with the machine Solving Malfunctions 10 2 Responding to Error Messages 10 8 Clearing Paper Jams 10 16...

Page 482: ...riginals loaded correctly When placing originals on the platen place them face down and align them with the original size indicator plates 2 65 When placing originals in the document processor place t...

Page 483: ...are not clear Did you choose appropriate image quality for the original Select appropriate image quality 5 15 Printouts are dirty Is the platen or the document processor dirty Clean the platen or the...

Page 484: ...operly Are the application software settings at the PC set properly Check that the printer driver and application software settings are set properly Cannot print with USB memory Is the USB host blocke...

Page 485: ...ent value Increase the adjustment value 1 level at a time from the current value If there is no improvement after the value is increased by 1 level increase by 1 level again If there is still no impro...

Page 486: ...t to High 1 set to High 2 8 137 The altitude is 1500 m or higher and dots appear in the image Run Altitude Adj and set the adjustment value to High 1 If there is no improvement when the value is set t...

Page 487: ...Has the SMB protocol been set to On Set the SMB protocol setting to On 3 27 Has the Host Name been entered properly Check the name of the computer to which data is being sent 3 31 Has the Path been en...

Page 488: ...9 4 Add toner C M Y K Replace the toner container Replace with a toner container of the color indicated in 9 4 Check waste toner box Is the waste toner box full Replace the waste toner box 9 6 Is the...

Page 489: ...d Press the OK key Machine failure Call service Internal error has occurred Make a note of the error code displayed on the Message Display Turn off the machine unplug the power cord and contact your S...

Page 490: ...originals from the document processor put them back in their original order and place them again Press the Start key to resume printing Press the Status Job Cancel key and press Cancel to cancel the j...

Page 491: ...ied container Insufficient memory Cannot start the job Further scanning cannot be performed due to insufficient memory Press the OK key to print the scanned pages Press the Status Job Cancel key and p...

Page 492: ...orrectly enter the user name in the domain user domain user or domain user format Is the correct folder path entered Enter the correct folder path Did you specify a user who is not allowed to access t...

Page 493: ...er the user name in the domain user or domain user format Did you specify an invalid user or password Enter the correct user name and password Error Code 1103 Is the correct folder path entered Enter...

Page 494: ...o Email Error Code Error Code 1101 Is the SMTP POP3 server name incorrect Set the correct server name in Embedded Web Server RX Error Code 1102 Did you specify an invalid user or password Enter the co...

Page 495: ...hentication method enabled Check the SMTP authentication settings on the server and client The SMTP authentication methods below can be used on the machine CRAM MD5 DIGEST MD5 PLAIN LOGIN Error Code 4...

Page 496: ...able for the machine Try changing the paper type For paper specifications see Paper Specifications in the Appendix Also refer to chapter 2 to how to insert paper correctly If paper jams still occur fr...

Page 497: ...ss to display the previous step Press the OK key to exit the online help message display When a paper jam occurs you can use the online Help message to remove the paper jam Multi Purpose Tray Follow t...

Page 498: ...the procedure below to remove the jam Paper jams in the cassette of the optional paper feeder are removed in the same way 1 Pull out the cassette 1 or optional paper feeder 2 Remove any partially fed...

Page 499: ...do not try to forcefully remove it Go to paper jam in the feed unit on page 10 19 Inside the Machine 1 Pull up the rear cover lever and open the rear cover CAUTION Some parts are very hot inside the...

Page 500: ...over and pull out the paper 6 If the jammed paper reaches the Duplex Unit as shown lift up the Duplex Unit and remove the paper 7 Close the rear cover The error will be cleared and printing will resum...

Page 501: ...ammed original If the original is caught in the rollers or difficult to remove proceed to the next step 4 Open the document processor 5 Remove the jammed original If the original tears remove every lo...

Page 502: ...Troubleshooting 10 22...

Page 503: ...11 1 11 Management This chapter explains the following operations User Login Administration 11 2 Job Accounting 11 13 Checking the Counter 11 35...

Page 504: ...user logs in for operations page 11 5 Displaying user login administration 1 Press the system menu counter key on the operation panel The system counter menu appears 2 From the system menu counter me...

Page 505: ...count 2 Press the or key to select User Login Set 3 Press the OK key The User Login Set menu appears 4 Press the or key to select User Login Item Description Local Authentication User authentication b...

Page 506: ...racters and port number of the authentication server and press the OK key NOTE If the Login User Name and Login Password are rejected check the following settings Network Authentication setting of the...

Page 507: ...ter the Login User Name and then press the OK key 3 Press the key to select Login Password press the OK key enter the Login Password and then press the OK key 4 Check the Login User Name and Login Pas...

Page 508: ...cedure for displaying user control on page 11 2 and display the User Job Account 3 In the User Job Account menu press the or key to select User Login Set Item Description User Name Mandatory at user r...

Page 509: ...xt screen and then press the OK key 9 Press the or key to select Exit and then press the OK key Select Detail and press the OK key to see information of the registered users 10 In Local User List pres...

Page 510: ...nt Name press Change the Right Select key select the account and then press the OK key NOTE If the user list is for device administrator and the device administrator does not log in Change is not disp...

Page 511: ...ser whose information you want to change and then press the OK key 2 In the same fashion as registering a new user press the or key to select the desired item press Edit the Right Select key change in...

Page 512: ...For details of LDAP server settings refer to the Operation Guide of the LDAP server This menu can be used only when Netwk Authentic is selected as the user authentication method Use the procedure bel...

Page 513: ...OTE Refer to Character Entry Method on Appendix 9 for details on entering characters 1 See the procedure for displaying user control on page 11 2 and display the User Job Account 2 Press the or key to...

Page 514: ...endix 9 for details on entering characters 1 See the procedure for displaying user control on page 11 2 and display the User Job Account 2 In the User Job Account menu press the or key to select Unkno...

Page 515: ...combined Restricting the print counter in one page increments up to 9 999 999 copies Resetting the print counter for each account or for all accounts combined First Job Accounting Setup Follow these s...

Page 516: ...ting select Off 7 Press the OK key Completed is displayed and the screen returns to the Job Account Set menu NOTE When the display returns to the System Menu default screen logout is automatically exe...

Page 517: ...login will fail Enter the correct account ID By pressing Counter the Left Select key you can refer to the number of pages printed and the number of pages scanned When the screen to enter the Login Use...

Page 518: ...aracter Entry Method on Appendix 9 for details on entering characters 4 The User Job Account menu appears 5 Press the or key to select Job Account Set 6 Press the OK key The Job Account Set menu appea...

Page 519: ...the OK key Completed is displayed and the screen returns to the Job Account Set menu NOTE When the display returns to the System Menu default screen logout is automatically executed and the screen to...

Page 520: ...OK key The Job Account Set menu appears 4 Press the or key to select Account List 5 Press the OK key Account List appears Item Description Account Name Enter the account name up to 32 characters Acco...

Page 521: ...t Exit and then press the OK key Select Detail and press the OK key to see information of the registered accounts 10 Account List is displayed and the new account is added to the account list Managing...

Page 522: ...u want to change and then press the OK key 2 Press the or key to select the item you want to change press Edit the Right Select key change account information and restriction of use and then press the...

Page 523: ...mpleted is displayed and the screen returns to Account List Managing the Copier Printer Counts You can select how the copying and printing page counts are shown either the total of both or each of cop...

Page 524: ...tal or Split 9 Press the OK key Completed is displayed and the screen returns to the Default Setting menu Restricting the Use of the Machine This section explains how to restrict the use of the machin...

Page 525: ...Printer print limit color A limit can be set for the number of pages printed in color Scan Restriction Others Limits the number of sheets scanned excludes copying Fax TX Restriction Limits the number...

Page 526: ...cted and then press Edit the Right Select key When selecting Split in Copy Print Count screen changes as shown in the left 4 Press the or key to select the desired restriction method and then press th...

Page 527: ...ibes the action taken Use the procedure below to apply the restriction limit 1 See the procedure for displaying user control on page 11 2 and display the User Job Account 2 In the User Job Account men...

Page 528: ...Press the OK key Apply Limit appears 8 Press the or key to select Immediately Subsequently or Alert Only 9 Press the OK key Completed is displayed and the screen returns to the Default Setting menu J...

Page 529: ...rint limit total A default value can be set for the total color and black white printed page limit Printer print limit color A default value can be set for the color printed page limit Scan Restrictio...

Page 530: ...want to set the default restriction on the number of sheets and then press the OK key 9 Use the numeric keys to enter the default restriction on the number of sheets and then press the OK key Complet...

Page 531: ...ount 2 In the User Job Account menu press the or key to select Job Account Set 3 Press the OK key The Job Account Set menu appears 4 Press the or key to select Total Accounting Item Detail Printed Pag...

Page 532: ...l Accounting menu 8 To reset the counter press the or key to select Counter Reset 9 Press the OK key A confirmation screen appears 10 Press Yes the Left Select key The counter is reset Completed is di...

Page 533: ...counts 7 Press the OK key A menu for the account appears 8 Press the or key to select the function of which you want to check counts and then press the OK key If you select Printed Pages select the i...

Page 534: ...key The screen returns to the menu for the account 10 To reset the counter press the or key to select Counter Reset 11 Press the OK key A confirmation screen appears 12 Press Yes the Left Select key T...

Page 535: ...rt will be printed by size Use the procedure below to print a job accounting report 1 See the procedure for displaying user control on page 11 2 and display the User Job Account 2 In the User Job Acco...

Page 536: ...Management 11 34 5 In the confirmation screen press Yes the Left Select key A job accounting report is printed Print Are you sure z Total JobAccounting Yes No...

Page 537: ...ey NOTE Refer to Character Entry Method on Appendix 9 for details on entering characters If you select Printed Pages select by Function or by Paper Size in the next screen and then press the OK key It...

Page 538: ...Management 11 36 4 Press the or key to check the count 5 After completing checking the count press the OK key The screen returns to the menu for the account Printed Pages C b Copy B W 1 5 1234567...

Page 539: ...quipment Appendix 2 Character Entry Method Appendix 9 Paper Appendix 13 Color balance adjustment Appendix 23 Sharpness adjustment Appendix 24 Color saturation adjustment Appendix 24 Specifications App...

Page 540: ...ing the paper feeder be sure to replace the cover Expansion Memory To expand the printer memory for more complex print jobs and faster print speed you can plug in optional memory module dual in line m...

Page 541: ...al object before handling the memory module Or wear an antistatic wrist strap if possible when you install the memory module Installing the Memory Module 1 Turn off the machine and disconnect the powe...

Page 542: ...e out of the socket to remove Verifying the expanded memory To verify that the memory module is working properly test it by printing a status page Card Authentication Kit User login administration can...

Page 543: ...This is a wireless network interface kit which supports the wireless network specifications IEEE802 11n Max 300 Mbps and 11 g b With the utilities supplied settings are possible for a variety of OS a...

Page 544: ...ial period differ depending on the application 1 In the Sys Menu Count menu press the or key to select System and press the OK key When you are performing user management and have not logged in a logi...

Page 545: ...p Function menu CAUTION If you change the date time while using an application you will no longer be able to use the application Checking Application Details Use the procedure below to check the detai...

Page 546: ...appears 5 Press Menu the Left Select key 6 Press the or key to select Detail The detail setting screen appears You can now view detailed information on the selected application System a b 2 I F Block...

Page 547: ...e character to the left of it is deleted 3 Back Key Press this key to return to the screen from which you invoked the character entry screen 4 Cursor Keys Use these to select the entry position or sel...

Page 548: ...screen press Text the Right Select key to select the type of characters you want to enter Each time you press Text the Right Select key the character type switches as follows ABC 123 Symbol ABC NOTE B...

Page 549: ...c Symbol d e f D E F 3 Numeric 3 Alphabetic Symbol g h i G H I 4 Numeric 4 Alphabetic Symbol j k l J K L 5 Numeric 5 Alphabetic Symbol m n o M N O 6 Numeric 6 Alphabetic Symbol p q r s P Q R S 7 Numer...

Page 550: ...c keys to display the Symbols screen Use cursor keys to select the symbol you want to enter and then press the OK key Entry When Select Character Is Selected in Login Operation Settings In the login s...

Page 551: ...m2 to 163g m2 Recycled 60g m2 to 163g m2 Color Colour 60g m2 to 163g m2 Letter Legal Statement Executive Oficio II A4 A5 B5 Folio 16K 216 340 mm ISO B5 Envelope 6 Envelope C5 Youkei 2 Envelope 10 Env...

Page 552: ...83 to 14 02 or 148 to 356 mm 50 80g m2 Thick paper A4 JIS B5 A5 Folio Legal Letter Oficio II Statement Executive A6 B6 ISO B5 16K Other sizes Portrait 2 76 to 8 50 or 70 to 216 mm Landscape 5 83 to 14...

Page 553: ...r that is supported with this machine Refer to the subsequent sections for further details NOTE Some recycled paper does not meet requirements for use with this machine as listed in the Basic Paper Sp...

Page 554: ...heat of printing and may damage the drum Be sure to use the standard paper that contains at least 80 pulp i e not more than 20 of the total paper content consists of cotton or other fibers Supported...

Page 555: ...mm Moisture Content Paper moisture content is the ratio of moisture to dryness expressed as a percentage Moisture affects how the paper is supplied the electrostatic changeability of the paper and ho...

Page 556: ...rself Packaging Choose paper that is properly packaged and stacked in boxes Ideally the packaging itself should have been treated with a coating to inhibit moisture Specially treated paper We do not r...

Page 557: ...the heat of printing Transparencies must meet the following conditions To avoid problems use the multi purpose tray for transparencies and load transparencies with the long side facing the machine If...

Page 558: ...multiple envelopes do not allow more than ten envelopes remain in the top tray at once Thick Paper Before loading thick paper in the multi purpose tray fan it and align the edges Some thick paper may...

Page 559: ...paper feeder multi purpose Preprinted Paper Preprinted paper must conform to the specifications listed on the page 13 of the Appendix The colored ink must be able to withstand the heat of printing It...

Page 560: ...ORTANT When printing on coated paper in very humid environments ensure that the paper is kept dry as moisture may cause sheets to stick together when they are fed into the printer Paper Type Indicator...

Page 561: ...Adjust the strength of cyan magenta yellow and black to make fine hue adjustments Refer to the Operation Guide for configuration details Original More Yellow More Cyan More Black Less Yellow Less Mage...

Page 562: ...on Guide for configuration details Color saturation adjustment The color saturation of the image can be adjusted Color can be emphasized or color can be made paler and closer to a monotone Original Mo...

Page 563: ...lour Prepunched Letterhead Thick Envelope Coated High Quality Custom 1 to 8 Paper Size Cassette 1 Maximum 8 1 2 14 Legal Duplex 8 1 2 14 Legal Minimum 5 1 2 8 1 2 A6 Duplex 7 1 4 10 1 2 A5 Multi Purpo...

Page 564: ...rface Kit Item Description Copy Speed Simplex A4 26 sheets min A5 B5 A6 until 15th image 28 sheets min Legal 23 sheets min A5 B5 A6 from 16th image 14 sheets min Letter 28 sheets min First Print Time...

Page 565: ...ws XP Professional Windows Server 2003 Windows Server 2003 x64 Edition Windows Vista x86 Edition Windows Vista x64 Edition Windows 7 x86 Edition Windows 7 x64 Edition Windows Server 2008 Windows Serve...

Page 566: ...sfeld platziert werden Item Description Original Feed Method Automatic feed Supported Original Types Sheet originals Paper Size Maximum Legal A4 Minimum Statement A5 Paper Weight 50 to 120 g m2 Duplex...

Page 567: ...automatically detects computers devices and services on an IP network Bonjour because an industry standard IP protocol is used allows devices to automatically recognize each other without an IP addre...

Page 568: ...ess is four sets of numbers separated by dots e g 192 168 110 171 Each number should be between 0 and 255 IPP IPP Internet Printing Protocol is a standard that uses TCP IP networks such as the Interne...

Page 569: ...te for the Internet access and PDF format as well as gradual improvements in implementation technologies PPM prints per minute This indicates the number of A4 size printouts made in one minute Printer...

Page 570: ...over a network TCP IP IPv6 TCP IP IPv6 is based on the current Internet protocol TCP IP IPv4 IPv6 is the next generation Internet protocol and expands the available address space which resolves the pr...

Page 571: ...opy 8 38 Combine Mode 2 in 1 Mode 4 11 4 in 1 Mode 4 12 Page Boundary Lines 4 12 Connecting LAN Cable 2 5 Power Cable 2 11 USB Cable 2 11 Connection Method 2 3 Continuous Scan Copy 4 14 Send 5 19 Conv...

Page 572: ...Status 7 20 Configuring 7 21 DHCP Appendix 29 Document Box 6 1 Quick Setup Registration 8 83 Document Processor Appendix 28 How to Load Originals 2 67 Loading Originals 2 66 Not Supported Originals 2...

Page 573: ...ing Sending to Different Types of Destinations 3 44 N NetBEUI Appendix 30 NetWare 8 200 Setup 8 200 Network Setup 2 15 Network Cable 2 4 Connecting 2 5 Network Interface 2 4 Network Interface Kit Appe...

Page 574: ...ay 8 16 Setup 8 8 Size and Media 2 57 Appendix 13 Special Paper 8 24 Appendix 18 Specifications Appendix 15 Weight 8 18 Paper Feeder Appendix 2 Paper Jam 10 16 Document Processor 10 20 Paper Selection...

Page 575: ...re 8 200 Network 8 174 Printer 8 99 Send 8 75 Sharpness adjustment Appendix 24 Sleep 2 9 Slit Glass Cleaning 9 3 SMTP Appendix 31 Solving Malfunctions 10 2 Specifications Common functions Appendix 25...

Page 576: ...nabling Disabling Group Authentication 11 10 Login 11 5 Logout 11 5 Unknown login user name Job 11 12 W WIA Appendix 32 Wireless Network Interface Kit Appendix 5 WSD Scan 5 25 X XPS File formats 5 12...

Page 577: ......

Page 578: ...First edition 2013 11 2PWGEEN000 TA Triumph Adler GmbH Betriebsst tte Norderstedt Ohechaussee 235 22848 Norderstedt Germany...

Reviews: