Section 2 Copy Mode
2-13
1.7 Advanced Settings
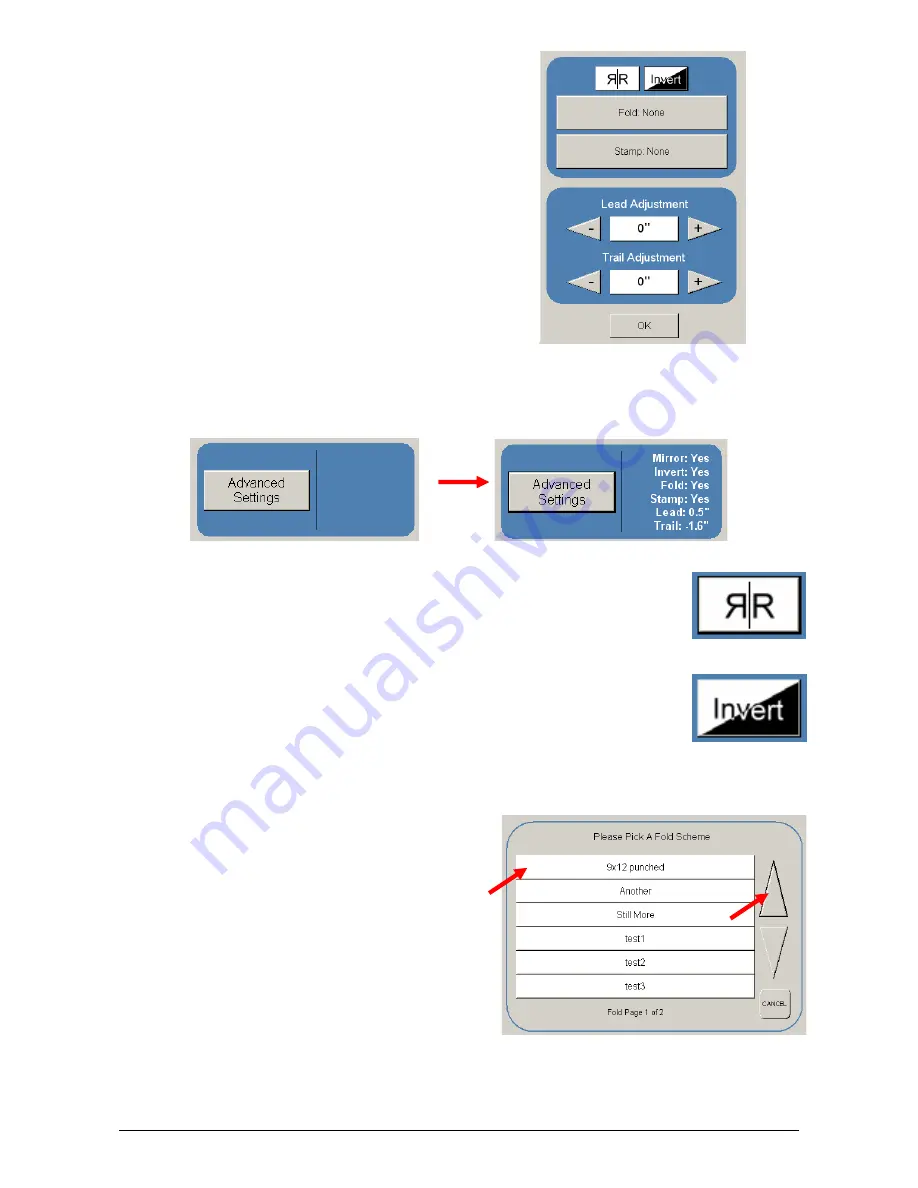
The Advanced Setting button contains the additional
parameters on a sub screen:
a) Mirror
b) Invert
c) Fold (if optional device connected)
d) Stamp (Water Mark)
e) Lead Edge Adjustment
f) Trail
Edge
Adjustment
When any of the adjustments / selections are selected, the selections will now be
displayed on the main Copy screen
1.7.1 Mirror
Select this button to “mirror” a scan. This can be utilized on originals that
may have the actual image on the reverse side such as older “sepia” or
“film” documents.
1.7.2 Invert
Select this button to change a region of white to black and visa versa of a
scanned document. This is normally used for “negative” documents or
“blue prints”.
1.7.3 Fold
Select “Fold” to display another sub screen. This will allow the selection of a “Fold Pattern”
to be applied to the copy.
a) use the Arrow buttons to scroll through the
available folds and then select the fold
from the list.
Summary of Contents for CX 8036
Page 1: ...Instruction Handbook CX 8036 Large Format System ...
Page 68: ...Section 2 Copy Mode 2 28 ...
Page 94: ...Section 4 Job Info Screen 4 8 ...
Page 138: ...Section 6 Windows Driver 6 22 ...
Page 150: ...Section 7 AutoCAD HDI Driver 7 12 5 0 Custom Settings 1 2 7 3 8 4 9 10 6 5 ...
Page 201: ...Section 8 Request 8 45 ...
Page 206: ...Section 8 Request 8 50 ...
Page 224: ...9 18 Section 9 KIP Print Net KIP PrintNet on Opera ...
Page 228: ...9 22 Section 9 KIP Print Net ...
Page 242: ...Section 11 Connectivity 11 8 ...
Page 246: ... 4 ...
Page 252: ...2 2 Select the Applications folder 3 Select the Utilities folder ...
Page 255: ...5 8 Select Add 9 The printer set up will be in the Printer List ...
Page 265: ......
Page 268: ...UTAX GmbH Ohechaussee 235 22848 Norderstedt Germany ...


