9-13 Section 9 KIP Print Net
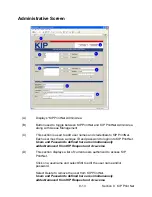
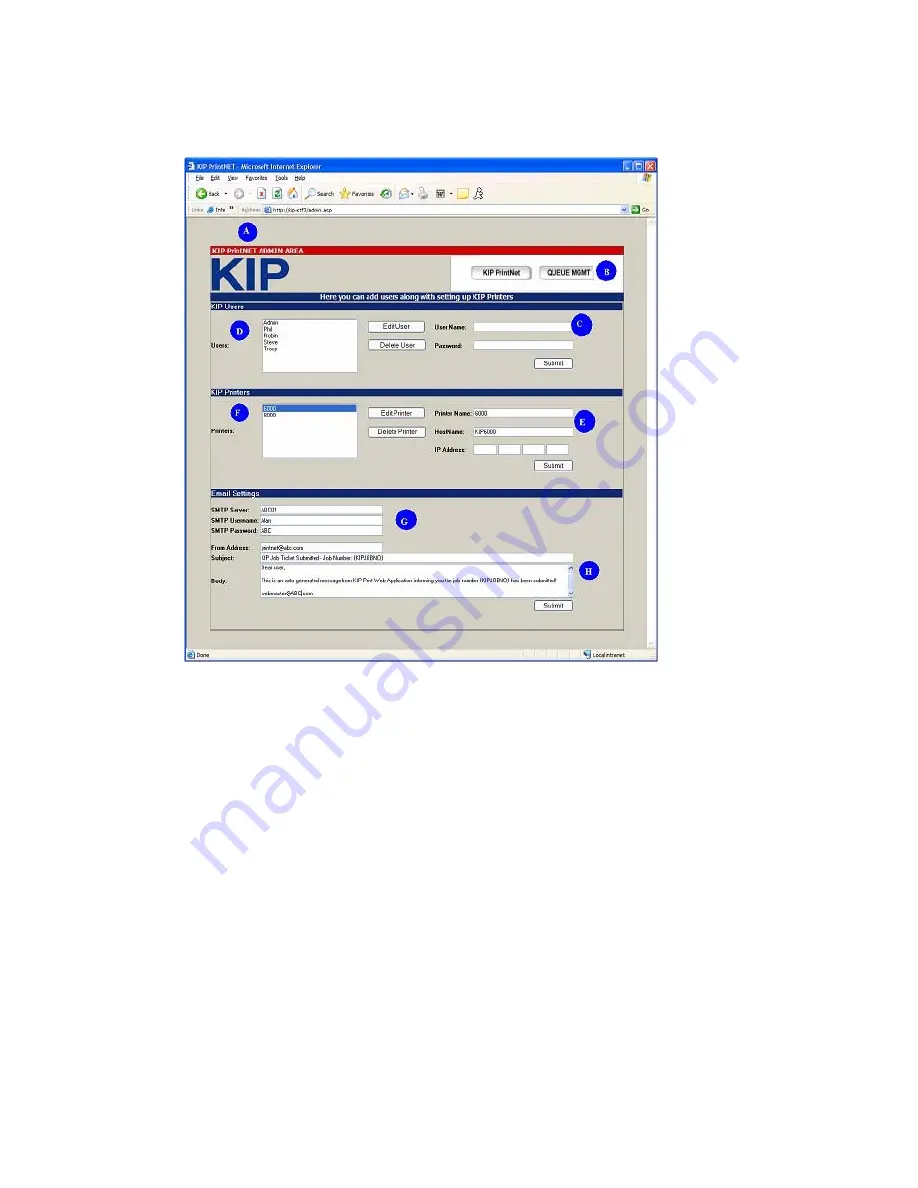
Administrative Screen
(A)
Displays “KIP PrintNet Admin Area
(B)
Button used to toggle between KIP PrintNet and KIP PrintNet Admin Area
along with Queue Management
(C)
This section is used to add user names and credentials to KIP PrintNet.
Each user must have a unique ID and password to login into KIP PrintNet.
Users and Passwords defined here are simultaneously
added/removed from KIP Request and vice-versa
(D)
This section displays a list of current users authorized to access KIP
PrintNet.
Click on a username and select
Edit
to edit the user name and/or
password.
Select
Delete
to
remove
the user from KIP PrintNet.
Users and Passwords defined here are simultaneously
added/removed from KIP Request and vice-versa
Summary of Contents for CX 8036
Page 1: ...Instruction Handbook CX 8036 Large Format System ...
Page 68: ...Section 2 Copy Mode 2 28 ...
Page 94: ...Section 4 Job Info Screen 4 8 ...
Page 138: ...Section 6 Windows Driver 6 22 ...
Page 150: ...Section 7 AutoCAD HDI Driver 7 12 5 0 Custom Settings 1 2 7 3 8 4 9 10 6 5 ...
Page 201: ...Section 8 Request 8 45 ...
Page 206: ...Section 8 Request 8 50 ...
Page 224: ...9 18 Section 9 KIP Print Net KIP PrintNet on Opera ...
Page 228: ...9 22 Section 9 KIP Print Net ...
Page 242: ...Section 11 Connectivity 11 8 ...
Page 246: ... 4 ...
Page 252: ...2 2 Select the Applications folder 3 Select the Utilities folder ...
Page 255: ...5 8 Select Add 9 The printer set up will be in the Printer List ...
Page 265: ......
Page 268: ...UTAX GmbH Ohechaussee 235 22848 Norderstedt Germany ...


