background image

5-14                 Section 5  Help-Configuration 


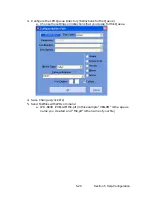
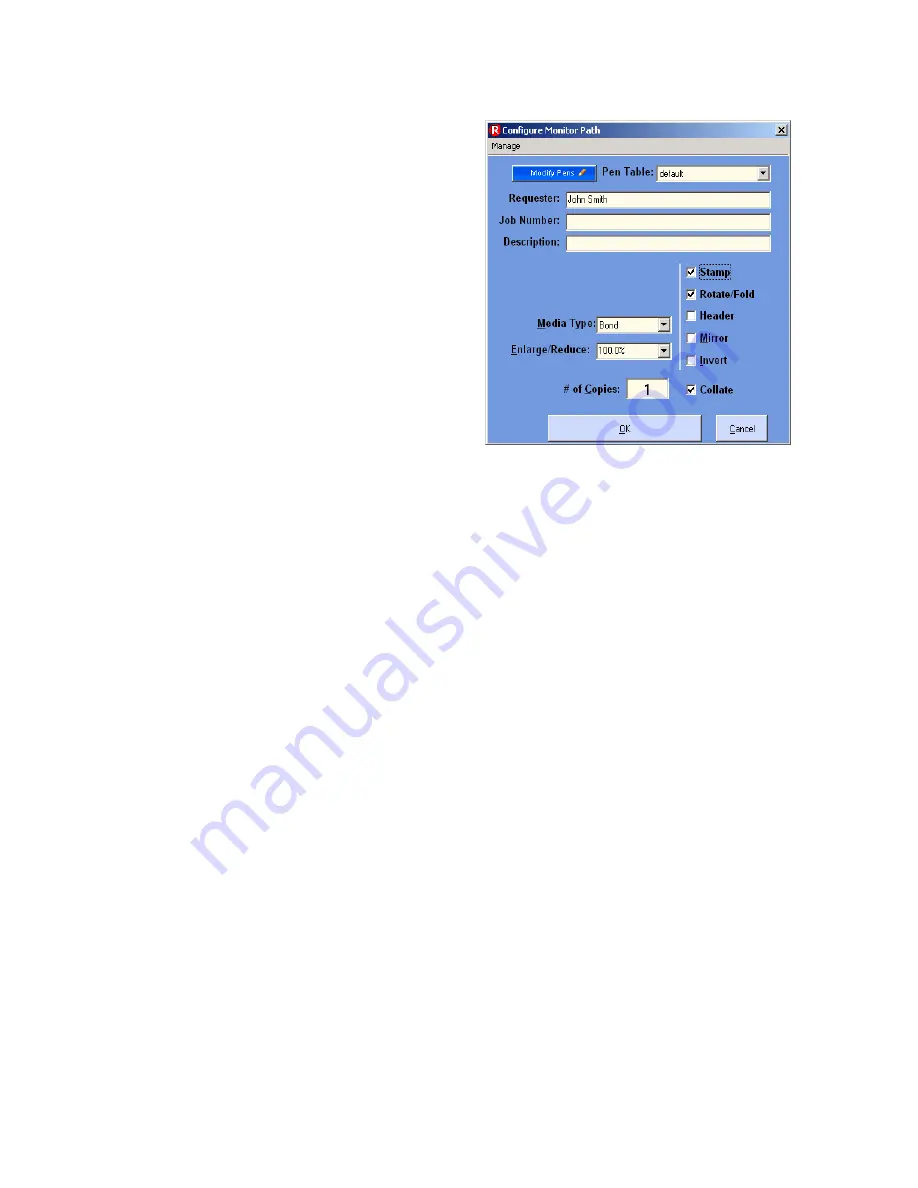
Configure Monitored Directory 


Any files (raster, vector) or the      

    Job ticket can be sent to 

 the  C:\Monpath1\Request 
 folder. 


Individual files sent to this  
folder will use the data  

folder that is  user   configurable. 
 
‘C:\Monpath1\Request’ is a fixed 
path and CANNOT be changed.  

 
The ‘Configure’ selection allows 
the user to apply custom attributes 
(number of copies, inversion, pen 
table information, Stamp 

information, header information, 
folding information and description for any job submitted for printing. 


Monitor Path Selection Arrows 

These arrows allow the user to toggle between the monitor paths currently 
setup on the controller. 


Save 

Allows the user to save monitor paths created in the set monitor    path  

 screen. 


Cancel 

Allows the user to exit the set monitor path screen and return to the 

 configuration 

menu. 


Summary of Contents for CX 8036

Page 1: ...Instruction Handbook CX 8036 Large Format System ...

Page 2: ...he interference Do not install Machine around other electronic equipment or other precision instruments Other devices may be effected by electrical noise during system operation If the machine is installed near other electronic equipment such as a TV or a radio interference to the noted equipment such as noise or flickering may occur Use a dedicated power source and install the PRINTER as far as p...

Page 3: ...lowing symbols are found throughout the USER GUIDE WARNING This WARNING mark means that there is a possibility of death or serious injury if you ignore or do not follow the instructions CAUTION This CAUTION mark means that there is a possibility of injury or damage if you ignore or do not follow the instructions This symbol means DO NOT ATTEMPT This symbol means pay close attention to ...

Page 4: ...rd is damaged it may cause a fire or you may receive an electric shock REPLACE THE CORD IF DAMAGED 1 Do not put a flower vase a flowerpot or any other water filled item on the product Spilt water could cause a fire or an electric shock 2 If the product generates an abnormal smell or noise turn it off and unplug it from the wall electrical outlet immediately 1 Do not remove the screw s or do not op...

Page 5: ... printer in a humidified room or a dusty room Also do not install the printer on an unstable floor as injuries may occur 1 Unplug the printer before you move it The power cord may be damaged and it may result in a fire or electric shock 2 If you do not use the printer for a long duration holidays company shutdown turn off and unplug the printer from the outlet for safety Ventilate the room well if...

Page 6: ...ions Section 2 Copy Mode Section 3 Scan Mode Section 4 Job Info Mode Section 5 Help Configuration Section 6 Windows Drivers Section 7 AutoCAD Drivers Section 8 KIP Request Section 9 KIP PrintNet Section 10 Reporting Package PRP Section 11 Connectivity ...

Page 7: ...ning off 1 16 2 3 Roll Media Replacement 1 16 2 4 Toner Installation 1 20 2 5 Cut Sheet Media Placement 1 24 2 6 Emergency Stop of a Copy or Scan 1 26 2 7 Dehumidify the Roll Media option 1 27 3 0 Error Messages 1 28 3 1 Operational Errors 1 28 3 1 1 Paper mis feed errors 1 28 3 1 1 1 Deck is jam Feeding Jam 1 28 3 1 1 2 Manual Jam 1 30 3 1 1 3 Internal Transport Jam 1 30 3 1 1 4 Fuser Jam 1 31 3 ...

Page 8: ...he installation site must not have any open flames dust or ammonia gases 2 The equipment must not be exposed to the air vents from heating cooling systems 3 The equipment should not be exposed to the direct sunlight Please draw curtains to block any sunlight When you open the printer Upper Half do not expose the Photoconductive Drum to strong intense light as this will damage the Drum Ozone will b...

Page 9: ... draft check goods ticket etc commutation ticket or book of tickets excluding that some specific companies can copy such originals it requires for its own business 2 We recommend you not freely copy scan government issued passports public or private issued licenses automobile inspection certifications ID and tickets passes or meal Law To Reference Items Prohibited to Duplicate Regulations to contr...

Page 10: ...canning Network ready copier Simple Operator assistance for every day tasks toner replacement procedure Image stamping All hardware software included for instant upgrade from Digital Copier to Network Printer to Scan to File system Information center displays all support information meter readings and serial number Network Printer Features Optional Standard TCP IP connectivity Direct support for v...

Page 11: ... method under UL Standard Dimensions 1240mm W x 600mm D x 1100mm H or 49 x 24 x 44 Operation Panel is not included in these dimensions Weight 195 kg or 430 lbs 1 roll 200 kg or 440 lbs 2 roll weights are estimated Environmental condition for usage Temperature 10 to 32 Centigrade or 50 to 86 Fahrenheit Humidity 20 to 85 RH Input power In U S A 120V plus minus 10 50 60Hz 10A In Europe 220 240V plus ...

Page 12: ... Standard 3 6m or 11 8 Option 24m or 75 Minimum 210mm or 8 5 Warm up time Less than 5 First print time 24 seconds D Landscape 32 seconds E Fusing method Heat Pressure Rollers Development method Dry non magnetic mono component toner Media Plain Paper 64 to 80g m2 US Bond 20lbs Tracing Paper US Vellum 20lbs Film 4 MIL Recommend media for electro photography process Storage of consumables Store toner...

Page 13: ... Transportable original width Max 932 2mm or 36 7 Min 275 0mm or 11 Scan length Max 15 240mm or 50 Including the margin area Min 210mm or 8 5 Including the margin area Margin area 3mm from leading edge and trailing edge Optical resolution 600dpi Digital resolution Max 600dpi Min 100dpi Original transportation Sheet through type Transportable original thickness Max 0 65mm Min 0 05mm NOTE specificat...

Page 14: ... to the user 6 Scanner Images the original for all scans or copies 7 Original Table Open this cover to replace the Toner Cartridge Place the original to feed into the Scanner to make a scan or copy 8 Engine Unit Levers Press up on the handles to open the printer engine 9 Cut Sheet Bypass Feeds a sheet of cut sheet media 10 Roll Deck Roll media installed here 1 Roll standard 2 Rolls optional 11 Pri...

Page 15: ...e here to connect the system to the network Do not connect a telephone line 3 Dehumidify Heater Switch Option Turn on the Dehumidify Heater with this switch when you would like to dry the paper in the humid season 4 Inlet Socket Connect the Power Cord here 5 Breaker It is possible to shut off supplying the AC power 6 Print Guide Trays These trays guide the prints to the Print Tray 1 6 2 3 4 5 ...

Page 16: ...nts and sets designation 6 Advanced Settings Invert mirror stamps folds and edge adjustments preformed displayed in this button sub screen 7 Reset Clears the image buffer and resets the system to default settings 8 View Last The last scan job can be viewed 9 Recall Job Images can be recalled from the last job for reprint Please note that a time limit may be set to recall or this feature may be dis...

Page 17: ...e of original to copy Also select Eng Arch Mode selected here 4 Quality Select Auto or Manual Image adjustments 5 Resolution Scroll through image resolution DPI of the scanner 6 Format Scroll through file formats 7 Advanced Settings Invert mirror stamps and edge adjustments preformed displayed in this button sub screen 8 Reset Resets the system to default settings 9 Mailbox Select where the image ...

Page 18: ...3 Status Shows the current status of a job and media selection 4 Type Displays a copy or network print job 5 Total Displays the total number of prints and current number printed 6 To Top After a job is selected see 2 the position can be changed to the next job printed 7 Pause Pauses printer to allow media change etc 8 Delete After a job is selected see 2 it can be removed from printing 9 Up Down S...

Page 19: ...s IPS number Host Name IP 3 Contact Shows the contact information for the Service and Supplies provider 4 User Guide User Guides for details on system functions and operations 5 Configurations Allows user set up of the system 6 Print This Screen Allows the current screen with version and counter values to be printed on the system 7 Service Allows advanced set up of the system Usually for technical...

Page 20: ...le formats 3 PDF PS Printing Allows direct PDF and Postscript file format printing from various applications including Request 4 Roll Deck 2 Second roll of media for increased productivity 5 Print Trays Slant Stacker To accommodate a larger quantity of prints than the standard front print tray rearward stacking systems are available 6 Folding KIPFold For fan and crossfold functions as a copier or ...

Page 21: ...e A Ready Indicator on the Copy Mode Screen will flash during the warm up process Ready Indicator 4 When the Ready Indicator stops flashing the system is ready to copy scan print WARNING 1 Do not handle the Power Plug with wet hands or you may receive an electrical shock 2 Make sure to ground the machine for your safety 3 Do not plug the printer into a multi plug connector in which other devices a...

Page 22: ... right side of system Switch to the O position to turn off the system Power Switch 2 3 Roll Media Replacement 1 Open the Roll Deck 1 Remove the Spool 2 with the roll core from the Roll Deck 2 Press down on the Lever 3 to release the core and then pull out the Spool 2 from the core 1 2 3 2 ...

Page 23: ...b 4 Place a new roll on a table desk or another stable flat surface Pressing down the Lever 3 insert the Roll Spool 2 into the core of new roll NOTE There are Size Guides 6 on the Spool The Paper Guide is provided with a triangle mark 7 place the Paper Guide so that the triangle aligns with the line of Size Guide 4 5 6 7 3 2 NOTE Please note the unwinding direction of the media at this time Please...

Page 24: ... the feeding roller Then rotate the Feeding Handle 9 clockwise so that the feeding rollers catch the roll paper 7 When the feeding rollers catch the media move the Lever 11 to the front side and rotate the Paper Feeding Knob 9 until the leading edge comes out from the guides 9 8 9 11 Leading edge of roll paper NOTE In case of Roll 2 rotate the Feeding Handle of Roll 2 10 10 ...

Page 25: ...cut the leading edge Remove the cut portion and discard 10 Close the Roll Deck 11 On the Operator Panel a screen will automatically appear after the deck is closed to define the media width and type Please select the width and type for each roll deck and then select the OK button to confirm the selection 12 ...

Page 26: ...creen in the Copy and Job Info Screens To replace the toner cartridge please follow these steps Please note that the replacement procedure can also be displayed on the Operator Panel for easier access by pressing User Guide Changing Toner on the screen 1 Open the Toner Cover 1 2 Slide the green Disk 2 to the right to unlock the Toner Cartridge 1 2 ...

Page 27: ...Lock Lever 3 lift up on the left side of the Toner Cartridge and then remove the entire cartridge from the machine Discard the spent cartridge using local recycling or waste management programs 5 Shake a new Toner Cartridge several times from left and right to loosen the toner NOTE If you remove the Toner Cartridge without resealing the toner outlet 5 the toner will drop from the toner outlet and ...

Page 28: ... fit the pin to the groove 7 7 Rotate the body of the cartridge 4 to the arrow s direction several revolutions to open the toner outlet Confirm that the projection 8 will fit into the notches 9 7 6 3 8 9 NOTE It is not necessary to lock the cartridge with the green Disk 2 It will automatically lock after the Toner Hatch is closed 2 4 ...

Page 29: ...Section 1 Basic Printer Functions 1 23 8 Close the Toner Cover 9 Press OK on the Operator Panel to continue copying or printing ...

Page 30: ...ic Printer Functions 1 24 2 5 Cut Sheet Media Placement 1 Select Cut Sheet Bypass Button on the Operator Panel Copy Mode 2 Select the size of the sheet and the media type not shown 3 Or use Custom to select a width ...

Page 31: ...Section 1 Basic Printer Functions 1 25 4 Select a standard length or use a Custom Length 5 Confirm the cut sheet size by pressing enter 6 Open the Cut Sheet Feeder 1 1 ...

Page 32: ...he Feeder referencing the size marks When the paper is inserted far enough the machine automatically sets the paper at the proper position 7 Continue with normal copy print functions See User Guide Copy or Print sections 2 6 Emergency Stop of a Copy or Scan If ever so required press the Stop Button 1 on the Scanner to immediately stop the original while making a copy or a scan 1 ...

Page 33: ...dia If the printer is located in an environment where the humidity may effect the image quality please turn on the dehumidifiers 1 Select Switch to I position Dehumidifier switch NOTE Dehumidifiers are an option for the system Please contact you local dealer for details ...

Page 34: ... Roll Deck Feeding Jam Cut Sheet Manual Jam Internal Jam Resist Jam Fuser Jam Accessory Jam 3 1 1 1 Deck jam Feeding Jam Either Deck jam or Feeding Jam is displayed when the roll paper is mis fed in the Roll Deck 1 Open the Roll Deck and unwind the roll paper 2 Insert the leading edge of media under the under the Guide Plate 2 until the edge touches the feeding roller Then rotate the Feeding Knob ...

Page 35: ... Lever 5 forward and rotate the Feeding Knob 3 until the leading edge comes out from the guides 4 Slide the Cutter Handle 6 fully from one side to another side to cut the media Remove the cut media 3 Leading edge of roll paper 6 NOTE In case of Roll 2 rotate the Feeding Knob of Roll 2 4 4 5 ...

Page 36: ... Printer Functions 1 30 3 1 1 2 Cut Sheet Manual Paper Jam 1 Carefully remove the paper by pulling as noted 3 1 1 3 Resist Jam Internal Jam 1 Pull up the Engine Levers 1 to open the printer 2 Remove any mi fed paper 1 ...

Page 37: ... device such as a Stacker or Folder Remove the mis fed paper referencing the User Guide of optional device 1 WARNING There are extremely hot parts inside of the Heater Area Do not touch any parts in the Heater Unit or you will be burnt Also note that the paper may be very hot as well NOTE If you can not find the mis fed paper inside of the Fuser refer to 3 1 1 3 Resist Jam Internal Jam and follow ...

Page 38: ... referencing the User Guide of optional device 3 1 2 3 Cut Sheet Manual Set NG This message is indicated when cut sheet media has been set before the system is turned on Remove media from the Cut Sheet Feeder 3 1 2 4 Cutter Set NG This message is indicated when the Cutter Knob is not in the correct position Open the Roll Deck and then slide the Cutter Knob fully to the left or right until it stops...

Page 39: ...rtridge 3 1 2 6 Paper Empty This message is indicated when the roll paper is empty Replace media referencing 2 3 Replacement of Roll Paper 3 1 2 7 The door opened during printing This message is indicated when the Roll Deck is opened for some reason in the middle of printing Close the Roll Deck The paper usually will be mis fed inside the machine please remove it Roll Deck Roll paper Toner Cartrid...

Page 40: ...mp E 001 Fuser Over Temp E 002 Fuser Low Temp E 003 Temp Not Rise E 010 Motor1 Error E 011 Motor2 Error E 012 Motor3 Error E 020 Counter Error E 031 1st Error E 032 AC Error E 033 Tr Error E 034 Bias Error E 040 Cutter Error E 050 FPGA Error E 070 Dev Error If any of the above errors is displayed 1 Turn off the printer wait approximately one minute and turn the printer on again 2 If the same error...

Page 41: ...arpness 10 1 5 5 Dither 10 1 6 Copy Count 10 1 6 1 Arrows Count Increase Decrease 11 1 6 2 Number Pad Count Increase Decrease 11 1 6 3 Set Copy 11 1 6 4 Clear 12 1 7 Advanced Settings 13 1 7 1 Mirror 13 1 7 2 Invert 13 1 7 3 Fold 13 1 7 4 Stamp 14 1 7 5 Leading Edge Adjustment 15 1 7 6 Trailing Edge Adjustment 16 1 8 Width 16 1 8 1 Auto 17 1 8 2 Manual Roll Selection 17 1 8 3 Enabling Cutsheet 18 ...

Page 42: ...Section 2 Copy Mode 2 2 1 10 4 Auto Zoom 25 1 10 5 Clear 26 1 11 Start 26 1 12 View Last 26 1 13 Recall Job 26 1 14 Stop Reset 26 1 15 Interrupt 26 1 16 Rescan 27 1 17 Log Off 27 ...

Page 43: ...tings Invert mirror stamps folds and edge adjustments preformed displayed in this button sub screen 7 Reset Clears the image buffer and resets the system to default settings 8 View Last The last scan job can be viewed 9 Recall Job Images can be recalled from the last job for reprint Please note that a time limit may be set to recall or this feature may be disabled by the administrator to prevent a...

Page 44: ...change to modify the copies as required 1 2 1 Select Copy Mode On the lower region of the Operator Panel select COPY 1 2 2 Select Size Mode Select whether the document is an engineering or architectural size document This will allow the automatic width detection to function Engineering widths 34 22 17 11 and 8 5 inches Architecture widths 36 30 24 18 12 and 9 inches ...

Page 45: ...r a combination of lines photos documents Greyscale used for a combination of lines areas of shade CAD originals Photo used for photographic originals This will allow automatic image quality adjustments for the scan 1 2 4 Copy Count Press the arrow buttons to scroll through the number of copies required or press on the actual number to set the quantity with the number pad ...

Page 46: ...lects automatic for best possible fit or manual roll selection 1 2 6 Length Select Auto for automatic cut length to the length of the original or Standard Cut for a manual length a number pad will request the desired length to be entered or ...

Page 47: ...ress on the Zoom number to enter a ratio on the key pad 1 2 8 Insert Original Using the guides on the feed table center the original face up and insert the document Continue to push forward until the scanner accepts the document The original will automatically commence to copy While this occurs the image will be displayed on the Operator Panel for your reference ...

Page 48: ...ode parameters to achieve the required result 1 4 Original This region allows the setting of the Size Mode Engineering or Architectural and the original image type 1 4 1 Original Size Mode This button is used to select the Size Mode of Engineering or Architectural This will allow the automatic width detection system to determine the image width when an original is placed in the scanner Engineering...

Page 49: ... desired original setting from one of the four diagrams This will allow automatic image quality adjustments for the next scan Please note that the selection will be highlighted with a black circle and the icon will become white as in the above example Greyscale 1 5 Quality This region is used to change the image quality settings from the automatic setting 1 5 1 Automatic For most copies Auto shoul...

Page 50: ...iginal 1 5 4 Sharpness To override the Automatic setting Sharpness can be adjusted Deselect Auto to enable Sharpness When the arrows are pressed the line sharpness will be increased to remove rough lines or decreased when photos are copies to allow smoother graduations 1 5 5 Dither To override the Automatic setting Dither can be adjusted Deselect Auto to enable Dither By pressing the dither button...

Page 51: ...h is a button to set the desired number of copies using a number pad This will allow the quicker entry of the desired quantity if a larger number is desired a Press the numbers for the quantity desired up to 999 b Select Enter c If an entry error was made press C to start again d If you wish to close the screen without changing the quantity press Cancel 1 6 3 Set Copy a To enable collated sets or ...

Page 52: ...til the set is closed To close a set press the start button The set with the total number of copies will be printed An example of Set Copy 3 originals with 3 sets or copies 1 6 4 Clear Press the clear button to reset the quantity to 1 Originals 1 2 3 Copies ...

Page 53: ...7 1 Mirror Select this button to mirror a scan This can be utilized on originals that may have the actual image on the reverse side such as older sepia or film documents 1 7 2 Invert Select this button to change a region of white to black and visa versa of a scanned document This is normally used for negative documents or blue prints 1 7 3 Fold Select Fold to display another sub screen This will a...

Page 54: ...roll through the available stamps and then select the stamp from the list b The Stamp button will now display the stamp selected c Select OK NOTE The list of Folds are loaded into Copy Mode by the system administrator or key operator They can not be altered or modified in any manner on the system Operator Panel Please contact these persons for any additional stamps that may be required Please see ...

Page 55: ... denote the quantity you wish to add or remove NOTE The list of Stamps are loaded into Copy Mode by the system administrator or key operator They can not be altered or modified in any manner on the system Operator Panel Please contact these persons for any additional stamps that may be required Please see KIP Request for these functions Image Scanner Image Scanner Image Scanner Image Scanner Leadi...

Page 56: ...mage can be removed such as a binding strip or a file hanger 1 8 Width This region allows automatic or manual roll selection roll size display cut sheet media the roll amount remaining and to set the installed media type and width Image Scanner Image Scanner Image Scanner Image Trail edge Trail Edge Original Copy Original Copy Added trailing margin Deleted trailing image ...

Page 57: ...o prevent surplus media consumption applies to the option two roll model Example 22 original 36 and 24 bond media installed Original is 22 wide 36 installed 24 Installed excess non imaged media has the best image to media fit therefore this roll will be used 1 8 2 Manual Roll Selection To select a roll deck press the roll deck desired Note that the roll information is displayed in the roll deck bu...

Page 58: ...ace 2 Select the Configuration button from the Info Help screen 3 Using the Left Right arrows located at the bottom of the page scroll to page three 3 4 From the Enable Cut Sheet Yes button 1 8 4 Cut Sheet To copy onto a cut sheet of media a Select the CUT SHEET button on the main screen b Select the Output Size of the actual cut sheet paper that will be inserted into the Cut Sheet feeder Select d...

Page 59: ...ough of the steps above 1 8 4 2 After a short period of time the Printer will beep notifying the user to insert the cutsheet into the Cutsheet feeder the Job Info button will also be flashing 3 Once the cutsheet has been printed there will be a short pause and the printer will start to beep again Insert the next cutsheet into the printer 4 Continue for multiples Note Only one cutsheet may be fed a...

Page 60: ...reen will automatically appear This screen allows the setting of the media type and width Please see the BASIC PRINTER FUNCTION Section 1 for the procedures to replace a roll of media a if no changes are required press cancel b if changes are required from the currently settings displayed select the correct media type and size for each deck and press OK This screen shows 36 bond for deck one and 1...

Page 61: ...tions that are applied to an image as well to prevent excess media without image 1 9 2 Standard This mode allows the media length to be determined by a standard length or a length set manually by the user with a number pad a select Standard Cut A sub screen will appear When Standard is used the roll must also be determined If Auto Roll is selected in the Media region the following screen will appe...

Page 62: ...esting the length b Once the roll is determined if so required the length can now be set Standard Length Auto Length Custom Length c Standard Length use an industry standard length Select the length and press Enter d Auto Length uses the length of the original to determine the copy length Select and press Enter ...

Page 63: ... button 1 10Size Zoom Image size Zoom can be altered in this region of the operator panel This includes automatic zooming predetermined percentages or ratio calculations to page size and simply percentage increments 1 10 1 Preset Percentages The system has several predetermined industry standard zoom percentages used for quick access These can be access with the arrow buttons ...

Page 64: ... is a button b This will show a keypad to enter the value please note that the button Manual on the side is a default c Press the desired zoom value and press enter 1 10 3 Page Size Zoom To enter a zoom percentage based on pages sizes into the system a press on the Percentage value displayed the number is a button This will show a keypad to enter the value 50 66 7 70 7 100 141 150 200 ...

Page 65: ...the desired Copy page size Again please note either Engineering or Architectural mode can be utilized f Press Enter to confirm your selections or Cancel to restart 1 10 4 Auto Zoom Press the Auto Zoom bottom to enable this function Auto Zoom features works in conjunction with the roll selected to scale the image to the selected roll width a if a roll is selected in the Media region the zoom from t...

Page 66: ...ype After a job is recalled make the required changes and then press Start 1 14 Stop Reset This button has two functions 1 Press the Stop button on the Operator Panel to stop the current scan After the original has been stopped press the Stop button again to eject the document from the scanner or open the scanner lid to remove the original 2 Press the Reset button to restore the default settings i...

Page 67: ...ity settings of the previous scan 1 17 Log Off This button only appears when Accounting functions are enabled This allows the current user to cease all system functions after the user has preformed the required copies after the code was entered to enable Coping Please note that the system also will automatically logoff from the current user after 180 seconds of no copy function activities by a use...

Page 68: ...Section 2 Copy Mode 2 28 ...

Page 69: ... Mode 6 2 2 2 Original Type 7 2 3 Original Size 7 2 3 1 Automatic Size 7 2 3 2 Manual Size 8 2 3 3 Hard Drive Space Monitor 9 2 3 4 Rotation 10 2 4 Quality 10 2 4 1 Automatic 10 2 4 2 Density 11 2 4 3 Sharpness 11 2 4 4 Dither 11 2 5 DPI 11 2 6 Format 12 2 7 Advanced Settings 12 2 7 1 Mirror 13 2 7 2 Invert 13 2 7 3 Stamp 13 2 7 4 Leading Edge Adjustment 14 2 7 5 Trailing Edge Adjustment 15 2 8 De...

Page 70: ...ality Select Auto or Manual image adjustments 5 DPI Scroll through final image resolution DPI 6 Format Scroll through formats the scanned file will be saved to 7 Advanced Settings Invert mirror stamps and edge adjustments preformed displayed in this button sub screen 8 Reset Stop Resets the system to default settings Stops a scan in process 9 Destination Select where the image will be stored after...

Page 71: ...the user can change to modify the scans 1 2 1 Select Scan Mode On the lower region of the Operator Panel select SCAN 1 2 2 Select Size Mode Select whether your document is an engineering or architectural size document This will allow automatic width detection to function Engineering widths 34 22 17 11 and 8 5 inches Architecture widths 36 30 24 18 12 and 9 inches ...

Page 72: ...ale used for a combination of lines areas of shade CAD originals Photo used for photographic originals This will allow automatic image quality adjustments for the scan 1 2 4 Select Format Press the button to scroll through the file formats available TIF G4 tif format Group 4 level compressed TLC format compressed CAL G4 Cals Group 4 level PDF PDF Level 3 Select the type you require which will save...

Page 73: ... on the Operator Panel for your reference 1 2 7 Retrieve the File Depending on the Destination you may now access your scan from a PC connected to the LAN This includes a from a FTP site using Microsoft Windows Internet Explorer or other FTP software b or from the KIP IPS Mailbox utilizing KIP Request to access the document Please see the User Guides of these applications for details on their func...

Page 74: ...details the functions and settings of each button and sub screens that can be used to adjust the scan parameters to achieve the required result 2 2 Original This region allows the setting of the Size Mode Engineering or Architectural and the Original Document type 2 2 1 Original Size Mode This button is used to select the Size Mode of Engineering or Architectural and Original Image type ...

Page 75: ...sed for a combination of lines areas of shade CAD originals d Photo used for photographic originals Press the desired original setting from one of the four diagrams This will allow automatic image quality adjustments for the next scan Please note that the selection will be highlighted with a black circle and the icon will become white as in the above example Greyscale 2 3 Original Size This region...

Page 76: ... 8 2 3 2 Manual Size To override the Automatic settings Manual can be selected When this button is pressed sub screens will appear a Select the size of the sheet b Or use Custom to select a width c Set a standard size width ...

Page 77: ...gin again Enter to accept the settings or Cancel to cancel Manual image size 2 3 3 Hard Drive Space Monitor Located on the main screen of the system scan menu the hard drive monitor provides a real time display of remaining disk space The monitor shows both the used space and the space available for image storage ...

Page 78: ... four settings 2 4 Quality This region is used to change the image quality settings from the automatic setting 2 4 1 Automatic For most scans Auto should be selected This will allow the scanner to automatically determine the best image settings without any user intervention please also note Original in 2 2 Threshold To override the Automatic setting Threshold can be adjusted Deselect Auto to enabl...

Page 79: ...ressed the line sharpness will be increased to remove rough lines or decreased when photos are copies to allow smoother graduations 2 4 4 Dither To override the Automatic setting Dither can be adjusted Deselect Auto to enable Dither By pressing the dither button a None b Fine c Medium or d Course dither of the image can occur This will change how the dots are arranged to create the final image of ...

Page 80: ...ompressed TLC format compressed CAL G4 Cals Group 4 level PDF PDF Level 3 Select the file type required to save the image into this format 2 7 Advanced Settings The Advanced Setting button contains the additional parameters on a sub screen a Invert b Mirror c Stamp Water Mark d Lead Edge Adjustment e Trail Edge Adjustment 300 400 TLC Cals ...

Page 81: ...ide such as older sepia or film documents 2 7 2 Invert Select this button to change a region of white to black and visa versa of a scanned document This is normally used for negative documents or blue prints 2 7 3 Stamp Select Stamp to display another sub screen This will allow the selection of a Stamp or Water Mark to be placed on the scanned image It will be imbedded into the image a use the Arr...

Page 82: ... Leading Edge use the arrows to denote the quantity you wish to add or remove NOTE The list of Stamps are loaded into Scan Mode by the system administrator or key operator They can not be altered or modified in any manner on the Operator Panel Please contact these persons for any additional stamps that may be required Please see KIP Request for these functions Image Scanner Image Scanner Image Sca...

Page 83: ...an be altered 4 c additional void area can be placed on the bottom of a scan or d image can be removed such as a binding strip or a file hanger Image Scanner Image Scanner Image Scanner Image Trail edge Trail Edge Original Scan Original Scan Added trailing margin Deleted trailing image ...

Page 84: ...e user to select where the files will be placed 2 8 1 Selecting a Destination a Use the arrow keys to scroll through the list as needed b Select the location by pressing on it 2 8 2 Setting a New Destination a Press the Destination Button b An electronic keyboard will be displayed ...

Page 85: ...ions Please contact your network administrator for details on how to configure and load FTP locations into the Scan Mode Administrator Service Functions Please see your network administrator for access to your FTP and the retrieval of the documents from the FTP 2 8 3 Removing a Destination a press the button on the main Scan screen b Select which Destination you wish to remove NOTE The Destination...

Page 86: ... the original 2 Press the Reset button to restore the default settings in Scan Mode Some of the default settings are determined in the Information Help Screen see Scan Mode Configurations chapter 2 11 Re Scan If the scanned image was not satisfactory you can replace the last image scan by selecting this button and proceeding with the scan procedure as normal 2 12 View Last Allows the last scan to ...

Page 87: ... Page 1 0 Job Info Screen 4 2 1 1 Main Screen Summary 4 2 2 0 Operation Details 4 3 2 1 Job List Main Screen 4 3 2 2 User Name 4 4 2 3 Job Number 4 4 2 4 Status 4 4 2 5 Type 4 5 2 6 Total 4 5 2 7 To Top 4 5 2 8 Pause 4 6 2 9 Delete 4 6 2 10 Page Scroll 4 6 ...

Page 88: ...d for other functions noted below 3 Status Shows the current status of a job and media selection 4 Type Displays a copy or network print job 5 Total Displays the total number of prints and current number printed 6 To Top After a job is selected see 2 the position can be changed to the next job printed 7 Pause Pauses printer to allow media change etc 8 Delete After a job is selected see 2 it can be...

Page 89: ...ew or manage the current copy or prints jobs 2 1 Job List Main Screen All jobs which are currently printing or are waiting to print are displayed in this area You may make a job large for viewing or for other functions described further in this manual by selecting the job from the list ...

Page 90: ...Displays the Job Number or any the details of the job This information is known from a fields from within e KIP Request f KIP Windows Driver g KIP AutoCAD Driver h or from the Accounting Fields as a copier scanner when accounted is enabled An example from Copy Scan Accounting 2 4 Status Displays the current Status of a job This can be one of the following a Processing job is currently printing b O...

Page 91: ...the following symbol is displayed 2 6 Total Displays the number of prints This includes a the quantity in each job b the amount remaining when a job is printing 2 7 To Top If a job in the list is required urgently and there are other jobs in the list prior to the urgent one it can be moved to become the next printed document s after the current job is complete a Select the job from the list ...

Page 92: ...The list will be updated with urgent job to be printed next 2 8 Pause To pause all print jobs to replace paper or another task that may require the printer to pause press the pause button 2 9 Delete To remove a job from the Job list a Select the job to remove ...

Page 93: ...button c The job will be removed from the list 2 10 Page Scroll Arrows may appear in the lower right corner of the screen to scroll through the pages of jobs Please note that the total number of pages will also be displayed as well as the current page ...

Page 94: ...Section 4 Job Info Screen 4 8 ...

Page 95: ... 1 9 Machine Serial Number 6 2 2 Supplier Technical Support 6 3 0 User Guides 7 4 0 Configuration 8 4 1 Inch or Metric Units 8 4 2 Language 8 4 3 Energy Star Mode 8 4 4 Power Save Settings 8 4 5 Reset Timer 9 4 6 Printer Density 9 4 7 Default Mode 10 4 8 Default Original Size STF 10 4 9 Default Original Size Copy 10 4 10 Test pattern 11 4 11 Shading 11 4 12 Options 11 4 13 Network Settings 11 4 14...

Page 96: ... Configuration screen press on the on the bottom right of the user interface Some of the configurable settings include a Language b Sleep Timers c Energy Star Mode d Reset Timer for Memory and Default Settings e Printer Density f Master Lead Trail Edge g Default Mode h Units Metric or Inch i Default Original Size Mode j Quality Scan Speed k Number of Rolls l Shading m Test patterns n Enable Option...

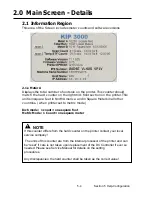
Page 97: ...formation Region Displays meter counts and version number of the system 3 Support Supplies Displays the contact information for technical support and printer supplies 4 User Guide Enters the Graphical Users Guides 5 Configuration Enters the settings and configurations modes 6 Print This Screen Prints the main screen 1 2 3 5 6 4 ...

Page 98: ... and in Square Meters in all other countries when printer set to metric mode Inch mode 1 count one square foot Metric Mode 1 Count one square meter NOTE If this counter differs from the hard counter on the printer contact your local service company The units of this counter are from the internal processor of the printer and can be reset if care is not taken upon replacement of the DC Controller if...

Page 99: ...ser Interface then 6 sq ft recorded 2 If the 36 wide original was scanned in at a 24 wide manual setting the size will be recorded as 24x24 or 2 square feet 2 1 5 Scan Count Temp This counter can be reset at any time to count the units in a particular job if so required The date of last reset is also displayed This counter s units are the same as in Scan Count Press the reset button to start at 0 ...

Page 100: ...plies the contact information for supplies and service This region should display your local Authorized dealers information If this information is incorrect please contact your distributor NOTE If this serial number differs from the hard coded number on the lower rear of the printer contact your local service company The hard code serial number is to be taken as correct in case of any discrepancie...

Page 101: ...des The User guides cover the most basic functions of the system operations including media toner replacement For comprehensive details please consult this User Manual a select the function assistance is required with b Use the arrow buttons to page through the guide c Press OK at any time to exit the guides ...

Page 102: ... production requirements These timers can be used to automatically turn off the printer when the office is closed for example overnight Energy Star Settings Energy Star compliant settings require that the printer goes to Warm Sleep after 15 minutes and into Cold Sleep after 90 minutes of inactivity These are the factory setting and can be achieved by selecting Reset There are two sleep mode settin...

Page 103: ...y From this screen users must enter a username and password before use if required by system administrator 4 6 Printer Density Sets the printer density for all images including copy and print jobs NOTE Other sleep timer are also available on the system set only by the technician These other timers set the printer to sleep within a certain number of minutes after last use and can be awaken by netwo...

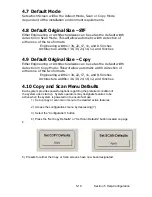
Page 104: ... set as the default width detection in Copy Mode This will allow automatic width detection of either one of the two formats Engineering widths 34 22 17 11 and 8 5 inches Architecture widths 36 30 24 18 12 and 9 inches 4 10 Copy and Scan Menu Defaults Each system provides powerful options regarding the preferred condition of the system upon start up System operators may designate features to be act...

Page 105: ...ed lines or shades in the scanned or copied images If you are unsure of the function please contact your local service technician Please follow the steps on the screen carefully if you undertake in this procedure 4 13 Options Enables options on the System Please contact your local dealer for more details and for the codes for your system 4 14 Network Settings Please see Section 11 Connectivity 4 1...

Page 106: ...ode Enabled allows the user to pause all network print jobs to allow copies to be printed first Disabled all copy jobs will be placed in the queue as the order they are received within any network print jobs 4 19 STF Files Types Selects the file types that can be chosen by the user in the Scan Mode 4 20 Service This button is password protected This area is to be used by Authorized Service Technic...

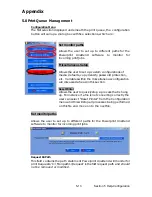
Page 107: ... Variables within the miscellaneous configuration are discussed ahead in this section Reset Printer Allows the user to quickly stop a process that is hung up For instance if a file is not converting correctly the user can select Reset Printer from the Configuration menu and this will stop all processes being performed on this file and move on to the next file Set monitor paths Allows the user to s...

Page 108: ...lection allows the user to apply custom attributes number of copies inversion pen table information Stamp information header information folding information and description for any job submitted for printing Monitor Path Selection Arrows These arrows allow the user to toggle between the monitor paths currently setup on the controller Save Allows the user to save monitor paths created in the set mo...

Page 109: ...5 Section 5 Help Configuration Creating Custom LPR Paths to be used with Unattend 1 Set up new printer object on KIP IPS a Add a printer wizard b Select local Printer c Use the KIP0 Port already installed ...

Page 110: ...5 16 Section 5 Help Configuration d Select Printer Driver from List e Choose Keep existing Driver ...

Page 111: ...5 17 Section 5 Help Configuration f Setup Queue name all Caps in English g It is not necessary to Share driver ...

Page 112: ...ction 5 Help Configuration h It is not necessary to print test page 2 Configure new queue Printer Object in the KIP Unattend software a Launch the Unattend Software on the IPS Controller b Select Configuration ...

Page 113: ...5 19 Section 5 Help Configuration c Select Set Monitor Paths d Select the Right Arrow Button to Change the path to the Next available path e Set the new LPD Directory Path f Set the new LPD Printer Name ...

Page 114: ...nstructions for the Queue a Choose the settings or instructions that you desire for this Queue 4 Save Changes click Ok 5 Send Test files with LPR command a LPR SK3K PVELLUM File plt in this example VELLUM is the queue name you created and File plt is the name of your file ...

Page 115: ...on include English Metric Allows the user to set the controller to read either English or Metric standards of measurement Log file directory Allows the user to set a directory in which the Printer status and accounting data should be stored Cold Sleep Settings These settings are to be set in the User Interface Separator Media Type of media on which the separator sheet should print can be specified...

Page 116: ... will not print out until the correct size media is loaded into the machine Unattended delay Allows the user to adjust the time interval in seconds in which the Powerprint Controller will seek the monitor paths for files to be printed out Print Separator Sheet Users can choose to print a separator sheet between each job or between each set This feature has been found to be very useful for users of...

Page 117: ... Copies 6 5 2 5 Media Type 6 5 2 6 Paper Size 6 5 2 7 Resolution 6 6 2 8 Halftone Color Adjustment 6 6 2 9 Management 6 6 2 10 Header 6 7 2 11 Folder 6 7 2 12 Mirrored Output 6 7 2 13 Reverse Collate 6 7 3 0 Installation 6 8 3 1 Prerequisites 6 8 3 2 Installation Process Automatic 6 9 3 3 Installation Process Manual 6 11 3 4 LPD LPR Port 6 13 3 5 Upgrade 6 13 4 0 Appendix 6 19 4 1 File Structure 6...

Page 118: ... Printer Driver KUWPD allows windows printing from Microsoft Windows NT4 2000 XP Operating systems as well as 2003 Server based applications The KIP Unified Windows Printer Driver is available for download from your local website and is also supplied with your Printer on the software CD ...

Page 119: ... the output media type Paper Size Selects the page size from standard sizes or create a custom page size Resolution Select the resolution to match the printer DPI Halftone Color Adjustment Allows dither pattern change from various colors from the within an application to the printed document Management Allows accounting to be used from windows applications Header Places a text header on the print ...

Page 120: ... For example Adobe Acrobat functions best when using Postscript output especially on images larger than E size Acrobat 6 Other graphics applications including MS Word Powerpoint and Excel also work very well with KIP Script output The KIP Script data can be smaller in file size and transmits quickly over networks NOTE The KIP PDF Powerscript3 option is required for printing KIP Script data Please ...

Page 121: ...s applications such as MS Word and MS Excel do not allow for scaling to engineering and architectural wide format paper sizes The Scaling feature in KUWPD allows the user to set a percentage to enlarge the document to fit the paper size desired when scaling is not included in the application Example No scale used scale applied to enlarge image 2 4 Copies Select the total number of copies you wish ...

Page 122: ...put can be changed from 400 DPI to 600 DPI Please select the DPI to match your printer DPI 2 8 Halftone Color Adjustment The driver can be adjusted to allow colors from within your application to have different variance of shading This provides the ability to increase or decrease the level of overall contrast of the grey tones on final output Adjust the level as required to satisfy your final prod...

Page 123: ...rmine which fold table to apply to the document The patterns must be set by the technician in the IPS 2 12 Mirrored Output The image can be mirrored as required by the user This may be needed on translucent media or for other specialty applications 2 13 Reverse Collate If the document to be printed contains more than one page collation may be important To allow the pages to be reversed printed las...

Page 124: ...tation will need to also remove that printer object and reconnect to the newly shared driver which will be installed KIP Unified Windows Printer Driver KUWPD offers HPGL2 HP RTL and Postscript Language printing to KIP digital printers from Microsoft Windows NT4 2000 XP 2003 based applications Windows 9x platforms not supported The driver can be downloaded from your local website and is included on...

Page 125: ...intman Utility Installation Method Once the KUWPD has been downloaded and unzipped the files can be placed directly on the workstation or server it will be installed at or on a USB drive or CD See Appendix A for more information on the files and structure a Execute printman exe from a Microsoft Windows NT4 2000 XP or 2003 operating system An installation window is displayed b Select the appropriat...

Page 126: ...crosoft Printer Control Panel If printer is not seen press F5 to refresh the printer list l Right Click KIP Printer and select Printing Preferences User Interface is displayed For Microsoft Windows NT4 select Document Defaults m The following settings will determine the initial defaults for the printer driver These defaults will be acquired by client workstations connecting to the shared printer d...

Page 127: ...te the appropriate folder that contains the monitor inf for your system platform KUWPD WINNT4 Microsoft Windows NT 4 Workstation Server KUWPD WIN2000 Microsoft Windows 2000 Workstation Server KUWPD WINXP Microsoft Windows XP Microsoft Windows 2003 Server Alternatively you can use the Microsoft Standard TCP IP port monitor configured for LPR LPD however some functionality and transport speed will b...

Page 128: ...e unless required For multiple KIP printers create an additional KIP Port per printer named KIP1 KIP2 KIP3 g Choose Server Workstation from Installation Location h Do not change Destination Directory i Provide the IP address OR hostname of your KIP printer for Controller Name IP Address It is important to add EITHER the hostname OR the IP address Do not add both This is the destination address j D...

Page 129: ...ent Windows Driver Configuration In your Windows Driver go to Properties Ports and locate your information for the KIP0 port Complete information within the table provided KIP Unified Windows Printer Driver KUWPD can be upgraded from previous versions of KIP Windows Printer Drivers on Microsoft Windows NT4 2000 XP 2003 platforms by manually adding the new printer driver plotter inf to an existing ...

Page 130: ...rinter When the Printer Wizard dialog is displayed select Local printer attached to this computer Click Next Microsoft Windows NT4 screens will vary slightly from those shown d Select Using the Following Port and assign KIP0 or use KIP1 KIP2 depending on the installation Select Next ...

Page 131: ...em locate the appropriate folder that contains the plotter inf for your system platform KUWPD WINNT4 Microsoft Windows NT 4 Workstation Server KUWPD WIN2000 Microsoft Windows 2000 Workstation Server KUWPD WINXP Microsoft Windows XP Microsoft Windows 2003 Server g Select the appropriate Printer from the list displayed Click Next ...

Page 132: ...on 6 Windows Driver 6 16 h Provide a Printer Name when prompted Select Next i Assign a shared name if applicable Select Next If replacing a previously shared driver it is possible to use the same share name ...

Page 133: ...t Page when prompted Select Next k Completing the Add Printer Wizard dialog is displayed Click Finish Printer Driver is added to system l Installed printer can now be accessed from the Microsoft Printer Control Panel If printer is not seen press F5 to refresh the printer list ...

Page 134: ...rinter driver Select these defaults prior to installing at client workstations Please note that some workstations may not be able to alter the Printer Preferences unless allowed by the network login o Select the desired Output Format and make your selections for default paper size orientation Management functions and Header information See Printing Hints section later in this document o Click OK w...

Page 135: ...Kipgs1020 ppd Postscript Printer Definition File Kuwntpd dll Printer Driver DLL for Microsoft Windows NT4 Workstation Server Kuwntpdui dll Printer Driver User Interface for Microsoft Windows NT4 Workstation Server Monitor inf Printer Port Monitor installation file Microsoft Windows NT 4 Workstation Server Plotter inf Printer Driver installation file Microsoft Windows NT4 Workstation Server WIN2000...

Page 136: ...File Kipgs600 ppd Postscript Printer Definition File Kipgs1020 ppd Postscript Printer Definition File Kuwxppd dll Printer Driver DLL for Microsoft Windows 2000 XP 2003 Kuwxppui dll Printer Driver User Interface for Microsoft Windows 2000 XP 2003 Monitor inf Printer Port Monitor installation file for Microsoft Windows XP 2003 Plotter inf Printer Driver installation file Microsoft Windows XP 2003 ...

Page 137: ...equires Postscript output Solution Default the Printing Preferences of the KIP driver to KIP Script prior to opening the Adobe application Printing of KIPScript data also requires the Powerscript3 option on the KIP Controller Issue The output format for driver MUST be chosen before entering an application to ensure proper output format Solution Ensure output format is set in Printing Preferences b...

Page 138: ...Section 6 Windows Driver 6 22 ...

Page 139: ... Request Software 7 13 5 1 2 Put Pen Media into File 7 13 5 1 3 Machine 7 13 5 1 4 Status 7 13 5 2 Plot Identification 7 14 5 2 1 Requester User Name 7 14 5 2 2 Job Number 7 14 5 2 3 Description 7 14 5 2 4 Stamp 7 14 5 3 Printer Connection 7 15 5 3 1 Type 7 15 5 3 2 Fold 7 15 5 3 3 Save Paper 7 15 5 3 4 Header 7 15 5 4 Raster Image Control 7 16 5 4 1 Gamma 7 16 5 4 2 Density 7 16 5 4 3 Raster phot...

Page 140: ...tem The KIP driver functions under these versions of AutoCAD from AutoDesk 2000 2000i 2002 2004 2005 2006 The following two screens are general to AutoCAD and may not be detailed within this User Guide They select the device to print to media size pen configurations and shading to list only a few functions Please refer to the AutoCAD User Guides for more details on their features and functions Plo...

Page 141: ... a stand alone entity Features when linked to KIP Request include stamping folding headers advanced raster image controls media type selections real time printer status and job accounting right from within the AutoCAD application Within the Plotter Configuration Screen noted in the previous page is Custom Properties please select Link to Powerprint Request Software ...

Page 142: ... tool that allows for complete and comprehensive control over printing plotting This software can operate on several remote workstations simultaneously With KIP Request users have the ability to obtain real time printer plotter status submit collated job sets password protect these submissions based on user and job information apply custom made stamps activate folding devices and modify job descri...

Page 143: ... Add A Plotter Wizard Icon 3 The Wizard screen may start noting that AutoDesk has changed from the PCP and PC2 file formats to a PC3 file format and will offer another screen during the installation process to migrate your PCP and PC2 to PC3 files for use in the newer versions of AutoCAD 4 Choose My Computer to install the driver to your local computer ...

Page 144: ...tation screen This screen allows users of previous AutoCAD versions to import their PCP and PC2 files to the AutoCAD 2000 family PC3 file format for use in the AutoCAD 2000 product as noted in step 3 If the user does not wish to migrate or does not have any PCP or PC2 files click the Next button and proceed with the installation 8 Output Port Selection Select KIP0 which is the Port created at the ...

Page 145: ...ture of your machine to identify the printer s name Example CX8036 10 To complete the installation click the Finish button Printer configuration will be done later and there is no need to Calibrate Plotter as the printer was calibrated during installation by the technician 11 Once the installation is complete please note the creation of the KIP 3000 pc3 file in the ACAD Plotters folder ...

Page 146: ...he PC3 file of the printer to open the Plotter Configuration Editor 3 Navigate to the Device and Document Settings tab 4 1 Media 1 Click the sign next to Media This will open up the Media Options and allows the selection of the Media Source which is Roll and Media Size 2 Select your media size to suit your image ...

Page 147: ... 255 shades of gray and the resolution The system has 600DPI resolution 4 3 Custom Properties 1 Click on Custom Properties 2 Then click on the button to see the Custom Settings dialog box 3 A number of the features of the KIP Request software have been directly integrated into the KIP HDI driver these features are enabled by linking the HDI driver to the KIP Request software ...

Page 148: ... driver uses to employ the KIP Request features 1 The following dialog box requires the user to locate the winreq ini file Click on the location button at this point 2 It will point to the default location which is C Program Files Windows Request Note KIP Request must be installed and configured to link these features to this HDI driver Please see the Request section of the User Guide ...

Page 149: ...e dependent on those used in Request 4 Select OK 5 Click on OK to finish the linking of the HDI to KIP Request 6 The KIP custom settings dialog box should display Real Time Status from the printer Users have the ability to track printing from the AutoCAD application by Requester Job Number and Description Users also have the ability to add a stamp to their document from the KIP HDI driver ...

Page 150: ...Section 7 AutoCAD HDI Driver 7 12 5 0 Custom Settings 1 2 7 3 8 4 9 10 6 5 ...

Page 151: ...ification Used for accounting job tracking and header information Preset stamps from KIP Request can also be selected 9 Status Real Time printer status Includes installed media 10 Machine Displays currently select printer model 5 1 Printer Connection 5 1 1 Link to Request Software This button should be selected to utilize the advanced features of the Custom Properties screen It links the AutoCAD D...

Page 152: ...lly type the name This field may be configured to be mandatory and also password protected as set in the KIP Request application see KIP Request Software Guide The drop down and passwords themselves are also configured in the Request Software Username may be used as an environment variable 5 2 2 Job Number This button allows the user to select a predetermined Job Number from a drop down list or ma...

Page 153: ...ted for a print is not currently installed the printer will hold the job and wait for the media type to be satisfied prior printing the job 5 3 2 Fold Uses the fold patterns configured on the KIP IPS when selected Please note that the optional folder must be installed for this action to occur 5 3 3 Save Paper If the media size selected is larger than the image size this button will prevent excess ...

Page 154: ... density of the image without affecting lines or shades in a print the vector data This can be used to enhance photos or other raster images placed within a drawing A higher value will have a greater density 5 4 3 Raster Photo Mode This button is used to print the shading effects of a raster image Some raster images are meant to be 100 solid no tones such as a line Others are pictures or drawings ...

Page 155: ... value will result in all lines decreasing in thickness 5 6 2 Vector Line Dither Controls dithering patterns for grayscale line entities Values are from Fine Tight to Coarse Wide dither patterns Note Does not control vector fill areas This should be set at the KIP IPS 5 6 3 RTL Image Dither Works in conjunction with Raster Image Control If Raster Photo Mode is enabled then RTL Image dither can be ...

Page 156: ...at can read ASCII data Specialized Mask Names and Rules These customized names can be assigned to the mask elements using all normal methods Dwgname and dwgpath are the only two variables that can be set Example AutoCAD reports original file path of drawing named R300 20 DWG and the path that the file is stored in as C Program Files AutoCAD 2006 drawings R300 20 DWG If mask item is set to Dwgname ...

Page 157: ...Files 8 10 2 3 2 Enlarge Reduce 8 10 2 3 3 Pen Table 8 10 2 3 4 Stamp 8 10 2 3 5 Fold 8 11 2 3 6 File Order 8 11 2 4 Key Job Settings 8 12 2 4 1 Requester 8 12 2 4 2 Job Number 8 12 2 4 3 Description 8 12 2 4 4 Requested Time 8 12 2 4 5 Date 8 12 2 4 6 Enlarge Reduce 8 12 2 4 7 Media Type 8 12 2 4 8 Pen Table 8 13 2 4 9 of Copies 8 13 2 4 10 Collate 8 13 2 5 Advanced Job Settings 8 13 2 5 1 Pen Co...

Page 158: ...Graphics 8 20 2 5 4 4 Current Font Area 8 20 2 5 4 5 Set Font 8 20 2 5 4 6 Stamp Placement Margins 8 20 2 5 4 7 Text Rotation 8 20 2 5 4 8 Text Graphic Gap 8 20 2 5 4 9 Graphic Rotation 8 20 2 5 4 10 Graphic Placement 8 21 2 5 4 11 Merge Type 8 21 2 5 4 12 Screening 8 21 2 5 4 13 Text Settings 8 21 2 5 4 14 Macros 8 21 2 5 4 15 Graphic Image Settings 8 21 2 5 4 16 Preview Stamp 8 21 2 5 5 Fold 8 2...

Page 159: ...sfer 8 27 2 9 Drop Box 8 28 2 10 Online 8 28 3 0 Retrieve Scans CX 8036 8 29 3 1 Mailbox Retrieval 8 29 3 2 Mailbox Deletion 8 31 4 0 Copier Configuration 8 32 4 1 Scan FTP Setup 8 32 4 2 Accounting Setup 8 32 4 3 Stamp Setup 8 32 4 4 Fold Patterns Setup 8 32 4 5 Push Updates to IPS 8 32 4 6 Dealer Contact 8 32 5 0 Request Installation 8 33 5 1 Methods of Installation 8 33 5 2 Connection to the KI...

Page 160: ...n of username job number media type zoom number of copies description of job pen table adjustments time date selection invert mirror stamping header and fold options only to name some features The Request package also allows configuration of the system This include scan to FTP location accounting to include Passwords and Usernames as well as retrieve scanned images from IPS Mailboxes It is also us...

Page 161: ...not available for the CX8036 see KIP PrintNet 6 Submit After file selection and adjustments sends job for printing 7 Key Job Settings This area allows the key details to be applied to a job if so needed 8 Pre View Files can be pre viewed prior to printing Click on this area to view a file 9 Printer Job Info Displays current printer roll information or status as well as basic job file information 1...

Page 162: ...rint are located on your local PC or on the network usual Windows mouse functions for folder selection 4 Click on the file s to print which will be shown with a check mark in the box beside the file 5 The files selected will now also be shown in the lower box noting any zoom pen stamp and fold to be applied NOTE Later in this manual descriptions of custom settings which you may wish to apply to pr...

Page 163: ...ype collation and number of copies sets 7 Press the Submit Print Job button 8 The files selected will be printed NOTE Later in this manual descriptions of custom settings which you may wish to apply to prints are detailed Custom settings that may be used should be configured prior to selection of the files ...

Page 164: ...for Request can be configured to only display files that are printable in the File Select area or to display all file types The Configured Types are set by the administrator Please see the INI Configuration for details on how to set this feature s function 2 2 File Select 2 2 1 Select a file a After selection of the folder which contains the files for printing files within the folder will be displ...

Page 165: ...ormats txt et cetera KIP Format tlc Requires an Option All file formats are registered to there respective companies These are some of the most common file extensions If the file extension differs and the file still remains a valid type it will print That is a plt file can be renamed xyz and as long as the structure remain intact the file will print 2 2 2 Recall Last File s The last file s sent to...

Page 166: ...ther zoom settings can be applied from the Advanced Job Settings 2 3 3 Pen Table Pen type and styles can be applied to vector or hybrid files They can include pen widths raster density junctions etc Please see Pens in 2 5 1 for greater details The name of the applied pen table is displayed here and can be changed prior to printing a Click on the pen Table of the file you wish to change b A drop do...

Page 167: ...troller in the Request This uses the automatic settings of the printer to determine the fold pattern for standardizes documents For documents that may require special folding please create the pattern in the Request software 2 3 6 File Order File print order and removal can be preformed in the JOB list Area After files have been selected right click in the Job List area A menu will appear To prefo...

Page 168: ...unting Information entered is applied to the KIP Job and Print Logs This information will also be printed in the KIP Header if applied The label of the field Job Number can also be customized i e Department Number or Job Name 2 4 3 Description This is a field which can be used for accounting Information entered is applied to the KIP Job and Print Logs 2 4 4 Requested Time Users can select a job be...

Page 169: ...ated prints 111 222 333 or 123 123 123 2 5 Advanced Job Settings On the left side of the main Request screen are buttons to allow advanced settings and configuration of the prints These buttons are Manage Pen Configuration Zoom Stamp Fold Header Mirror Invert View 2 5 1 Pen Configuration This button allows the modification of the settings of vector plot files Files pen table and screening informat...

Page 170: ...the dots per inch or resolution for their documents to be converted The system is a 600 DPI device 2 5 1 4 Border allows a border to be used in the file A maximum border of five inches can be applied to each edge 2 5 1 5 Calcomp setup Only use this when submitting a Calcomp language file Allows the change of Calcomp file settings so that the printer will interpret any Calcomp file correctly These ...

Page 171: ...s to positive values to compensate for thin lines Choosing 1 0 will remove 1 pixel from vector data lines Choosing 3 0 will add 3 pixels to vector data lines Choosing 0 0 makes no changes to the lines 2 5 2 2 Vector Line Dither pattern Users have 2 choices of vector line dither patterns This will alter the appearance of vector greyscale in different ways Fine is the default setting or an optional ...

Page 172: ...r to merge lines of different shades When not applied the layers within the plot file determine how lines merge on each other 2 5 2 6 Raster Photo Mode When a raster image has been embedded within a plot file Raster Photo Mode should be used Raster Photo Mode can be applied to all drawings whether they contain raster images or not Some raster images may wish to printed in 100 solid rather than the...

Page 173: ... preference 2 5 3 Enlarge Reduce This button allows the for scaling of the image and advanced page sizing for printing All setting will be saved as a scheme for later use 2 5 3 1 Image Information The current selected file size and any scale applied to it will be displayed here To note any other selected tagged files use the drop down to select the required file ...

Page 174: ...age can be entered rather than using the automatic length of the zoom file Please also not that a value of 0 will automatically cut the media to the length of the image to avoid any waste 2 5 3 6 Rotation All prints are automatically rotated to best fit the installed media This can be changed to allow custom rotation of the image on the page configured in this screen Degrees include 90 180 and 270...

Page 175: ...ttons which selects the position of the image one the page as well These are Center upper left upper right lower left and lower right 2 5 4 Stamp The stamp button allows configuration of watermarks stamps or overlays of images Either or both text and graphics can be utilized 2 5 4 1 Stamp Schemes Custom Stamp settings are saved as schemes which can be used All stamps are to be saved prior to their...

Page 176: ...ions Then margins can be applied to move the image up to 5 from the selected border 2 5 4 7 Text Rotation Pull down Allows the user to rotate counter clockwise the text portion of their stamp in 45 increments User may also click on the KIP in the Stamp Placement area to cycle through the Text Rotation options 2 5 4 8 Text Graphic Gap Text Field If so selected a space of up to 5 can be applied betw...

Page 177: ... set screening percentages 2 5 4 13 Text Settings Area Enter the text of the stamp Add a Macro within the text if desired 2 5 4 14 Macro Pull down Menu Choose a macro from the list to apply information at print time such as Requester name time of day etc 2 5 4 15 Graphic Image Settings Area Displays the path to your selected graphic image The path is relative to the user s workstation NOTE 1 The i...

Page 178: ...ion and pattern B Override the printer settings to have rotation and patterns set in the Request The choice between the two methods depends on the installation environment That is if a small number of document sizes are to be folded with a standard set for width length and orientation the most simplest way is to have the printer control the folding requires setup by qualified technician If the doc...

Page 179: ... presets ini file in the LOGDIR folder and displays the folding patterns available in a dropdown menu These pattern type are configure by the technician 2 5 5 5 Roll Size Allows roll selection to be automatic closet or precise exact Lease note that some images may nee to be exact or correct fold pattern will not be attained If Exact chosen then the media width of the file must also be installed in...

Page 180: ... on the name to select the printer to send the job to Printer status will also be displayed in the lower area of the main screen see Printer information 2 7 2 7 Printer Information Roll status cover or door opened toner requirement misfeeds and other selected printer status are displayed in the lower center of the main screen 2 8 Menu Like most other Windows based application a menu is located at ...

Page 181: ...to zoom back out 2 8 2 5 View all tagged images Opens all tagged files in the viewer noted in d Use the arrows to view the next document or the dropdown to view the selected document 2 8 2 6 Convert all tagger to Will convert the selected file s to any of the accepted raster formats TIFF Group 4 CALS Group 4 PCX TLC CIT or PDF You will also be prompted to the placement of the files once converted ...

Page 182: ...When a field is required the user must enter data before the job will be submitted Making Pull Down Menus When checked the user must choose from an established list of field entries Normally users cannot add a pull down entry without knowing the Request Master Password Each pull down entry can also be password protected so only the specific users can select specific entries Default Stamp ON Checki...

Page 183: ...if they know the Request Master Password NOTE A user who can MANAGE the queue is able to manipulate the system It has been incorporated for ease of use for making file updates to the KIP internal controller This feature works with IP based printers only Upon clicking this feature the user is prompted with an explorer window to choose and pick a file meant to be placed on the KIP controller For exa...

Page 184: ...Use Windows Explorer to locate the printable files or other file viewing utility 2 Select the files using Windows conventions and then drag them with the mouse and drop the files into the DropBox 3 The files selected will now appear in the Job List region 2 10 ONLine KIP ONLine is not available for the CX8036 systems Please see KIP PrintNet for simular web based submission function ...

Page 185: ...ments scanned into mailboxes on the IPS The mailboxes can be created and selected in the Scan Mode Please see the Scan Section for greater detail on the use Scan Mode To retrieve documents that are scanned into a mailbox use the Request in the following manner 1 Use the Folder selection area to browse to KIP Mail Box located under Desktop on the local drive ...

Page 186: ... 5 A screen will appear to allow the Mailbox directory to copy scanned files to local drives or networked storage locations 6 After you have copied the files it will ask if you wish to delete the folder on the IPS This can be preformed at this time if so desired 7 After the folder with the scanned images has been copied other tasks can be preformed with applications and other third party applicati...

Page 187: ...al drive 2 Click on KIP Mailbox and the list of ALL the Mail boxes on the IPS will be seen 3 Click on the mailbox folder that contain the scanned images that are no longer required 4 Right Click with the mouse to Delete Current Scan Directory 5 A Delete Folder confirmation screen will appear to confirm the command ONCE DELETED THE FOLDER and FILES ARE PERMANENTLY REMOVED ...

Page 188: ...Section 8 Request 8 32 4 0 Copier Configurations Please see the Administrator Service Functions document to add and control these features or functions ...

Page 189: ...ck on the button and follow the prompts Please accept the default settings for easy of configuration 5 1 2 CD Installation 1 locate the Software CD and place in disk drive 2 Browse CD for INSTALLATION and KIP Request 3 Follow the prompts and select all defaults settings for easy of configuration 5 1 3 First Time Run After the software installation is complete the application can be run from the De...

Page 190: ... KIP PRINTERS window click ADD A PRINTER TO THIS LIST 2 Select SET IP ADDRESS and enter the IP Address of the KIP IPS 3 In the Description field key in a friendly Printer Name that the User can recognize model number such as 3000 4 TEST the connection Note If the IP address is invalid the following message is seen 5 Click OK to return to the SELECT PRINTERS screen and ensure that the printer is se...

Page 191: ...see 2 5 1 in this section of the User Guide 2 Raster and Hybrid files are quite common Please see the Advanced button under Pen Table for any customization required Please see 2 5 2 in this section of the User Guide The final result on the print may be your best guide to the desired settings 5 3 3 Advanced Configuration and Settings The KIP Request Application is customizable For these advanced cu...

Page 192: ... to document 1 2 3 as listed in KIP ASCII Job Ticket Pen Table PEN default pen etc 0000 PPN 0001 PPN 0002 PPN referring to PEN filename to apply to document 1 2 3 as listed in KIP ASCII Job Ticket Fold FLD default fld 36x24 fld etc 0000 FLP 0001 FLP 0002 FLP referring to FLD filename to apply to document 1 2 3 as listed in KIP ASCII Job Ticket FLD File Contents sample KipFolderSettings Ver 1 0 Fol...

Page 193: ...ts the image the best after applying the rotation specified Note If using Force Size feature of the Job Ticket you must also use the same Roll Size for Force Size in FolderRollSize of the FLD file FolderPreset 2 Refers to the preset in the Kipfoldpreset ini The settings defining packet size margin and fan and cross fold settings are set in the kipfoldpreset ini by the technician at the controller ...

Page 194: ...lt 1 Printview is used to view the output on the screen as before submitting it to the printer This is different than right clicking on the file and using view selected image as Printview uses information from stamp rotate invert and mirror selection before making an output for viewing 1 Allows to use printview capability 0 views the file but does not use the fields as described above DisplayPrevi...

Page 195: ...able called Description You may also enter information after the that will be displayed in the DESCRIPTION field each time the Software is started Up to 30 characters may be used Prompt Distribution This line allows the user to customize the Distribution field name RequesterPrompt Requester This line allows the user to customize the Requester field name TextSize 0 10 A KIP text header will be appl...

Page 196: ...ow built into the Request Pen Table Value 1 100 Y KIP 8000 specific Z KIP 8000 specific An example of how multiple switches might appear in the line AddHpglCmd D 300 G 50 DebugVal 999 Used for diagnostic purposes only MP à Þ àƒ 000000 The encrypted master password as set by the installer ST 00 This next section MultiplePrinters should not be configured outside of the GUI of Request MultiplePrinter...

Page 197: ...e KIP icon title bar Additional KIP Printers Users may create additional groups of printers to select from directly underneath the current paths For example MultiplePrinters RequestDir0 C Monpath1 Request StatusDir0 C Monpath1 LogDir MachineType0 6000 RequestDir1 F abc Request StatusDir1 F abc LogDir MachineType1 3000 UL RequestDir2 40Server 8000 Request StatusDir2 40Sever 8000 LogDir MachineType2...

Page 198: ...Type13 ASCII DAT A Type14 ASCII LOG A etc PaperTypes Addition media types can be added but they must also be Paper0 Bond added into the IPS INI Paper1 Vellum Paper2 Film Paper3 OnHold PullDownDistribution ð Ï àƒ þ Š ˆ ÿûýÛÝ šŽŒœà Þ àƒ þ Š ˆ ÿûýÛÝ šŽŒœ PullDownRequester PullDownDescription Ô Õ àƒ þ Š ˆ ÿûýÛÝ šŽŒœà Þ àƒ þ Š ˆ ÿûýÛÝ šŽŒœ OutputTypes Type0 TLC Tiled Format t Type1 CAL CALS Group 4 C T...

Page 199: ...SCII file format There are three main accounting fields in the Request software Request 1 Requester This is a field which can be used for accounting Information entered is applied to the KIP Job and Print Logs 2 Job Number This is a field which can be used for accounting Information entered is applied to the KIP Job and Print Logs This field is tied to ALL Reports 3 Description This is a field whi...

Page 200: ... 1 Printing 2 Scanning 3 Meter Reading 1 Printing This report will include both prints and copies that have been sent to the 3000 print engine The report will include Date Time Requester Media of originals of Copies and Sq Feet The information for Requester and Job Number shown below are gathered from all KIP printing applications The user can select the Start Date and the End Date of the report a...

Page 201: ...Section 8 Request 8 45 ...

Page 202: ...Requester Location Type Format and Sq Feet The information for Requester shown below is gathered from all KIP printing applications The user can select the Start Date and the End Date of the report along with what to do with this data The report can be sent directly to the default printer attached to the PC generating the report or to the Notepad to be saved to a file ...

Page 203: ...include Date Meter A Meter B and Total run This meter reading should closely match the actual meter reading on the printer The user can select the Start Date and the End Date of the report along with what to do with this data The report can be sent directly to the default printer attached to the PC generating the report or to the Notepad to be saved to a file ...

Page 204: ...r Autodesk DWF Writer software enables you to publish to DWF format from CAD applications that do not offer built in DWF publishing such as Bentley Microstation or Dassault s Solidworks software Autodesk DWF Writer is a certified Microsoft Windows system printer driver that enables you to quickly and easily convert files to DWF format If you re NOT using AutoCAD Autodesk Inventor or other Autodesk...

Page 205: ...s will allow the user a to print all pages in a multi page dwf file or only the desired pages b select to Print Colors in Black to change all of the lines areas to print solid black and not gray c choose Reverse Print Order d enter a password if the DWF files was created with password protection ...

Page 206: ...Section 8 Request 8 50 ...

Page 207: ...election 9 6 2 7 Remove 9 7 2 8 Remove All 9 7 2 9 Enlarge Reduce 9 7 2 10 Header 9 7 2 11 Invert Mirror Collate 9 7 2 12 Email communication 9 8 2 13 Submit Print Job 9 8 2 14 Manage Queue 9 8 3 0 Installation 3 1 Requirements Host PC OS 9 9 3 2 Requirements Host PC NTFS Permission 9 9 3 3 Requirements Host PC Network Protocol 9 9 3 4 Installation Host PC 9 10 4 0 Host PC Configuration 9 12 5 0 C...

Page 208: ...on tool including its features and functionality It demonstrates the use of Windows Internet Explorer although other web browsers may have similar functions For installation technical details and administrative procedures please refer to the chapters of Installation Setup and Configurations near the end of this section Please note that a host PC is required for the use of KIP PrintNet The Appendix...

Page 209: ... new print submission 7 File Selected Area Displays file names and the file size of selected files 8 Select Browse to select the file s for printing from the PC LAN 9 Remove Remove All Deleting one or all files from the job list 10 Job Settings Pen table selection Media type selection Stamp selection Rotate Fold selection number of copies selection and print image size 11 Header Header Position In...

Page 210: ...Name In our example we use our host name as KIP STF3 hence the address line would read http KIP STF3 Please contact your network administrator for your URL to the KIP printer as installation will differ This link will take the user to the login web page Users are required to enter a login name and password as assigned by an Administrator The User Name can be a combination of numbers and letters up...

Page 211: ...or Displays the login name of the person who logged in using their user name and password 2 Printer User can make their choice of printer that is available on the network to send print jobs to The printer setup is explained in the Installation and Setup section 3 Project Code User has the choice of using Administratively defined job numbers from this list as in KIP Request software 4 Notes This fi...

Page 212: ...mp scheme to be applied to printed documents Stamps that can be used here are created using the KIP Request software 10 Rotate Fold Users can choose to use one of the available Rotate Fold schemes Schemes for Fold Rotate that are used here are created using the KIP Request software 11 Number of Copies Based on user choice the number of copies to print 2 5 File Selection Area In this section users ...

Page 213: ...any all files the are not required to be printed 2 9 Enlargement Reduction Force Size The entire set of documents selected can be reduced or enlarged from 25 up to 400 If the user would prefer to print files to a specific size media Force size feature is available Entries in Force Size are determined by KIP Request software 2 10 Header size and Position Header 0 1 mm to 1 5mm can be deployed on th...

Page 214: ...r detail 2 13 Submit Print Job Sends the selected print files and job information to the host PC for printing 2 14 Manage Queue To use this feature the IP or URL of the system must be known That is a HOST PC configuration can not access the print queue only direct connection to the system Select this button to manage and view the job queue in the Printer Printer status or installed roll informatio...

Page 215: ...ify NTFS permissions to the following files for KIP Request and KIP PrintNet applications include emailsettings asp Request winreq ini 2 Internet Guest Account IUSR_XXXX requires read write modify NTFS permissions to the following directories for KIP Request and KIP PrintNet applications Request Request Settings Uploads 3 3 Requirements Host PC Network Protocol 1 TCP Port 80 inbound for web page c...

Page 216: ...es 2 Install KIP Request on the Host PC please see the KIP Request section see install KIP Software CD 3 Execute the KIP PrintNet installation by double clicking on the KPNSetup_v1 0 exe see KIP Software CD 4 Read and accept the KIP End User License Agreement 5 Enter User Information and Company Information ...

Page 217: ... Net 6 Select Installation directory Default is C Program Files KIP PrintNet 7 Click Next to complete installation KIP PrintNet creates a virtual directory with the alias PrintNet on the instance of IIS provided by the Host PC ...

Page 218: ...r name and password for Administrative access to KIP PrintNet must be defined within KIP Request software using Prompt Setup operations for the Requester field Requester prompt must be configured as Required from the pulldown list The default user name for accessing the Administrative account is admin The default password for accessing the Administrative account is kip Upon administrative authenti...

Page 219: ...ser must have a unique ID and password to login into KIP PrintNet Users and Passwords defined here are simultaneously added removed from KIP Request and vice versa D This section displays a list of current users authorized to access KIP PrintNet Click on a username and select Edit to edit the user name and or password Select Delete to remove the user from KIP PrintNet Users and Passwords defined h...

Page 220: ...ltaneously added removed from KIP Request and vice versa G Email Settings SMTP Server Specify an available SMTP server hostname or IP address to connect to in order to send confirmation e mail messages SMTP Username Specify a valid SMTP user name to send confirmation e mail messages SMTP Password Specify a valid SMTP password associated with SMTP user name in order to send confirmation e mail mess...

Page 221: ...reflected in KIP PrintNet From the main screen our main focus will be on the following features a Requester Job Number and Description To edit open Winreq ini on the Host PC and scroll to the following lines Prompt Job Number RequesterPrompt Requester DescriptionPrompt Description Requester Job Number and Description fields can be edited to match user requirements An example is shown below Prompt ...

Page 222: ...lum Paper2 Film Paper3 TBond d Stamp Available stamps are created and defined within KIP Request KIP PrintNet software will use stamps defined in KIP Request Please refer KIP Technical User Guide for KIP Request software for more information on pen table setup e Rotate Fold Available Rotate Fold parameters are defined within KIP Request KIP PrintNet software will use Rotate Fold parameters defined...

Page 223: ...t the time of publishing Other browsers are available which may change operation of KIP PrintNet This is based upon the ActiveX abilities of the browser and the OS Here are only a few other examples of browsers that are available to submit prints using KIP PrintNet KIP PrintNet on Mozilla Firefox KIP PrintNet on MAC Safari ...

Page 224: ...9 18 Section 9 KIP Print Net KIP PrintNet on Opera ...

Page 225: ...tton jpg User Interface Graphic images back jpg User Interface Graphic images button2 png User Interface Graphic images kiplogo jpg User Interface Graphic images kiplogo gif User Interface Graphic images minus gif User Interface Graphic images plus gif User Interface Graphic images return jpg User Interface Graphic images submit jpg User Interface Graphic include email asp Provides e mail function...

Page 226: ...e person connected to the queue All jobs in the queue will be listed along with the Printer Media status Jobs can be selected for deletion by checking the box to the left of the job and clicking on the Delete Selected Jobs button Note In order for Queue management to work you MUST connect directly to the IPS on the CX8036 minimum of 4 users The queue management features are not available to the us...

Page 227: ...pe of issue Q Do I have to use Windows 2000 Server or Windows 2003 Server A Not necessarily Windows 2000 Professional and Windows XP Professional contain a stripped down version of IIS but is limited by concurrent connection limits and full IIS features and capabilities Q What is IIS 5 1 How do I get it A IIS stands for Internet Information Services and is provided by Microsoft in Windows 2000 Pro...

Page 228: ...9 22 Section 9 KIP Print Net ...

Page 229: ...Section 10 PRP 10 1 Section 10 Productivity Reporting Package Productivity reports in KIP 6 0 software 2 Creating Productivity Reports 3 1 Printing 4 2 Scanning 5 3 Meter Reading 6 ...

Page 230: ...ounting and meter information PRP reports can be opened into Notepad or exported as an ASCII file format There are three main accounting fields in the Request software Request 1 Requester This is a field which can be used for accounting Information entered is applied to the KIP Job and Print Logs 2 Job Number This is a field which can be used for accounting Information entered is applied to the KI...

Page 231: ...thly or custom time frame The Productivity reports can be accessed by doing the following 1 On the Request main screen select Manage from the menu bar and then select Print Reports 2 The Following window will appear This is where the currently selected printer information will be displayed There are three different types of reports that can be generated from this screen 1 Printing 2 Scanning 3 Met...

Page 232: ...f originals of Copies and Sq Feet The information for Requester and Job Number shown below are gathered from all KIP printing applications The user can select the Start Date and the End Date of the report along with where to print the report The report can be sent directly to the default printer attached to the PC generating the report or to the Notepad to be saved to a file ...

Page 233: ...equester Location Type Format and Sq Feet The information for Requester shown below is gathered from all KIP printing applications The user can select the Start Date and the End Date of the report along with what to do with this data The report can be sent directly to the default printer attached to the PC generating the report or to the Notepad to be saved to a file ...

Page 234: ...clude Date Meter A Meter B and Total run This meter reading should closely match the actual meter reading on the printer The user can select the Start Date and the End Date of the report along with what to do with this data The report can be sent directly to the default printer attached to the PC generating the report or to the Notepad to be saved to a file ...

Page 235: ...P Manual IP assignment 11 4 1 2 2 DHCP Manual DNS assignment 11 5 1 2 3 DHCP Manual WINS assignment 11 6 1 2 4 Apply Settings 11 7 1 3 Exit Configuration Mode 11 7 2 0 Appendix Applications Diagram A Applications Diagram B Connectivity Diagram C A Printing from Microstation B Printing from MAC OS 9 C Printing from Mac OS X Terminology and Base Function ...

Page 236: ...IP Addressing 1 1 Configuration Mode To access and set the IP address a Press the button on the Operator Panel b Then press the Configuration button c Enter Setup Menu and locate Network d Click Network to enter TCP IP Properties Page ...

Page 237: ...Address Displays IP address 3 Subnet Mask Displays Subnet Mask 4 Default Gateway Displays Gateway 5 DNS Setting Selects DHCP assigned DNS address or manually assigned DNS address 6 WINS Setting Selects DHCP assigned WINS address or manually assigned WINS address 7 DNS Address Displays DNS address 8 WINS Address Displays WINS address 1 2 3 5 4 6 7 8 ...

Page 238: ...ctivity 11 4 1 2 1 DHCP Manual IP Assigment a Press Use DHCP button for DHCP to assign IP address b Press Use Following IP Address button to enter IP address manually c Enter desired IP Address Subnet Mask and Gateway ...

Page 239: ...on 11 Connectivity 11 5 1 2 2 DHCP Manual DNS Assigment a Press Obtain DNS button for DHCP to assign DNS address b Press Use The Following DNS button to enter DNS address manually c Enter desired DNS Address ...

Page 240: ...1 Connectivity 11 6 1 2 3 DHCP Manual WINS Assignment a Press Obtain WINS button for DHCP to assign WINS address b Press Use The Following WINS button to enter WINS address manually c Enter desired WINS address ...

Page 241: ...Section 11 Connectivity 11 7 1 2 4 Apply Settings a Select Apply button to accept IP addressing information 1 3 Exit Configuration a Select OK button to exit Configuration Menu ...

Page 242: ...Section 11 Connectivity 11 8 ...

Page 243: ...ws printer including dither patterns paper settings etc Simply choose Printer plt as the driver to use the KIP Printer by default from MICROSTATION Click on Page and select properties of the KIP Windows driver Click on Plot to complete printing using the KIP Windows driver See Windows Driver Section 6 for details on driver installation Method 2 Not Recommended Use an HPGL 2 driver from within MICR...

Page 244: ...s marked below in bold For an example we will assume that the MICROSTATION User requires to print to a Printer We will also assume the Computer name to be KIP PPC Method 2 Direct Print Since the Port would be set up automatically with the change as on the next page users would be able to use this driver KIPGL PLT to create plot file data directly to the KIP controller Method 2 Request Print Genera...

Page 245: ... output file name comment out the default_extension line above and uncomment this line lpt1 may be substituted with any desired filename e g MS_PLTFILES plotfile 000 default_outFile auto_overwrite lpt1 Substitute the name of a pentable file to be loaded when this driver is selected pentable dir file tbl border pen 1 filename time leave this out for no border communication handshake 0 baud 9600 par...

Page 246: ... 4 ...

Page 247: ... configure a desktop printer by specifying the type of printer being used and its IP address To configure the desktop printer do the following steps 1 Open the Desktop Printer Utility The following dialog box should appear a Select the printer driver you wish to use LaserWriter 8 5 1 or later in the popup menu b Select the Printer LPR to specify TCP IP printing c Click OK ...

Page 248: ...tScript Printer Description PPD File click Change A list of Printer Description files should appear Select the PPD with the same name as your printer Click the Select button and you will see the desktop printer configuration dialog appear again ...

Page 249: ...as described in Palomar s Setting Printer IP Addresses page A Queue name is not needed for direct printing to a TCP IP printer it is only used when using a UNIX print spooler a Click Verify to verify the printer s location If a printer is found to exist at the specified IP address a message stating that a printer exists at the specified location appears at the bottom left hand corner of the screen...

Page 250: ...this 6 Select Save under the File menu to create a desktop printer Select a name for the desktop printer A new printer icon should appear on the desktop Verify that the configuration works by dragging a printable document onto the new desktop printer ...

Page 251: ...nnected to Macintosh systems through TCP IP Macintosh allows for this by configuring a desktop printer to point to the KIP IPS The Following steps note the procedure for setting up a Macintosh system for TCP IP printing These steps apply to Macintosh OS X 1 On the desktop open the Mac hard drive ...

Page 252: ...2 2 Select the Applications folder 3 Select the Utilities folder ...

Page 253: ...3 4 Find the Printer Setup Utility 5 On the top menu bar select Printers and then Add a Printer ...

Page 254: ...the second Printer Type pull down select LPD LPR c In the third area Printer Address set this to your KIP printer IP Address d In the fourth area Queue Name set the queue name to KIP this is the default Queue name e In the fifth area Printer Model select Other 7 Locate the desired PPD file ex KIPGS600 PPD select choose ...

Page 255: ...5 8 Select Add 9 The printer set up will be in the Printer List ...

Page 256: ...6 10 In the menu bar on top select Printers then select Create Desktop Printer from the pull down choices ...

Page 257: ...ocol TCP IP is a widely adopted networking protocol standard that is common place in many environments requiring network capable equipment and network connectivity to company intranets the larger internet e mail wireless communications shared printing devices IP telephony and many other applications Many other networking protocols exist at the same OSI level as TCP IP e IPX SPX AppleTalk NetBEUI a...

Page 258: ...so found and accepted on Windows based networks and Novell based networks Transmission Control Protocol Internet Protocol KIP Printers are TCP IP devices TCP IP is short for Transmission Control Protocol Internet Protocol TCP IP is a widely adopted networking protocol standard that is common place in many environments requiring network capable equipment and network connectivity to company intranet...

Page 259: ...er s listening TCP port 8421 KIPSERVE EXE KIPSERVE EXE is a KIP designed executable that can best be described as a listening service or listening daemon KIPSERVE resides within the OS of all KIP digital printers KIPSERVE accepts data on TCP port 8421 from KIP Request software via KAWPDFT EXE and or from the port monitor component of the KIP Unified Windows Printer Driver described below As data a...

Page 260: ...his mode All KIP digital printers are factory delivered and equipped with a KIP port monitor in Controller Mode This is essential for LPR based print delivery methods as it coordinates closely with LPD services also present within the operating system of KIP digital printers Port Operations Regardless of the port mode Server vs Controller the KIP0 port is capable of functioning in native mode or p...

Page 261: ...rd Windows based application and or printing methodology These types of applications generally make use of helper drivers and or internal drivers to prepare printable data before any GDI or Windows based driver mechanism comes into direct contact with the print data Examples of such Windows applications that have internal rendering capability are but are not limited to AutoDesk AutoCAD products vi...

Page 262: ...ETWORK CONNECTIVITY Windows Workstation Windows Server Digital Printer NT 2000 XP NT 2000 2003 Windows Printer Driver AutoCAD Driver Helper Drivers SPOOLER KIP0 Port Monitor Or LPR Port Monitor TCP 8421 Or TCP 515 ...

Page 263: ...NOVELL NETWORK CONNECTIVITY Windows Workstation Netware Server Digital Printer NT 2000 XP 5 X 6 X Windows Printer Driver AutoCAD Driver Helper Drivers NDPS Gateway LPR over IP TCP 515 SPOOLER ...

Page 264: ...WORK CONNECTIVITY Unix CAD Workstation Unix Server Digital Printer Sun HP SGI IRIX 5 X 6 X Catia V4 GL 2 output Ideas GL 2 output Unigraphics GL 2 output TIFF output CALS output Others LP LPR LPD TCP 515 LP LPR ...

Page 265: ......

Page 266: ... SGI IRIX LP LPR LPD Catia V4 GL 2 Ideas GL 2 Windows Workstation NT 2000 XP Unix Server Novell Netware Server 5 X 6 X Windows Server NT 2000 2003 TCP 515 TCP 515 TCP 515 TCP 8421 Spooler Windows Printer Driver AutoCAD Driver Helper Drivers KIP 3000 Network Connectivity ...

Page 267: ...et KIP Request Users AutoCAD Drivers UNIX Spreadsheets Organization charts Presentations Office Design Project Management AutoCAD 2000i 2002 2004 2005 2006 Catia Ideas Raster Files Vector Files PDF DWF Files Internet Explorer Netscape Internet Explorer Netscape UNIX Server KIP Network Connectivity ...

Page 268: ...UTAX GmbH Ohechaussee 235 22848 Norderstedt Germany ...

Reviews: