Configuring the Network Settings
- 72 -
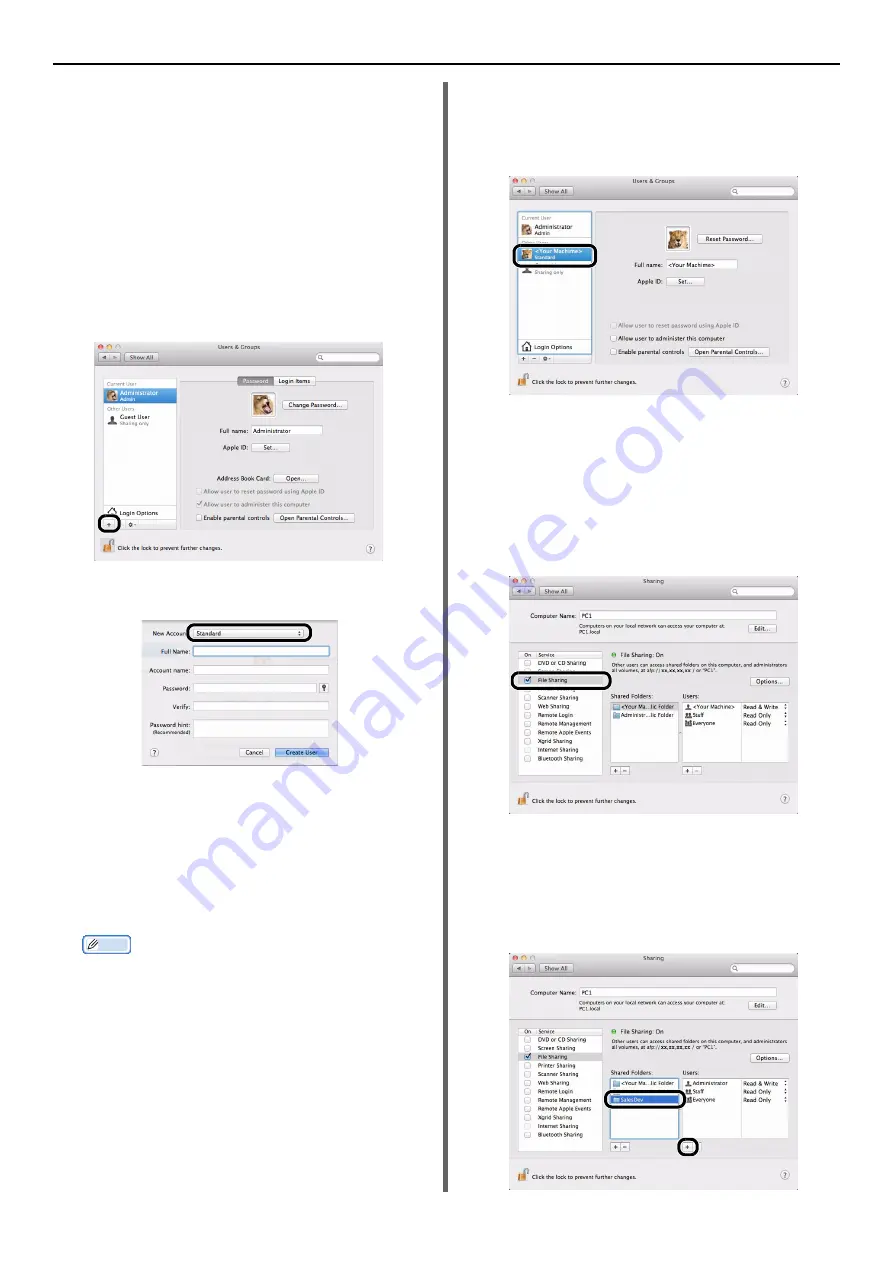
For Mac OS X 10.5 to 10.7
1
From the Apple menu, select [
System
Preferences
].
2
Click [
Users & Groups
] (for Mac OS X
10.5 and 10.6: [
Accounts
]).
3
Click [
Click the lock to make
changes.
] at the bottom left of the
screen and enter the administrator
password. Then, click [
Unlock
] (for Mac
OS X 10.5 and 10.6: [
OK
]).
4
Click [
+
].
5
Select [
Standard
] from [
New
Account
].
6
Enter the value of C-2 in [
Name
].
For Mac OS X 10.5, enter the value of C-2 in
[
Name
].
7
Enter the value in C-3 in both
[
Password
] and [
Verify
].
8
Click [
Create User
] (for Mac OS X 10.5
and 10.6: [
Create Account
]).
Memo
z
After the dialog box for auto login appears, disable the
auto login.
9
Check that an account is added to
[
Other Users
] (for Mac OS X 10.5 and
10.6: [
Other Accounts
]) with the name
of C-2, and close [
Users & Groups
] (for
Mac OS X 10.5 and 10.6: [
Accounts
]) .
10
Create a new folder on the computer
with the name entered in C-5.
11
From the Apple menu, select [
System
Preferences
].
12
Click [
Sharing
].
13
Check the check box of [
File Sharing
].
14
Click [
+
] under [
Shared Folder
].
15
Select the folder created in step 10 and
click [
Add
].
16
Select the folder added in step 15 and
click [
+
] under [
Users
].


