Connecting to a Computer
- 53 -
Setup
1
7
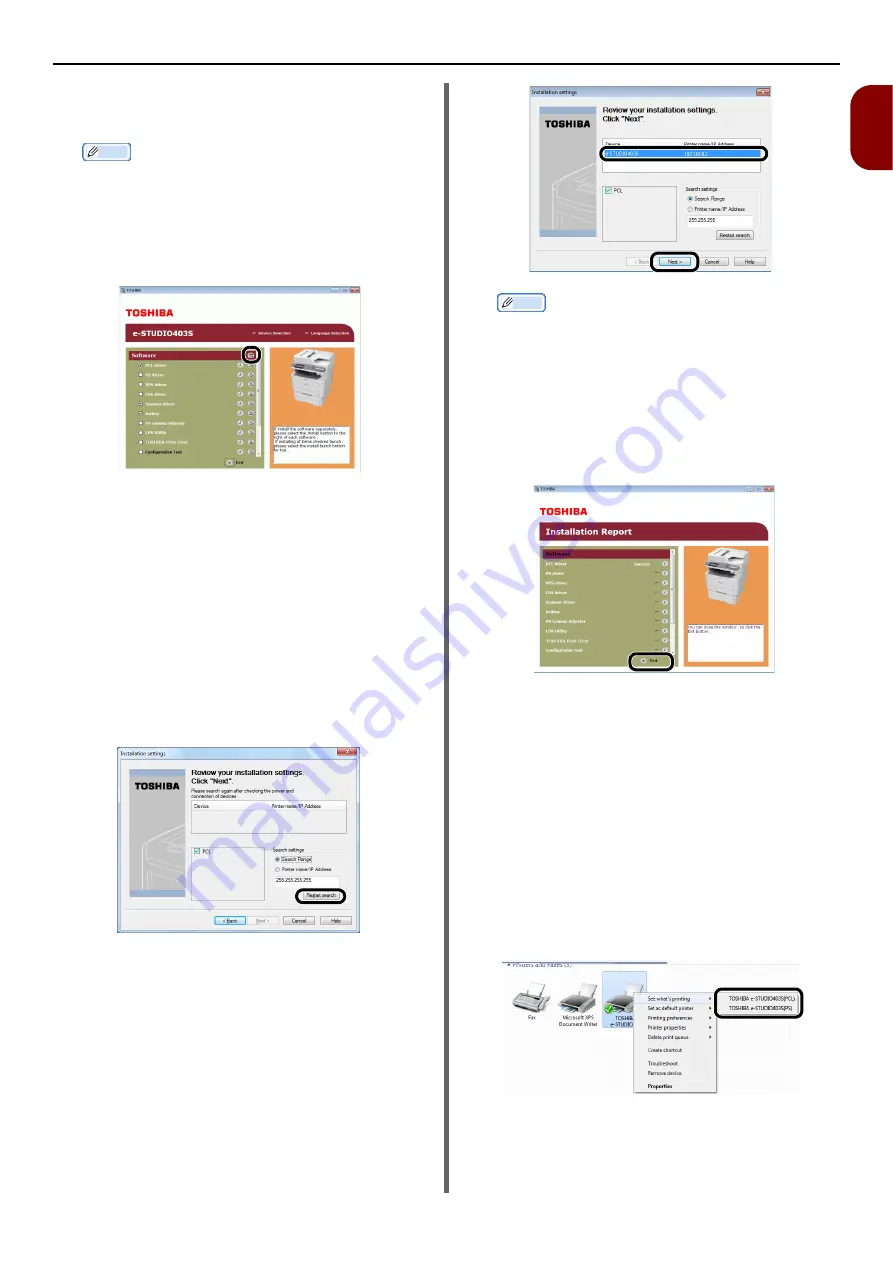
Select the checkbox for the printer driver
and fax driver you wish to install, and click
the Install bunch button.
Memo
z
By factory default, [
PCL driver
], [
Scanner driver
],
and [
ActKey
] are selected.
z
All drivers and software packages are installed by the
collective installation if their boxes are checked. If you
wish to install drivers and software separately, click
the Install button on their right and follow the on-
screen instructions.
8
If the [
Windows Security
] dialog box
appears, click [
Install this driver
software anyway
].
9
Click the [
Network
] button.
The device search starts.
- If the machine is detected, it is automatically
installed. Proceed to step 11.
- If the machine is not detected, the
[
Review your installation settings.
]
screen is displayed. Proceed to step 10.
10
click [
Restart search
] to restart the
device search.
After the machine is displayed, select the machine
and click [
Next
].
Memo
z
If the machine is not displayed by clicking [
Restart
search
], select [
Printer name/IP Address
] and
enter the IP address assigned to your machine, and
then click [
Next
].
11
If the [
Windows Security
] dialog box
appears, click [
Install this driver
software anyway
].
12
Click the [
Exit
] button.
13
Remove the "Software DVD-ROM" from
the computer.
The installation is complete.
Print a test page to check that the printer
driver is successfully installed on the
computer.
1
Click [
Start
] > [
Devices and Printers
].
2
Right-click the TOSHIBA e-STUDIO403S
icon and select [
Printer properties
] (>
a desired printer driver if you have
installed multiple drivers) from the pop-
up menu.
3
On the [
General
] tab, click [
Print Test
Page
].


