Authentication by PIN
- 124 -
3
Press the or on the confirmation
screen to select [
Yes
] and then press
.
Memo
z
After a certain period of time, the machine automatically
logs out users.
Operation From a Computer
To control access to operations from a computer,
you need to install Print Job Accounting Client on
the computer in advance.
Memo
z
The authentication type specified on the computer
overrides the one specified on the machine.
Reference
z
For details on Print Job Accounting, refer to the User's
Manual Advanced.
Printing (for Windows)
Memo
z
This procedure uses NotePad and PCL driver as an
example. The procedures and menus may differ depending
on the OS you use.
1
Click [
Start
] > [
All Programs
] >
[
Toshiba
] > [
Print Job Accounting
Client
] > [
Change Job Accounting
Mode
].
On the [
User Account Control
] window, click
[
Yes
]. (Click [
Continue
] for Windows Vista.)
2
Select the printer driver you want in
[
Driver
].
3
Select the [
Tab
] check box and then
click [
Change
].
4
Click [
OK
].
5
From the [
File
] menu, select [
Close
].
6
Click [
Start
] and select [
Devices and
Printers
].
7
Right-click the TOSHIBA e-STUDIO403S
icon and select [
Printer properties
] >
[
TOSHIBA e-STUDIO403S(*)
].
* Select the type of driver you want.
8
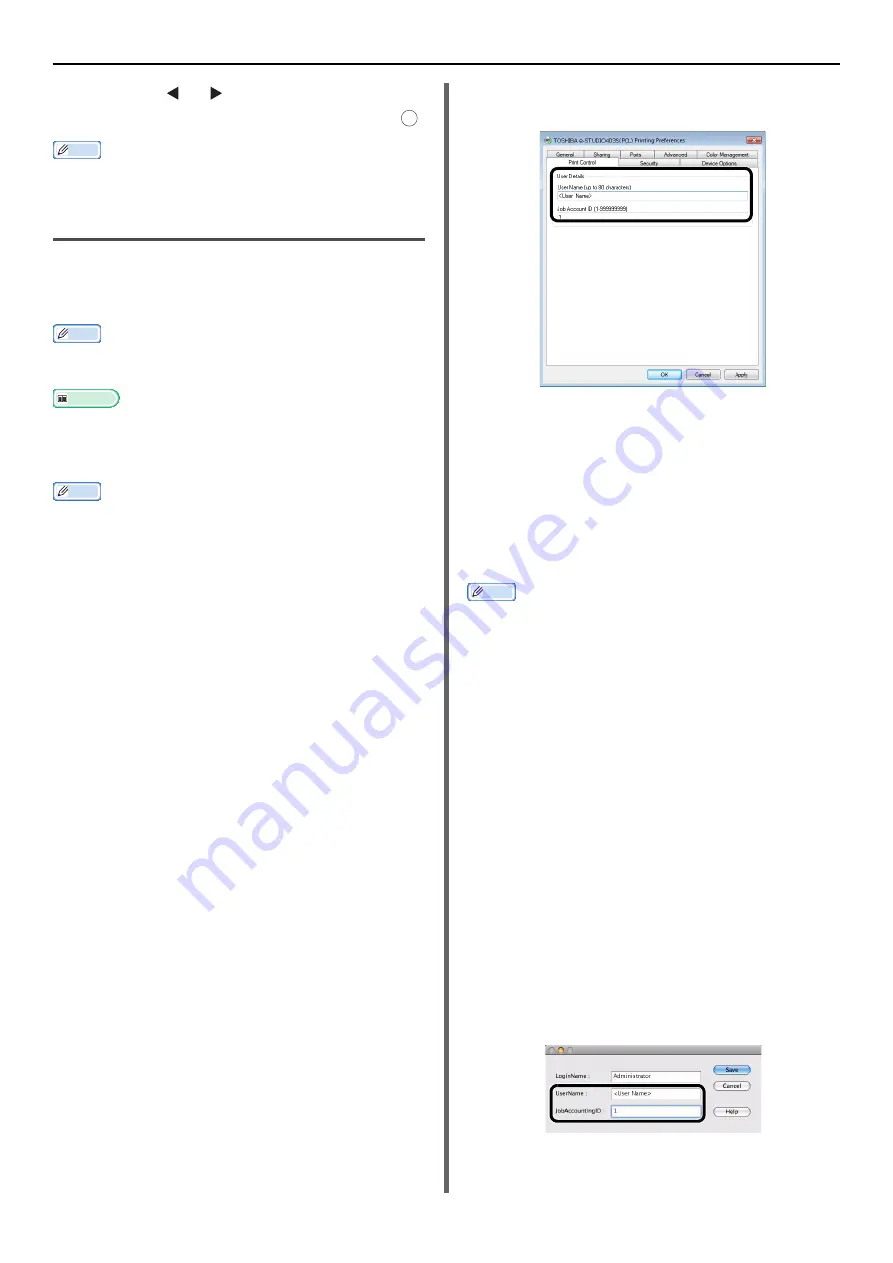
Select the [
Job Accounting
] tab.
9
Enter the user name in [
User Name
]
and the PIN in [
Job Account ID
].
10
Click [
OK
].
11
Open the file you want to print.
12
From the [
File
] menu, select [
].
13
Select the printer driver you selected in
step 7 and then click [
].
Printing (For Mac OS X PS Driver)
Memo
z
This procedure uses Text Edit as an example. The
procedures and menus may differ depending on the OS
you use.
1
Put the Software DVD-ROM into the
computer.
2
Double click on the [
TOSHIBA
] icon on
your desktop.
3
Double-click on [
Utilities
].
4
Copy the [
Print Job Accounting
Client
] folder by dragging and dropping
to your Applications folder.
5
Open the [
Print Job Accounting
Client
] folder you opened, and double
click on [
Print Job Accounting
Client
].
6
Click [
New
].
7
Enter the username into [
UserName
]
and enter the PIN into
[
JobAccountingID
].
8
Click [
Save
].
OK


