19
4.2.2 Admin
y
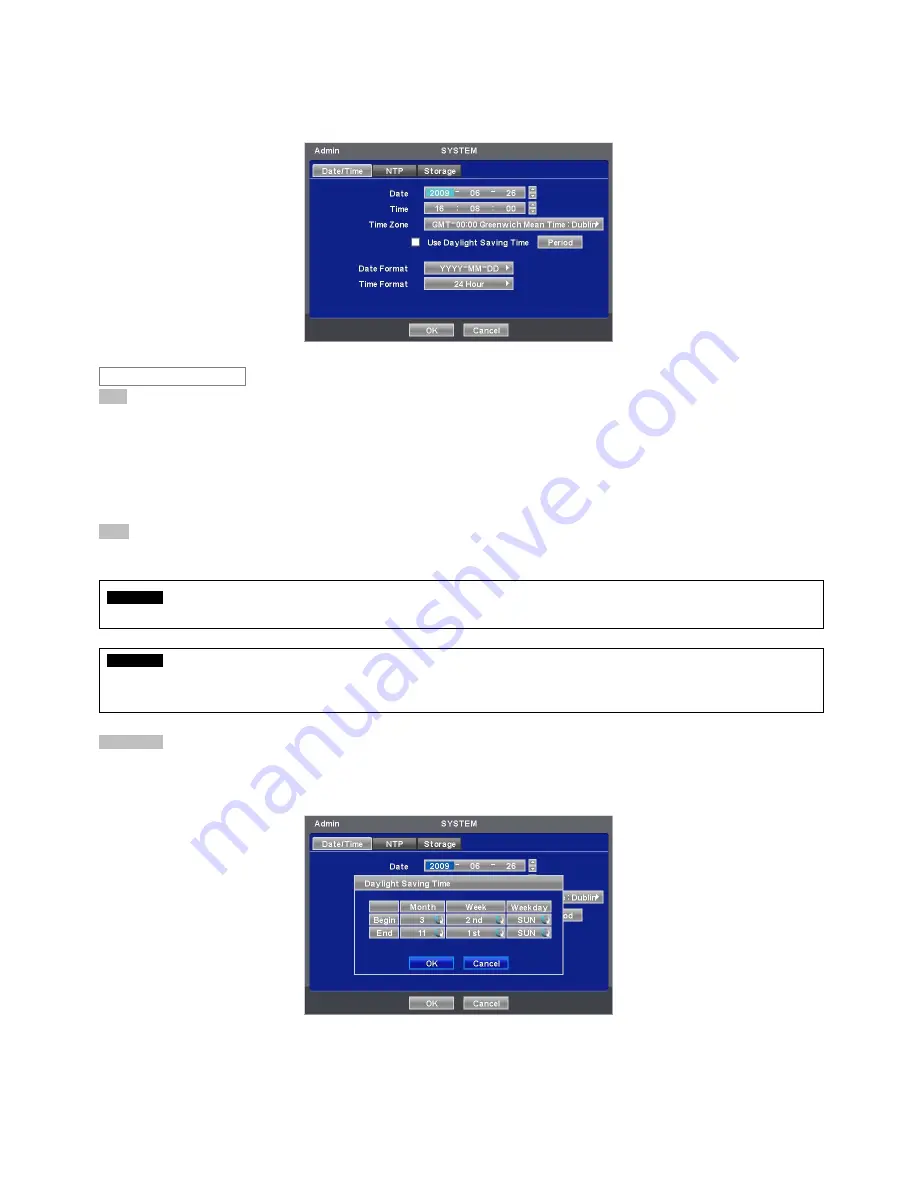
Please click (
) SYSTEM>Admin and the following screen will appear.
Date
y
This menu will allow user to adjust the settings.
y
Please follow the procedure below for time adjustment.
①
Click (
) items (Y, M, D) to change. A designated item will be highlighted in a box (Y: Year, M: Month and D: Date).
②
Adjust the number by clicking (
)
▲
,
▼
buttons on the right-hand side.
③
Repeat the same procedure to change Y, M and D.
Time
y
This menu will allow user to adjust the current time. The adjustment procedure is same as of Date.
CAUTION
IF ADJUSTED DATE/TIME IS PRIOR TO RECORDED DATA, DATA AFTER NEW DATE/TIME MAY BE ERASED.
CAUTION
ANY CHANGE IN DATE/TIME IS IMMEDIATELY APPLIED ON VIEWING SCREEN (LIVE), BUT THE DATE/TIME WHEN THE RECORDING
WAS DONE ARE NOT CHANGED. MAKE SURE TO REBOOT DVR AFTER CHANGING THE DATE/TIME. DO NOT FORGET TO
EXECUTE SHUTDOWN (SYSTEM>Shutdown) BEFORE REBOOT.
Time Zone
y
Please click (
) Time Zone frame to see the list of nations and choose one.
y
Click (
) a check box next to Use Daylight Saving Time. When user dwells in a region of DST area, please check it (i.e.
5
).
y
If DST is observed, please click (
) Period and the following screen will appear.
y
Adjust the dates of beginning (Begin) and end (End) of DST by ‘Month/Week/Weekday’.
y
Click (
) the numbers in ‘Month/Week/Weekday’ for adjustment.
y
Choose ‘OK’ to confirm the setting.
Date / Time


