21
y
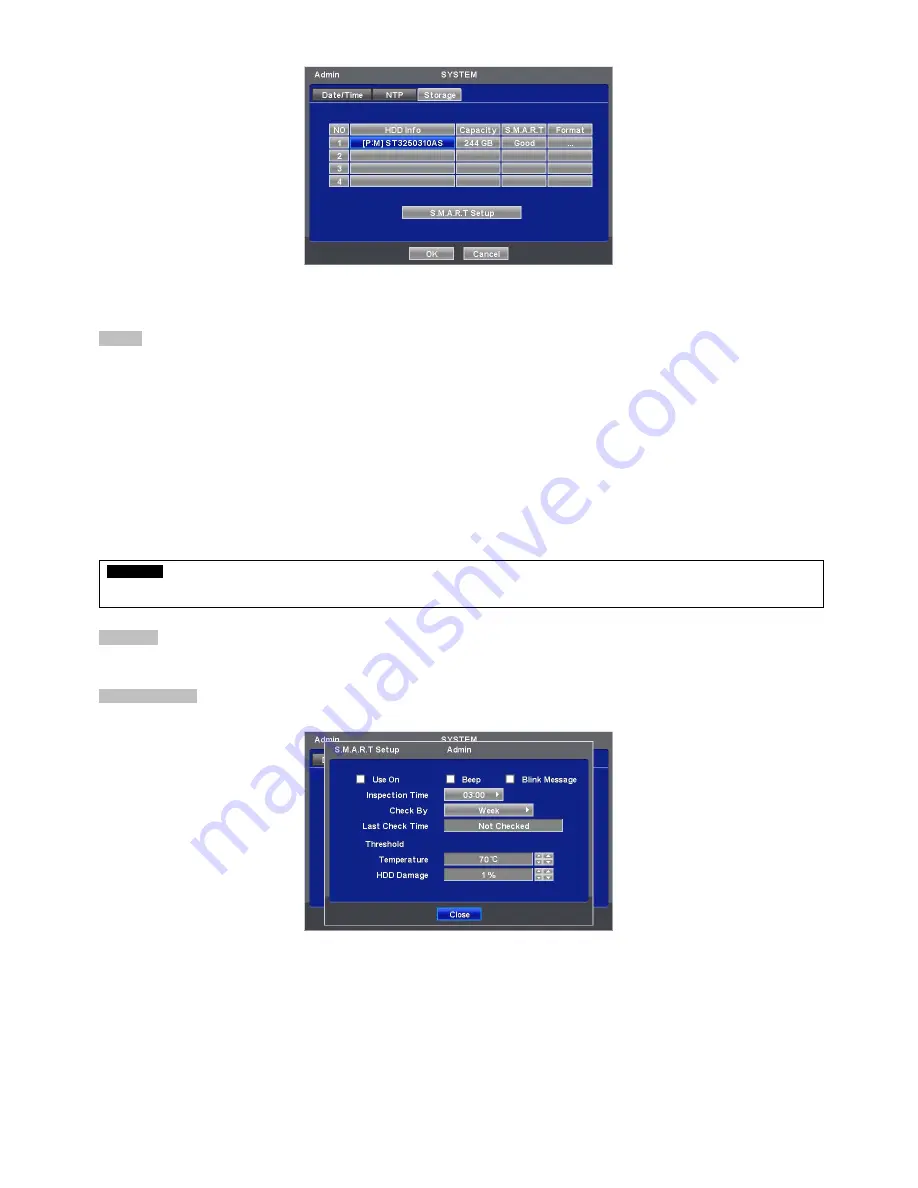
Four rows will show as follows:
-
1: SATA 1 Port
Format
y
User must format when:
-
install new HDD
-
add another HDD
-
replace HDD
-
move HDD (change installation port)
-
remove HDD
y
Click (
) Add/Remove frame in Format column and choose ‘OK’ on the dialogue box to start formatting.
y
Following format, DVR will auto-reboot. If there are more than 2 HDDs, please format each of HDDs. DVR will auto-reboot
when all the HDDs are formatted.
y
If the frame changes to ‘---‘ after reboot, it means formatting has been properly done.
CAUTION
EXECUTE REMOVE PROCEDURE EVEN WHEN USER REMOVE PREVIOUSLY INSTALLED HDD. THE REMOVE PROCEDURE IS THE
SAME AS THE FORMAT PROCEDURE DESCRIBED ABOVE.
S.M.A.R.T
y
Click the frame on S.M.A.R.T column and temperature and HDD damage will show.
S.M.A.R.T Setup
y
Please click (
) S.M.A.R.T Setup and the following screen will appear.
y
Check the square box
5
next to Use On. Through S.M.A.R.T function, make alarm message, indicating HDD damage, will
show.
y
Check
5
Beep, it will give the alarm sound, indicating HDD damage, as the SMART setup.
y
Check
5
Blink Message, the alarm message will blink on the OSD, as the SMART setup.
y
If “Use on” box is unchecked, Beep, Blink Message will be unchecked automatically. Only when “Use on” is checked
5
, user
can set Beep, Blink Message function.
y
Click (
) Inspection Time frame to set inspection time.
y
Click Check by frame to select inspection interval.
y
Last Check Time: show the time of the last inspection.
y
Click (
)
▲
,
▼
direction buttons on the right-hand side of Temperature frame to adjust to maximum temperature for the


