EVOS
™
M5000 Imaging System User Guide
55
3.
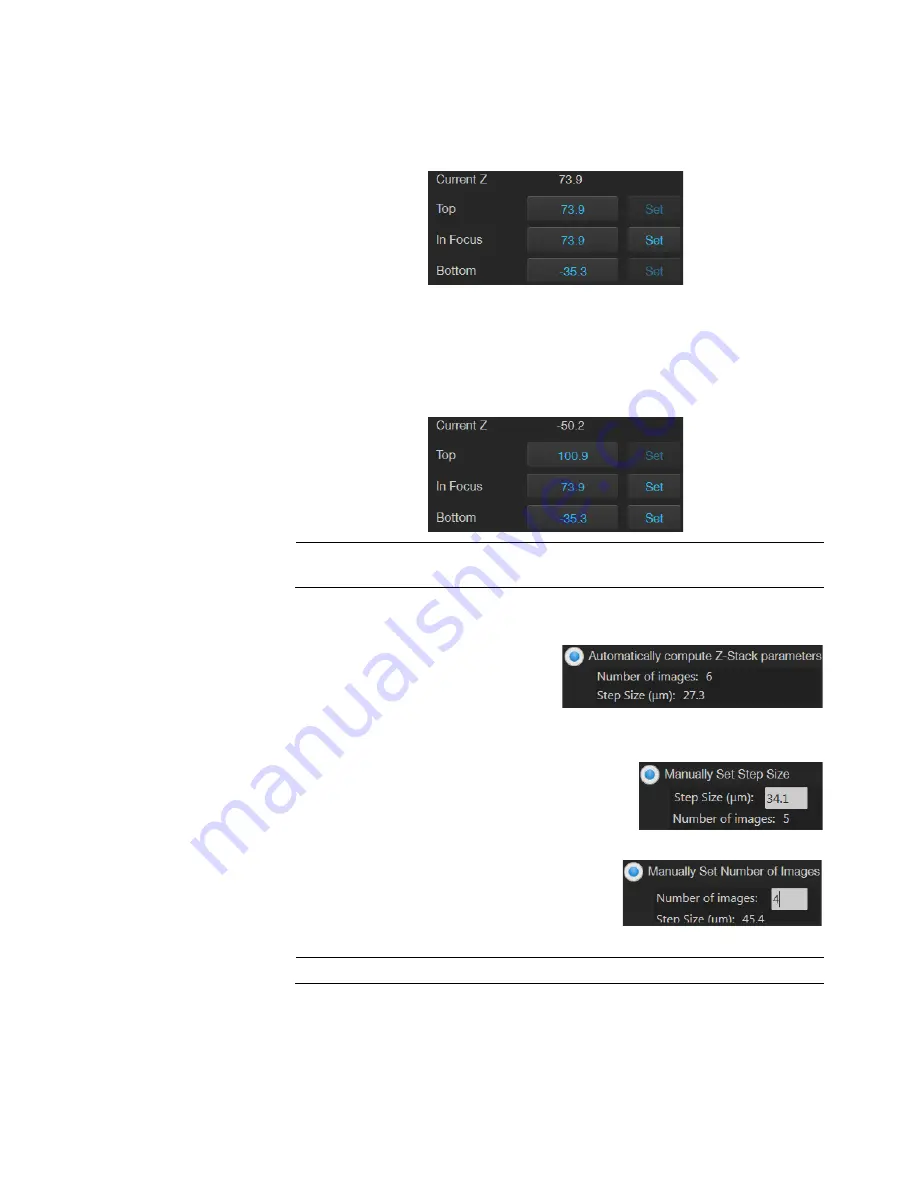
If not already on, click the
Light
button to illuminate the sample, then adjust
brightness
and
focus
using the corresponding sliders on the Capture tab.
The focus position you set in this step is the initial Current Z position.
4.
To accept the
Current Z
as the
In Focus
position, click
Set
for In Focus.
To change the
In Focus
position, move the
Coarse
and
Fine
focus
sliders on
the Capture tab to focus on the sample, then click
Set
.
5.
Move the focus sliders up from the Current Z position to the desired
Top
position (upper boundary of the Z-Stack), then click
Set
for Top.
6.
Move the focus sliders down from the Current Z position to the desired
Bottom
position (lower boundary of the Z-Stack), then click
Set
for Bottom.
Note:
You can click the
Z number
button for the Top, In Focus, and Bottom
positions to jump to those positions along the Z-axis.
7.
Define the
Z-Stack parameters
to determine the number of “optical sections”
captured in the Z-Stack image set:
•
Automatically compute Z-Stack
Parameters:
Select to calculate the
number of images and their
Z-positions automatically based
on the Z-Stack boundaries and the
default Step Size.
•
Manually Set Step Size:
Select to enter the
Step Size
(Z-distance in µm between focal
planes) in the text box. The system calculates
the number and Z-positions of the images
based on your entry.
•
Manually Set Number of Images:
Select to
enter the
Number of Images
(Z-distance in
µm between focal planes) in the text box.
The system calculates Step Size and the
Z positions of the images.
Note:
You can take up to 100 images (“optical sections”) for a Z-Stack.


