142
•
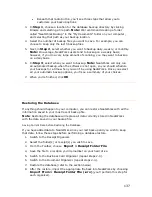
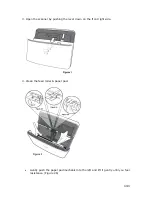
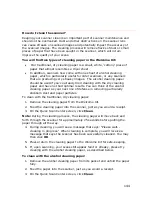
Squeeze both sides of the paper pad mechanism and gently pull it out. (Figure
2c)
•
Clean the paper pad mechanism. Be careful not to bend the metal tab.
•
Wipe the feed roller from side to side and then rotate it. Repeat until its entire
surface is cleaned. (Figure 2d)
•
Replace the paper pad mechanism. Be sure you hear the paper pad mechanism
‘click’ back into place.
5. Clean the lower glass imager.
•
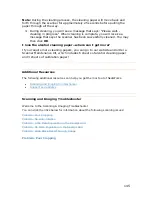
Gently wipe over the length of the glass image. (Figure 2) Be extremely careful
not to catch the plastic tab with your cloth. Do NOT spray the isopropyl alcohol
on the glass.
6. Clean the upper glass imager.
Gently wipe over the length of the glass image. (Figure 2). Be extremely careful:
•
Do not catch the long plastic tab with your cloth.
•
Do not spray the isopropyl alcohol on the glass.
•
Use extreme caution when cleaning around the paper sensor (the small plastic
arm just above the upper glass imager).
7. Wait for cleaned areas to dry completely.
8. Close the ADF cover by pushing it back down until it snaps back into place.
T
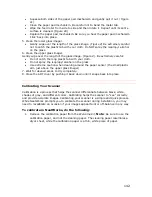
Calibrating Your Scanner
T
Calibration is a process that helps the scanner differentiate between black, white,
shades of gray, and different colors. Calibrating helps the scanner to "see" correctly
and provide accurate images. Calibrating your scanner is a simple and quick process.
While NeatWorks prompts you to calibrate the scanner during installation, you may
need to recalibrate on occasion if your images appear faint or off-balance in any way.
T
To calibrate in NeatWorks, do the following:
T
1.
Remove the calibration paper from the Welcome Kit.
T
Note
T
: Be sure to use the
calibration paper, and not the cleaning paper. The cleaning paper resembles a
dryer sheet, while the calibration paper is a thin, white piece of paper.

