


Section 4 INSTALLATION & BASIC OPERATION
62
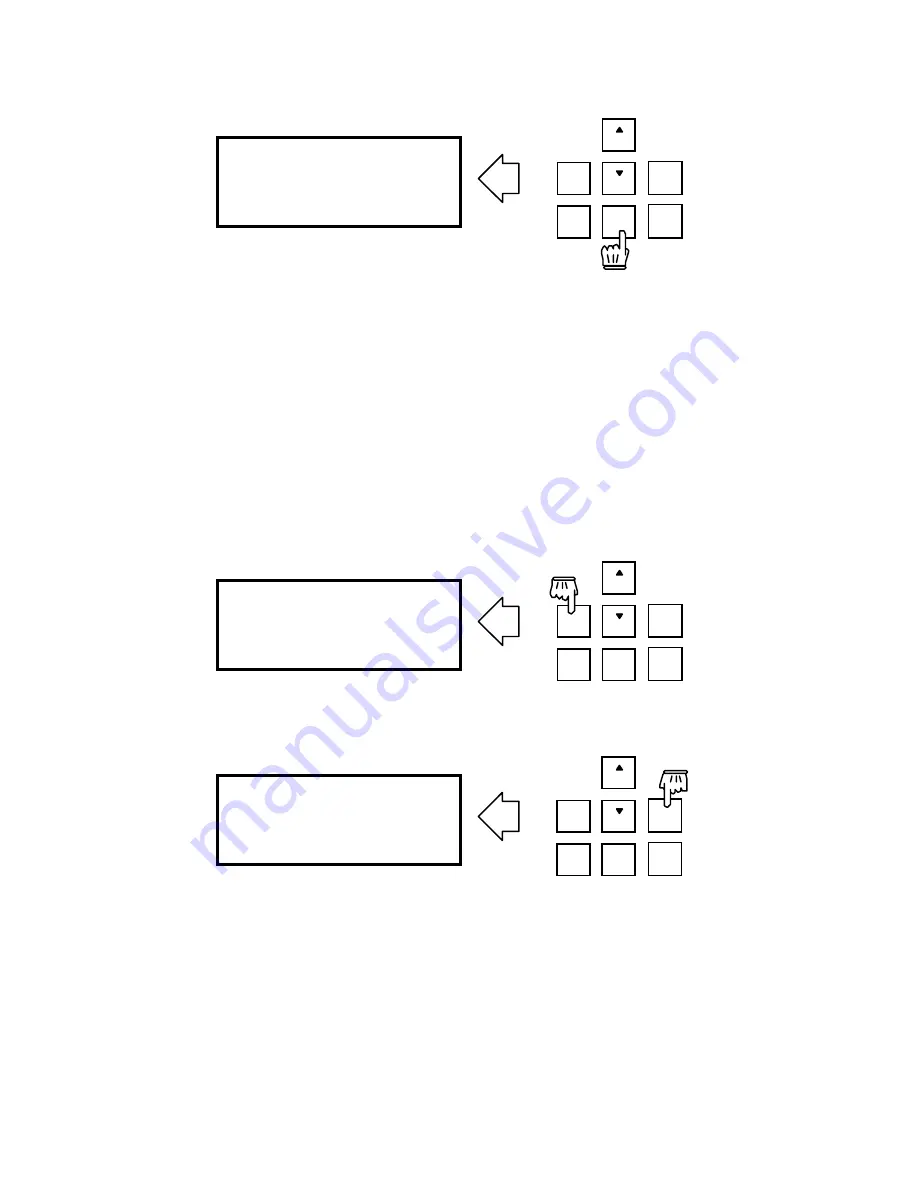
The first screen looks like this:
N O
-
SE L
YE S
+
V O L
SE L
UT IL
H EL P
Xmt [ L3 DUAL ]
Rcv L3 MONO
Rate 56kbps 32kHz
<NO> options
Note that the prompt is different from the one in the Volume screen. Use <NO- > to
cycle through the options and <YES+> to confirm and activate your choice. Repeated
presses of <NO- > cycle you through all of the available options. But, no action is taken
until <YES+> is pressed – we’re “just looking.”
Maybe you think you want to change the mode, but you’re not sure what the
possibilities are. So, you can press the <
NO-
> button to see all of the modes for this
menu item.
The two- step select- and- then- confirm process also protects you from making changes
which could disturb a transmission in progress.
After a <NO- > press, the prompt at the bottom changes to let you know that the
displayed mode may now be accepted by pressing the <YES> button:
N O
-
SE L
YE S
+
V O L
SE L
UT IL
H EL P
Xmt [ L3 STEREO ]
Rcv L3 MONO
Rate 56kbps 32kHz
<YES> accept
You decide you want stereo, so the <
YES+
> button is pressed when
L3 STEREO
mode
appears:
N O
-
SE L
Y E S
+
V O L
SE L
UT IL
H EL P
Xmt [ L3 STEREO ]
Rcv L3 MONO
Rate 56kbps 32kHz
One moment...
Changing the transmit mode takes a little time – about 3 seconds – as the system must
re- configure, so you see
One Moment...
on the prompt line at the bottom of the
screen, during which the system is not operating and it is not possible to press any other
buttons and any audio transmission in progress will be temporarily interrupted..
(Actually, you
can
press the buttons of course, but nothing will happen.)
Summary of Contents for Zephyr
Page 13: ...Table of Contents 13 SECTION 1 QUICK RESULTS ...
Page 26: ...Section 2 INTRODUCTION 26 This page intentially left blank ...
Page 27: ...Section 2 INTRODUCTION 27 SECTION 2 INTRODUCTION ...
Page 38: ...Section 2 INTRODUCTION 38 This page intentionally left blank ...
Page 39: ...39 SECTION 3 ZEPHYR AT A GLANCE ...
Page 52: ...Section 4 INSTALLATION BASIC OPERATION 52 This page intentionally left blank ...
Page 53: ...Section 4 INSTALLATION BASIC OP 53 SECTION 4 INSTALLATION BASIC OPERATION ...
Page 84: ...Section 4 INSTALLATION BASIC OPERATION 84 ...
Page 85: ...Section 5 ISDN 85 SECTION 5 ISDN ...
Page 105: ...Section 6 NON ISDN NETWORKS 105 SECTION 7 AUDIO CODING ...
Page 118: ...Section 7 AUDIO CODING PRINCIPLES 118 This page intentionally left blank ...
Page 119: ...Section 8 DETAILED MENU REFERENCE 119 SECTION 8 DETAILED MENU REFERENCE ...
Page 157: ...Section 9 REMOTE CONTROL 157 SECTION 9 REMOTE CONTROL ...
Page 176: ...Section 9 REMOTE CONTROL 176 This page intentionally left blank ...
Page 177: ...Section 10 ADVANCED PROBLEM SOLVING 177 SECTION 10 ADVANCED PROBLEM SOLVING ...
Page 196: ...Section 10 ADVANCED PROBLEM SOLVING 196 This page intentionally left blank ...
Page 197: ...Section 11 TECHNICAL INFORMATION 197 SECTION 11 DETAILED TECHNICAL INFORMATION ...
Page 219: ...Section 12 SCHEMATICS 219 SECTION 12 SCHEMATICS ...
Page 221: ...Section 13 MANUFACTURER S DATA SHEETS 221 SECTION 13 MANUFACTURER S DATA SHEETS ...
Page 223: ...Section 14 SPECIFICATIONS WARRANTY 223 SECTION 14 SPECIFICATIONS AND WARRANTY ...
Page 228: ...228 This page intentionally left blank ...
Page 229: ...Section 15 APPENDICES 229 SECTION 15 APPENDICES ...


