


Installation
Page 20
Your SM9256D and SM9234D support RTU/DTE with either RS-232 or RS-485 interface for
communications. The modem is set to use the RS-232 interface (DB-9 connector) as the default
interface from the factory. If you do not use RS-485/RS-422 option of the modem, skip this
section and continue the installation with the “Installing Your Modem” section below.
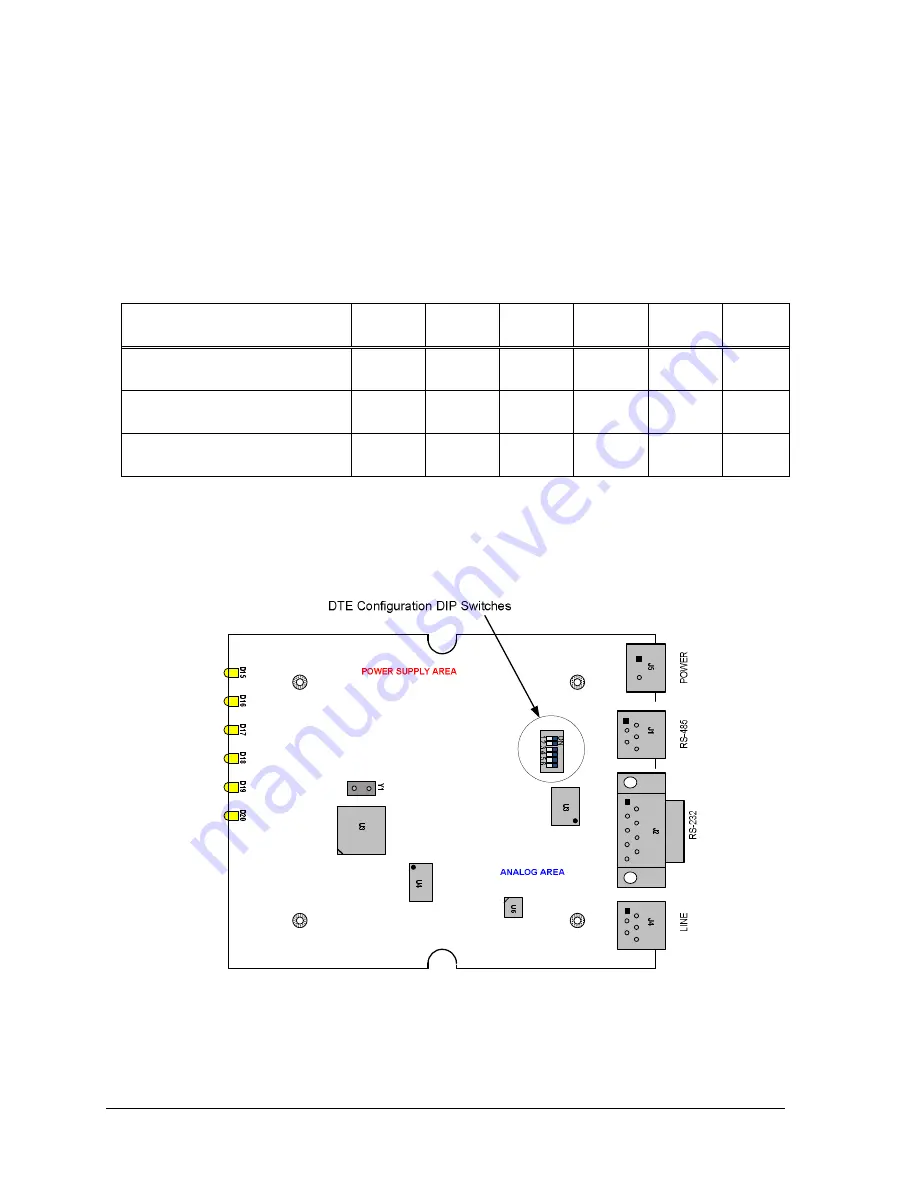
To configure the modem for RS-485/RS-422 interface, you will need to connect your DTE/RTU
to the RJ-11 connector as shown in Fig. 1 below and set up the DTE configuration DIP switches
(SW1) provided on the modem PCB as indicated in the table below.
DTE/RTU Interface
SW-1
SW-2
SW-3
SW-4
SW-5 SW-6
RS-232 (DB-9) (default)
OFF
OFF
OFF
OFF
OFF
OFF
RS-485 4-wire full duplex
ON
ON
ON
OFF
OFF
ON
RS-485 2-wire half duplex
OFF
ON
OFF
ON
ON
OFF
Note: Use a sharp pin to push and slide the DIP switches to the side labeled “ON” on the DIP
switch is equivalent to CLOSE the switch.
Figure 1 Configuration DIP Switch
Summary of Contents for SM9234D
Page 1: ...SM9256D and SM9234D Modems User s Guide 0049 2500 001 Rev B ...
Page 5: ...Page v local or long distance transmission charges ...
Page 6: ......
Page 14: ......
Page 17: ...Introduction Page 17 ...
Page 18: ......
Page 26: ......
Page 28: ...Using the Modem s Auto Connect Feature Page 28 ...
Page 87: ...AT Commands Page 87 example modem models supporting V92 may not support K56 ...
Page 107: ...AT Commands Page 107 Data Transfer Bit error rates for each direction ...
Page 136: ...AT Commands Page 136 S86 26 Remote hangup detected ...
Page 198: ...AT Commands Page 198 OK ERROR If not in Voice Mode ...
Page 213: ...AT Commands Page 213 ...
Page 214: ......


